Showing posts with label peanut butter. Show all posts

Thursday, September 15, 2011

MSC: Peanut Butter (No Jelly!) Cupcakes


I'm so happy to be back blogging along with the Martha Stewart's Cupcakes Club again this month! I skipped out last month but now I'm back and ready to talk about some Peanut Butter Cupcakes! The original recipe was for Peanut Butter and Jelly Cupcakes, but I just decided to leave out the jelly. I dunno, maybe it's un-American of me or something, but I just don't eat the peanut butter/jelly combo. I know, what a weirdo! If you give me anything peanut butter/chocolate, I'm yours, but for some reason I just don't really love jelly all that much.


I halved this recipe and made 10 cupcakes. I came across some reduced-fat natural peanut butter, so I used that in place of standard natural peanut butter in the batter. I don't know if my reduced-fat pb was the culprit for this, but my cupcakes turned out super dense. Like, must grab a big glass of milk to wash this cake down with dense! Also, I left out the chopped peanuts. It was good, peanut buttery cake, it just felt thick in your mouth.

For the frosting, I wanted to reduce some of the fat there, too. Sooo, I used fat-free cream cheese. Again, not the most perfect frosting in the world. It was a bit grainy in texture, and not very sweet. That was okay with me, but I don't think I would have served it to company or anything. I think putting the dollop of jelly on top could have masked the frosting's texture a bit, but obviously I will never know.


My verdict on these? They are good, especially if you're a die-hard peanut butter fan (which I am). But they do need a little something else. They need a contrasting flavor/texture to balance out all that pb. I ate these with a little splotch of chocolate sauce on the top, and that really did help out. Some ice cream alongside would probably improve these, too.

Thanks to Karen of Karen's Cookies, Cakes, and More for the selection! Check out the MSC blogroll to see how the others fared with these cupcakes!

Thursday, July 28, 2011

CEIMB: Chicken Sate with Asian Noodle-Vegetable Salad


It's been two weeks, so it's time for another great Craving Ellie in My Belly recipe! As it turns out, this week's selections mark three great new recipes for the price of one. Danica of Danica's Daily chose for us to make Chicken Sate with Spicy Peanut Dipping Sauce and a Soba Noodle-Vegetable Salad. I was actually quick shocked to discover that I hadn't made any of these dishes yet. Well, I was going to fix that for sure!


First off, we have the Chicken Sate. It's a simple enough recipe. Take your chicken pieces, coat them in a yummy marinade, then thread the pieces onto bamboo skewers and grill until cooked through. A sprinkle of basil (and chopped peanuts, which I didn't use) goes on top, and then you can dip your chicken sticks in the Spicy Peanut Sauce.


The chicken turned out juicy, succulent, and flavorful. It almost didn't need any dipping sauce....almost. The sauce is addictive stuff! I love anything that contains peanut butter, so I knew I would be a fan. However, Ellie adds a couple unique touches to her version of peanut sauce, such as a small amount of curry paste, which make this particular dip unforgettable. It's just spicy enough, just sweet enough, and just tangy enough to be, in my book, perfect. Yum.


The Noodle-Vegetable Salad is great, too, although I did like the chicken and peanut sauce better. For my salad, I chose to use a combination of some skinny brown rice vermicelli that I had left over from a soup I made long ago, and some wide Asian noodles. The latter noodles were similar to a fettuccine noodle, so I thought the two contrasting cuts of pasta would be fun. And it was fun, but a bit confusing. In the future I will definitely stick to just one type of noodle! The salad was very delicious. It was fresh from the chopped herbs, crunchy from the red bell pepper and carrot, and zingy from the Asian dressing. The dressing was the best part of this recipe, no doubt. I will be using this dressing in other salads! I did not follow the directions to the letter here. Ellie says to present the salad in lettuce cups, made from Bibb lettuce leaves. I didn't have any nice lettuce to use for this, so I just served up the salad as is. In my opinion, it worked out just fine.


Thanks to Danica for the excellent picks! Together, it all made for a fantastic Asian meal that my family truly enjoyed. To see if the other CEIMBistas loved it too, check out the blogroll, here. For the Chicken and Peanut Sauce recipes, click over to Food Network's site, here. The Noodle Salad recipe is over there also; click here.

Thursday, July 21, 2011

Peanut Butter Blondies


A few weeks ago, I received Iron Chef Cat Cora's latest cookbook, and I was eager to start digging in and making all the wonderful things I've found in there. In a few days I will post about a fabulous dinner we had recently, most components of which came from this book. But since I personally believe that dessert is the best meal of the day, I will be telling you about these Peanut Butter Blondies first!


First of all, a simple bar-cookie-type dessert loaded with peanut butter, and with a surprsingly low butter content? Count me in! I debated making these, or making her peanutter cookies, but I have a feeling those cookies will be making an appearance in my house sooner rather than later! I'm glad I chose these, because they took about a blink of an eye to make.


These are very simple blondies, but sometimes that can be such a good thing. With these, I felt like they turned out just a tad less moist than I would like, but I am guessing that this is because I test-drove a new peanut butter in these. Smucker's now makes a reduced-fat natural peanut butter. Since I have never seen a peanut butter that is both natural and reduced-fat, so I definitely wanted to see if it would work. And while the peanut butter is very tasty and doesn't seem lower in fat at all, I think that it did contribute to the less-than-greasy texture of the blondies. But I'm not complaining about it; I warm up a blondie for a few seconds, pile some ice cream on top, and I'm a happy girl. I made them in my Magic Brownie Pan, so that eliminated the guesswork of slicing these evenly, too. So easy, it's dangerous! There's no excuse not to make them often!


Peanut Butter Blondies
adapted from Cat Cora's Classics With a Twist
makes 12 blondies

Ingredients
4 Tbsp. unsalted butter, slightly softened
1/2 cup peanut butter, preferably creamy
3/4 cup granulated sugar (I actually used vegan cane sugar)
1/3 cup light brown sugar
2 large eggs
1 tsp. pure vanilla extract
1 1/3 cup all-purpose flour
1 tsp. baking powder
1/2 tsp. kosher salt
1 Tbsp. quick oats (Cat used 2 Tbsp. chopped peanuts)

Directions
1. Preheat oven to 350 degrees F. Position a rack in the middle; coat a 9-inch baking dish with nonstick cooking spray, or line it with parchment or nonstick aluminum foil.

2. With an electric mixer, beat the butter and peanut butter until fluffy. Add both sugars and beat until combined. Add the eggs, one at a time, beating after each addition.. Add the vanilla and mix until smooth.

3. In a separate bowl, stir together the flour, baking powder, and salt. Gradually add the dry ingredients to the peanut butter mixture, beating after each addition, until a smooth dough forms. Spread the dough in the prepared pan and sprinkle with the quick oats.

4. Bake until a toothpick inserted into the center comes out clean, 30 to 35 minutes. Let the blondies cool in the pan on a rack for 15 minutes, then cut into 12 rectangles and serve. The blondies will keep for 3 to 4 days in an airtight container.

Tuesday, May 17, 2011

Butterscotch Krimpets (With Peanut Butter Variation)


I may live in the Midwest currently, but at heart I am still an East Coast girl. I was born and bred in the suburbs of Philadelphia, Pennsylvania, and most of my family still lives there today. One of the fondest food memories I have from when I was growing up is eating the region's Tastykake products.


Tastykakes is a line of baked goods that is found primarily in Pennsylvania; in fact, I'm not even sure if you can purchase them in stores in any other state (though you can order them online). There are several products that are available, among them kreme-filled cupcakes, donuts, and little pies, but my favorites were always the Butterscotch Krimpets and the Peanut Butter Kandy Kakes. Nearly every day in my lunch box, my mom would pack for me either one of these delicious treats. I loved them both equally; to choose which one I preferred would be similar to choosing which of my two sons I favor. In other words, it's impossible! They are each scrumptious in their own right, although they taste different from one another.


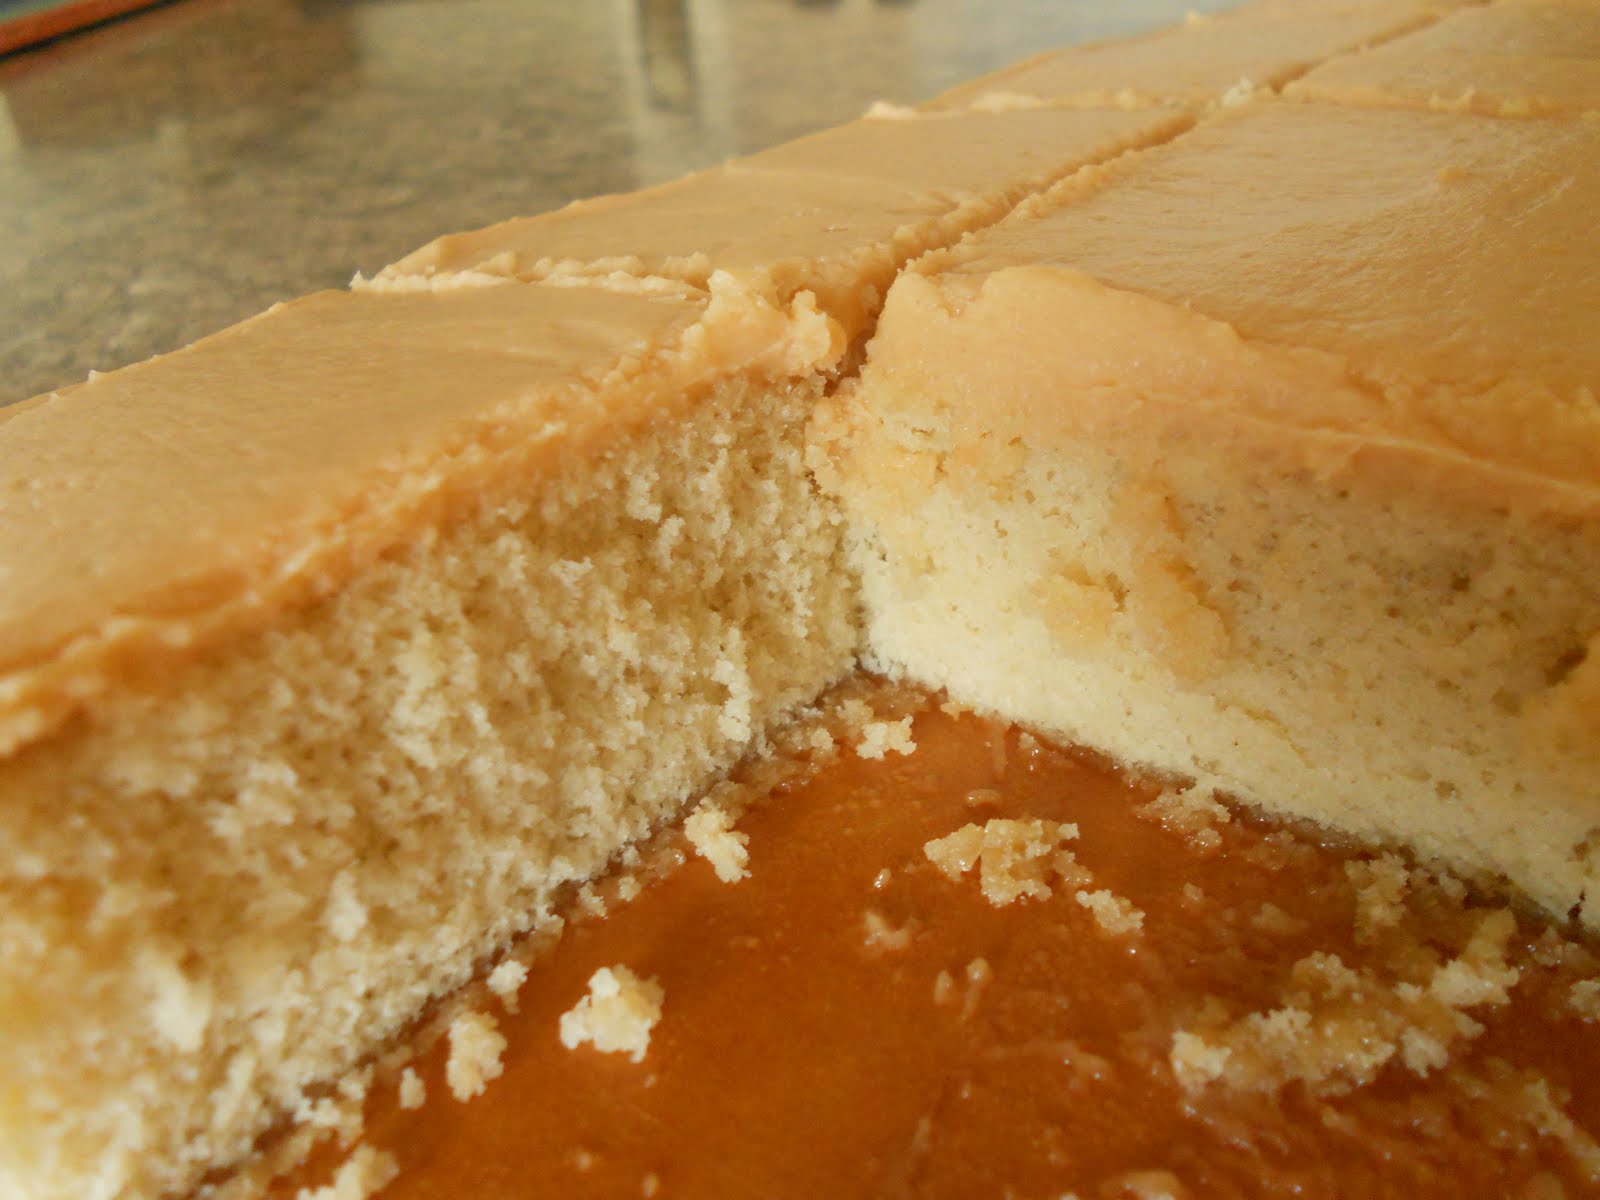
The Butterscotch Krimpet is a light, airy sponge cake, covered with a sweet butterscotch frosting and sliced into long, zigzag-y strips and packaged in twos. They're so good; I can still recall unwrapping them, flipping then over and eating them cake-side first, then the frosting. Weird, but yummy!

Then there was the Peanut Butter Kandy Kake. The cake part is similar to that of the krimpet; both are light, springy vanilla cakes. But the kandy kake is a round little cake, smeared with peanut butter and then dipped in chocolate, so that the entire cake is surrounded by it. Again, yummy! I would eat these by nibbling off all the chocolate first, until all that was left was the peanut butter-covered cake. And I had to eat them slowly; that way I could truly savor every bite.


Now that you know what a devotee I was as a child to these Tastykakes, you can understand how excited I was to know that I could recreate these treats in the comfort of my own home! That's right; there's copycat recipes out there, and I've made them! I made the Butterscotch Krimpets a few weeks back, fully expecting that I would be the only member of my household to be consuming them. I was pleasantly surprised when my oldest son and my husband both fell head over heels for the krimpets and devoured every last one (after I had snagged a few, of course)! I was thrilled to be sharing my krimpet love with them!

A few days after the krimpets were all gone, my son asked me when we could make more. He said he missed having them around. So, I decided to make them again, but this time I thought I would cut the cake part in half after baking, and frost only half in the butterscotch frosting. The other half, I decided, was going to taste like the Kandy Kakes.

My mom actually has a killer recipe for the Peanut Butter Kandy Kakes in which you bake the sponge cake, then slather it with peanut butter while the cake is still warm. Once that has cooled, you melt a bunch of chocolate and spread that all over the top. So decadent, so good. However, I just decided to find a different frosting recipe that combined the peanut butter and the chocolate into one convenient little package. It still hits the same nummy flavor notes, but it took about half the time to put together.

So, feel free to try one, or both, of the recipes below. Either way, I promise that you can't go wrong! It definitely beats paying for a box of these to be delivered to your house; they're every bit as wonderful as the originals. Just note: the measurements below for the frosting indicate the amount needed to frost the whole cake. So if you were to divide the cake in half and frost each half in a different frosting, you would need to cut both frosting recipes in half.


Butterscotch Krimpets
adapted from Baking Bites
makes 20-24 pieces

Ingredients
For the sponge cake:
4 large eggs, room temperature
3/4 cup granulated sugar
3/4 cup light brown sugar
1 1/2 tsp. pure vanilla extract
1 cup milk (2% is fine)
2 Tbsp. unsalted butter, softened
2 cups all-purpose flour
1 tsp. baking powder
1/4 tsp. salt

For the butterscotch frosting:
6 Tbsp. butterscotch chips
1/2 cup (1 stick) unsalted butter, softened
1 1/2 cups confectioners' sugar, sifted
2 Tbsp. milk
1/4 tsp. salt

For the chocolate peanut butter frosting (from Food.com):
1/2 cup creamy peanut butter
1 oz. mascarpone cheese, softened (or cream cheese)
1 pinch salt
1 tsp. vanilla extract
3-4 Tbsp. milk
1 1/2 cups confectioners' sugar, sifted
1/4 cup unsweetened cocoa powder, sifted (Dutch process)

Directions
Make the sponge cake: 1. Preheat oven to 350 degrees F. Lightly grease a 15x10 jelly roll pan (17x11 works too) and line the bottom with parchment or nonstick aluminum foil. In a large bowl (or the bowl of an electric mixer), beat together eggs and sugars until pale and thick, 3-5 minutes. Beat in vanilla.

2. While the eggs are beating, heat the milk and butter in a small saucepan on the stove over low heat. Once the butter is just melted and the milk is steaming, but not boiling, remove from heat and set aside.

3. Gradually sift flour, baking powder, and salt into the egg mixture; mix at low speed until just combined. With the mixer running, still at low speed, drizzle in the milk and butter mixture and mix until batter is uniform.

4. Pour batter into prepared pan, spread it out evenly, and bake for 20-25 minutes. The cake is done when a toothpick inserted into the center comes out clean, and when the top is golden and springs back when touched lightly. Allow cake to cool for 5 minutes, then turn it out onto a cooling rack to finish cooling completely.

Make the butterscotch frosting: 1. In a heatproof bowl, combine the butterscotch chips and butter; melt in the microwave and set aside for a few minutes to cool to room temperature. Transfer to the bowl of an electric mixer.

2. Add the confectioners' sugar, milk, and salt to the bowl; beat until everything is well combined, and free of lumps. Spread in a thin layer across the cake. Cut into squares; cake can be stored for a few days at room temperature in an airtight container.

Make the chocolate peanut butter frosting: 1. Beat together the peanut butter, mascarpone (or cream cheese), and salt in the bowl of an electric mixer until smooth and fluffy. Blend in the vanilla and 3 Tbsp. of the milk until mixed well.

2. Gradually add in the confectioners' sugar and cocoa powder, beating just until incorporated. Add in the extra Tbsp. of milk if the frosting appears too thick or not spreadable enough. Spread in a thin layer across the cake. Cut into squares; cake can be stored for a few days in the refrigerator in an airtight container.

Sunday, January 30, 2011

Baked Sunday Mornings: Double-Chocolate Loaf


This week's Baked Sunday Mornings pick was the incredibly decadent "breakfast bread," Double-Chocolate Loaf. I'm not quite sure if it's even okay to consume all that chocolate for breakfast, but if Matt and Renato say it's fine, then it must be!


This is such an easy loaf to make. You can throw all the ingedients together in just about no time flat, then it bakes up in the oven for an hour or so (mine took about an hour and fifteen minutes). The most difficult part of making this, for me, was having to smell its chocolatey, heavenly aroma for that long! Torture, it was.


Mine baked up pretty well, I thought, except for a minor sinking issue in the center of the loaf. I wonder if anybody else experienced this? Anyway, it looked pretty gorgeous otherwise, and smelled insanely wonderful.

I ran into a snag when I set out to make the peanut butter spread which accompanies this loaf in the cookbook. I had no cream cheese in the house, and it was snowing that day so we were trying to avoid having to leave the house. So, I just decided to whip up a little something different. I found a recipe on the website for Marshmallow Fluff for a Fluffernutter Frosting, so I decided to make that instead. I'll include the recipe at the bottom of this post, because it was yummy! Even if the peanut butter/cream cheese spread was divine, and I'm sure it was, I just wanted to share this Fluffernutter Frosting with you because it is worth trying. You could put it on so many things, I'm sure, and it would work perfectly.


So, I sent this loaf in, along with the spread, to my husband's office the morning after I made everything. He came home empty-handed at the end of the day; the whole thing was gone! The reviews were completely positive; people were cursing me for allowing such a treat to enter their radar. Well, I'd much rather be cursed because something was sinfully good than because something tasted horrible, so I'd say it went over well! The only minor complaint my husband had about the loaf was that it was just a tad dry. Of course, that is probably why this is supposed to be served alongside a spread. He also said it was rich, dense, and very chocolatey. I wish I could say I tried some myself, but it just didn't happen this time. Oh well. It just gives me an excuse to make it again!

You can find the Baked Sunday Mornings blogroll for this loaf here.


Fluffernutter Frosting
adapted from the Marshmallow Fluff website
makes enough to frost a 9-inch layer cake (I cut the recipe in half)

Ingredients
1 cup marshmallow fluff
1/2 cup peanut butter
1/3 cup butter, softened
1/4 tsp. pure vanilla extract
1/4 tsp. salt
1 1/3 cup confectioners' sugar
2 Tbsp. milk

Directions
1. In the bowl of an electric mixer, combine the fluff, peanut butter, and butter at low speed. Increase speed to medium and mix until fluffy. Scrape down the sides of the bowl.

2. Slowly add in the confectioners' sugar, alternating with the milk, beating well after each addition. Add only enough milk to make the frosting smooth and spreadable. Beat in vanilla and salt; mix well to combine.

Monday, January 10, 2011

Peanut Butter Buckeyes


I think if I had to pick a favorite candy, it would be a no-brainer for me. I love Reese's Peanut Butter Cups more than just about anything in the world (the food world, that is). So the peanut butter/chocolate combination is pretty much about as good as it gets, in my humble opinion.

So when I found this recipe in my Baked Explorations cookbook for Peanut Butter Buckeyes, I knew it was going to be on my Christmas goodies tray this year. It's a ball of peanut butter, mixed with cream cheese, crushed graham crackers, confectioners' sugar, and butter, that is dipped into dark chocolate. You leave just the very tops of the balls open, with no chocolate coating, which makes it look like the nut of a buckeye tree.


My candies turned out looking way less perfect than the ones depicted in the cookbook, but at least they look homemade, right? I admit, I tried a different method for dipping my peanut butter balls than the one listed in the directions below. It just seems like I always have a heckuva time dipping things in chocolate, and I get myself all frustrated. So this time, I experimented with a new way. I put on some latex gloves, then dipped each ball into the chocolate with one gloved hand. With the other gloved hand, I would drop the dipped ball onto the waiting parchment-lined baking sheet. This was way messy, but for some reason it was a lot less infuriating than dipping each ball with a fork or a toothpick. When I do it that way, I always seem to lose balls in the melted chocolate; they fall right off the fork. This way, I just used my covered fingers to fish each ball out. I don't know; it worked for me!

These buckeyes are absolutely perfect for a peanut butter craving, or a chocolate craving, or a "both" craving! They are delicious right out of the fridge, but they're fantastic at room temperature too. They do taste exactly like a Reese's, which was what I was hoping for. I'd be curious to see what would happen if I used chunky peanut butter next time, so I'm sure I'll be trying them that way, too. I don't think you could really go wrong there. I will say this, though: the book warns against using the natural-style peanut butter, I think because of the separation issue. So just beware if you decide to make these.


Buckeyes
from Baked Explorations
makes 36 to 42 Buckeyes

Ingredients
1/4 cup cream cheese, softened
1 1/2 cups peanut butter
1 cup graham cracker crumbs (about 14 individual crackers, not whole sheets)
3 cups confectioners' sugar
10 Tbsp. (1 1/4 sticks) unsalted butter, melted and cooled
12 oz. good-quality dark chocolate (60 to 72%), coarsely chopped

Directions
1. In the bowl of a standing mixer fitted with the paddle attachment, beat the cream cheese and peanut butter until combined. Add the graham cracker crumbs and beat on medium speed for 10 seconds. Add the confectioners' sugar and butter. Beat at low speed for 20 seconds to prevent the sugar from spilling over, then gradually increase the speed until the mixture is completely combined. Scrape down the sides and bottom of the bowl and beat again. The mixture will feel slightly dry. Set the peanut butter filling aside while you melt the chocolate.

2. In the top of a double boiler set over hot water, melt the chocolate, stirring frequently until it is completely smooth. Pour the chocolate into a small, deep bowl. Let it cool to tepid (about 100 degrees F, body temperature) while you shape the peanut butter centers.

3. Line a sheet pan with parchment paper. Scoop out slightly more than 1 Tbsp. worth of filling and use your hands to form it into a ball. (For uniform balls, use a medium-size melon baller or a very small ice cream scoop with a release mechanism.) Place the ball on the prepared sheet pan and repeat the process until all the filling has been shaped. The balls can sit fairly close to each other on the sheet; just make sure they are not touching.

4. One by one, using a fork or large skewer, dip each ball into the chocolate. Roll the ball around from side to side to cover almost the entire peanut butter center, leaving a small part uncovered. Manipulate the buckeye so that the dripping chocolate covers the holes made by the fork. Let the excess chocolate drip back into the bowl and return each chocolate-covered buckeye to the pan. Refrigerate the entire sheet pan for about 30 minutes to set the chocolate before serving. Buckeyes will keep for up to 3 days, tightly covered, in the refrigerator.

Saturday, November 20, 2010

Monster Cookies


In honor of my son's birthday party, which was Sesame Street-themed, I baked some Monster Cookies. Get it? Sesame Street's full of monsters, so I served cookies named after them! Oh well, I thought it was clever.

These cookies, like so many baked goods I have made lately, are straight out of my Baked: New Frontiers in Baking cookbook. Talk about a behemoth of a cookie! This one's got just about anything I could ever ask for in a cookie: chocolate chips, oats, peanut butter, M&Ms. And they are generously sized; the recipe indicates you should scoop 2-Tablespoons' worth of dough per cookie! The result? A big, chewy, delicious, hearty cookie that will please any crowd.


Now, one quick observation I made. Along with these cookies, I also baked the Chocolate Chip Cookies out of the same cookbook. These, while also delicious, turned out a bit differently than expected. Because the recipe calls for dark brown sugar, the cookies come out of the oven so dark one might think they had burned. I mean, I am only guessing here, but I believe that the dark brown sugar is the reason for this. Once you get past the way they look, you're pleasantly surprised at how flavorful they are. Plus, this recipe actually calls for an entire bag of chocolate chips, plus nearly half of another bag! I wasn't sure I would like the cookies that loaded down with chips, but they were very yummy. If you would ever like to attempt those Chocolate Chippers, I found the recipe on the How To Eat a Cupcake blog, here.

In the meantime, though, you should absolutely try these Monster Cookies! I'm already planning on making these a part of my Christmas cookies tray this year. One final note: I thought it was strange that this recipe called for cold butter, when normally you need softened butter for a cookie recipe that requires the creaming method. However, I saw why this worked after I had added all 5 (5!) eggs and the peanut butter to the mix. These two added ingredients make it so wet, I was glad the butter hadn't been super soft when I began. Anyway, I just wanted to say that the cold butter instruction was not a typo, as I had originally thought. It does work out great that way!


Monster Cookies
adapted from Baked: New Frontiers in Baking
makes about 24-36 cookies

Ingredients
1/2 cup all-purpose flour
1 Tbsp. baking soda
Pinch of salt
5 3/4 cups rolled oats
3/4 cup (1 1/2 sticks) cold unsalted butter, cut into cubes
1 1/2 cups firmly packed light brown sugar
1 1/2 cups granulated sugar
5 large eggs
1/4 tsp. light corn syrup
1/4 tsp. pure vanilla extract
2 cups creamy peanut butter (I used half creamy, half chunky)
1 cup (6 ounces) semisweet chocolate chips
1 cup (6 ounces) M&Ms (Reese's Pieces would be a good idea here, too!

Directions
1. In a large bowl, whisk the flour, baking soda, and salt together. Add the oats and stir until the ingredients are evenly combined.

2. In the bowl of an electric mixer fitted with the paddle attachment, cream the butter until smooth and pale in color. Add the sugars and mix on low speed until just incorporated. Do not overmix. Scrape down the bowl and add the eggs, one at a time, beating until smooth (about 20 seconds) and scraping down the bowl after each addition. Add the corn syrup and vanilla and beat until just incorporated.

3. Scrape down the bowl and add the peanut butter. Mix on low speed until just combined. Add the oat mixture in three additions, mixing on low speed until just incorporated. Use a spatula or wooden spoon to fold in the chocolate chips and M&Ms. Cover the bowl tightly and refrigerate for 5 hours.

4. Preheat the oven to 375 degrees F. Line two baking sheets with parchment paper. Use an ice cream scoop with a release mechanism to scoop out the dough in 2-Tbsp.-size balls onto the prepared baking sheets, 2 inches apart. Bake for 12 to 15 minutes, rotating the pans halfway through the baking time, until the cookies just begin to brown. Let cool on the pans for 8 to 10 minutes before transferring the cookies to a wire rack to cool completely. Cookies can be stored in an airtight container for up to 3 days.

Tuesday, October 19, 2010

Peanut Butter Cookies with Milk Chocolate Chunks


Just one of the many things I love about cooking and baking is the fact that you get to share recipes with other people. I love discovering a new meal or a different treat, and then being able to show it off to whoever will patiently listen, or read this blog, or endure my kitchen experiments enough to try all the messes along with the successes (that was directed at you, hubby!). This Peanut Butter Cookie recipe, from the wonderful cookbook Baked: New Frontiers in Baking, is the kind of recipe that you want to tell the whole world about, just so that everybody can try it and revel in its deliciousness.

What I love most about these cookies is their sheer simplicity. They're very basic cookies, made from all the traditional cookie staple ingredients. They include a generous amount of peanut butter and a sprinkling of chopped milk chocolate, and that's what turns these from the ordinary to the extraordinary. I have a weakness for the peanut/butter chocolate combo, and these completely fit that bill. The authors of the book advise you to use milk chocolate because it pairs so well with the peanut butter, and of course they're right. The chocolate is the perfect complement to the not-too-sweet cookie.


I gave half of this batch away to my mother in-law, who was able to serve them at a birthday party that Andy and I could not attend. After all the cookies were eaten, I found out that Andy's grandmother, in particular, really loved them. In fact, she loved them so much that she asked for the recipe, which I consider a very high compliment. Andy's grandmother is no slouch in the kitchen; she's a fantastic cook, and a wonderful baker. The fact that she would want me to share my simple little peanut butter cookie recipe with her made me feel really good!

As it turns out, I haven't been able to give the recipe to her yet, but she recently obtained a computer and she has access to my blog now. So, Grandma, this one's for you!


Peanut Butter Cookies with Milk Chocolate Chunks

from Baked: New Frontiers in Baking

makes 24-36 cookies, depending on how big you make yours


Ingredients

1 3/4 cups all-purpose flour

2 tsp. baking soda

1 tsp. salt

1 cup (2 sticks) unsalted butter, softened, cut into 1-inch pieces

1 cup granulated sugar, plus more for sprinkling

1 cup firmly packed dark brown sugar

2 large eggs

1 tsp. pure vanilla extract

1 cup creamy peanut butter

6 ounces good milk chocolate, coarsely chopped


Directions

1. Sift the flour, baking soda, and salt into a medium bowl and set aside.


2. In the bowl of an electric mixer fitted with the paddle attachment, beat the butter and sugars together until fluffy. Scrape down the bowl and add the eggs, one at a time, beating until each is incorporated. The mixture will look light and fluffy. Add the vanilla and peanut butter and beat until just incorporated.


3. Add half of the flour mixture and mix for 15 seconds. Add the remaining flour mixture and mix until just incorporated. Using a spatula or wooden spoon, fold in the chocolate. Cover the bowl tightly and refrigerate for at least 3 hours.


4. Preheat the oven to 375 degrees F. Line two baking sheets with parchment paper. Drop the dough by rounded tablespoons onto the prepared baking sheets, at least 2 inches apart. With the palm of your hand, very gently press each cookie down so it forms a very tall disk shape. Do not press too hard and do not press it flat.


5. Sprinkle the tops of the cookies with granulated sugar and bake for 10 to 12 minutes, rotating the pan halfway through the baking time, until the tops of the cookies just begin to brown. Remove the pan from the oven and cool on a wire rack for 5 minutes. Use a spatula to transfer the individual cookies to the rack to cool completely (although they are also delicious warm). The cookies can be stored, in an airtight container, for up to 3 days.

Sunday, June 13, 2010

My Everyday Granola Bars


Well, I have finally found it. Yes, here it is. It's the granola bar recipe that could easily be the only granola bar recipe I'll ever use again. Now, this is a very bold statement, coming from me. I love to try out different variations of just about everything, from chocolate chip cookies, to brownies, to frosting. It's hard for me to imagine settling on just one version of any of those. However, this granola bar recipe has made me a believer. Now, I know I can settle for just one of something, because I am in love with these bars. I don't see a reason to look any further!


I found this recipe on Recipezaar, as is the case with so many fantastic recipes I've found over the last few years. I have over 40 different granola bar recipes saved in my own breakfast bar file on that site, and I chose this one because it had dark chocolate in the title. What can I say? If it has chocolate, I'm there! Also, there was a minimal amount of fat, and the fat that is present is the good kind; healthy fats from the peanut butter and nuts, plus the dark chocolate (which of course, is the "healthier" chocolate!).


Oops, sorry for that shot of hubby's foot! This was one of the best shots of the bars, and I figured nobody would mind that the foot ended up in there too. Anyway, one of the greatest things about this recipe is how easily it all comes together. There is a long ingredient list, but everything is basically mixed up in a huge bowl, pressed into a 9x13 pan, and baked for just 20 minutes. Then, voila! You have an easy, on-the-go snack or meal bar that tastes great and actually fills you up! For my money, that can't be beat. So often, granola bar recipes taste good but leave you feeling hungry afterward. With these, I actually do feel as though I have eaten a meal, and that is just what I need. I eat these for lunch almost every day!


It's great how forgiving the recipe is, too. You can substitute ingredients in the recipe and the bars will still turn out wonderfully. You can use any type of nut; you can use any flavor chips in place of dark chocolate. You can use regular or reduced fat peanut butter. You can use any dried fruit in place of dried cranberries. The variations go on and on!

I've made these probably 5 or 6 times now in the last few months. I bake them up, cut them into 12 bars, wrap each in plastic wrap, and freeze them in a Ziploc bag. It's so easy to just grab one an hour or so before I want to eat it; it's thawed by the time I'm ready for it. Then you don't have to worry about them going bad, etc. They're always just as good as fresh! If you're looking for a homemade granola or breakfast bar recipe, I highly, highly recommend these! Although, you'll have to forgive me if you ever catch me posting yet another granola bar recipe someday. Even though this bar is IT, that doesn't mean I won't ever try another one again! Sometimes I'm funny like that.


The original recipe for Dark Chocolate Granola Bars can be found here.
Below is my favorite variation. Feel free to use whatever you want, though!

Dark Chocolate Granola Bars
adapted from Recipezaar
makes 12 bars

Ingredients
1/4 cup sugar (or 2 Tbsp. Splenda Sugar Blend, which I currently use)
1/4 cup maple syrup (I have been using light corn syrup, just to use it up)
1/4 cup honey
2 Tbsp. any kind peanut butter
1 egg white
1 Tbsp. fat-free evaporated milk (regular 2% milk is fine)
1 tsp. vanilla extract
1 cup whole-wheat flour
1/2 tsp. baking soda
1/2 tsp. ground cinnamon
1/4 tsp. ground allspice
2 cups old-fashioned oats
1 1/2 cups crispy rice cereal
1/3 cup dark chocolate chips
1/4 cup dried cranberries
1/4 cup chopped walnuts

Directions
1.Preheat oven to 350 degrees F. In a very large bowl, combine the first 7 ingredients. Mix well. Next, combine the following 4 ingredients (flour through allspice) in a separate bowl. Add this to the first 7 ingredients. Add the rest of the ingredients, stirring well to coat everything with the wet ingredients.
2. Line a 9x13 pan with parchment paper or aluminum foil. If using foil, spray it with nonstick cooking spray. Press the granola mixture into the pan, being careful to smooth out the top so that the granola is evenly placed. It is easier if you use the extra pieces of parchment or foil that hang over the edges to help press everything down. Simply fold the excess over the top of the mixture, press down firmly to spread it all out, then peel the parchment/foil back from the mixture. The mixture should now be even.
3. Bake for 18-20 minutes (20 is my magic number for this), then remove from oven and score surface immediately with shallow cuts. Allow to cool completely on a wire rack, then cut and separate into bars.

Sunday, May 16, 2010

Peanut Butter Sandwich Cookies with Milk Chocolate Filling


I want to start off this post by apologizing in advance for the poor quality of my pictures this time around. You see, my Mother's Day gift this year was a new camera (yay!) and I have been getting myself used to it. Therefore, I had a lighting issue with some of my shots, and then by the time I (okay, Andy) corrected the problems, the cookies were gone. Polished off. Demolished.

Maybe that's because these cookies are heaven. Wonderful, magical little treats. As long as you are down with the tried and true chocolate/peanut butter combination, you will not be disappointed by these little yummies.


I checked a book out of the library called The Craft of Baking, and I was really excited to try several of the recipes contained within. This is actually the second one I attempted. The first, a coffee cake muffin with pecan streusel, was absolutely delicious. Unfortunately, the muffins were also ultimately a failure. I couldn't get them out of the muffin tins; they were stuck to the bottom, despite my generous dose of cooking spray in each cup. When I tried to carefully carve them out of the tins with a paring knife, I wound up with 12 little piles of crumbs. I transferred these to one giant plate of crumbs, and we all picked at them and called it a day.

So I was a little wary about making these cookies, since my only experience with this book had been such a colossal flop. Still, they sounded too delicious for me not to try them out. And I am very glad I did.


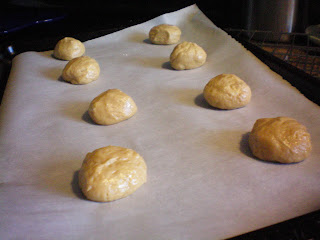
They are very easy to make. A simple, peanut-buttery cookie dough is put together with the help of a mixer, and then the dough is shaped into rounds (made easy by using an ice cream or small cookie scoop). Bake them off, then let them cool completely before assembling them into sandwiches.

I froze these cookies before they were sandwiched, because I had a chance to bake them at one point, and then I wanted to serve them over a week later. They froze just fine; no problems.

When it was time to whip together the peanut butter/milk chocolate filling, this simple step took almost no time at all. The consistency of the filling seems thin when you first make it, but the instructions state to chill the filling so that it firms up. Once it is ready to be spread, it almost feels like a truffle consistency; thick, sort of pliable, and solid rather than liquid. Oh, and utterly scrumptious. Forgot to mention that part.


Eek! There's the really bad shot! And unfortunately it was the best of the shots I had of me spreading the filling. Oh well. Pictures can only do these cookies so much justice. The real proof is in the tasting. Trust me.

I find it easier to assemble these as you eat them, rather than assembling the sandwiches all at the same time and then storing them that way. I will take as much filling as I need out of the fridge and let it sit at room temperature for at least 30 minutes. Then, when it is soft enough to slather, I put the cookes together. No matter what method you use, these cookies are worth the minimal effort it takes to make them. You really should try them. Really!


Peanut Butter Sandwich Cookies with Milk Chocolate Filling

from The Craft of Baking, by Karen DeMasco

makes about 24 sandwich cookies


Ingredients

For the Cookies:

1 3/4 cups unbleached all-purpose flour, plus more for rolling

1 tsp. baking powder

1/2 tsp. baking soda

1/2 tsp. kosher salt

6 Tbsp. unsalted butter, at room temperature

1/2 cup plus 1 Tbsp. lightly packed dark brown sugar

3/4 cup plus 1 Tbsp. confectioners' sugar

1/2 cup creamy peanut butter (I used reduced-fat, with great results)

1/2 cup vegetable oil

1 1/2 tsp. pure vanilla extract

1 large egg


For the Filling:

6 oz. milk chocolate, roughly chopped

1/2 cup creamy peanut butter (I used reduced-fat for this, too)

1/4 cup confectioners' sugar

1/4 tsp. kosher salt

3/4 cup heavy cream


Directions

1. For the Cookies: Preheat oven to 350 degrees F. Line two baking sheets with parchment paper. In a large bowl, sift together the flour, baking powder, baking soda, and salt.

2. In the bowl of an electric mixer fitted with the paddle attachment, beat the butter, brown sugar, and confectioners' sugar on medium-high speed until light and fluffy, about 2 minutes. Add the peanut butter and beat to combine, scraping down the sides of the bowl as needed. With the mixer on low speed, slowly add the oil, vanilla, and egg. Beat until jut combined, about 20 seconds, then add the flour mixture and beat to just combine.

3. Lightly flour the palms of your hands, and roll the dough into balls about 1/2 inch in diameter. Place them about 1 inch apart on the prepared baking sheets. Bake, rotating the sheets halfway through, until the cookies are golden brown on the edges, about 12 minutes. Transfer the baking sheets to wire racks to let cool completely. (The cookes can be stored, unfilled, in an airtight container at room temperature for up to 1 week.)

4. For the filling: combine the chocolate, peanut butter, confectioners' sugar, and salt in a medium bowl. In a small saucepan, bring the cream to a boil. Remove the cream from the heat and pour it over the chocolate mixture. Stir with a spatula until the chocolate is completely melted, and mixture is smooth.

5. Set the bowl in an ice bath, or chill it in the refrigerator, until the filling has cooled to room temperature and is thick enough to spread. Use it immediately or transfer it to an airtight container and refrigerate it for up to 1 week (let it come to room temperature before using).

6. Using an offset spatula, spread 1 teaspoon of the filling over the flat sides of the cookies. Sandwich with the remaining cookies, flat sides together. Once filled, the cookies are best eaten the same day, but they can be kept in an airtight container in the refrigerator, up to 3 days.

Sunday, February 7, 2010

There's Peanut Butter in My Soup

I have been cooking more and more one-pot meals lately. We've had lots of soup, lots of chili, some stews. Up until now I had always just used my beat-up old large pasta pot for all of these tasks. That is, until my darling hubby came home one day with a gift for me!
Here is my brand new Dutch oven. I am absolutely loving it so far. I am not used to having a big, heavy pot like this! It keeps stuff hot forever! It's such a beautiful thing.

So recently we were watching Alton Brown cooking on TV, and he was preparing a soup that was African in origin. It contained boiled peanuts, if I recall correctly. This is something that intrigued us instantly. I mean, it sounds like something that should be good, but it still is a scary concept. It reminded me, though, that there is a recipe for a similar soup in my Ellie Krieger cookbook, The Food You Crave, that seemed worth trying. It's called Sweet and Spicy Peanut Soup, which is pretty much a great way to sum it up. It is a broth-based soup, with assorted veggies, and some cayenne and black peppers. You simmer the soup for a while and then you blend it until smooth. Once you transfer it back to the pot, you top it off with peanut butter and honey. Garnish with scallions, and you're ready to serve.
I forgot to get a picture of the soup before it was pureed, but you'll just have to take my word for it that it looked completely different than the above picture, which was taken post-peanut butter. It just looked like a hearty vegetable soup. But once you add that peanut butter, it changes into a rich, reddish-brown concoction that looks velvety and decadent.
We added some bean sprout to the garnish, as well. The glare in this picture is horrible, but I think you get the idea. We really loved this soup, and we were proud that we were brave and ventured out of our comfort zone. I actually thought the sweet potato in the soup was a more dominant flavor than the peanut butter; the peanut butter makes it taste rich. It was very filling, too; a warming, comforting winter meal! The recipe for it can be found here, although it is called Nutty Sweet Potato Soup on Food Network's website. It is worth the gamble!