Showing posts with label cake. Show all posts

Sunday, September 11, 2011

Baked Sunday Mornings: Caramel Apple Cake


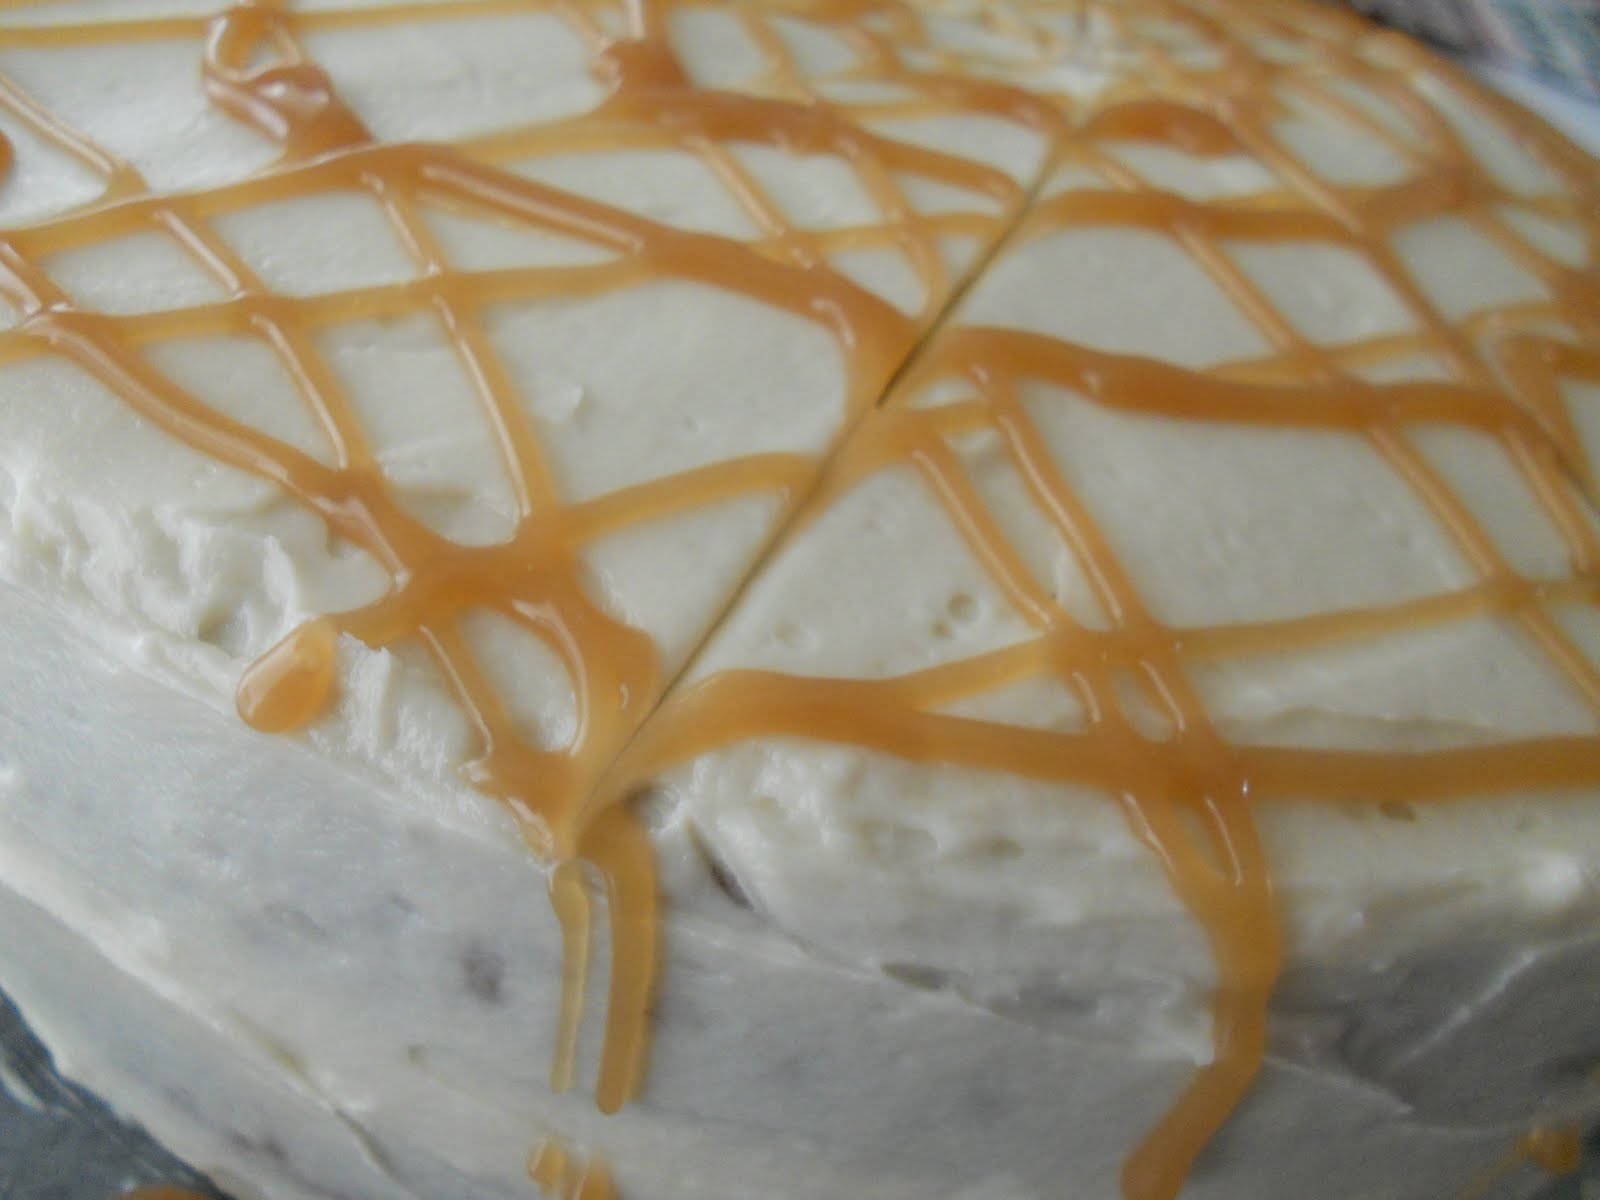
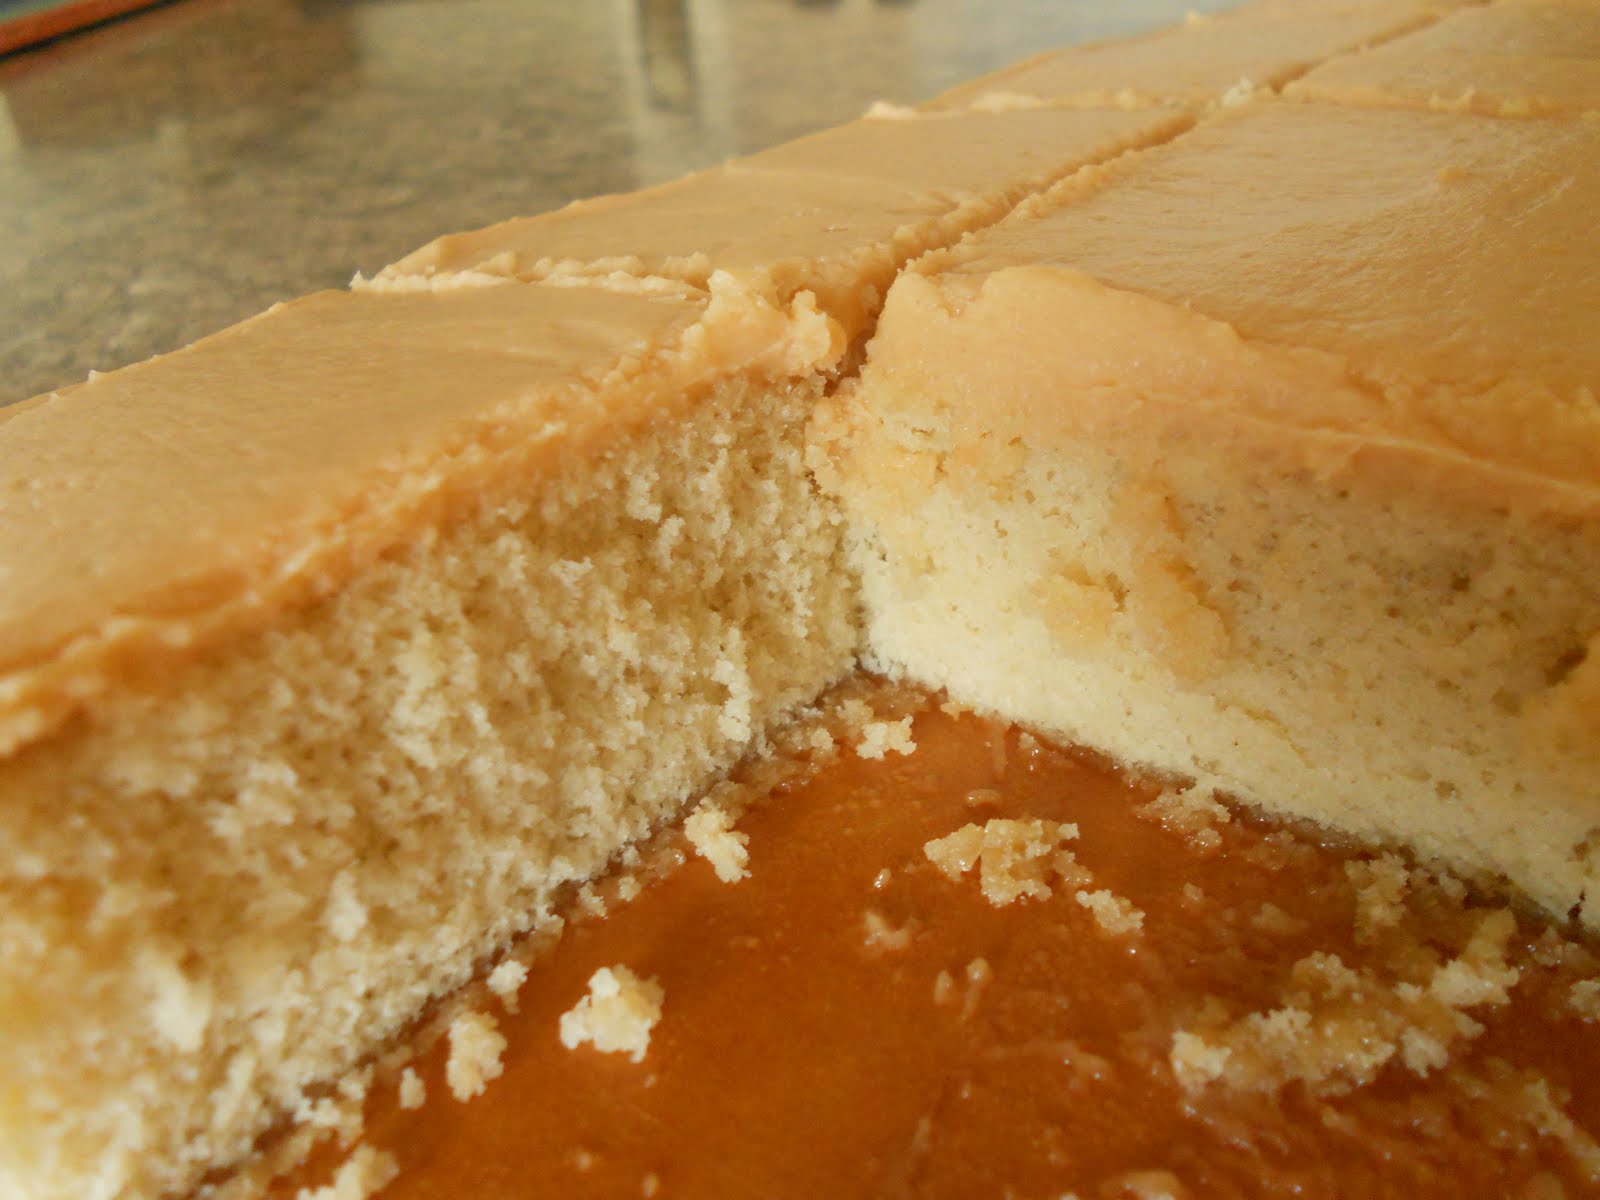
I had the privilege of making the Baked Explorations book's Caramel Apple Cake last weekend for my Baked Sunday Mornings group. Boy, what an undertaking! This was not your simple, thrown-together kinda cake. This was much more of a clear-your-calendar, spend the whole day covered in flour and frosting cake. But let me tell you, it was worth every second spent on it! It was nothing short of magnificent.


I broke the recipe up into steps; it made the whole thing so much easier and more manageable. I made the homemade applesauce, which goes into the cake batter, about two days before I was going to bake the cake. I made the homemade caramel, which is incorporated into the frosting as well as drizzled on top of the finished cake, about three or four days prior to baking day. I have to say, my confidence was totally boosted by making both the applesauce and the caramel; I had great success with both! I tend to mess up when making caramel, but this particular batch turned out pretty perfect. The applesauce was my first ever attempt at making it from scratch. It was completely easy to do and came together beautifully.


For the cake itself, I decided to cut the whole recipe in half. I was serving this for my brother-in-law's birthday, and there were going to be 7 of us eating the cake. Since this is a very decadent cake and I didn't really want there to be tons of leftovers lingering for days later, I thought a two-layer cake instead of a three-layer cake would be best. The cake was easy to whip up; I used two 9-inch round pans for it. The baking time was a bit less than the book indicated, but I am pretty sure it's because I switched things up.


The frosting, which is a cooked flour frosting, turned out way better than I expected it to. I've made this type of frosting before, and both times I have hit a bump in the road. Not this time. This batch came out great; satiny, luxurious, with a perfect hint of caramel flavor. Addictive stuff! I reduced the amount of frosting I made to just a third of the original amount, and it wasn't actually enough to frost the top and sides and fill the middle layer. So, I improvised. I had some leftover butterscotch frosting from my son's birthday cake, so I used that to fill the middle of the cake. It worked beautifully! The butterscotch complemented the spice cake so well, and the pale orange color coordinated nicely as well.


The cake was a huge hit, needless to say. Everyone really loved it. It was impressive to look at (even though my cake decorating skills need some work) and tasted unbelievably delicious. The cake was so moist from all that applesauce, and the spices were gentle but present. Everything comes together wonderfully in this cake; I don't know what else I can say about it!

But maybe there are some other people who have different things to say about it. Go check out the Baked Sunday Mornings blogroll to see the group's thoughts on this cake.

Sunday, August 28, 2011

Baked Sunday Mornings: Mom's Olive Oil Orange Bundt (Better Late than Never)


After mixing up my dates for two of Baked Sunday Mornings' selections, I am now finally posting about the Olive Oil Orange Bundt that the rest of the group made nearly a month ago. I am so glad I decided not to just skip it; it was so worth the wait!


It is a pretty straightforward bundt cake recipe. The only major difference between this cake and bundt cakes I have made before is the incorporation of olive oil. It takes the place of butter or any other oil in the cake, so its presence is definitely noticed in the finished product. Fresh orange zest is added to the batter, and it gives the cake such a fresh, bright flavor. Finally, the method of separating the egg whites from the yolks and whipping them before adding them to the batter makes it a bit lighter in texture than other, denser bundt cakes.


I was kinda grateful that others had made this before me, because I could learn something from their tips. The most important lesson I learned from the other bloggers was that I should cut down on the baking time, just slightly. I believe I checked the cake around 37 minutes, and it was just right. The recipe, as written, indicates more like 40-50 minutes. I don't know how much of a difference it made for my cake, but mine was perfect as is.


I hope the other members of Baked Sunday Mornings enjoyed making the Coffee Ice Cream that I made by mistake last month! You can see their results on the main blog, here. To see how everybody liked this Olive Oil Bundt, you can click on the blog post about it over on the main blog, here.

Saturday, August 13, 2011

Roasted Red Pepper and Feta Spread (Plus a Birthday Cake!)


This weekend is my oldest son's sixth birthday. I can't, for the life of me, believe that I have a child going into first grade! It seems like only moments ago, he was born and I was holding a little baby (okay, maybe not so little. He was nearly 9 pounds when he came into the world!). But enough of me strolling down memory lane. We have a cake to discuss here!


I blogged about this Butterscotch Krimpet cake a couple months ago, and I mentioned how much my son loved it. Turns out, he loved it enough to request it as his birthday cake this year! It actually works out great, because orange is his favorite color, and the butterscotch frosting is naturally orange. I did add a couple drops of orange gel food coloring to make it pop a bit more, and I think it turned out nice and vibrant. I baked the cake in two round 9-inch cake pans, slathered a generous helping of frosting in between the layers, and piped a teal border around the top and bottom of the cake. Since his favorite TV show is Scooby Doo, he wanted there to be some sort of Scooby theme. So, orange and teal represent Scooby, and just before serving the cake we pressed a few of his Scooby Doo action figures onto the top. Voila!


Now, I promised you a Roasted Red Pepper and Feta Spread recipe, and I did not forget about it. This is my own, made-up version of a white bean hummus with a nice chunk of feta and a roasted red pepper thrown in for good measure. I decided to make it to go along with my CEIMB recipe this past week, since I was too chicken-y to try the assigned feta spread. I really loved it; give it a try and see if you agree!


Roasted Red Pepper and Feta Spread
recipe by Bri
makes about 2 cups

Ingredients
1 (15-ounce) can cannellini beans, preferably low-sodium, drained and rinsed
1 roasted red pepper, drained and coarsely chopped
1/4 cup (1 ounce) feta cheese, crumbled
Juice of 1 lemon
2 Tbsp. tahini (sesame seed paste)
1/2 tsp. ground cumin
1/2 tsp. dried oregano
1 jalapeno pepper, seeded and coarsely chopped
Salt and freshly ground black pepper, to taste

Directions
1. In the bowl of a food processor, combine the cannellini beans, roasted red pepper, and feta cheese. Pulse a few times to break up the ingredients. Add the remaining ingredients, turn on the food processor, and blend until very smooth. Transfer to an airtight container; store in the refrigerator.

Wednesday, August 3, 2011

Brown Sugar Angel Food Cake


So I got this new cookbook called Cake Keeper Cakes. It's basically exactly the kind of cookbook I've always wanted, but for some reason never had up until now. It's full to the brim with simple, no-frills, casual cakes. There's a section on bundt cakes, a section on loaf cakes, and a section on angel food cakes and chiffon cakes. All the recipes appear easy to follow, and none of them require weird, exotic ingredients.


Now, don't get me wrong. I love my fancy cookbooks, filled with complicated baking techniques and precise instructions that, should you fail to follow them to the letter, could end in a kitchen disaster and lead to dashed hopes and dreams (at least as far as eating something delicious is concerned). Those higher-level cookbooks have taught me a lot, and I continue to get an education every time I bake from them. But, you know, sometimes you just want to bake something quick and easy, with predictable results. And I'm happy to say that so far, this cookbook allows me the opportunity to do just that.


I made a chocolate birthday cake for a coworker of Andy's first from this book, and it went over really well at the office. I didn't happen to get any, since it was devoured before Andy brought the empty cake pan home, but I took that as a huge compliment! Encouraged by this huge reception, I decided to make a second cake for home. This time, I wanted to make something I knew my kids would eat. That meant angel food cake.


I think I've mentioned this on the blog before, but my oldest son hates frosting. Well, he hates most frostings. He likes his sweets on the plain, unadorned side. He's that kid that throws a fit when you take him to a birthday party and one of the activities is to decorate your own cookie/cupcake. He just wants to take the naked cupcake and eat it that way, darnit! So I've come to realize that angel food cake is a great cake for both of us. For him, it's nice and plain and spongy and he really loves the taste. For me, I get to eat a fat-free cake for dessert! Not bad. I chose a Brown Sugar Angel Food Cake, just because it sounded like a fun spin on the original. It's pretty much exactly like a standard angel food cake (whipped egg whites, a bit of cake flour, some vanilla, etc.) but with light brown sugar in place of the granulated sugar. There was a simple cinnamon glaze recipe along with the cake in the book, but of course I omitted that on my son's behalf.


I was a bit nervous about how this would turn out, but my fears were quickly calmed when I took this beautiful, pillowy tower of cake out of the oven. The last time I tried making an angel food cake, the thing looked flat and deflated and it didn't go over too well. This one, on the other hand, was a home run! It was unbelievably soft; it almost dissolved on the tongue. It had fantastic height, and it kept very well for days on my counter in an airtight cake dome. It was wonderful with the Coffee Ice Cream I made the other day, too! This cake is now in the running to become my son's birthday cake, so I'd say he loved it!


Brown Sugar Angel Food Cake
from Cake Keeper Cakes
makes 1 10-inch cake

Ingredients
1 1/4 cups cake flour
1 1/2 cups packed light brown sugar, divided
1/4 tsp. salt
14 large egg whites, room temperature
1 tsp. cream of tartar
2 tsp. pure vanilla extract

Directions
1. Preheat the oven to 350 degrees F. Have ready a 10-inch ungreased angel food tube pan with a removable bottom.

2. Combine the flour, 3/4 cup brown sugar, and salt in a medium mixing bowl and whisk thoroughly to break up any lumps. Set aside.

2. Place the egg whites in a large mixing bowl or electric mixer bowl fitted with the whisk attachment. Whisk on medium speed until the whites are frothy. Add the cream of tartar and continue to beat on medium speed until the egg whites begin to turn white. With the mixer still on medium speed, pour in the remaining 3/4 cup brown sugar in a slow, steady stream and whip until the egg whites just hold soft, floppy peaks when the whisk is lifted from the mixture. Stir in the vanilla until it is just combined.

3. Place a small fine-mesh strainer over the bowl of egg whites and strain about 1/4 cup of the flour mixture into the egg white mixture. Gently fold in the flour mixture with a rubber spatula. Repeat with the remaining flour mixture in 1/4-cup increments until all of it has been folded in. Pour the batter into the tube pan and smooth the top with a rubber spatula.

4. Bake the cake until it is golden brown and the top springs back when you touch it, about 45 minutes (Note: mine only took about 38 minutes).

5. Remove the pan from the oven. If your pan has feet, invert the pan onto a heatproof surface and allow it to cool. If your pan doesn't have feet, invert 4 heatproof drinking glasses on the counter and rest the inverted pan on top of the glasses to allow air to circulate around the cake while it cools. (Alternatively, you can do what I did, which is to place a heavy juice bottle underneath the hole in the center of the tube pan and allow the center hole piece of the pan to rest on the top of the bottle, inverted.) Let the cake cool in the pan for at least 1 hour or for up to 6 hours.

Thursday, July 7, 2011

Mississippi Mud Cake


This is my birthday cake. At least, I think I can call it a cake. It's sort of a cake, sort of a pie. It's part pudding. All delicious, though. And decadent. I mean, just look at the thing. Chocolate, on top of chocolate, smothered with even more chocolate. Love!


It all starts with a chocolate cookie crust. The original recipe has you grind up a bunch of Oreo cookies and turn them into a cookie crust (oh, did I mention that the original recipe is from the Baked Explorations cookbook? Yeah. So I knew I was in good hands with this one.). However, I actually prefer the flavor of chocolate graham crackers, so I made my crust with those instead. It was a wise decision; I mean, the cake has enough sweetness (and calories!) without adding Oreo cookies to the mix. And those chocolate graham crackers are tasty.


So, once you have assembled and baked the cookie crust, you're ready to make the next layer: a flourless chocolate cake. Could you just die? It's an amazingly rich, gooey, almost molten cake. It closely resembles a brownie, actually, but I think it's even richer. It's very delicate, too, and it cracks on top while it's being baked. Then, while it's cooling on your counter, it deflates and sinks. It looks pretty cool, when all is said and done. So, once you have cooled your flourless cake layer, it's time to stick it in the fridge and let it set up for a few hours (overnight works even better, as it allows the coffee flavor to mellow out some).

Next, you make a dark chocolate pudding, and that is supposed to go on top of the flourless cake. Now, maybe I messed up on the pudding (and that is most likely what happened), but the pudding layer turned out very runny, at least the first night we ate the cake. I got a phone call while I was stirring the pudding over the stove, and I think the distraction proved to be my undoing. The pudding tastes phenomenal; rich, sweet, yet delicate. It just wouldn't set up and form a solid layer for me. So, as you can see below, as soon as we cut the cake into slices the pudding ran all over the place. An avalanche of yumminess. It was still totally edible. And addictive. And by the next evening, the pudding was much sturdier and held up on top of the cake very well.

The book suggests a whipped cream layer to go on top, but I decided that it was going to be good enough with just the three layers I made. I know it seems ridiculous given the sinfulness of this dessert, but I figured I really didn't need a fourth layer comprised pretty much completely of heavy whipping cream! Call me crazy. This cake is a chocoholic dream. It is not for the faint of heart, and it does take a bit of time to put together. However, I guarantee that you will absolutely love this cake if you are a huge fan of chocolate. It is worth the effort!


Mississippi Mud Pie (B), aka Muddy Mississippi Cake
adapted from Baked Explorations
makes one 9-inch round cake

Ingredients
For the Chocolate Cookie Crust:
24 full sheets chocolate graham crackers, broken into pieces
4 Tbsp. unsalted butter, melted and cooled
1 egg white

For the Flourless Chocolate Cake:
4 Tbsp. unsalted butter
6 ounces good-quality dark chocolate (60 to 70%), chopped
2 Tbsp. plus 1 tsp. instant espresso powder
1/4 cup strong coffee, at room temperature
1/4 tsp. salt
1 Tbsp. pure vanilla extract
6 large eggs, separated, at room temperature
1 cup sugar

For the Chocolate Pudding:
1/2 cup plus 2 Tbsp. sugar
1/2 cup dark, unsweetened cocoa powder (I used Scharffen Berger)
1/4 cup cornstarch
1/4 tsp. salt
4 large egg yolks
2 1/2 cups whole milk
3 Tbsp. unsalted butter
2 tsp. pure vanilla extract
3 ounces good-quality dark chocolate (60 to 70%)

For the Simple Whipped Cream (which I omitted):
1 1/4 cups heavy whipping cream
2 Tbsp. granulated sugar


Directions
Make the Chocolate Cookie Crust: 1. Preheat the oven to 300 degrees F. Lightly spray a 9-inch springform pan with nonstick cooking spray. Line the pan with parchment paper and lightly spray the parchment and sides of the pan.

2. In a food processor, grind the graham crackers to a very fine crumb. You should have about 3 cups. With the food processor running, stream in the melted butter and the egg white. Continue to blend until the liquids have mixed in.

3. Turn the crumb mixture into the prepared pan and press it into the bottom and up the sides, leaving about 1/2 inch between the top of the crust and the top of the pan. Use the back of a large spoon (the bottom of a heavy glass works, too) to get an even layer of crust. Place the pan in the freezer and let the crust set for about 10 minutes.

4. Bake the crust in the oven until it is dry to the touch, about 10 minutes. Transfer the pan to a wire rack and let cool.

Make the Flourless Chocolate Cake: 1. Increase the oven temperature to 350 degrees F. Using a double boiler or microwave, melt the butter and chocolate together. Set aside to cool.

2. In a small bowl, whisk together the espresso powder, coffee, salt, and vanilla. Set aside. In the bowl of a standing mixer fitted with the whisk attachment, beat the egg yolks with 1/2 cup of the sugar until the mixture is light and has almost doubled in volume, about 5 minutes.

3. Add the chocolate mixture to the yolk mixture and beat until just combined. Scrape down the sides and bottom of the bowl and mix on low speed for 5 seconds. Add the coffee mixture and beat until just combined. Scrape down the sides and bottom of the bowl and mix on low for 5 seconds.

4. In a clean bowl fitted with the whisk attachment, beat the egg whites until foamy. Gradually increase the speed to high and add the remaining 1/2 cup sugar, beating until soft peaks form.

5. Scoop 1 cup of the egg whites into the chocolate mixture. Use a rubber spatula to gently fold in the egg whites. After about 30 seconds of folding, add the remaining egg white and continue folding until they are almost completely combined. Do not rush the folding process, work gently, and take care not to overmix.

6. Pour the batter into the cooled cookie crust and bake for 38 to 42 minutes, until the cake is set but still jiggles slightly. It might not appear to be completely cooked. Transfer it to a wire rack to cool completely. (As it cools, the cake will deflate in the center and look sunken. Do not despair, this is just the way it settles.) Tightly wrap and refrigerate the cake for at least 3 hours or overnight.

Make the Chocolate Pudding: 1. In a medium saucepan, whisk together the sugar, cocoa powder, cornstarch, and salt. Add the egg yolks and whisk until combined. The mixture will look like a thick paste. Slowly pour in the milk, whisking constantly.

2. Place the saucepan over medium heat on the stove and bring the mixture to a boil, whisking constantly to prevent it from burning on the bottom of the pan. Boil for 30 seconds, then transfer it to a medium bowl. Add the butter, vanilla, and chocolate and whisk until combined.

3. Continue to whisk for a few more minutes to cool the mixture slightly. Let the pudding stand for 15 minutes at room temperature. Press a piece of plastic wrap directly onto the surface of the pudding to prevent a skin from forming, and chill it for at least 3 hours.

Assemble the Mississippi Mud Pie: 1. Stir the pudding to loosen it, then pour it on top of the cake, making sure to stay inside the cookie-crust border. Use an offset spatula to spread the pudding into an even layer. Return the cake to the refrigerator for at least 30 minutes while you prepare the whipped cream topping.

2. Pour the cream into a chilled metal bowl and beat with a chilled whisk for about 1 minute or until soft peaks form. Sprinkle the sugar on the cream and continue whisking vigorously until stiff peaks form.

3. Remove the cake from the fridge and spread the whipped cream across the pudding layer, all the way out to the sides. Unmold the cake, and serve it immediately. The cake can be kept, covered, in the refrigerator for up to 2 days.

Tuesday, May 17, 2011

Butterscotch Krimpets (With Peanut Butter Variation)


I may live in the Midwest currently, but at heart I am still an East Coast girl. I was born and bred in the suburbs of Philadelphia, Pennsylvania, and most of my family still lives there today. One of the fondest food memories I have from when I was growing up is eating the region's Tastykake products.


Tastykakes is a line of baked goods that is found primarily in Pennsylvania; in fact, I'm not even sure if you can purchase them in stores in any other state (though you can order them online). There are several products that are available, among them kreme-filled cupcakes, donuts, and little pies, but my favorites were always the Butterscotch Krimpets and the Peanut Butter Kandy Kakes. Nearly every day in my lunch box, my mom would pack for me either one of these delicious treats. I loved them both equally; to choose which one I preferred would be similar to choosing which of my two sons I favor. In other words, it's impossible! They are each scrumptious in their own right, although they taste different from one another.


The Butterscotch Krimpet is a light, airy sponge cake, covered with a sweet butterscotch frosting and sliced into long, zigzag-y strips and packaged in twos. They're so good; I can still recall unwrapping them, flipping then over and eating them cake-side first, then the frosting. Weird, but yummy!

Then there was the Peanut Butter Kandy Kake. The cake part is similar to that of the krimpet; both are light, springy vanilla cakes. But the kandy kake is a round little cake, smeared with peanut butter and then dipped in chocolate, so that the entire cake is surrounded by it. Again, yummy! I would eat these by nibbling off all the chocolate first, until all that was left was the peanut butter-covered cake. And I had to eat them slowly; that way I could truly savor every bite.


Now that you know what a devotee I was as a child to these Tastykakes, you can understand how excited I was to know that I could recreate these treats in the comfort of my own home! That's right; there's copycat recipes out there, and I've made them! I made the Butterscotch Krimpets a few weeks back, fully expecting that I would be the only member of my household to be consuming them. I was pleasantly surprised when my oldest son and my husband both fell head over heels for the krimpets and devoured every last one (after I had snagged a few, of course)! I was thrilled to be sharing my krimpet love with them!

A few days after the krimpets were all gone, my son asked me when we could make more. He said he missed having them around. So, I decided to make them again, but this time I thought I would cut the cake part in half after baking, and frost only half in the butterscotch frosting. The other half, I decided, was going to taste like the Kandy Kakes.

My mom actually has a killer recipe for the Peanut Butter Kandy Kakes in which you bake the sponge cake, then slather it with peanut butter while the cake is still warm. Once that has cooled, you melt a bunch of chocolate and spread that all over the top. So decadent, so good. However, I just decided to find a different frosting recipe that combined the peanut butter and the chocolate into one convenient little package. It still hits the same nummy flavor notes, but it took about half the time to put together.

So, feel free to try one, or both, of the recipes below. Either way, I promise that you can't go wrong! It definitely beats paying for a box of these to be delivered to your house; they're every bit as wonderful as the originals. Just note: the measurements below for the frosting indicate the amount needed to frost the whole cake. So if you were to divide the cake in half and frost each half in a different frosting, you would need to cut both frosting recipes in half.


Butterscotch Krimpets
adapted from Baking Bites
makes 20-24 pieces

Ingredients
For the sponge cake:
4 large eggs, room temperature
3/4 cup granulated sugar
3/4 cup light brown sugar
1 1/2 tsp. pure vanilla extract
1 cup milk (2% is fine)
2 Tbsp. unsalted butter, softened
2 cups all-purpose flour
1 tsp. baking powder
1/4 tsp. salt

For the butterscotch frosting:
6 Tbsp. butterscotch chips
1/2 cup (1 stick) unsalted butter, softened
1 1/2 cups confectioners' sugar, sifted
2 Tbsp. milk
1/4 tsp. salt

For the chocolate peanut butter frosting (from Food.com):
1/2 cup creamy peanut butter
1 oz. mascarpone cheese, softened (or cream cheese)
1 pinch salt
1 tsp. vanilla extract
3-4 Tbsp. milk
1 1/2 cups confectioners' sugar, sifted
1/4 cup unsweetened cocoa powder, sifted (Dutch process)

Directions
Make the sponge cake: 1. Preheat oven to 350 degrees F. Lightly grease a 15x10 jelly roll pan (17x11 works too) and line the bottom with parchment or nonstick aluminum foil. In a large bowl (or the bowl of an electric mixer), beat together eggs and sugars until pale and thick, 3-5 minutes. Beat in vanilla.

2. While the eggs are beating, heat the milk and butter in a small saucepan on the stove over low heat. Once the butter is just melted and the milk is steaming, but not boiling, remove from heat and set aside.

3. Gradually sift flour, baking powder, and salt into the egg mixture; mix at low speed until just combined. With the mixer running, still at low speed, drizzle in the milk and butter mixture and mix until batter is uniform.

4. Pour batter into prepared pan, spread it out evenly, and bake for 20-25 minutes. The cake is done when a toothpick inserted into the center comes out clean, and when the top is golden and springs back when touched lightly. Allow cake to cool for 5 minutes, then turn it out onto a cooling rack to finish cooling completely.

Make the butterscotch frosting: 1. In a heatproof bowl, combine the butterscotch chips and butter; melt in the microwave and set aside for a few minutes to cool to room temperature. Transfer to the bowl of an electric mixer.

2. Add the confectioners' sugar, milk, and salt to the bowl; beat until everything is well combined, and free of lumps. Spread in a thin layer across the cake. Cut into squares; cake can be stored for a few days at room temperature in an airtight container.

Make the chocolate peanut butter frosting: 1. Beat together the peanut butter, mascarpone (or cream cheese), and salt in the bowl of an electric mixer until smooth and fluffy. Blend in the vanilla and 3 Tbsp. of the milk until mixed well.

2. Gradually add in the confectioners' sugar and cocoa powder, beating just until incorporated. Add in the extra Tbsp. of milk if the frosting appears too thick or not spreadable enough. Spread in a thin layer across the cake. Cut into squares; cake can be stored for a few days in the refrigerator in an airtight container.

Wednesday, April 6, 2011

Burnt Sugar Bundt Cake


I decided to whip up an easy bundt cake to take to my in-laws' house not too long ago. My hubby's birthday is today (Happy Birthday, darling!), and so I figured it would be nice to have a cake that everybody could eat together, since he wouldn't be seeing any extended family on the actual day of. I knew I could turn to my Baked Explorations book for something that would be tasty and easy, but would still appear elegant and fancy enough to qualify as birthday cake.


This one is a real gem. It's listed in the book as Burnt Sugar Bundt Cake with Caramel Rum Frosting, but since I left out the rum mine is simply a caramel frosting. The cake is a simple one, but it is dressed up with the addition of a burnt sugar mixture, which is divided in half and added to both the cake batter and the frosting. A basic hard caramel candy topping is made on the stovetop, broken into pieces, and arranged on top of the frosted cake, dressing it up nicely. The book lists the topping as optional, but I totally think it's a must here.


I think I may have made my burnt sugar liquid a little, well, less burnt than I was supposed to. You're instructed to heat sugar in a saucepan until it melts and turns a dark caramel color. I thought I did that, but the resulting liquid (which is a blend of the melted sugar, heavy cream, coconut milk, and lemon juice) turned out an off-white color. The cake, which contains half the liquid, is a pale yellow color, while the picture in the book clearly shows a dark brown, almost chocolate-looking cake. However, I honestly don't think it mattered to anybody because the cake was positively scrumptious.


One little note about the frosting, though: I think it needs extra confectioners' sugar. The recipe calls for 2 1/3 cups, but I would venture to say that closer to 3 cups is called for here. When I attempted to apply the frosting to the cooled cake, I encountered a problem. The frosting ran, avalanche-style, down the sides of the cake! Because it's a liquid/confectioners' sugar blend, it eventually did set up for me, like a glaze, although I had to refrigerate it overnight to make sure everything stayed put. After that, it was firm and it stayed that way. The hole in the center of the cake was filled with extra frosting, since it had pooled down there before settling. Again, it did not affect the taste at all, but I just thought I'd issue a warning in case anybody tried to make this! It's worth the steps, and it's not complicated at all. Just perfect to take along to a party!


Burnt Sugar Bundt Cake with Caramel Frosting
adapted from Baked Explorations
makes 1 (10-inch) bundt cake

Ingredients
For the burnt sugar liquid:
1/2 cup granulated sugar
1/2 cup heavy cream
Approximately 3/4 cup coconut milk
1 1/2 Tbsp. fresh lemon juice

For the bundt cake:
3 cups all-purpose flour
1 tsp. baking powder
1/2 tsp. baking soda
1 tsp. salt
1 1/4 cups unsalted butter
(2 1/2 sticks) cut into 1-inch cubes, at room temperature
2 cups granulated sugar
4 large eggs
1 tsp. pure vanilla extract
Burnt Sugar Liquid (see above)

For the caramel shard topping:
1/2 cup granulated sugar
About 1 tsp. water

For the caramel frosting:
1/2 cup (1 stick) unsalted butter
1 Tbsp. pure vanilla extract
2 1/3 cups confectioners' sugar (or more, as needed)
Burnt Sugar Liquid (see above)

Directions
Make the burnt sugar liquid: 1. In a medium saucepan over medium heat, slowly melt the sugar. Use a wooden spoon to stir it continuously to ensure even melting. When the sugar turns a dark caramel color, remove the pan from the heat and slowly stream in the cream while continuing to stir (don't worry if mixture starts to clump). Return the pan to medium heat and stir until completely combined; cook for 2 minutes longer, stirring.

2. Transfer the burnt caramel mixture to at least a 2-cup heatproof liquid measuring cup (like Pyrex) and add enough coconut milk to make 1 1/4 cups liquid. Add the lemon juice. Whisk to combine, divide the mixture in half, and set both portions aside.

Make the bundt cake: 1. Preheat the oven to 325 degrees F. Generously spray the inside of a 10-inch Bundt pan with nonstick cooking spray; alternatively, butter it thoroughly, dust it with flour, and knock out the excess flour.

2. In a medium bowl, whisk together the flour, baking powder, baking soda, and salt. Set aside. In the bowl of a standing mixer fitted with the paddle attachment, beat the butter and sugar until pale and fluffy. Scrape down the bowl and add the eggs, one at a time, beating until each is incorporated. Add the vanilla and beat for 5 more seconds.

3. Retrieve one of the reserved portions of burnt sugar liquid. Add the flour mixture in three parts, alternating with the burnt sugar, beginning and ending with the flour mixture. Scrape down the sides and bottom of the bowl and beat again for 10 seconds. Pour the batter into the prepared pan and bake for 45 to 50 minutes, or until a small sharp knife inserted into the center of the cake comes out clean. Transfer the pan to a wire rack to cool completely. Gently loosen the sides of the cake from the pan and turn it out onto the rack.

Make the caramel shard topping: 1. Place the sugar in a small saucepan. Add enough water - it takes approximately 1 tsp. - to make it the texture of wet sand. Cook on high heat until the sugar turns amber. Pour the caramel onto a half-sheet pan lined with nonstick aluminum foil. Let cool. Break the cooled caramel into small shards and use them to decorate the frosted cake.

Make the caramel frosting: 1. Put the butter, vanilla, confectioners' sugar, and remaining portion of burnt sugar liquid in a food processor. Pulse in short bursts until the frosting is shiny and smooth.

Assemble the burnt sugar bundt cake: 1. Use an offset spatula to spread the frosting over the crown of the Bundt in a thick layer. Top with caramel shards. Let the frosting set before serving. The cake will keep in an airtight container, at room temperature, for up to 3 days.

Sunday, February 27, 2011

Baked Sunday Mornings: Devil's Food Cake with Angel Frosting


It's time for another Baked Sunday Morning! And what better way to end the weekend than by talking about cake? Chocolate cake, in fact. Moist, dark, delightfully sweet chocolate cake. Oh, and did I mention the perfectly fluffy Italian meringue icing? No? Well, feast your eyes on the picture below!


I could go gushing on and on about this frosting forever, possibly. I just love everything about it. I love the fact that I've become pretty proficient at making it, and know how it's supposed to look when it's ready. I love the voluminous, marshmallowy, luxurious yet light texture. I love the fact that it's actually fat-free, which is so hard to believe when you taste it! The only bummer about the frosting is the fact that you need to serve it pretty much right away. That makes for a challenge when you don't really have a need or occasion for a chocolate cake with this lovely frosting on top. I made this cake in two parts. The cake layers were made late one afternoon, and then the meringue frosting was made in the morning, right before my husband was to take this cake in to work.


I am hardly a master cake decorator. In fact, my skills still kind of embarrass me, but I've been working on it! Cakes like this give me opportunities to practice, and I love that. This one was pretty easy to frost; again, to praise that meringue frosting, it was a dream to work with! It was so simple to make the frosting smooth, and then it was fun to give little frosting "peaks" to the top of the cake. I grated some milk chocolate down over top, too, just to give it a little something extra. The cake was hugely well-received at work; my husband came home with just some crumbs left on the plate! In fact, it made me pretty sad, as I had wanted to try a slice. Overall, I thoroughly enjoyed making this cake, and my hubby and I are already trying to come up with an occasion for me to make it again!


The full recipe is posted over at Baked Sunday Mornings. Make sure to stop over there and check it out if you're interested!

Thursday, February 17, 2011

CEIMB: (Mexican) Mocha Cake with Chocolate Glaze


This week's Craving Ellie in My Belly was a little something different; it was a chocolate cake! We've been making a lot of main dishes for the group lately, which I love, but it was great to be able to switch things up a bit this time. Chaya, of Chaya's Comfy Cook Blog, chose for us to make Ellie's Mocha Cake with Cream Cheese Frosting.


This was my third time making this cake, and each time I've done something differently. I love that this recipe is so versatile; I can imagine so many variations on the base chocolate cake here. Last time I made it, I used dark cocoa powder and it turned out super, duper chocolatey and delicious. This time, I wanted to spice it up...literally! I thought it would be fun to make this into a spicy mocha cake, and add a few Mexican-tinged flavors to the batter. I cut the recipe in half (because the other times I've made this, I have found that it makes an awful lot of cake!). Then, I added 1/2 teaspoon of cinnamon, and 1/8 teaspoon each of cayenne pepper and ground black pepper to the batter. I felt like a bit of a mad scientist, playing around with this cake! It was a fun experiment.


I used my trusty old brownie pan, again, and it worked out well for the most part. I noticed that not all the slices of cake baked up evenly, so I had some shorter pieces and some larger ones. I reduced the cooking time by about 5-7 minutes, and it was just enough.

I also wanted to do something else for the frosting this time. I opted to make a very simple chocolate glaze to pour over the tops of the slices. I used 1 cup plus 3 Tbsp. confectioners' sugar, 3 Tbsp. milk, 1/2 tsp. vanilla, 1/4 tsp. cinnamon, and 3 Tbsp. cocoa powder to form my glaze (pictured above). The glaze was mostly hardened and set, and then I transferred the cake pieces to the fridge. When I poked around to try a slice later on, I noticed that the glaze was softer than it had been. I guess the fridge softens it back up. It didn't matter, though: it was still totally scrumptious! I highly recommend this variation if you're ever looking for a uniquely flavored, slightly good-for-you chocolate cake to take somewhere!


Thanks to Chaya for allowing me to revisit an old favorite in a new way! For the full recipe as written by Ellie, check out the whole thing on Food Network's website, here. And to see what the other CEIMB-istas did with this one, be sure to head on over to the blogroll, here.

Saturday, August 21, 2010

Scooby-Doo, and a Recipe Too!


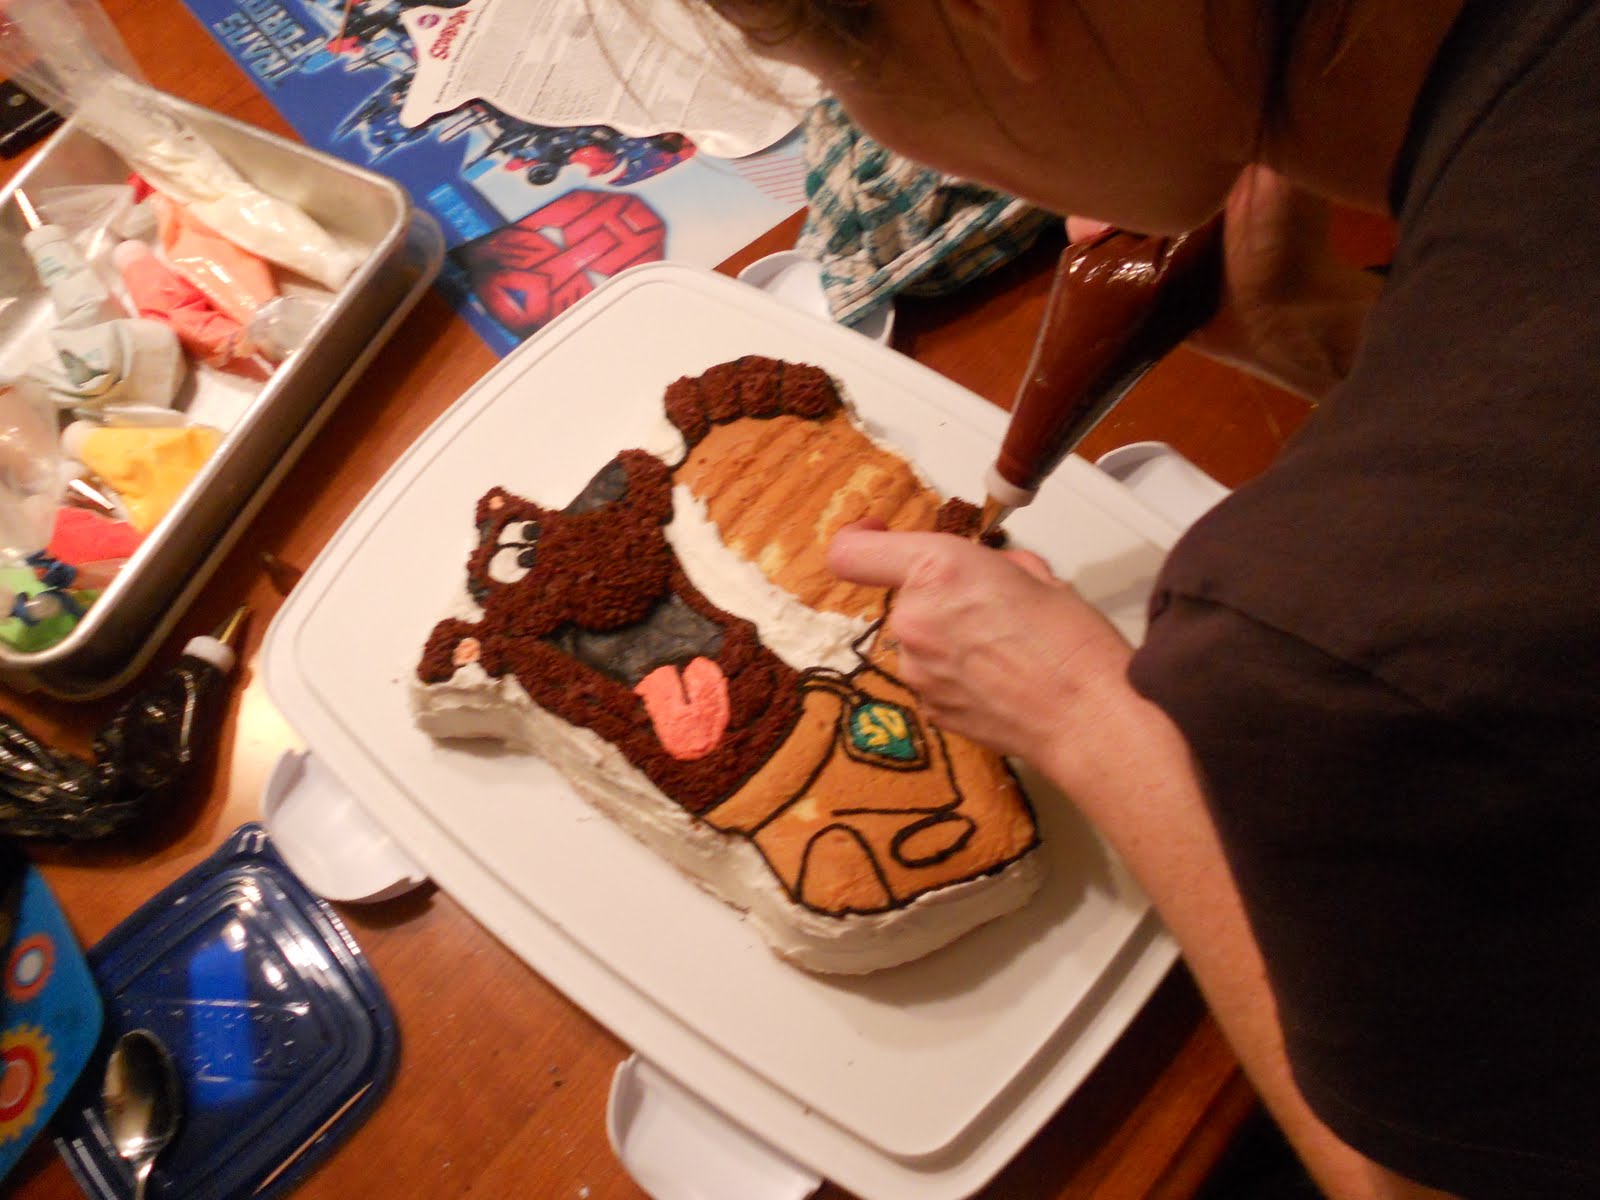
Okay, first of all, I should apologize for the lighting in these photos. Boy, it really makes everything look unnaturally bright and washed out. These pictures were taken late at night before my son's 5th birthday, and I found that the cake looked even worse in the morning light the next day. Go figure! So I'm presenting you with the lesser of two evils.


This cake was the capper on a week of Scooby-Doo treats that I had prepared for his special day. There were the cookies, then there were the cupcakes. He wanted everything to be Scooby-themed; even most of his gifts this year were Scooby-related. This cake was the piece de resistance, the crowning touch to end the festivities.


We were fortunate enough to find this cake pan at a Michael's store about 5 months ago. I made Xander promise me that he would not change his mind about wanting a Scooby-themed birthday party this year, and he kept his word. Hard to believe, but he is still just as much in love with Scooby now as he was 5 months ago! Anyway, we grabbed the cake pan that day at Michael's because they don't usually carry it, and it was on clearance. I've never seen another one since, so I'm glad to have found it.


This was hard, intricate work, let me tell ya. I've done a pirate ship-shaped cake before, so I was familiar with this style of decorating. This was much more difficult, though. It required you to first frost the sides and background sections with plain white frosting. Then, you had to trace Scooby's entire outline in black frosting. Andy helped me do Scooby's nose and mouth, while I worked on his tongue and eyes. Next, you could fill in the brown fur sections and his dog tag and collar. Finally, I did Scooby's hamburger, and then I outlined the entire cake with a bunch of orange stars (Xander's favorite color is orange, and I thought it went just fine with the rest of the cake).


I used a new cake recipe for this one, and I was really happy with it. It comes from a cookbook I've come to really enjoy lately, The Craft of Baking. It's for a basic yellow layer cake with a milk chocolate buttercream, but obviously I went in a different direction with my frosting. This cake almost reminds me of sponge cake; by folding egg whites into the batter before baking, you produce a light, airy cake that holds together incredibly well, and is tender and moist at the same time. Best of all, it is not too sweet, so the buttercream I used paired well with the cake.

In case you're wondering about the frosting, it's actually the Wilton recipe for buttercream. It's sinful, I know, because it contains some shortening. I justified this by reasoning that since I was using up all the Crisco I had in the house (which I had bought when I took Wilton's cake decorating classes), and because it was a special occasion, it'd be okay. And it does work very well for this type of decorating project. To make the brown for Scooby's fur (I think I made it a bit too dark) and the black for his outline, I added some cocoa powder to some of the frosting, then added a bit of water to thin it out. Then I just tinted the rest of my white frosting with various shades of gel-paste food coloring.

I'm including the recipes for the yellow cake and the Wilton frosting below. I would love to try this cake next time with the frosting in the cookbook, though. I have no doubt it would be sublime. Until then, here you go!


Yellow Layer Cake

from The Craft of Baking

makes one 10-inch layer cake (or one Scooby-Doo cake plus about 4 cupcakes!)

Ingredients

2 Tbsp. unbleached all-purpose flour

12 Tbsp. (1 1/2 sticks) unsalted butter, very soft, plus extra for the pans

1 3/4 cups sugar

1 1/2 tsp. pure vanilla extract

7 large egg yolks

3 cups cake flour

1 tsp. kosher salt

3/4 tsp. baking powder

3/4 tsp. baking soda

1 cup plus 2 Tbsp. sour cream

7 large egg whites


Directions

1. Butter the bottoms and sides of three 8-inch cake pans and line the bottoms of the pans with rounds of parchment paper. Butter the tops of the paper liners, and then dust the pans with the all-purpose flour, tapping off any excess. Preheat the oven to 350 degrees F.

2. In the bowl of an electric mixer fitted with the paddle attachment, mix the butter, 1 1/2 cups of the sugar, and vanilla extract on medium speed, scraping down the sides of the bowl several times, until pale and fluffy, 5 minutes. Add the egg yolks, one at a time, letting each become incorporated into the batter before adding the next.

3. In a separate bowl, sift together the cake flour, salt, baking powder, and baking soda. Reduce the mixer speed to low and alternate adding the flour mixture and the sour cream to the butter mixture, adding one third of each at a time and letting them fully mix in before adding the next. When all of the flour mixture and sour cream have been added, turn the mixer to medium-high speed and mix for about 2 minutes, to fully incorporate the ingredients and help build the structure.

4. Scrape the batter into a large mixing bowl. Clean the bowl to the mixer well and, using the whisk attachment, whip the egg whites on low speed until frothy, about 5 minutes. (Instead of doing this, I just used a hand mixer and whipped the egg whites in a smaller bowl, then proceeded with the recipe.) Add the remaining 1/4 cup sugar and increase speed to medium high. Whip whites to soft peaks, then fold them into the batter in 3 additions.

5. Divide the batter between the three prepared cake pans and spread it out evenly with a spatula. Place pans on two baking sheets. Bake the cakes, rotating the pans and switching the cakes between the upper and lower racks of the oven halfway through, until they are lightly golden on top, gently bounce back when touched, and a cake tester inserted in the center of the cake comes out clean, 30 to 35 minutes. (Mine obviously took about 15 to 20 minutes longer, due to the size of the Scooby pan.)

6. Transfer the cake pans to a wire rack and let the cakes cool for 30 minutes. Then remove them from the pans and let them cool completely, at least 3 hours, before frosting.


Buttercream Icing

from Wilton

makes about 3 cups


Ingredients

1/2 cup solid vegetable shortening

1/2 cup (1 stick) butter or margarine, softened

1 tsp. clear vanilla extract

1 Tbsp. meringue powder

4 cups sifted confectioners' sugar (about 1 lb.)

2 Tbsp. milk

3 Tbsp. cocoa powder

1-2 Tbsp. water

Gel-paste food coloring


Directions

1. In large bowl, cream shortening and butter with an electric mixer. Add vanilla, then the meringue powder. Gradually add sugar, one cup at a time, beating well on medium speed. Scrape sides and bottom of bowl often. When all sugar has been mixed in, icing will appear dry. Add milk and beat on medium speed until light and fluffy. Keep bowl covered with a damp cloth until ready to use.

2. For best results, keep icing bowl in refrigerator when not in use. Refrigerated in an airtight container, this icing can be stored 2 weeks. Rewhip before using.

3. For chocolate buttercream, proceed through the confectioners' sugar addition, then add cocoa powder. Add water gradually, a bit at a time, then the milk, until the desired consistency is achieved. Add more or less than the recipe calls for, depending on how thick/thin you'd like your icing to be.

Tuesday, July 6, 2010

Sweet and Salty Cake


No picture I could ever take of this cake could do it the true justice it deserves. No picture is ever going to capture the deep, dark, chocolatey fluffiness of the frosting. I won't be able to sell you on words alone on the moist, tender crumb of the three chocolate cake layers. Likewise, I'm probably never going to convince you that the salted caramel layers are nothing short of a revelation, lending an amazing depth and complexity of flavor that just elevates the entire cake to a whole other level. But hey, I'll do the best I can!

This cake caught my eye immediately about a year ago, back when I first purchased the Baked cookbook. As I flipped through the pages, reading recipe titles, none sounded quite as interesting, as innovative, as downright delicious to me as this one. Sweet and Salty Cake. How intriguing. The idea of sweet and salty together in an almost absurdly decadent chocolate cake definitely appealed to me. This, I thought, was the very embodiment of indulgence.

How fitting, then, that I should finally decide to make this as a very special birthday treat for....me! Yes, I am ridiculous and wanted to make myself a birthday cake. Why not? I enjoy baking, and I enjoy eating. Sounds like a great way to spend a birthday to me.


I had read on several other blogs about how other people had a devil of a time making this cake. People truly lamented their time spent slaving in the kitchen, all for the love of the sweet and salty. However, the unanimous consensus heard 'round the blogosphere, as far as I could tell, was that eating the cake was well worth the effort and hours.

The effort I speak of is as follows: first, you bake a three-layer chocolate cake; next, you make your own salted caramel. This will be drizzled on each cake layer and allowed to soak into the cake a bit.....yum! See above picture, in which the salted caramel is sprinkled with sea salt atop my second cake layer. Finally, you make even more caramel, to be incorporated into a heinously unhealthy (but ever so delicious!) whipped chocolate ganache frosting. You assemble the cake, garnish it with a final sprinkle of sea salt (or fleur de sel, as the recipe states), and there you have it.


Perhaps it is simply because I was warned about how complicated it was, but I really didn't find this cake all that complex. I mean, sure, there are a ton of steps. It does take a very long time to put everything together, beginning to end. There are elements that are tricky, such as making the caramel...twice. However, I felt as though I was successful in the end, and I was proud of the accomplishment.

I did face one complication, though. The recipe's instructions state that this cake keeps "beautifully" at room temperature in a cake saver. I finished making this cake around 10:30 p.m. When I lifted the lid to my cake saver about 12 hours later to admire it, I realized that some of the frosting had begun to roll, avalanche-style, down the side of the cake! I still don't know for certain why this happened, but I decided to bite the bullet and throw the whole shebang in the fridge to let the frosting firm up. I realize that refrigerating a cake such as this is violating like a hundred baking commandments, but I felt like my hands were tied in this situation. I couldn't have runny frosting!


Its brief stay in the fridge did allow me to fix the gooey side after a couple hours of chilling, and in the end I think it all worked out. The cake turned out divine, exquisite, like no other cake I've had. Each element is distinctly flavorful, but when combined it's just out of this world! My husband proclaimed this cake "the best one I've ever eaten." A superior compliment, to be sure, but I believe he has said this before about other cakes (or cupcakes) I've made in the past. So, he's either being way too nice and forgiving with me, or maybe I'm really improving with each cake I make. I don't know for sure, but I do know that this cake was among the best I've ever eaten, too. Seriously, I don't think I could have asked for a better cake for my birthday. Worth every second I worked on it, truly!


Sweet and Salty Cake
recipe from Baked
makes one 8-inch, 3-layer cake (I made mine in 9-inch cake pans)


Ingredients
For the classic chocolate cake layers:
3/4 cup dark unsweetened cocoa powder
1 1/4 cups hot water
2/3 cup sour cream
2 2/3 cups all-purpose flour
2 tsp. baking powder
1 tsp. baking soda
1/2 tsp. salt
3/4 cup unsalted butter, softened
1/2 cup vegetable shortening (I used a trans fat-free variety from Whole Foods)
1 1/2 cups granulated sugar
1 cup firmly packed dark brown sugar
3 large eggs, at room temperature
1 Tbsp. pure vanilla extract

For the salted caramel:
1/2 cup heavy cream
1 tsp. fleur de sel
1 cup sugar
2 Tbsp. light corn syrup
1/4 cup sour cream

For the whipped caramel ganache frosting
1 lb. dark chocolate (60 to 70% cacao), chopped
1 1/2 cups heavy cream
1 cup sugar
2 Tbsp. light corn syrup
2 cups unsalted butter, soft but cool, cut into 1/2-inch pieces

To assemble the cake
2 tsp. fleur de sel, plus more for garnish


Directions
Make the classic chocolate cake layers: 1. Preheat the oven to 325 degrees F. Butter three 8-inch (or 9-inch) round cake pans, line the bottoms with parchment paper, and butter the parchment. Dust with flour, and knock out the excess flour.
2. In a medium bowl, combine the cocoa powder, hot water, and sour cream and set aside to cool. Sift the flour, baking powder, baking soda, and salt together in another medium bowl and set aside.
3. In the bowl of an electric mixer fitted with the paddle attachment, beat the butter and shortening on medium speed until ribbonlike, about 5 minutes. Add the sugars and beat until fluffy, about 5 minutes. Add the eggs, one at a time, beating well after each addition, then add the vanilla and beat until incorporated. Scrape down the bowl and mix again for 30 seconds. Add the flour mixture, alternating with the cocoa mixture, in three additions, beginning and ending with the flour mixture.
4. Divide the batter among the prepared pans and smooth the tops. Bake for 35-40 minutes (mine took 30 for the 9-inch cake pans), rotating the pans halfway through the baking time, until a toothpick inserted in the center of each cake comes out clean. Transfer the cakes to a wire rack and let cool for 20 minutes. Invert the cakes onto the rack, remove the pans, and let cool completely. Remove the parchment.

Make the salted caramel: 1. In a small saucepan, combine the cream and fleur de sel. Bring to a simmer over very low heat until the salt has dissolved.
2. Meanwhile, keeping a close eye on the cream mixture so it doesn't burn, in a medium saucepan combine 1/4 cup water, the sugar, and corn syrup, stirring them together carefully so you don't splash the sides of the pan. Cook over high heat until an instant-read (or candy) thermometer reads 350 degrees F., 6 to 8 minutes. Remove from the heat and let cool for 1 minute.
3. Add the cream mixture to the sugar mixture. Whisk in the sour cream. Let the caramel cool to room temperature, then transfer to an airtight container and refrigerate until you are ready to assemble the cake. (At this point, the caramel will keep in the fridge up to 3 days.)

Make the whipped caramel ganache frosting: 1. Put the chocolate in a heatproof bowl and set aside. (I just placed mine inside the bowl that goes to my stand mixer, since we'll need the chocolate in there soon anyway.)
2. In a small saucepan, bring the cream to a simmer over very low heat. Meanwhile, keeping a close eye on the cream so it doesn't burn, in a medium saucepan combine 1/4 cup water, the sugar, and corn syrup, stirring them together carefully so you don't splash the sides of the pan. Cook over high heat until an instant-read (or candy) thermometer reads 350 degrees F., 6 to 8 minutes. Remove from the heat and let the caramel cool for 1 minute.
3. Add the cream to the caramel and stir to combine. Stir slowly for 2 minutes, then pour the caramel over the chocolate. Let the caramel and chocolate sit for 1 minute, then, starting in the center of the bowl, and working your way out to the edges, slowly stir the chocolate and caramel mixture in a circle until the chocolate is completely melted. Let the mixture cool, then transfer it to the electric stand mixer.
4. Mix on low speed with the paddle attachment until the bowl feels cool to the touch. Increase the speed to medium-high and gradually add the butter, beating until thoroughly incorporated. Scrape down the bowl and beat on high speed until the mixture is fluffy.

Assemble the cake: 1. At this point, I wrapped each cake layer in two layers of saran wrap and put them in my freezer for about 45 minutes, just to firm them up enough to trim the tops. The cookbook does not say to do this, but after reading up on this cake on other blogs, it seemed like a crucial step. I think it helped me out. But it is optional.
2. Trim each cake layer so it lays flat on top and on the bottom. Place one cake layer on a serving platter. Spread 1/4 cup of the caramel over the top. Let the caramel soak into the cake, then spread 3/4 cup of the ganache frosting over the caramel. Sprinkle 1 tsp. of the fleur de sel over the frosting, then top with the second cake layer.
3. Spread with caramel, then frosting, and sprinkle with 1 tsp. of the fleur de sel. Then top with the third layer. Spread with caramel. Crumb coat (spread a very thin layer of the ganache frosting over the entire cake) the cake and put the cake in the refrigerator for 15 minutes to firm up the frosting. Frost the sides and top with the remaining frosting. (I did generously frost my cake, but I still had some frosting left over.) Garnish with a sprinkle of fleur de sel.
4. This cake will keep (maybe?) in a cake saver at room temperature (cool and humidity-free) for up to 3 days. If your room is not cool, place the cake in a cake saver and refrigerate for up to 3 days. Remove the cake from the refrigerator and let it sit at room temperature for at least 2 hours before serving.