Sunday, May 30, 2010

Buffalo Chicken Chili Mac


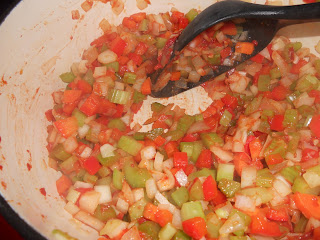
I'm always looking for new incarnations for buffalo chicken. We've done buffalo lasagna, buffalo dip, buffalo potato skins. I've also made Rachael Ray's Buffalo Chicken Chili. As it turns out, this recipe is just like her chili, but taken to another level. Instead of just serving up the buffalo chili in bowls with chips and other garnishes, you toss the whole pot with a pound of pasta, and then top the whole thing with cheese and slip it into the oven to cook a bit longer. Voila; chili mac!


This recipe makes a mountain of food! Seriously, I think it made enough for us to have it for dinner maybe four times, along with side dishes, before we ran out. It would be great to make for company (as long as they like buffalo), served with bread and salad. If I had to change anything about this, it would be to increase the heat level. I felt like I couldn't really taste the buffalo sauce as much as I would have liked to; it got lost somewhere amid all the tomato sauce and cheese. It still had a kick, though. The kids had a hard time eating it because of the spiciness. Andy and I loved it, though!


The original recipe can be found here. I did change a couple things, so I'm leaving my version of the recipe below.


Buffalo Chicken Chili Mac
adapted from Rachael Ray
serves 6-8


Ingredients
1 Tbsp. extra-virgin olive oil, divided
1 1/2 lbs. boneless, skinless chicken breasts, cut into 1-inch cubes
1 large carrot, peeled and finely chopped
1 large onion, chopped
3 ribs celery, finely chopped
5 large cloves garlic, finely minced or chopped
1/2 Tbsp. smoked paprika
1/2 Tbsp. chili powder
2 bay leaves
salt
freshly ground black pepper
1 1/4 cups chicken stock or broth
1/4-1/2 cups buffalo wing sauce (use your own personal discretion here)
1 (15-ounce) can crushed tomatoes
1 lb. short-cut pasta, any shape (I used these cute tennis racket shapes)
3/4 cup shredded pepper jack cheese
1/4 cup crumbled blue cheese
1/4 cup chopped fresh cilantro

Directions
1. Place a large pot of water on high heat, bring to a boil. Add pasta, cook according to package directions, and drain. Preheat oven to 375 degrees F.
2. Meanwhile, place a large skillet or Dutch oven over medium-high heat. Add 1/2 Tbsp. olive oil to the pan, then the chicken, browning on all sides (about 8-10 minutes). Add the carrot, onion, celery, garlic, paprika, chili powder, bay leaf, and salt and pepper to the chicken. Cook veggies, stirring frequently, until tender, about 3-4 minutes. Add chicken stock and scrape up the brown bits on the bottom of the pan. Add the hot sauce and crushed tomatoes and bring up to a boil. Simmer the chili for at least 10 minutes, until slightly thickened.
3. Add the pasta to the chili and toss to combine. Transfer to a casserole dish and sprinkle the pepper jack and blue cheeses evenly over the top. Cover with foil, then bake for about 15 minutes at 375 degrees.
4. Remove the casserole dish from the oven, remove foil, and continue to bake for another 10-15 minutes, until the cheese is melted and the casserole is bubbly. Sprinkle chopped cilantro over the top. Let stand a few minutes before serving.

Wednesday, May 26, 2010

Dark Chocolate Mocha Cake


I made this cake recently when I needed a dessert that tasted decadent, but wasn't outrageously unhealthy. This is another one of Ellie Krieger's fantastic recipes, and I've made it before. It's a pretty basic chocolate cake, but made with a few simple swap-outs to lower the calories and fat. Some espresso is thrown into the mix, which obviously pairs up excellently with the chocolate. The cake is frosted with a reduced-fat cream cheese frosting spiked with more espresso. Simple, yet delicious.


Evan's making this sad, worried face because he isn't sure what's going on with the Craving Ellie in My Belly group! Ok, I'm kidding. He was actually making that face because we were inside a capsule in the St. Louis Gateway Arch, going up to the top to look out from the observation windows. He was pretty unsure of what was going on, but he handled it like a trooper! He was even good the whole time we were at the top of the Arch, much to my surprise.

We really don't know what's going on with the CEIMB group, though. There haven't been any new recipes assigned to us, so I didn't have a recipe to make for this Thursday. I figured I'd cover my bases and post about this cake, since it is an Ellie creation. I'm hoping we get some new recipes to make for next week, since I've really enjoyed being a part of this blogging group and definitely do not want to stop.


In the meantime, though, try this cake! It's fabulous for fulfilling a chocolate craving. It's tender and moist, and it's just sweet enough without being super sweet. Oh, and a final note about it: I've made it before with regular cocoa powder, but this time I switched it up and made it with Hershey's Special Dark Cocoa Powder. What a difference! It was pitch dark and heavenly. I sprinkled milk chocolate shavings across the top of the cake, and it was perfect.

The recipe for the Chocolate Mocha Cake can be found here.

Monday, May 24, 2010

Caribbean Chicken Drumsticks with Asparagus and Radish Salad


I can hardly believe this, but I made this over a month ago and then forgot to write a post about it! This is actually a pretty unforgettable dish, but I got caught up in blogging more recent things I had made and somehow this one just slipped through the cracks. I found this all the way back in January, in Food Network Magazine. I had bought that particular issue of the magazine because they had done a feature on cupcakes, and I'm a sucker for those. However, I ended up using this issue for all sorts of tasty dishes, and this one may have been the very best one.


These chicken drumsticks are the creation of Food Network personality Sunny Anderson. This is the first recipe of hers I've made, and it really makes me want to make more of her meals. This was so simple and unbelievably flavorful. The best part about these drumsticks is that they are baked in the oven, making this cooking method way healthier than other cooking methods listed in the magazine (a bunch of Food Network chefs had contributed to this feature on chicken wings, each providing a unique recipe for chicken).


The drumsticks are marinated in a jamaican jerk-style blend of herbs, spices, and juices. Then they're placed on a baking sheet to bake. After boiling the leftover marinade on the stove, you remove the drummies from the oven, baste them with all of that leftover goodness, and bake them a bit longer at a higher temperature. The glaze becomes caramelized and sticky and just absolutely delicious and messy. The meat is insanely tender, and the flavors are perfectly combined.

I decided to serve these drumsticks with a simple buttered Israeli couscous, and a quickly thrown-together asparagus and radish salad. If I recall correctly, the salad was dressed with a mixture of vinegar, soy sauce, and olive oil, along with salt, pepper, and dried cilantro. It was great; the crunch of the radish contrasted well with the quick-steamed asparagus, and the flavors in the dressing were present in the chicken drumstick marinade as well. A wonderful meal, and do-able on a weeknight!


The original recipe for Sunny's wings can be found here.


Sunny Anderson's Caribbean Chicken Wings (or, in my case, drumsticks!)

from Food Network Magazine

makes 3 lbs. wings or drumsticks


Ingredients

1/2 habanero pepper, seeded and chopped

2 Tbsp. soy sauce

2 Tbsp. honey

2 Tbsp. packed light brown sugar

1 Tbsp. granulated sugar

1 tsp. fennel seeds

1 tsp. cayenne pepper

1 tsp. allspice

1 tsp. dried thyme

1/2 tsp. ground ginger

2 cloves garlic, chopped

2 scallions, chopped

2 Tbsp. apple cider vinegar

2 Tbsp. fresh lime juice

2 Tbsp. fresh orange juice

3 lbs. chicken wings (I used drumsticks)


Directions

1. Combine the first 12 ingredients (through scallions) in a blender. Add the vinegar, lime juice, and orange juice and blend until smooth. Place the wings in a large, resealable bag and pour the marinade over them. Seal and refrigerate for 4 to 6 hours.

2. Preheat the oven to 350 degrees F. Line 2 baking sheets with foil. Remove the wings from the bag, place on the lined sheets, and bake for 20 minutes. Meanwhile, bring the marinade to a boil in a small saucepan over medium heat and cook until reduced by one-third, about 10 minutes.

3. Remove the wings from the oven and brush with the glaze. Raise the oven temperature to 400 degrees and continue to bake until the wings are cooked through, 20 more minutes.

Saturday, May 22, 2010

Southwestern-Style Shrimp Taco Salad


Now that the weather has turned warmer, and the weekend days have turned a bit lazier, it's always nice to have some lighter meals on the menu. Salads, in particular, are one of those meals where if we haven't had one in a while, we forget how great they are. When done right, salads can be a completely satisfying, filling dish.

We couldn't believe how delicious this Southwestern-Style Shrimp Taco Salad was. I found this one in the May issue of Cooking Light Magazine. It was, as my husband put it, exquisite. So many flavors, but none of them competed with each other. The dressing was a sweet-tart delight that added a hit of smoky spice. The shrimp contributed a filling, tasty protein to the mix. The greens and tortilla chips were so crisp, and the roasted corn, burst tomatoes, and avocado were all so tender and unique in taste.


Were it not for the steps involved in the preparation, this would be a snap to make. It does take a bit of time, but I assure you that it is well worth every second you will spend on readying this salad for your dinner table. Trust me on this.


Once all the components have been gathered and prepared, you can assemble this any way you want to. The recipe, as written, instructs you to use the tortilla chips as a bed for the rest of the salad, but we framed our bowls with chips rather than throwing them on the bottom. Alternatively, you could crush the chips and sprinkle them on top. Then you can add the remainder of the ingredients any way you like. The dollop of sour cream is totally optional; I had mine without and loved it. Andy used the sour cream and thought it was a revelation. So it's really your call.


Best of all, this salad was fantastically filling, but it doesn't make you feel heavy or gross after you've eaten it. It's almost refreshing in a way; it feels so good to eat something comprised mostly of fresh ingredients that taste so great together. I can't stress this enough, but I'll try one more time: you should try this salad! It's a perfectly summery meal, and one that we can't wait to eat again.


The original recipe can be found here.

Southwestern-Style Shrimp Taco Salad

adapted from Cooking Light

makes 3-4 servings


Ingredients

1/4 cup fresh lime juice

2 Tbsp. extra-virgin olive oil

1 tsp. ground cumin

2 tsp. fresh minced garlic

2 tsp. pure maple syrup

2 tsp. chipotle hot sauce (we used Chipotle Cholula, yum!)

3/4 pound peeled, deveined raw shrimp

2 ears shucked corn

cooking spray

1 cup chopped romaine lettuce

1/2 cup chopped green onions

1/4 cup chopped fresh cilantro

1 (15-ounce) can black beans, rinsed and drained

3 plum tomatoes, chopped (we used 1/2 pint of cherry tomatoes, halved and slightly burst)

2 oz. baked tortilla chips (Cooking Light used blue corn chips, we didn't have those)

1/3 cup light sour cream

1/4 cup peeled, diced avocado

Lime wedges, for garnish (optional)


Directions

1. Prepare grill to medium-high heat. Combine lime juice, olive oil, cumin, garlic, maple syrup, and hot sauce in a small bowl, stirring with a whisk. Place shrimp in a shallow bowl. Drizzle 1 Tbsp. of lime mixture over shrimp, tossing gently to coat. Reserve remaining lime mixture. Thread shrimp onto metal skewers. Lightly coat corn with cooking spray. Place shrimp kebabs and corn on grill rack coated with cooking spray. Grill 8 minutes, turning kebabs once and turning corn frequently until browned. Remove from grill; cool slightly.

2. Remove shrimp from skewers and place in a large bowl. Cut kernels from the ears of corn. Add corn, chopped lettuce, green onions, cilantro, black beans, and tomatoes to shrimp. Drizzle reserved lime mixture over the shrimp mixture, and toss to combine.

3. Divide tortilla chips evenly among shallow serving bowls; top each chip serving with shrimp mixture, dividing evenly. Combine sour cream and avocado in a small bowl; mash with a fork until well blended. Top each serving with 1 Tbsp. sour cream mixture. Serve with lime wedges if desired.

Note: we didn't mix up the sour cream and avocado like the recipe indicates. Instead, we sprinkled the diced avocado and dolloped the sour cream on top. It worked great!

Thursday, May 20, 2010

CEIMB: Chocolate Egg Cream


This week's Craving Ellie in My Belly recipe was actually a beverage. This recipe was chosen by Chaya's Comfy Cook Blog. We were to make Chocolate Egg Creams, which are sort of a cross between a chocolate milk and a soda float. There is no ice cream in these, but they are still creamy, with a bubbliness from the seltzer water and a surprise salty kick from the pretzel rod you garnish it with at the end.


Andy and I thought these were okay, but I don't think I would ever go out of my way to make these again. I'd rather just go ahead and indulge in a soda float or chocolate milkshake and accept the fact that I'd be ingesting extra calories.


I do have to say, though, that I am very grateful that I tried them. Why? Because in the process, I have discovered the love of a new coffee beverage that is starting to become my new favorite.


Every afternoon, I make myself an iced mocha on my home espresso machine. I've played with the formula time and again, trying to always make it tasty and low-calorie at the same time. When I read the ingredient list for Chocolate Egg Creams, I realized that if I just added some shots of espresso to this, I could really have a great drink. So I decided to make the recipe exactly as stated, and then make another version with an added java jolt. I also added ice because the espresso is warm when it comes out of the machine. Adding it meant adding warmth, so I had to compensate.


This turned out so well! I have never, ever thought to add carbonation to my coffee drinks. This is genius! It adds flavor, and a different dimension that just makes it so much more refreshing. Plus, it's a welcome substitute for the plain water I normally add to dilute the milk (which is how I lower the calorie content). In this household, we aren't huge fans of the seltzer water. However, in this, I think it's a winner! And the pretzel rod, though I wouldn't treat myself to one every day, was a fun and interesting little stir stick.


So the ex-Starbucks employee in me tinkered with the recipe, and she was successful! If you enjoy Starbucks iced mochas, I recommend you try adding some coffee to your egg cream next time! It's fantastic!


The original recipe for Ellie's Chocolate Egg Creams is found here.


Tuesday, May 18, 2010

Almost-Vegetarian White Bean Soup with Cheese "Crackers"


This soup is amazing. Really, I'm not just saying that because I made it. I can be honest here and tell you that I wasn't expecting to love it as much as I did. But it completely exceeded all my expectations. I don't even care that we're heading into summer; I just want to make this soup again, and again.

I found this soup recipe in March's Cooking Light Magazine. In that month's issue, Ellie Krieger (who I love, of course) had done a guest feature on rush-hour meals. These recipes were all supposed to be easy and fast to make after a long day at work, or school, or whatever. Plus, they all have the distinction of being both Ellie and Cooking Light-approved. It seemed like a match made in heaven to me!


Of course, I didn't stick to the recipe word for word. The original calls for spicy pork sausage and is actually titled Vegetable and Spicy Sausage Soup with Cheese "Crackers." I did not have pork sausage on hand, and I really felt like making this soup vegetarian (with the exception of the use of chicken broth). So I played around with the formula, and this is what I came up with.

I followed the directions at first. I sauteed the veggies, then added some tomato paste and cayenne pepper to absorb into the vegetables. I then added a pureed blend of white beans, chicken broth, and the sauteed veggies into the mix. Another 2 1/2 cups of broth went in, and everything came up to a boil. (Ellie's version has you add another full can of white beans into the mix at this point, but since I'm not a crazy big fan of white beans, I did without.)


While this simmered on the stove, I went to work on the cheese "crackers." This is something I see over and over again, but I had never tried it myself. I've seen Giada make these; I've seen Rachael make these (I think), but it was finally my turn. It's very easy; I don't know why I was so scared of these turning out right.

All you do is grate some parmesan cheese into mounds, flatten those mounds into 3 (ish)-inch circles, crank some black pepper down over the tops, and bake them in a very hot oven (500 degrees) for about 3 minutes. They come out just perfect; crisp, toasty, and bubbly. They've got that almost-burnt cheese taste to them, which you either love or hate (turns out Xander hates it!). Andy and I loved these. I will be using this technique a lot more often, I think.


After the soup has had time to simmer, about 20 to 30 minutes, you can take it off the heat. At this point, Ellie adds half-and-half, rosemary, and a bit of salt and pepper, to taste. I chose to eat mine cream-free (I wasn't feeling the creamy soup that evening) but I added a touch of heavy cream to the rest of the pot, for Andy (heavy cream was all we had).

Finally, Ellie's version has you serve the soup with some previously cooked and reserved pork sausage crumbled on top, and the cheese "cracker" dipped into the bowl. Instead, and please bear with me here, I sprinkled some Boca vegetarian chicken pieces on top. I know, it's really strange. I actually meant to sprinkle some regular Boca burger crumbles on, but I had already pulled the box and the patty out of the freezer before I fully realized that I had pulled out the wrong thing. I just decided to go with it; why not? It turned out really good, I have to say. The "chicken" patty was breaded, so the breading sort of lent an extra thickness to the soup, and the pieces lent some extra texture that I thought it needed. It was a successful experiment, and one we will be repeating!


The original recipe can be found here.

Almost-Vegetarian White Bean Soup with Cheese "Crackers"

adapted from Cooking Light

serves 4


Ingredients

1/2 Tbsp. olive oil

1 1/2 cups finely chopped onion

1/2 cup finely chopped carrot

1/3 cup finely chopped celery

1/2 tsp. kosher salt, divided

2 garlic cloves, minced

2 Tbsp. tomato paste

1/8 tsp. cayenne pepper

3 cups fat-free, less-sodium chicken broth (or vegetable broth), divided

1 (15.5-oz.) can cannellini beans, rinsed and drained

1/4 cup heavy cream

1 tsp. freshly ground black pepper, divided

4 Tbsp. grated fresh Parmigiano-Reggiano cheese

2 Boca burger or chicken patties


Directions

1. Heat a Dutch oven over medium heat. Add olive oil, then onions, carrot, celery, 1/4 tsp. salt, and garlic; cook for 5 minutes or until vegetables are tender, stirring frequently. Stir in 2 Tbsp. tomato paste and cayenne; cook for 1 minute, stirring constantly.

2. Place 1 cup of this vegetable mixture, 1/2 cup broth, and the can of beans into a food processor or blender, and process until smooth. Return bean mixture to pot.

3. Add remaining 2 1/2 cups broth to pot; bring to a boil. Reduce heat and simmer for at least 20 minutes, or until vegetables are thoroughly cooked. Remove from heat, and add the cream, remaining salt, and 1/2 tsp. of black pepper. Cover and keep warm.

4. While the soup simmers, preheat oven to 500 degrees F. On a parchment-or silpat-lined baking sheet, grate the cheese into 4 even mounds of approximately 1 Tbsp. each, then evenly sprinkle the remaining 1/2 tsp. of pepper over each mound. Flatten each mound into a 3-inch round. Bake at 500 degrees for 3 minutes or until golden and bubbling. Cool on pan for 3 minutes before removing.

5. Heat 2 Boca patties (your choice of variety/flavor) according to package directions. Chop cooked patties into small pieces. Divide soup evenly into four bowls, then sprinkle the patties evenly over each serving. Dip one cheese "cracker" into each bowl, and serve.

Sunday, May 16, 2010

Peanut Butter Sandwich Cookies with Milk Chocolate Filling


I want to start off this post by apologizing in advance for the poor quality of my pictures this time around. You see, my Mother's Day gift this year was a new camera (yay!) and I have been getting myself used to it. Therefore, I had a lighting issue with some of my shots, and then by the time I (okay, Andy) corrected the problems, the cookies were gone. Polished off. Demolished.

Maybe that's because these cookies are heaven. Wonderful, magical little treats. As long as you are down with the tried and true chocolate/peanut butter combination, you will not be disappointed by these little yummies.


I checked a book out of the library called The Craft of Baking, and I was really excited to try several of the recipes contained within. This is actually the second one I attempted. The first, a coffee cake muffin with pecan streusel, was absolutely delicious. Unfortunately, the muffins were also ultimately a failure. I couldn't get them out of the muffin tins; they were stuck to the bottom, despite my generous dose of cooking spray in each cup. When I tried to carefully carve them out of the tins with a paring knife, I wound up with 12 little piles of crumbs. I transferred these to one giant plate of crumbs, and we all picked at them and called it a day.

So I was a little wary about making these cookies, since my only experience with this book had been such a colossal flop. Still, they sounded too delicious for me not to try them out. And I am very glad I did.


They are very easy to make. A simple, peanut-buttery cookie dough is put together with the help of a mixer, and then the dough is shaped into rounds (made easy by using an ice cream or small cookie scoop). Bake them off, then let them cool completely before assembling them into sandwiches.

I froze these cookies before they were sandwiched, because I had a chance to bake them at one point, and then I wanted to serve them over a week later. They froze just fine; no problems.

When it was time to whip together the peanut butter/milk chocolate filling, this simple step took almost no time at all. The consistency of the filling seems thin when you first make it, but the instructions state to chill the filling so that it firms up. Once it is ready to be spread, it almost feels like a truffle consistency; thick, sort of pliable, and solid rather than liquid. Oh, and utterly scrumptious. Forgot to mention that part.


Eek! There's the really bad shot! And unfortunately it was the best of the shots I had of me spreading the filling. Oh well. Pictures can only do these cookies so much justice. The real proof is in the tasting. Trust me.

I find it easier to assemble these as you eat them, rather than assembling the sandwiches all at the same time and then storing them that way. I will take as much filling as I need out of the fridge and let it sit at room temperature for at least 30 minutes. Then, when it is soft enough to slather, I put the cookes together. No matter what method you use, these cookies are worth the minimal effort it takes to make them. You really should try them. Really!


Peanut Butter Sandwich Cookies with Milk Chocolate Filling

from The Craft of Baking, by Karen DeMasco

makes about 24 sandwich cookies


Ingredients

For the Cookies:

1 3/4 cups unbleached all-purpose flour, plus more for rolling

1 tsp. baking powder

1/2 tsp. baking soda

1/2 tsp. kosher salt

6 Tbsp. unsalted butter, at room temperature

1/2 cup plus 1 Tbsp. lightly packed dark brown sugar

3/4 cup plus 1 Tbsp. confectioners' sugar

1/2 cup creamy peanut butter (I used reduced-fat, with great results)

1/2 cup vegetable oil

1 1/2 tsp. pure vanilla extract

1 large egg


For the Filling:

6 oz. milk chocolate, roughly chopped

1/2 cup creamy peanut butter (I used reduced-fat for this, too)

1/4 cup confectioners' sugar

1/4 tsp. kosher salt

3/4 cup heavy cream


Directions

1. For the Cookies: Preheat oven to 350 degrees F. Line two baking sheets with parchment paper. In a large bowl, sift together the flour, baking powder, baking soda, and salt.

2. In the bowl of an electric mixer fitted with the paddle attachment, beat the butter, brown sugar, and confectioners' sugar on medium-high speed until light and fluffy, about 2 minutes. Add the peanut butter and beat to combine, scraping down the sides of the bowl as needed. With the mixer on low speed, slowly add the oil, vanilla, and egg. Beat until jut combined, about 20 seconds, then add the flour mixture and beat to just combine.

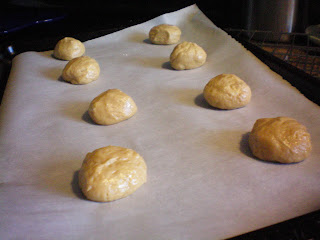
3. Lightly flour the palms of your hands, and roll the dough into balls about 1/2 inch in diameter. Place them about 1 inch apart on the prepared baking sheets. Bake, rotating the sheets halfway through, until the cookies are golden brown on the edges, about 12 minutes. Transfer the baking sheets to wire racks to let cool completely. (The cookes can be stored, unfilled, in an airtight container at room temperature for up to 1 week.)

4. For the filling: combine the chocolate, peanut butter, confectioners' sugar, and salt in a medium bowl. In a small saucepan, bring the cream to a boil. Remove the cream from the heat and pour it over the chocolate mixture. Stir with a spatula until the chocolate is completely melted, and mixture is smooth.

5. Set the bowl in an ice bath, or chill it in the refrigerator, until the filling has cooled to room temperature and is thick enough to spread. Use it immediately or transfer it to an airtight container and refrigerate it for up to 1 week (let it come to room temperature before using).

6. Using an offset spatula, spread 1 teaspoon of the filling over the flat sides of the cookies. Sandwich with the remaining cookies, flat sides together. Once filled, the cookies are best eaten the same day, but they can be kept in an airtight container in the refrigerator, up to 3 days.

Thursday, May 13, 2010

CEIMB: Whole-Wheat Apple Pancakes with Nutty Compote


For this week's Craving Ellie in My Belly recipe, we made these wonderful Whole-Wheat Apple Pancakes. This was chosen by Dishin', and I was really looking forward to it. I could probably eaet pancakes for breakfast every single day; that's how much I love them. Waffles run a close second, but they require a little bit more effort. Once I finally learned how to make pancakes, a few years back, I have enjoyed preparing them in different ways. This way, to sprinkle apples on top of the pancakes while they cooked on the griddle, was one I hadn't tried before.


The preparation was simple. An easy pancake batter is put together, made with half whole-wheat and half all-purpose flours. You chop up an apple into small chunks and gently heat the chunks in the microwave. Once the pancakes are on the griddle, you sprinkle about a tablespoon of apple onto each pancake. When you flip them, the apple continues to heat through, and they are served (or at least, we served them) with the apple on the bottom.


But wait, that's not all. Next, you make a nutty compote, which of course is really just a fancy way of saying "nutty topping." I loved the nutty topping, but I have to admit that I modified Ellie's recipe. It was partially out of laziness (not wanting to go to the store for some things) and partially because I thought we would like it better if we altered it a bit. Instead of the sunflower seed-pumpkin seed-almond mix that was called for, we used only almonds. We did use the sesame seeds, wheat germ, and pure maple syrup that was part of the original recipe.


Altogether, this made for a wonderful breakfast. The compote worked so well with the pancakes. The nutty crunch was an unexpected, but welcome contrast to the soft pancakes. I have to admit, I did add some additional syrup, mostly because the compote didn't contribute that syrupy coating that I love so much. Even so, this recipe was fabulous, and I believe I'll be making it again. Even Xander, my picky eater, admitted that this was good. Score!

The recipe for these pancakes, and their topping, can be found here. Thank you to Dishin' for a great meal!


Tuesday, May 11, 2010

Cajun Lasagna: A Work in Progress


I love lasagna. It's one of those comfort foods, to me, that will always warm you up inside and make you feel great all over. However, I just can't make it the way my mom does. I've tried, unsuccessfully, to duplicate her recipe. I've tried to make it other ways, in the hopes that I could find the next great lasagna. No luck. So I decided to try something completely different, something that would still be a lasagna, but with a fun, new twist. That's right: Cajun Lasagna.


Sure, it sounds a little weird, but I thought it sounded really promising, too. Originally, the idea came from a recipe over on trusty ol' Recipezaar with the same name. A quick perusal of the ingredient list turned me off a little, though. The "sauce" they used was 20 oz. of white alfredo sauce. No. Just, no. I wasn't going to dump 2 1/2 cups of store-bought, preservative-laden cheese sauce all over my lovely lasagna (no matter how yummy alfredo can be, under the right circumstances). I decided to modify the recipe I had found, make it my own. It's more fun that way.


Instead of both chicken and andouille sausage in the filling, I went with lean Italian turkey sausage because it's what I had readily available. I used celery, onions, and red bell peppers as the nice cajun veggie base, then some garlic, then some cajun seasoning. I simmered everything in a can of crushed tomatoes, then mixed the sauce with 1 cup of part-skim ricotta cheese to give it the creaminess that I have come to expect in my lasagna. Plus, I had to do something to sort of replace the white sauce I had omitted.

I used a little over a half pound of lasagna noodles, and I think I probably used one too many layers worth of noodles. In the future, I would scale back, maybe do three layers of four noodles each instead of four layers of four. It just seemed like an improper ratio of filling to pasta. I never thought anything could be too noodle-y, until this lasagna. But I digress.


I could easily have loaded each filling layer with tons of gooey cheese, but I used restraint. It was hard. Instead, I sprinkled a healthy dose of mozzarella and parmesan, freshly grated, across the top once the layers were in place. I thought it was just perfect this way, but I'm sure it would be heaven with extra inside, too!

So, how was the cajun creation? It was very good! There was only one problem: besides the noodliness (invented word alert!), this lasagna just didn't taste very, well, cajuny. I had used the base recipe I had found as a guideline, and they had you use 2 tsp. of Cajun seasoning. This sounded like it would almost be too much, but I used what they had prescribed. Now, looking back, I would have at least doubled it. Or maybe it would have been good with some Tabasco mixed into the tomato sauce. Either way, it definitely lacked that nice burn that I always associate with Cajun food. It was yummy, though! When I give the recipe for this lasagna below, I will suggest how much Cajun seasoning I think it should have, not how much I actually used. The original, and ultimately nothing like my own, recipe can be found here.


Cajun Lasagna

adapted from Recipezaar

serves 10-12


Ingredients

8 oz. lasagna noodles, uncooked

2 tsp. olive oil, divided

1 lb. lean Italian turkey sausage

4-5 tsp. Cajun seasoning (plus, optionally, 4-5 shakes from the Tabasco bottle)

1 tsp. dried sage

1 tsp. dried thyme

1 small onion, diced

3-4 stalks celery, diced

1 red bell pepper, diced

2-3 cloves garlic, minced

1 28-oz. can crushed tomatoes

8 oz. part-skim ricotta cheese

1 8-oz. can tomato sauce

1/2 cup shredded mozzarella cheese (part-skim is great)

1/2 cup shredded parmesan cheese


Directions

1. Heat a pot of water to boil, add uncooked lasagna noodles, and cook for about 8-10 minutes, until al dente. Set aside.

2. Meanwhile, heat a deep skillet over medium-high heat. Add 1 tsp. of the olive oil, then the sausages. Cook for about 10 minutes, turning occasionally, until cooked through. Reserve sausages on a plate, then add the other 1 tsp. oil and the onion, celery, and pepper to the skillet.

3. Cook veggies until soft, about 5 minutes, then add the garlic, sage, thyme, and Cajun seasoning. Cook for another minute, then add the crushed tomatoes. Once it is bubbling, turn the heat down to a simmer. Slice the sausages on the diagonal (about 8-10 slices per link) and add them back to the skillet. Simmer for at least 10 minutes, stirring occasionally.

4. Preheat oven to 325 degrees F. Coat a 9x13-inch baking dish with cooking spray. Using the 8 oz. can of tomato sauce (which you can doctor/season to your discretion), cover bottom of pan with enough sauce to just coat the entire surface, to prevent sticking.

5. Remove sauce from heat, then gently stir in the 8 oz. ricotta cheese. Layer 4 lasagna noodles on the bottom of the dish, then 1/2 of the sauce mixture. Add 4 more noodles, then the other 1/2 of the sauce. Add 4 more noodles, then top the surface generously with the plain tomato sauce. Sprinkle the shredded cheeses all over the top.

6. Bake in the 325 degree oven for 50-60 minutes, covered with foil. Remove foil, then bake another 10-15 minutes, until the lasagna is bubbly and the cheese is melted. Let stand at least 15 minutes before slicing.

Sunday, May 9, 2010

Millionaire's Shortbread


I've had my eye on this recipe for a while. It's another one from my Baked cookbook, and since I've had nothing but luck with their bar cookie recipes, I thought it would be a simple enough endeavor. This cookie combines three irresistible (to me, anyway) layers: crumbly, buttery shortbread, topped with a thick, creamy milk caramel, then finished off with deep, dark chocolate.

In addition to sounding positively scrumptious, this recipe held the distinction of having me make my very own dulce de leche from cans of sweetened condensed milk, which I have wanted to try but never had. It sounded very easy, so I wasn't too worried about the whole process.


I started out by making the shortbread cookie layer. It is done by mixing together the dough ingredients, partially by mixer and partially by hand, and transferring it all into a 9x13-inch pan. It's pressed down evenly, and then pricked all over with a fork. Once it is fully baked, you allow it to cool before adding the remaining layers.


The next layer is where I started to run into some trouble. Well, maybe not trouble (yet), but I did run into some uncertainty as to whether or not I was doing things correctly. For the dulce de leche layer, you simply empty two cans of sweetened condensed milk into a heatproof bowl, set it over a pot of simmering water, and allow it to thicken and turn a darker, more caramelly color. The cookbook said this would take anywhere from 1 to 1 1/2 hours.

At around the 2 hour mark, we were still simmering away. By then, the mixture had turned a slightly darker shade and was marginally thicker. However, it was nowhere near ready to come off the heat. I'm pretty sure I know what the problem was. I had used one can of regular milk, and one can of fat-free milk. I realize that you should probably only use this method for full-fat milk, but I really thought it could be done. I should have anticipated that it would have a harder time thickening up, but I wanted to experiment, anyway.

By nearly 3 hours, I decided to quit while I was ahead. At this point, the milk had definitely transformed into a much more gooey, almost spreadable mixture, but was still thin compared to standard caramel. In addition, the color was not nearly as dark as I would have liked. I looked up pictures on the Internet of dulce de leche as a reference, and saw caramels of all colors and consistencies. Thus, I finally decided it would be okay, and I used it on the shortbread.


I allowed this layer to firm up in the fridge for two hours, then put together the dark chocolate topping and spread that over the dulce de leche. Once everything was all layered nicely, it went back into the fridge to set up and become hard enough to cut into squares. I decided to let it sit overnight and cut them in the morning.

When I cut my first row of squares, I could immediately see the negative effects of cooking the caramel as a full-fat/no-fat hybrid. As the squares were sliced away individually, you could instantly see the caramel begin to ooze out the sides. Worse, they just kept oozing and oozing. It was even difficult to snap that first picture of this post before the caramel ran completely down the bars. I am currently storing them in the freezer; the fridge just didn't seem to keep them stiff enough. I'm disappointed in the way they turned out, at least in appearance.

In taste, though? They are very decadent, very rich, and totally delicious. It's a shame that they are way too messy to serve at Andy's office; I'm sure these bars would be a crowd-pleaser. Nevertheless, they will be safely stowed away in our freezer here at home, where they will lurk in the shadows until a chocolate craving takes hold....


Millionaire's Shortbread

adapted from Baked: New Frontiers in Baking

makes 24-36 bars


Ingredients


For the shortbread:

1/2 cup sugar

1 1/4 cups unsalted butter, softened

2 1/2 cups all-purpose flour, divided, plus more for dusting

1 large egg yolk, slightly beaten


For the caramel filling:

28 oz. (2 14-oz. cans) sweetened condensed milk (and I learned that only full-fat will do!)


For the chocolate glaze:

6 oz. dark chocolate (60% cacao), coarsely chopped

1 tsp. light corn syrup

1/2 cup unsalted butter, softened and cut into cubes


Directions

1. Make the shortbread: Preheat oven to 350 degrees F. Line a 9x13-inch baking pan with parchment paper. In the bowl of an electric mixer, beat the sugar and butter until blended.

2. Add 2 cups of the flour and beat until well combined. Add the egg yolk and beat for a few seconds, or until just combined. Turn the dough out onto a lightly floured work surface. Dust the top of the dough and your hands with a little flour. Use your hands to gently work the dough into a 6-by-6-inch square. You will have to turn the dough and sprinkle the top with flour as you go. Sprinkle the remaining 1/2 cup flour on the surface of the dough. Fold the dough over and knead until incorporated, then flatten the dough into a rectangle. Transfer the rectangle to the prepared pan and press it into the pan.

3. Prick the dough all over with a fork and bake in the center of the oven for 20 to 22 minutes, until golden brown. Transfer to a wire rack and let cool completely.

4. Make the caramel filling: Put the sweetened condensed milk in a medium heatproof bowl and set it over a saucepan of boiling water over low heat. Cook for 1 to 1 1/2 hours, until thick and caramel colored. Remove the bowl from the pan and beat until smooth.

5. Pour the caramel filling over the cooled shortbread and place the pan in the refrigerator until cool, about two hours.

6. Make the chocolate glaze: In a large, nonreactive metal bowl, combine the chocolate, corn syrup, and butter. Set the bowl over a saucepan of simmering water and cook, stirring with a rubber spatula, until the mixture is completely smooth. Remove the bowl from the pan and stir for 30 seconds to cool slightly.

7. Pour the mixture over the chilled caramel layer and use an offset spatula to spread it into an even layer. Put in the refrigerator for 1 hour, or until the glaze hardens.

8. Remove the pan from the refrigerator at least 30 minutes before serving, so as not to crack the chocolate glaze. Cut into squares and serve. The bars can be stored in the refrigerator, tightly covered, for up to 4 days.

Wednesday, May 5, 2010

CEIMB Rewind: Chicken Cacciatore


Despite the fact that I decided to sit out this Thursday while the other CEIMB'ers make lamb chops, I still wanted to do something Ellie Krieger-related. I thought I'd make a CEIMB recipe that the other bloggers in the group had made in the past, before I was a part of the group. I settled on Chicken Cacciatore, both because it sounded good and easy, and because I just happened to have most of the ingredients on hand. The one big component of this dish that is missing is the mushrooms. I hardly ever keep them in stock, but I did have carrots to use in their place. I know that mushrooms are an important part of a cacciatore, so I hope my rendition is still faithful enough to the original.

I was cooking like a madwoman while the kids were occupied, and then right around the time I was finishing up, the baby started begging for food at my heels and being very demanding. That is why we wound up with that silly opening picture, and not a proper "finished plate" picture this time. Sorry about that! That's actually a photo of the leftovers, getting ready to be tossed into the fridge! I missed the boat this time.


Thankfully, despite the kids' neediness and everything else, this was still a very easy dish to make. Start out by browning some boneless, skinless chicken breasts in a pot or dutch oven, then remove them and set aside. Saute some carrots, onion, and red bell pepper, then add some wine (I used red) to deglaze. After the liquid has been reduced by at least a third, the pot is ready for the tomatoes. Ellie uses diced, but mine were partially diced, mostly crushed. It still works! Add the reserved chicken breasts back into the pot, and let it simmer away.


I especially like the fact that there is lots of time during the cooking process where no babysitting is required. You can just let this stuff bubble away on the stove while you get other parts of the meal put together. I served this with wide egg noodles (which were great for soaking up all that sauce!) and steamed broccoli. Healthy and delicious, just like Ellie would have wanted!

As I said in my last CEIMB post, I will be back to cooking with the group next week. We'll be having pancakes, which I am very excited about! Breakfast is my favorite meal, especially when it's more than just a bowl of cereal.

The chicken cacciatore was originally chosen, back in January of 2009, by Peggy of Pantry Revisited. You can check out her blog to see how she fared with the dish. You can find the recipe on her blog, and also here.


Monday, May 3, 2010

Ancho Chile Pork Tacos with Roasted Corn and Caramelized Onions


I have recently begun to cook pork a lot more often than I used to. Since I do not eat beef, or hardly any fish, I wanted to be able to switch it up every now and again from chicken, chicken, and more chicken. I've been trying to figure out some creative ways to use pork, and this recipe certainly fits the bill.


I found this recipe online, by browsing Recipezaar for pork tacos. I thought that sounded really good, and plus I had some flour and corn tortillas to use up! This dish seemed very simple and relatively low maintenance, so I made it on a weeknight when I knew I'd need something like that up my sleeve. I did change the recipe slightly based on what I had on hand that I wanted to use up.

You roast the pork in the oven with a quick spice rub slathered on. While this cooked, I was able to caramelize some onions, chop up some green onions, and shuck some previously roasted corn. Roasting corn is my new favorite way to prepare it. It is very hard to mess up! Simply put the corn, still in its husk, into a 350 degree oven for about a half hour. That's all there is to it! I learned this method while watching Tyler Florence on the Food Network one day, and I just had to try it. It's pretty much foolproof.


Once the pork was finished, I allowed it to rest for about 10 minutes. I sliced it up sort of thinly, then set up all the taco toppings in bowls and warmed up some tortillas. The taco filling is so simple, yet so fresh and light! The spice-rubbed pork was so delicious for containing so few ingredients. The caramelized onions are sweet and juicy. The roasted corn adds a welcome bit of crunch and flavor. The green onions provide a nice, sharp contrast to the other, much sweeter veggies. A sprinkle of green salsa and Cholula (our hot sauce of choice!) added some great heat to the taco. Together, all these components added up to a seriously yummy creation. Next time, I could add some limes to the dinner table. Some citrusy juice sprinkled over the tops of these would be so divine. Even without that, I was completely satisfied with this meal. My kids loved the pork, too, so that was a plus!


I found the original recipe here. I am going to post the recipe the way I made it, though, since I really enjoyed this with my changes.

Pork Tacos with Roasted Corn and Caramelized Onions

adapted from Recipezaar (original recipe from Cooking Light)

makes 8 tacos

Ingredients

2-3 ears of corn, in husks

1 Tbsp. ancho chile powder

1 tsp. brown sugar

1/2 tsp. salt

1 lb. pork tenderloin, trimmed of visible fat

1/2 Tbsp. vegetable oil

2 cups onions, thinly sliced

8 tortillas (I used half flour, half corn)

2-3 green onions, thinly sliced on the diagonal

Salsa, green salsa, or hot sauce, to taste

Directions

1. Heat oven to 350 degrees F. Place ears of corn, still in the husk, directly on the oven rack and bake for 30 minutes. Remove corn from oven and let cool enough to handle.

2. Turn heat up to 425 degrees F. Prepare pork by combining the ancho powder, brown sugar, and salt in a small bowl and rubbing it evenly over the pork. Place tenderloin on a foil-lined baking sheet, coated in cooking spray, and bake in the oven for 20 minutes, until an instant-read thermometer reads 160 degrees. Let the pork rest for 5-10 minutes before slicing.

3. While pork is cooking, heat a medium nonstick skillet over medium heat. Add the vegetable oil, then the thinly sliced onions. Cover and cook at least 10 minutes, until onions are soft and golden brown, stirring frequently. Uncover and cook another few minutes, then remove from heat.

4. As the onions and pork continue their respective cooking processes, you can cut the corn off their husks. I use a bundt pan to do this. I peel the husk back and use it as a handle. I then place the corn into the center hole of the bundt pan and, using a sharp knife, slice downward. The corn falls away from the cob and into the bundt pan. It's a great trick!

5. After pork rests, slice it thinly and serve it alongside the caramelized onions and roasted corn. Gently warm the tortillas, then assemble tacos and enjoy!