Monday, January 31, 2011

Meatless Mondays: Pea-Lafels


Wow, this whole Meatless Mondays thing is becoming a real habit for me! What has it been now, three I've done? It's been so easy to go meatless at least once a week for us. It's truly been refreshing to see what else is out there in terms of creative entrees.


Hey, speaking of creative entrees, check out these Pea-lafels I recently made! This recipe comes from the reigning champ of Food Network's show, The Next Food Network Star, Aarti Sequeira. I've made a few of her recipes now, and I've loved every single one. This one is certainly no exception. I actually found this one on her blog, Aarti Paarti. There's some really good stuff over there, stuff that she hasn't cooked on her Food Network show. Check it out if you are at all into Indian food!


So what are pea-lafels, anyway? Well, they're a riff on the more traditional falafels, which are chickpea balls that are normally deep-fried. These little green wonders, on the other hand, are made of peas and edamame. Yum! You add in some freshly ground spices, such as fennel and coriander (and the fenugreek that I bought especially for this!). There's some shallot, some garlic, and salt and pepper. Oh, and mint. That adds a nice zinginess. You puree the mixture in a food processor, add some flour to bind everything, and you're ready to bake them. Well, I baked them, but in Aarti's recipe she gives instructions for deep-frying. I decided to modify this just slightly, since it worked well enough when my CEIMB group did Ellie's Baked Falafel.

This results in a crisp, brown pea-lafel on the outside, with a creamy, soft interior. They were delicious! In the future, I may try to add some spice to the mixture. Then again, that is probably why Aarti advises you to add horseradish! I didn't have any, so I obviously couldn't do this, but I see now why she did. These make a great pita sandwich with veggies and either yogurt or ranch dressing inside. They're easy, they're scrumptious, and they're exotic! How's that for a Monday night dinner?


Pea-Lafels
adapted from Aarti Paarti
makes enough for 4 or 5 pitas

Ingredients
1/2 tsp. fenugreek seeds
1/2 tsp. fennel seeds
1/4 tsp. coriander seeds
1 cup frozen peas, thawed and drained
1 cup frozen, shelled edamame, thawed and drained
1 shallot, peeled and roughly chopped
1 clove garlic, peeled
Handful of fresh mint leaves, plus more for yogurt sauce
Extra-virgin olive oil (I used 1 Tbsp.)
Salt and pepper
Squirt of horseradish sauce (optional; I omitted)
1/4 cup flour (Aarti used chickpea flour, which I do not have)
2-3 pita breads, sliced in half
Fresh spinach leaves
Thinly sliced radish
Plain yogurt, or
Ranch dressing

Directions
1. Preheat the oven to 425 degrees F. In a small skillet, toast the fenugreek, fennel, and coriander seeds for several minutes, until fragrant and slightly darker. Remove from pan into a small bowl to cool. Meanwhile, mix yogurt with desired amount of fresh mint leaves and salt; chill in fridge until ready to eat. Throw cooled seeds into a coffee/spice grinder and powder.

2. Throw the peas, edamame, spices, shallot, garlic, mint, extra-virgin olive oil, salt, and pepper into a food processor. Puree the mixture; add up to 1/4 cup water, one tablespoon at a time, if the mixture is not coming together. Note: the mixture will not be completely smooth, because of the edamame, but blend as best you can.

3. Scrape the mixture into a bowl; add horseradish, if using, and flour. Mix well. Using your hands, form the mixture into balls and place on a nonstick baking sheet lined with foil (or spray the sheet with nonstick cooking spray). You will probably get about 12 or so total.

4. Spray the tops of the balls with cooking spray. Bake for 20 minutes, remove the sheet, from the oven, and flip the balls. Bake for an additional 20 minutes. Remove from oven when the pea-lafels are crisp and browned.

5. Assemble pitas: add fresh spinach leaves, thinly sliced radish, 3 pea-lafel balls, and your choice of yogurt sauce or ranch dressing to each pita half. Enjoy!

Sunday, January 30, 2011

Baked Sunday Mornings: Double-Chocolate Loaf


This week's Baked Sunday Mornings pick was the incredibly decadent "breakfast bread," Double-Chocolate Loaf. I'm not quite sure if it's even okay to consume all that chocolate for breakfast, but if Matt and Renato say it's fine, then it must be!


This is such an easy loaf to make. You can throw all the ingedients together in just about no time flat, then it bakes up in the oven for an hour or so (mine took about an hour and fifteen minutes). The most difficult part of making this, for me, was having to smell its chocolatey, heavenly aroma for that long! Torture, it was.


Mine baked up pretty well, I thought, except for a minor sinking issue in the center of the loaf. I wonder if anybody else experienced this? Anyway, it looked pretty gorgeous otherwise, and smelled insanely wonderful.

I ran into a snag when I set out to make the peanut butter spread which accompanies this loaf in the cookbook. I had no cream cheese in the house, and it was snowing that day so we were trying to avoid having to leave the house. So, I just decided to whip up a little something different. I found a recipe on the website for Marshmallow Fluff for a Fluffernutter Frosting, so I decided to make that instead. I'll include the recipe at the bottom of this post, because it was yummy! Even if the peanut butter/cream cheese spread was divine, and I'm sure it was, I just wanted to share this Fluffernutter Frosting with you because it is worth trying. You could put it on so many things, I'm sure, and it would work perfectly.


So, I sent this loaf in, along with the spread, to my husband's office the morning after I made everything. He came home empty-handed at the end of the day; the whole thing was gone! The reviews were completely positive; people were cursing me for allowing such a treat to enter their radar. Well, I'd much rather be cursed because something was sinfully good than because something tasted horrible, so I'd say it went over well! The only minor complaint my husband had about the loaf was that it was just a tad dry. Of course, that is probably why this is supposed to be served alongside a spread. He also said it was rich, dense, and very chocolatey. I wish I could say I tried some myself, but it just didn't happen this time. Oh well. It just gives me an excuse to make it again!

You can find the Baked Sunday Mornings blogroll for this loaf here.


Fluffernutter Frosting
adapted from the Marshmallow Fluff website
makes enough to frost a 9-inch layer cake (I cut the recipe in half)

Ingredients
1 cup marshmallow fluff
1/2 cup peanut butter
1/3 cup butter, softened
1/4 tsp. pure vanilla extract
1/4 tsp. salt
1 1/3 cup confectioners' sugar
2 Tbsp. milk

Directions
1. In the bowl of an electric mixer, combine the fluff, peanut butter, and butter at low speed. Increase speed to medium and mix until fluffy. Scrape down the sides of the bowl.

2. Slowly add in the confectioners' sugar, alternating with the milk, beating well after each addition. Add only enough milk to make the frosting smooth and spreadable. Beat in vanilla and salt; mix well to combine.

Thursday, January 27, 2011

CEIMB: Fettuccine with Creamy Red Pepper Sauce


It was back to making an entree for this week's Craving Ellie in My Belly selection, Fettuccine with Creamy Red Pepper Sauce. This delicious meal was chosen by Jessica of Learning to Love Vegetables. I am so glad she picked this one, because it has caught my eye more than a few times, but for some reason I never got around to making it on my own.


This one is such a snap, too. You puree up a blend of roasted red peppers (I wanted to make my own roasted reds again, like I did recently for soup, but the pickings were slim at the grocery store so I went with jarred), sauteed onion and garlic, a splash of chicken broth, and a healthy sprinkling of feta cheese. My feta cheese was the reduced-fat variety, and I didn't detect a decrease in flavor at all. Anyway, you puree all these ingredients to make a thick sauce. Boil up a batch of fettuccine (mine wasn't whole wheat, unfortunately), reserve some of the starchy cooking liquid to loosen the sauce, and then toss everything together. Sprinkle the pasta with a couple tablespoons of reserved feta and some fresh flat-leaf parsley, and you've got dinner!

I wanted my pasta to be just a tad more substantial, so I tossed it with a bunch of fresh spinach. I have to say, I liked that addition! It gave the dish more bulk, and of course made it healthier, too. I served this with some steamed broccoli tossed in lemon juice. We really loved it. If I had anything to gripe about with it, it would be that the leftovers were very dry. I guess my sauce could have benefited from lots of cooking liquid. We liked our sauce kinda thick, so I didn't use all that much pasta water. Other than that, no complaints! A great, flavorful pasta dish from Ellie, as usual.


Thanks so much to Jessica! I'm always up for trying a new pasta meal. You can find the full recipe on Food Network's website, here. To check out the CEIMB blogroll for this week, click here.

Wednesday, January 26, 2011

Kale Chips


I have been dying to try this recipe for the longest time. I don't know why it took me so long; now that I know how easy these are to make, I'm especially kicking myself.

Kale chips. Leaves of kale, baked in the oven until crispy like a chip. Sounds so strange, right? Well, it's not! It's actually completely delicious, so very simple, and good for you, too!


All you need to do is rip a bunch of kale leaves from their stems, wash and dry the leaves, then drizzle them with olive oil, sprinkle them with salt and pepper (or any other seasonings your mind can dream up), and bake for about 15 minutes. The trick is to crisp them up without turning them black. Once they are brown and crunchy, they are good to to.

Did I mention these are absolutely delicious? They've got a very slight bitter taste to them, but it's somehow made pleasant by the process of baking them. You can feel good about reaching back into the bowl again and again, because kale is incredibly healthy for you, and of course olive oil is a "good" fat, so it sure beats a bowl of potato chips. At least, if you're looking to satisfy a crunchy craving without the guilt, they beat potato chips! I don't know if anything can ever truly replace a potato chip.

That said, I'd probably prefer to eat kale chips anyday! Kale is usually fairly inexpensive in the winter, and it's not hard to fire up the oven for this one. It always feels so good to find something great to eat that you know isn't bad for you.


Kale Chips
adapted from Allrecipes.com
makes about 6 servings

Ingredients
1 bunch kale
1 Tbsp. olive oil
Salt and pepper, to taste

Directions
1. Preheat oven to 350 degrees F. Line a non-insulated baking sheet with parchment paper or nonstick aluminum foil.

2. Carefully separate kale leaves from the thick stems; discard stems. Break the kale leaves into bite-sized pieces. Wash and dry thoroughly (a salad spinner will work), spread the leaves onto the baking sheet, and drizzle with the oil. Season with salt and pepper.

3. Bake until the leaves are brown but not burnt, 10 to 15 minutes. (I don't think leftovers would be very good here, so try to make only as much as you can eat at one meal!)

Monday, January 24, 2011

Meatless Mondays: Red Pepper Fennel Soup


Wow, this is two Meatless Mondays in a row! This could be habit-forming. I have to say, I have been enjoying it. I can get a little tired of chicken and then chicken, so it's always great to find ways of preparing meat-free meals that are just as satisfying.

This soup is perfect for filling you up on a cold night. We've been getting hit with some snow this past week, and I tend to crave soup when the temperatures drop (or drop even lower than they were before!). I found this Red Pepper Fennel Soup on Food.com, and it was cited as having come from Rachael Ray's September 2007 magazine. I could not find this soup on Rachael's official website, though, so I have provided the link to the Food.com version down at the bottom of this post with my take on the recipe.


The soup starts with a leek and a bulb of fennel as its base. Since these are two vegetables we love to eat when we can get our hands on them, I figured we were off to a good start. I roasted my own red peppers for this; I feel like it's worth the extra time to do that instead of using a jar of roasted peppers. Fortunately, I actually did have enough extra time to do it this time! That's not always the case.

So you throw in your sliced red peppers, along with a sliced potato, broth, and some seasonings (I added fenugreek because I had just purchased some for the first time the day before I made this. I was looking for just about any excuse to try it out!). Let everything come up to a boil and simmer until the potato has cooked through. Then you pull out your immersion blender and puree the veggies. It becomes so thick and luxurious, and then you make it even more luxurious with the help of some heavy cream. I didn't want too much; the original version called for 1/2 cup, but I just put in 2 Tbsp. It was just enough for me. It made the soup slightly creamy without adding tons of fat.

To go alongside, you whip up some homemade pita chips in the oven. It's so easy; I do it every now and then, experimenting with different ways of seasoning them. This time, they had a mix of salt, pepper, fenugreek, and some fennel fronds on them. I overcooked them by a minute or two, so they were slightly charred. I thought that was actually pretty good in this case, since it matched well with the charred red peppers. I thoroughly enjoyed this meal, and was plenty full after one bowl. All that, and it was meat-free! Not shabby at all.


Red Pepper Fennel Soup

adapted from Food.com

makes 4-6 servings

Ingredients

2 roasted red peppers, thinly sliced lengthwise

1 1/2 Tbsp. olive oil

1 leek, thinly sliced crosswise (white parts only)

1 small fennel bulb, with fronds, bulb finely chopped and fronds chopped for garnish

1 (1/2 lb.) potato, peeled, halved, and thinly sliced

2 cups chicken broth

1/2 tsp. fenugreek, plus more to taste

salt and pepper, to taste

3 pita bread, split and cut into wedges

2 Tbsp. heavy cream

Directions

1. Preheat the oven to 400 degrees F. In a medium Dutch oven, heat 1/2 Tbsp. olive oil over medium heat. Add the leek and chopped fennel bulb and cook until lightly golden, about 10 minutes.

2. Add all the roasted pepper strips except 4-6, leaving the remaining 4-6 for garnish. Add in the potato, broth, salt, pepper, and 1/2 tsp. fenugreek and bring to a boil. Lower the heat and simmer, partially covered, until the potato is tender, about 10 minutes.

3. Meanwhile, place the pita wedges on a baking sheet and toss with the remaining 1 Tbsp. olive oil. Sprinkle salt, pepper, a few fennel fronds, and fenugreek seasoning over the wedges and toss to coat. Toast in the oven, 6-8 minutes, until crispy. Set aside to cool.

4. Once the potato in the soup has softened and cooked through, use an immersion blender to puree the soup (or puree in a blender, in smaller batches). Stir in the heavy cream and season with salt and pepper. The soup can be served hot or cold, with the reserved red pepper strips and fennel fronds on top for garnish. Serve the pita chips alongside, for dipping.

Saturday, January 22, 2011

Mexican-Inspired Calzones


I got the inspiration to make these calzones when I was thumbing through Ree Drummond's cookbook, The Pioneer Woman Cooks, not too long ago. She has a great recipe for pizza crust that she shares in the book, and then she lists a couple of different recipes for pizza, and finally a calzone recipe. They just sounded and looked so good, but I didn't have everything I needed on hand to make her version. No problem; I'd just make up my own variation!


First, you whip up a batch of Ree's pizza crust, which is easy and straightforward, as far as pizza crust recipes go. The thing I liked about the calzone recipe is that it uses up the whole batch, as opposed to pizza recipes which would only use up half the batch. Waste not, want not! Meanwhile, you prepare the calzone filling: brown some sausage, add in onion, then throw in a can of diced green chilies, 3/4 of a block of cream cheese, and a generous heap of salsa. Let everything become all incorporated, then let it cool some before assembling the calzones.


For the assembly, first you need to divide the crust into 8 equal portions. Roll each out, then add 1/8 of the filling to the circle. Fold it up, pinch the ends together to seal, then pretty it up by pressing the tines of a fork into the edges. Once you have every calzone assembled, spray them all down with some cooking spray (the higher-fat option would be to brush each with olive oil).

They bake up in about 15 minutes, and they taste like a gourmet Hot Pocket. But way, way better. The mixture is ultra creamy and slightly zesty, thanks to the cream cheese and salsa. The dough is perfect and delicious, and I loved how easy it was to work with. Plus, the possibilities are endless with calzones; the sky is the limit as far as fillings go. I can't wait to play around with other ideas for this. In the meantime, here's the recipe for this version.


Mexican Calzones
created by Bri
makes 8 calzones

Ingredients

1 lb. spicy pork sausage

1/2 onion, diced

1 (4 oz.) can diced green chilies

1/2 - 1 cup salsa, any kind

6 oz. cream cheese, cubed

1/3 cup cheddar cheese, shredded

Salt and freshly ground black pepper, optional

Flour, for dusting surfaces

1 recipe Pizza Crust (recipe follows)

Nonstick cooking spray

Directions

1. Preheat the oven to 450 degrees F. In a large skillet, brown the sausage over medium-high heat, breaking up the meat as it cooks. When sausage is nearly cooked through, add the onions. Saute until onions are soft and meat is fully cooked. Remove the skillet from the heat, then add the diced green chilies, salsa, and cream cheese. Stir constantly until cream cheese has melted completely and the salsa is fully incorporated. Season with salt and pepper if desired. Set aside.

2. Take your pizza crust and divide it into 8 equal-size balls. With a rolling pin on a floured surface, roll each ball into a 6-inch circle. Place one-eighth of the meat and cheese mixture in the middle of each circle. Fold half of the circle over the other half, gently pressing to slightly spread and flatten the filling inside. Press a fork along the edge to seal closed, then transfer the calzone to a greased baking sheet. Repeat this with the remaining 7 balls of dough and the remaining filling. Lightly spray each calzone with cooking spray.

3. Bake the calzones for 12 to 15 minutes, until golden brown. Transfer the calzones to a serving platter or wrap individually in foil.


Pioneer Woman's Pizza Crust

from The Pioneer Woman Cooks

makes 2 pizza crusts (or just enough for these 8 calzones)

Ingredients

1 tsp. or 1/2 packet active dry yeast

4 cups all-purpose flour

1 tsp. kosher salt

1/2 cup extra-virgin olive oil, plus more for drizzling

Directions

1. Pour 1 1/2 cups warm water into a bowl. Sprinkle the yeast over the water.

2. Combine the flour and salt in a mixing bowl. With an electric mixer on low speed, drizzle in the olive oil until just incorporated. In a separate bowl, gently stir the yeast/water mixture, and then drizzle it into the flour/oil mixture; mix until the dough forms a ball.

3. Drizzle a little olive oil into a clean bowl. Toss the ball of dough in the bowl and turn over to coat in oil. Cover the bowl with a moist kitchen towel and set in a warm place for 1 to 2 hours, or cover with plastic wrap and store in the fridge for up to 2 days. If refrigerating, bring the dough back up to room temperature before using.

Thursday, January 20, 2011

CEIMB: Vanilla Spice Oatmeal


Okay, I'm not proud to admit it, but I almost did not participate in Craving Ellie in My Belly this week, and it was all because we were supposed to be making oatmeal. Ellie's Vanilla Spice Oatmeal, chosen by Mary of Popsicles and Sandy Feet, was not something I ever even considered making when I first purchased her So Easy cookbook. You see, here's another little-known bit of trivia about me: I can't stand oatmeal.

Yep, it's true. Or at least, I was pretty sure it was true up until this past weekend. I know I have been offered oatmeal in the past. I've turned it down every time. If I had to pinpoint my utter disgust concerning the mere presence of oatmeal, I'd say it's because of the texture. I'm just a big weirdo when it comes to food textures, and in particular I'm completely not a fan of mushy textures. Mashed potatoes are not my friend, and neither are grits, polenta, or even cream-based soups. So oatmeal certainly falls into that category for me.


When I first learned what we were to make this week, I told my husband, and then said that I would be choosing an Ellie rewind recipe from before I joined the group. I figured I would just make something else in place of the oatmeal. But then he asked me, "Why not just make it?" And you know what, I realized he was right. Why not? Neither of my children had ever eaten oatmeal (because I would never make them eat it, nor did I want to buy it and prepare it for them!), and it has been years since I last tried it. The truth is, my horizons have broadened so much in the last few years. I'm trying (and liking!) so many things now that I never dreamed I would. I've been pleasantly surprised so many times by foods that my former self could not palate.

And so, I decided right then and there, that I would make the oatmeal after all! At best, I would discover that I really did like it. At worst, I would just try it again and see that my suspicions were justified. Either way, no harm done.


In the end, I have to be honest. Me and oatmeal will probably never be bosom buddies. I loved the ease of making oatmeal from scratch (because I honestly had no idea it was so simple and fast!) and I did love Ellie's add-ins. She incorporates vanilla, cinnamon, brown sugar, and pecans for crunch. She added raisins to hers; I added dried cranberries. However, that darn texture is just not something I crave, or particularly enjoy consuming. I thought it tasted very good, but the mushiness is tough to deal with. Turns out, my husband is not a huge oatmeal fan either! I thought that was ironic and hilarious, considering he is the one who convinced me to make it! So he liked it okay, but wasn't in love. My five year-old son really did not care for it, but I had a feeling he wouldn't, so there were no shockers there.

I'm glad I revisited oatmeal, just so I could know for sure that it's just not our thing. Sorry I could not report some big culinary epiphany, though! I wanted it to work out better. Thank you to Mary for pushing me past my comfort levels! For the full recipe, you can go here, to Food Network's website. For the full CEIMB blogroll, click here.

Monday, January 17, 2011

Meatless Mondays: Curry-Spiced Noodles


I've been waiting for another opportunity to do a Meatless Monday, and finally that time has come! It's always great for the wallet and the waistline to substitute meats with extra veggies or beans or something, and this meal proves that you do not need chicken or beef in a stir-fry dish in order to have something completely filling and satisfying.

I found these Curry-Spiced Noodles in my current issue of Cooking Light Magazine. Since I had just bought a whole jar of mild red curry paste and really wanted to find different ways to use it, I was really excited to find this. It's simple and quick: just chop up an assortment of vegetables, julienne-style, then stir-fry them while cooking a pot of spaghetti noodles. Add in some Indian spices and curry paste, along with garlic and ginger. Simmer briefly in some broth and soy sauce, then toss the whole thing together with the spaghetti. Top with some cashews for crunch, and you're ready to eat dinner. Almost too easy, right?


The original recipe calls for lemongrass, but I wasn't able to get any this time around. I have worked with it before and was kinda iffy about it. It does lend a great aroma and a unique flavor to a dish, but I think last time I did not know how to trim and chop the stalks properly. However, this issue of Cooking Light also features a tutorial on how to tend to lemongrass correctly, so I do want to find some soon and try it out again! It feels great to be armed with knowledge sometimes, doesn't it?

I also subbed in chicken broth for the vegetable broth called for here. It still counts as a meatless dish, I figured. Besides, you can easily just use the veggie broth to make this 100% vegetarian. Finally, I had no fresh cilantro on hand, so I didn't use any despite the fact that the recipe called for about 1/3 cup. We didn't really miss it; it was great just the way it was.

The flavors were assertive, and I would classify them as "warm," rather than hot or spicy. My kids shocked me by loving this stuff! I guess I just assumed they would turn their noses up at this. Instead, it was devoured and loved by all. The house smelled so fragrant and amazing while this cooked, and the smell pleasantly lingered for the rest of the evening. Best of all, the hearty shiitake mushrooms were meaty and substantial enough that you weren't left wanting for more when you were finished eating. It was the perfect meat-free meal for our family, and maybe it would be for yours, too!


Curry-Spiced Noodles
adapted from Cooking Light
makes 4 servings

Ingredients
1 (13.25 oz.) box whole-wheat spaghetti
1/2 Tbsp. vegetable oil
2 cups julienne-cut carrot
2 cups julienne-cut green bell pepper
1 cup julienne-cut red bell pepper
4 cups thinly sliced shiitake mushroom caps (about 8 oz.)
1 Tbsp. grated peeled fresh ginger
1 Tbsp. red curry paste
2 tsp. ground cumin
1 tsp. ground turmeric
5 garlic cloves, minced
1 cup low-sodium chicken broth
1/2 cup water
2 tsp. lower-sodium soy sauce
1/4 tsp. kosher salt
3 green onions, thinly sliced
1/4 cup chopped dry-roasted, unsalted cashews

Directions
1. Cook noodles according to package directions, omitting salt and fat. Set noodles aside; keep warm.

2. Heat a large nonstick skillet over medium-high heat. Add 1 tsp. oil to pan; swirl to coat. Add carrot to pan; saute 2 minutes. Add bell peppers; saute 2 minutes. Remove carrot mixture from pan.

3. Heat remaining 1/2 tsp. oil in pan over medium-high heat; swirl to coat. Add mushrooms; saute for 2 minutes. Add the next 5 ingredients (through garlic); cook for 1 minute, stirring constantly. Add broth, 1/2 cup water, soy sauce, and salt. Bring to a boil; cover, reduce heat, and simmer for 2 minutes or until slightly thick. Add noodles, carrot mixture, and onions; cook for 2 minutes, tossing to combine.

4. Divide mixture evenly among 4 bowls; top with cashews. One serving equals about 2 cups noodle mixture and 1 Tbsp. cashews.

Sunday, January 16, 2011

Baked Sunday Mornings: Farm Stand Buttermilk Doughnuts


Our assignment for this week's Baked Sunday Mornings was to make the Farm Stand Buttermilk Doughnuts. As luck would have it, I had already tried my hand at these back in October, but I'd never blogged about them. I think it probably had something to do with the fact that our doughnuts did not exactly turn out picture perfect. Okay, they actually came out looking a bit deformed! But they were absolutely delicious, so they are definitely worth telling you about. Maybe somebody out there can learn from my mistakes!


I started out on the wrong foot with these because I was short an ingredient: sour cream. Instead of sour cream I just added more buttermilk, if memory serves me correctly. Turns out, that sour cream must be kinda essential to these dougnuts, because I had a heck of a time with my dough. It was so sticky and loose, you couldn't even form doughnut shapes. Well, you kinda could, but then you couldn't actually lift them and drop them into the hot oil without them becoming all misshapen. So we started to just form blobs out of the dough, but then we discovered that the inside centers were still raw (which was a total bummer, since we had our two sons waiting and waiting for the doughnuts to cool enough to eat, only to discover that they had icky, gooey middles). Fortunately, the doughnut hole-sized treats we made worked out perfectly, since they took next to no time to make.


As I think you can probably tell from below, the doughnuts were a huge winner once we started working out the kinks! The biggest hit was the cinnamon sugar topping with our boys; they are cinnamon addicts. I personally favored the chocolate glaze; we topped those with orange sprinkles since it was almost Halloween when we made these. I skipped the vanilla glaze, but I would love to try it sometime.


I was tempted to make these again specifically for the group, but I decided that it was worthwhile to just blog about the ones I had made previously. After all, it is a lesson in what not to do! However, I do apologize for subjecting you to these silly deformed doughnut pictures!


To check out how the other members of the group did with this, be sure to check out the post on these doughnuts over at Baked Sunday Mornings, here. The full recipe is posted there, too, for your convenience!

Saturday, January 15, 2011

MSC: Black Forest Cupcakes


It feels so good to be participating in the Martha Stewart Cupcakes Club again this month! I've been MIA for the last two assignments, for various reasons, but this time I'm back and ready to bake! This time around, we were to make Martha's Black Forest Cupcakes, chosen by Janine of Janine's Crazy World. I almost did not participate this time, either, because I'm not really a fan of cherries. However, I decided to go for it and to take on the challenge of adapting this to better fit my personal taste.


The cupcake part was made exactly as the recipe was written. Well, I did cut the recipe in half, and I used low-fat sour cream, but other than that it was very faithful to Martha's original take. I didn't want to mess with the cupcake; it sounded so good just the way it was! But then I got to the filling part, and I just had to start tampering with it.

You see, even though I am not a fan of eating whole cherries, I could totally see myself eating some yummy frosting that tasted like cherries. So I decided I would slice my cupcakes in half, through the middle like Martha indicates. However, instead of filling them with pastry cream and cherries, I thought I would make a cherry buttercream filling for this. Then, instead of brushing the cut cupcake sides with the cherry liquor/syrup, I just brushed some cherry preserves on each side. The buttercream was a delicious combination of butter, confectioners' sugar, and cherry preserves. The preserves contained pieces of cherry, but once they joined the butter and sugar in my stand mixer they got all chopped up. They were able to leave the frosting mostly smooth, with streaky bits of cherry throughout.


Finally, I topped the cupcakes with the indicated chocolate ganache glaze. Yum! That is all I have to say about the topping. I sent these to work with my husband and he returned home with just one left (which was for him since he did not get a chance to eat one at the office), so I am assuming that these were well-received by everybody! I thought they were delicious, and I really enjoyed my variation. It made the cherry flavor way more palatable for me, and I loved the way they looked. They almost reminded me of a chocolate parfait or something; lovely layers of goodness!


I'm glad these were chosen for this month because if I hadn't been assigned to make these, I probably never would have. Now I've discovered a new flavor combo that I previously would have been skeptical to try. Thanks, Janine, for the great choice! The full recipe (Martha's way) can be found on Martha's website, here. And to see how the other bakers in the group did, check out the Martha Stewart's Cupcakes Club blogroll, here.

Thursday, January 13, 2011

CEIMB: Walnut and Dried Cherry Bars


Ahhh, it's so good to finally be back in the swing of things! It seems like it has been forever since I've posted a Craving Ellie in My Belly recipe on time! But this week I was all set and ready to roll. Out assignment this time was to make Ellie's Walnut and Dried Cherry Bars, chosen by Heide of Chez Zero. As I've said before, I am a big fan of nutritious, flavor-packed bars. Granola bars, energy bars, or whatever you want to call them, I am always eager and willing to try a new and different variation on the healthy bar. I've been looking forward to trying this one for a while.


Since this recipe was supposed to be made in an 8x8 inch square baking pan and then cut into 12 equal pieces, I decided to break my brownie pan out of hibernation and put it to good use! You know the brownie pan I'm talking about, right? It's the one from all the infomercials. It has a metal, grid-like insert which you place on top of whatever batter you have spread into the pan. When the bars have fully baked, they are already cut for you! Well, as you can probably see from the above picture, I messed up a little. When I first put the insert into the bars, it was facing the wrong way, so I had to remove it and switch it around. When these came out of the oven, they still had little cuts where the grid had first sliced into them. Other than that little bit of silliness, I am happy to say that these came out wonderfully!

Of course, I had to go off-script just a tad. It's what I do! First, I threw all the dry ingredients into my food processor. I did this because ever since our group made Ellie's Energy Bars a few months back, I've been making all my granola-ish bars that way. It just makes things soooo quick and easy! Simply toss in the dry stuff, whirl it around until there are no longer large bits of anything, and then add the wet ingredients. Once things have just come together, you're ready to spread the concoction into your baking pan and put it into the oven!

I added 1/4 cup semisweet chocolate chips to my batch, because I just feel like all my healthy bars need a small dose of decadence. It's just the way I am. Also, I had cherry preserves on hand to make another recipe later in the week, so I used those to spread on top of the baked bars rather than apricot preserves. I figured since dried cherries were being used inside the bars, this would work out quite nicely. I have to say, it really did! I loved the interplay of flavor and texture here. I was skeptical about the addition of the preserves at first, but I'm now sold. It almost seemed like there was icing on top, and it tasted great with the bars. I expected more of a crunchy bar here, but these were pleasantly cakey. They resembled a low-fat brownie in texture, and they weren't too sweet. The food processor chopped the walnuts very finely, so there was a lot of nice nutty crunch dispersed throughout the bars. Overall, I would definitely make these again, and I will have fun using different flavor combinations.


Thanks to Heide for the excellent pick! If you'd like the full recipe, it is posted at Food Network, here. And the CEIMB blogroll can be found here.

Tuesday, January 11, 2011

Easy Oreo Bark


Okay, I promise that I will soon be all out of recipes for delicious Christmas treats very soon! I made a lot of stuff this year, and most of it was worth sharing on my blog, so that is why you are still seeing so much of it, even after New Year's has been long gone. This recipe is probably the very easiest one that was made the whole season....and I'm not technically the one who made it.

I wanted to make Oreo Cookie Bark for Christmas this year because my husband's family enjoys treats made with Oreo cookies. Last year I had made Oreo Truffles, but they are time-consuming and I needed something that I could make more quickly. When I discovered this recipe for Oreo Bark, I was immediately sold on it. It requires just two ingredients, Oreo cookies and white chocolate. Cinchy!


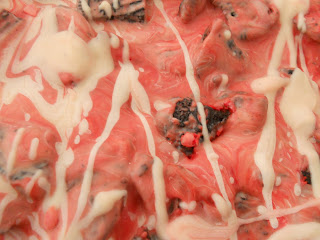
The bark comes together in just about zero time flat. I had my husband make it for me while I was out getting other things done one day. Just break the Oreos up, melt the white chocolate down, and mix the two together. Press it down flat in a pan, then refrigerate until firm enough to slice into pieces. Could not be simpler! I bought the fun, festive Winter Oreos for this, since I thought it would be way prettier, what with the red creme centers melting and swirling in with all the white chocolate and dark chocolate of the cookies. I was right; it looked very cool! I was afraid it would look a lot like peppermint bark, and that mint-fearing folk wouldn't even try it.

Turns out, I shouldn't have been worried. This bark disappeared in what seemed like seconds. It was by far the most popular candy I tried my hand at this year. I highly recommend it if you're trying to make something in a hurry that will impress people and look fantastic on a tray with other goodies. Just be sure to use good white chocolate for this; with only two ingredients in the whole recipe, they both really stand out. A poor-quality white chocolate would just ruin the whole thing. And that would be a real shame.


Oreo Cookie Bark
adapted from Allrecipes.com
makes about 2 pounds

Ingredients
Nonstick cooking spray
1 (16 oz.) Winter Oreos (with the red creme filling)
18 oz. good-quality white chocolate, coarsely chopped

Directions
1. Line a 10x15 jellyroll pan with waxed paper (I recommend spraying the pan before lining it with waxed paper as well). Coat paper with nonstick cooking spray and set aside.

2. In a large mixing bowl, break the cookies into coarse pieces with your fingers or the back of a wooden spoon.

3. Place the white chocolate in a heatproof bowl over a pan of simmering water. Melt the white chocolate, stirring often, until almost completely smooth. Carefully remove the bowl from the heat and continue to stir until all the lumps have been smoothed. Working quickly, add the cookie pieces and gently fold them into the chocolate.

4. Spread mixture evenly in prepared pan, then refrigerate until solid, about 1 hour. Remove bark from pan, place on a cutting board, and carefully peel off waxed paper. Cut into large pieces with a sharp knife and store in an airtight container. I kept mine in the fridge; that seemed to work best for me.

Monday, January 10, 2011

Peanut Butter Buckeyes


I think if I had to pick a favorite candy, it would be a no-brainer for me. I love Reese's Peanut Butter Cups more than just about anything in the world (the food world, that is). So the peanut butter/chocolate combination is pretty much about as good as it gets, in my humble opinion.

So when I found this recipe in my Baked Explorations cookbook for Peanut Butter Buckeyes, I knew it was going to be on my Christmas goodies tray this year. It's a ball of peanut butter, mixed with cream cheese, crushed graham crackers, confectioners' sugar, and butter, that is dipped into dark chocolate. You leave just the very tops of the balls open, with no chocolate coating, which makes it look like the nut of a buckeye tree.


My candies turned out looking way less perfect than the ones depicted in the cookbook, but at least they look homemade, right? I admit, I tried a different method for dipping my peanut butter balls than the one listed in the directions below. It just seems like I always have a heckuva time dipping things in chocolate, and I get myself all frustrated. So this time, I experimented with a new way. I put on some latex gloves, then dipped each ball into the chocolate with one gloved hand. With the other gloved hand, I would drop the dipped ball onto the waiting parchment-lined baking sheet. This was way messy, but for some reason it was a lot less infuriating than dipping each ball with a fork or a toothpick. When I do it that way, I always seem to lose balls in the melted chocolate; they fall right off the fork. This way, I just used my covered fingers to fish each ball out. I don't know; it worked for me!

These buckeyes are absolutely perfect for a peanut butter craving, or a chocolate craving, or a "both" craving! They are delicious right out of the fridge, but they're fantastic at room temperature too. They do taste exactly like a Reese's, which was what I was hoping for. I'd be curious to see what would happen if I used chunky peanut butter next time, so I'm sure I'll be trying them that way, too. I don't think you could really go wrong there. I will say this, though: the book warns against using the natural-style peanut butter, I think because of the separation issue. So just beware if you decide to make these.


Buckeyes
from Baked Explorations
makes 36 to 42 Buckeyes

Ingredients
1/4 cup cream cheese, softened
1 1/2 cups peanut butter
1 cup graham cracker crumbs (about 14 individual crackers, not whole sheets)
3 cups confectioners' sugar
10 Tbsp. (1 1/4 sticks) unsalted butter, melted and cooled
12 oz. good-quality dark chocolate (60 to 72%), coarsely chopped

Directions
1. In the bowl of a standing mixer fitted with the paddle attachment, beat the cream cheese and peanut butter until combined. Add the graham cracker crumbs and beat on medium speed for 10 seconds. Add the confectioners' sugar and butter. Beat at low speed for 20 seconds to prevent the sugar from spilling over, then gradually increase the speed until the mixture is completely combined. Scrape down the sides and bottom of the bowl and beat again. The mixture will feel slightly dry. Set the peanut butter filling aside while you melt the chocolate.

2. In the top of a double boiler set over hot water, melt the chocolate, stirring frequently until it is completely smooth. Pour the chocolate into a small, deep bowl. Let it cool to tepid (about 100 degrees F, body temperature) while you shape the peanut butter centers.

3. Line a sheet pan with parchment paper. Scoop out slightly more than 1 Tbsp. worth of filling and use your hands to form it into a ball. (For uniform balls, use a medium-size melon baller or a very small ice cream scoop with a release mechanism.) Place the ball on the prepared sheet pan and repeat the process until all the filling has been shaped. The balls can sit fairly close to each other on the sheet; just make sure they are not touching.

4. One by one, using a fork or large skewer, dip each ball into the chocolate. Roll the ball around from side to side to cover almost the entire peanut butter center, leaving a small part uncovered. Manipulate the buckeye so that the dripping chocolate covers the holes made by the fork. Let the excess chocolate drip back into the bowl and return each chocolate-covered buckeye to the pan. Refrigerate the entire sheet pan for about 30 minutes to set the chocolate before serving. Buckeyes will keep for up to 3 days, tightly covered, in the refrigerator.
Saturday, January 8, 2011

Adult Hot Chocolate...and My Very First Cheesecake Creation!


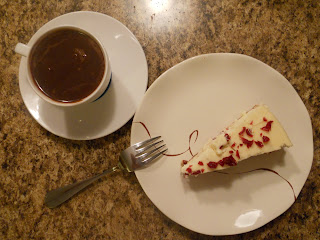
I don't think I have ever tasted a beverage quite like this one before now. We tried this Adult Hot Chocolate recipe from my wonderful Baked: New Frontiers in Baking cookbook on Christmas Day, and I have to say it knocked our socks right off. It's craaazy good.

Since it is "adult," you can be sure that this recipe calls for some liquor. The Baked guys used amaretto, but we went with creme de menthe because it just seemed Christmas-y to us (plus, it was what we had!). Then, you chop up 7 oz. of chocolate (some milk, but mostly dark) and add enough boiling water to melt it. Boil some milk, heavy cream, and a touch of maple syrup, then add the melted chocolate and the liquor. Garnish with whipped cream if you like, and you are ready for the ultimate chocolate experience!


At first sip, you might actually think you are drinking pure, liquid chocolate. I mean, it is just that potent. Then, as you sip again, you can taste the creme de menthe, present but not hardly overpowering. This hot chocolate is definitely not for the faint of heart, and only the most serious of chocolate lovers should try it. After about 5 sips, I had about reached my limit, and I can usually overdose on chocolate with the best of them. It's just so rich. That said, it sure made the perfect holiday beverage, because it was just 100% indulgence. Yum.

Alongside this, I served a white chocolate cranberry cheesecake that I kinda invented myself. I posted about those cloned Starbucks Cranberry Bliss Bars a couple weeks back, and I had wanted to tinker with those bars a bit. Since we love those bars so much and we also adore cheesecake, I thought why not make a Cranberry Bliss Cheesecake? I have to say, I kinda love this idea. I made a shortbread cookie recipe, studded with dried cranberries and small chunks of white chocolate, and ground it to crumbs in my food processor. I pressed these crumbs down into my springform pan to form the crust. Then, I made a cheesecake layer that contained fresh lemon zest, ground ginger, melted white chocolate, and dried cranberries. To finish it all off, I garnished the cheesecake with more dried cranberries, and a drizzle of melted white chocolate. It was sooo good, and I am not just saying that because I created it myself! Everyone that tried it agreed that it was a winner. I would love for this cheesecake to become a new Christmas tradition for us!

Since my cheesecake recipe is something that I just had fun playing around with, I am not going to post the full, detailed instructions here. But if you email me, I'd be happy to share what I did, step-by-step! And here is the Adult Hot Chocolate, posted below. You were warned.


Adult Hot Chocolate
adapted from Baked: New Frontiers in Baking
makes 2 (very generous) servings

Ingredients
2 oz. good-quality milk chocolate, coarsely chopped
5 oz. good-quality dark chocolate (60 to 72% cacao), coarsely chopped
1/2 cup boiling water
3/4 cup whole milk
1/4 cup heavy cream
1 Tbsp. maple syrup
2 Tbsp. creme de menthe liquor
Whipped cream, optional

Directions
1. Put the chocolates in a small heatproof bowl. Pour the boiling water over the chocolate, and make sure most of the chocolate is submerged. Let the chocolate sit for 1 minute, then whisk until smooth. Set aside.

2. In a small saucepan over low heat, bring the milk, cream, and maple syrup just to a simmer. Pour the chocolate mixture into the milk mixture and whisk until combined.

3. Turn the heat up to medium and cook, whisking constantly, until the mixture is just about to boil. Add the creme de menthe, stir one more time, and ladle into mugs. Top with whipped cream if desired, and serve immediately.

Thursday, January 6, 2011

CEIMB (A Week Late!): White Turkey Chili


Today I'm going to post about last week's Craving Ellie in My Belly recipe, White Turkey Chili, chosen by Leslie of Lethally Delicious. I was out of town for a few days last week, so this recipe just didn't get made in time to blog about it last Thursday. However, I had been wanting to try this one for quite some time now, so I made sure I caught up and made it this week. Plus, I have to admit that I probably wouldn't have made this week's Beef and Mushroom Barley Soup, since my hubby is the only one that would have eaten it. So this seemed like the perfect compromise.


This chili is definitely more flavorful and layered than it may at first appear to be. A fragrant blend of vegetables is sauteed (though I had to swap out celery and add carrots, and trade jalapenos for the poblanos, since that is what I had). Then, a simple but delicious spice blend of coriander, cumin, and cayenne pepper is thrown into the mix. Then, you cook the turkey meat, add the broth, and stir in oregano and white beans (I used only one can instead of two, and I pureed them before adding them to the pot). Allow it to simmer for around a half an hour, then add a can of hominy (ok, so I used frozen corn instead!) and more cayenne pepper if it is needed. After another 10 minutes of simmering, you're ready to garnish and serve! I did not use any garnish on my finished chili bowl, but my husband did use a dollop of sour cream and he loved it that way.

We really enjoyed this meal! I didn't have lime wedges on hand, but I really wish I had because I could see how that would have complemented the other flavors. This was so simple to put together, but it delivered lots of flavor. Plus, the two jalapenos I used were nice and fiery, so it had great heat! Since I don't always like the texture of beans, but I do like the nutritional benefits, the pureeing option worked well here. The beans helped to thicken the chili and give it more body. I have tried hominy before and liked it okay, but I had plenty of frozen corn to use up so that seemed like a good swap. Basically, this was a great winter warm-up meal and I can't wait to make it again sometime this winter!


Thanks to Leslie for the pick, and sorry it's a bit late! It was worth the wait, though. For the full recipe, you can go to Food Network's website, here. And it's not too late to check out the blogroll for this recipe and for the Beef Soup chosen for today, at the CEIMB site, here.