Wednesday, June 30, 2010

Homemade Barbecue Sauce


Usually, when I am blogging about a meal or a baked good, it's something I've made last week, or at least a few days prior. I like to keep my meals in order, and so I have a queue of sorts. The pictures are uploaded onto the computer, and they wait patiently until I get around to them.

So when I say that I made this barbecue sauce yesterday, and that I couldn't wait any longer to blog about it, that's truly saying something special about this sauce!


I've been a huge fan of barbecue sauce for pretty much my whole life. It is, hands down, my favorite condiment. I can't get enough of it. I'll put it on pretty much anything you can think of. I was dared, as a teenager, to try it on the likes of pancakes, Reese's peanut butter cups, even cinnamon rolls! Ok, let me tell you, none of those were brilliant ideas; they were all pretty gross. But I still tried them, because I was just that devoted to my love of barbecue sauce.

However, I had never made it from scratch....until yesterday. I'd always wanted to, for sure. I knew that I would enjoy playing around with components and spicing it the way I wanted to, and I finally found a reason to whip up a batch; leftover habanero peppers. That's right; we had some extra peppers we'd bought, and suddenly my brain was overtaken with visions of a habanero-flavored barbecue sauce that would knock your socks off. I took to my trusty Recipezaar to see what I could find.


Finally, I found the perfect recipe. It did not have habanero listed in its title; the pepper is almost like a stealth ingredient, listed all the way at the end of the recipe. But, boy, does it make its presence known! I tasted this sauce first before I added the pepper, and then again after I had incorporated it, and the difference was astounding. Of course, that's to be expected when you're dealing with such a hot pepper, but still! It just adds so much to the overall flavor and heat level of the sauce.


Of course, I did tinker with the original recipe a bit, because that's just what I do. I decided to use up some more of my pomegranate molasses in this, since it did call for some molasses. I had to add more sweetness after that, since the pomegranate is very tart and regular molasses is not. So I threw in some honey to increase the sweet. I found out that I was out of chili sauce, so I improvised and used some more of my new best friend, Frank's RedHot Sweet Chili Sauce, along with a bit of extra ketchup. The recipe called for chili powder; instead of regular, I used some ancho chili powder. Oh, and I cut the recipe down to 1/3 the full amount, since that would have yielded about 3 pints of sauce. A bit too much for my little family!

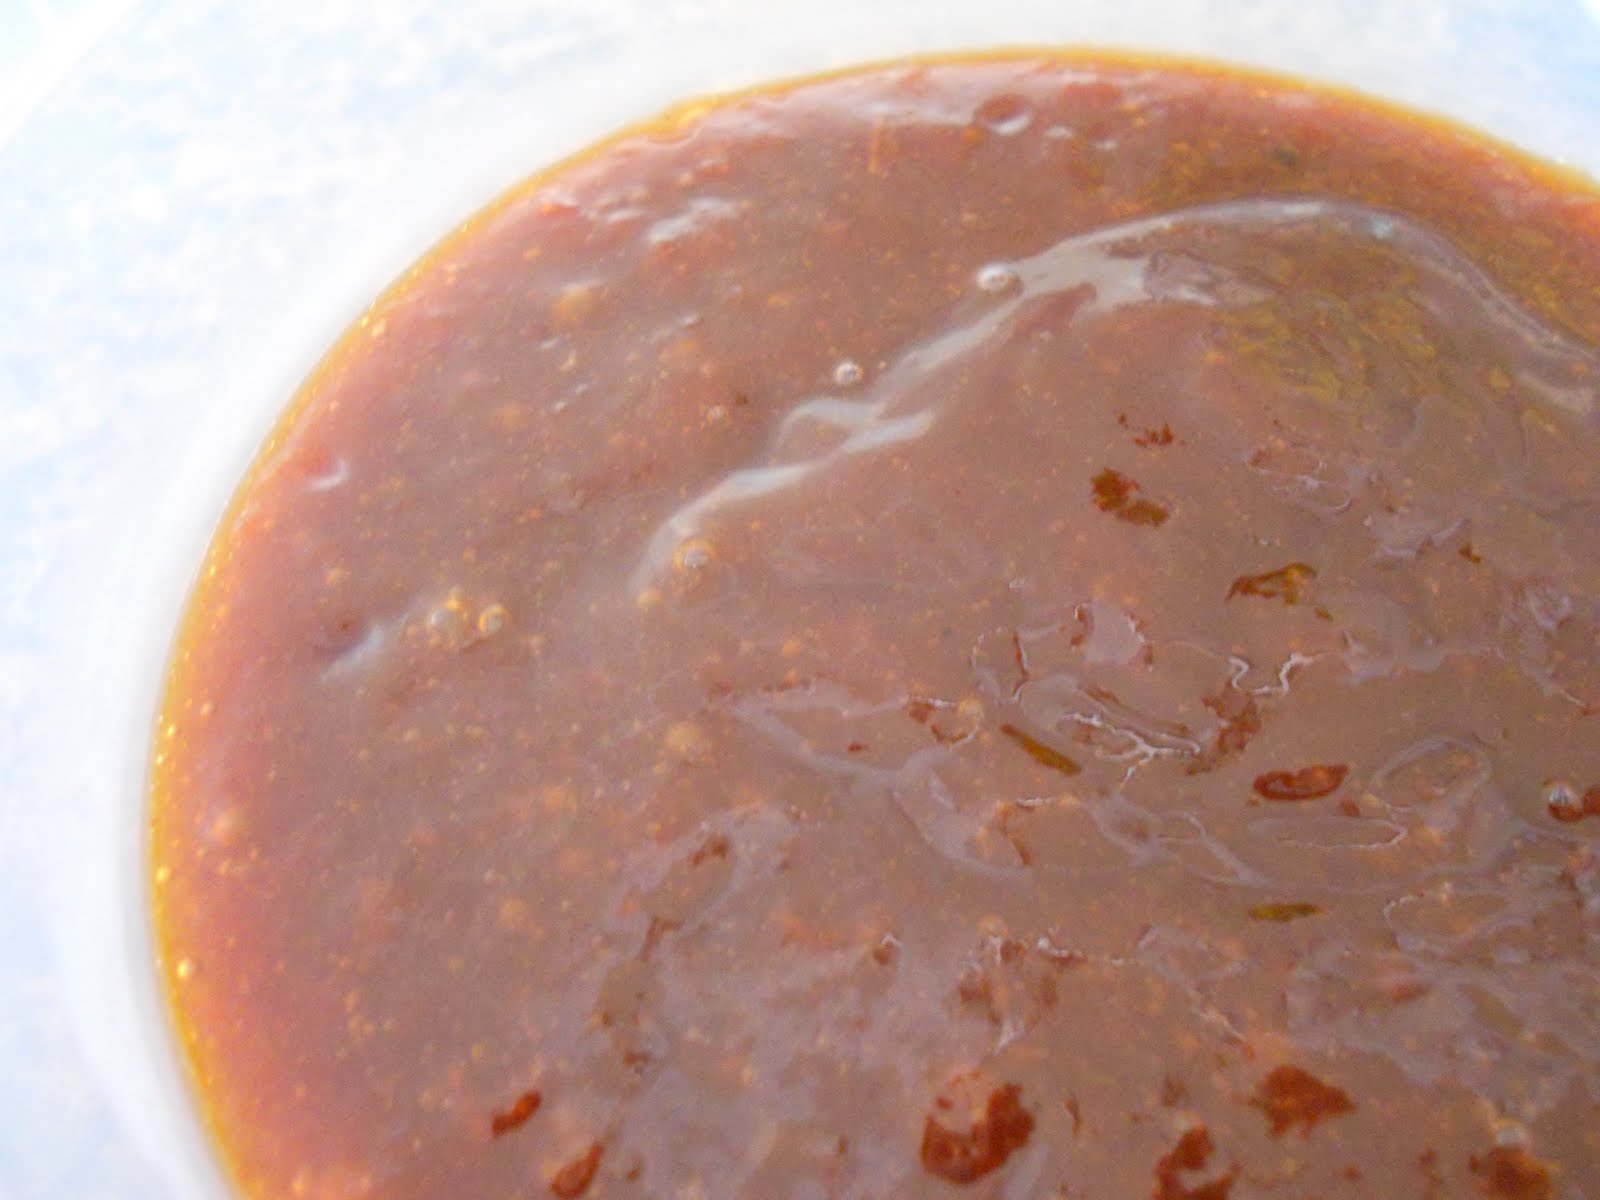
The end result of my playing and experimenting was a dark, thick, sweet sauce that had a sharp tang and a swift kick from the habanero. I have to admit, I just couldn't stop taste-testing this stuff while it was simmering on the stove! It filled the house with an incredibly smoky aroma; it just smelled like summer to me. (It also smelled like dinner to me, so it was very hard to wait around until we could eat!)

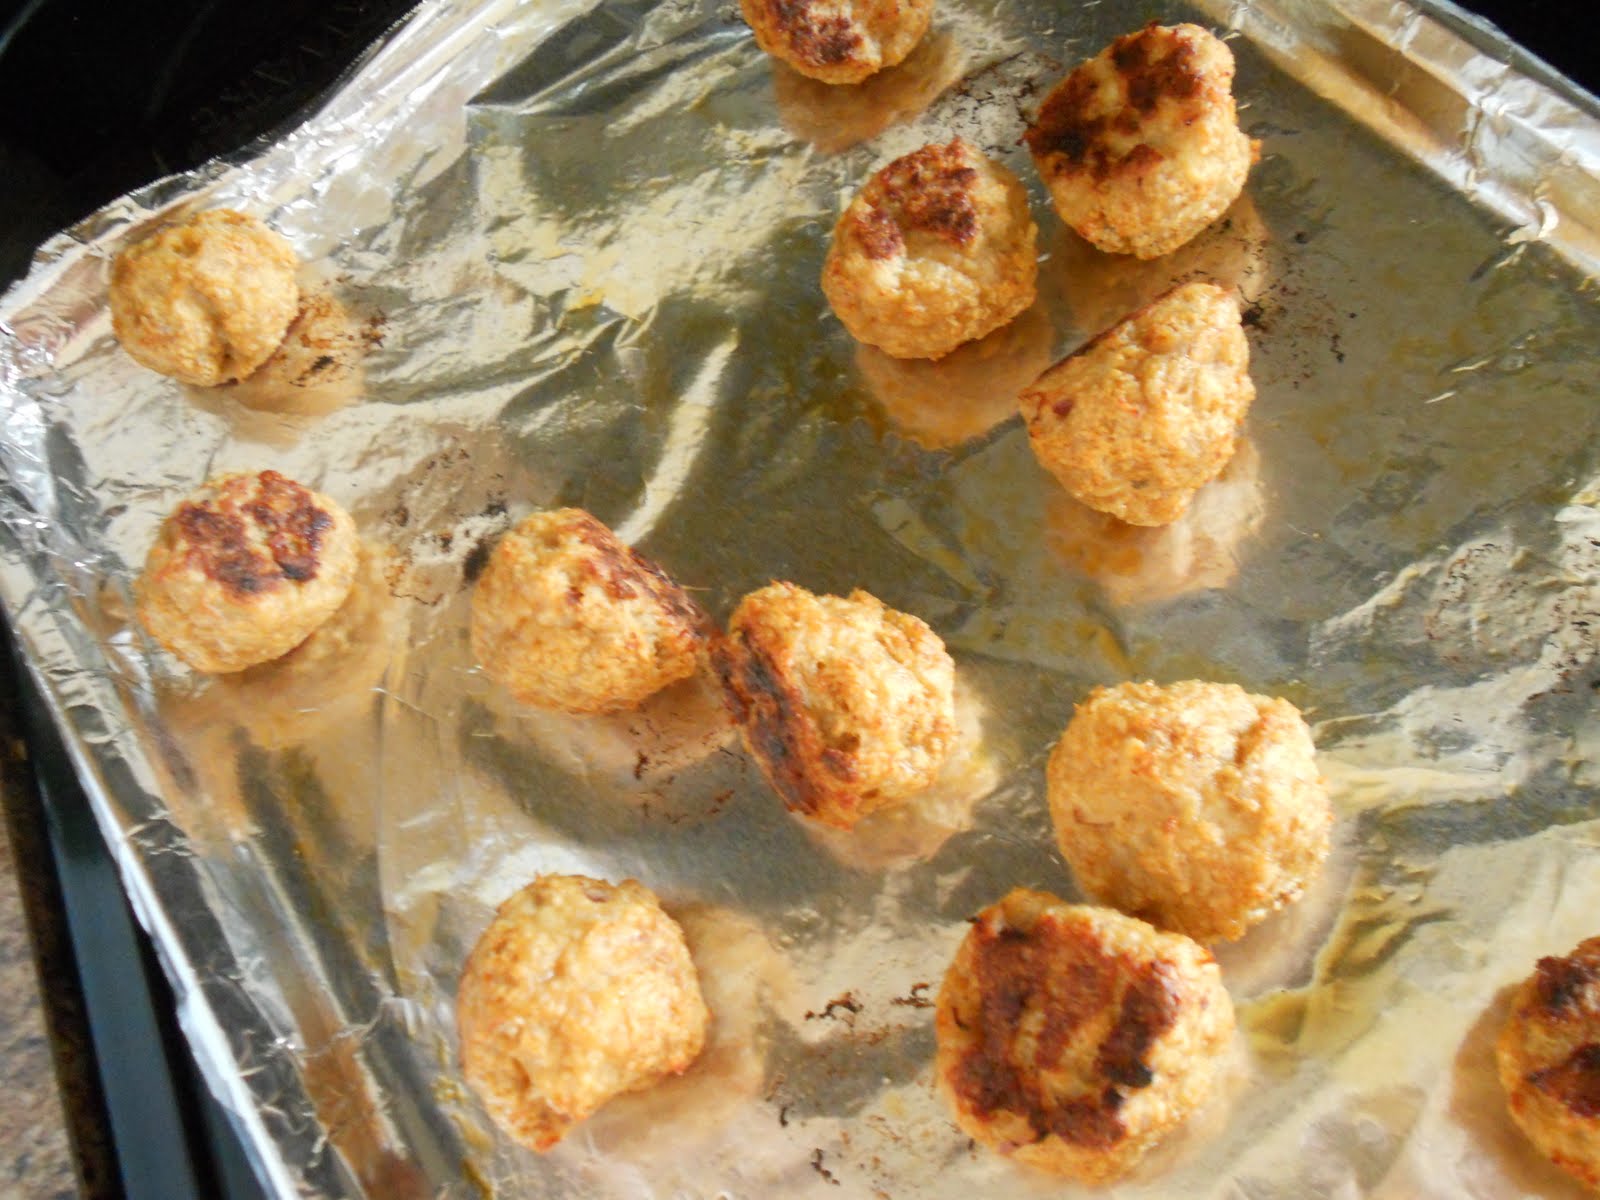
I served this alongside a relatively simple turkey burger that was seasoned to taste like Caribbean jerk, a barley and veggie salad, and sweet potato oven fries. The barbecue sauce was fantastic for dipping the burgers in, and I thought it paired especially well with the sweet potato fries. A winner, if I do say so myself!

I said it before, but I'll say it again. If you do try this sauce, be warned: it is spicy! However, it would be just as delicious if you were to omit the habanero, or substitute a slightly less spicy pepper (a jalapeno would be great in this, as well). There's plenty of other flavors in there to make up for the heat.


The original barbecue sauce recipe can be found right here. The recipe I used for the turkey burgers can be found here. It originally came from Rachael Ray, and then somebody posted it to Recipezaar. The sweet potato fries I used were just Ore-Ida frozen fries, and they were good! Finally, the barley and veggie salad recipe is half Cooking Light, half my own creation. I won't post a step-by-step description of what I did, but here is a link to the Cooking Light recipe. I used barley in place of the orzo, kept the dressing the same, and omitted the chicken and goat cheese. It was delicious!

Homemade Barbecue Sauce
adapted from Recipezaar
makes about 2-3 cups

Ingredients
1/2 cup onion, chopped
1/2 cup red bell pepper, chopped
1 clove garlic, minced
1 Tbsp. olive oil
1 tsp. ground dry mustard
1 tsp. ancho chili powder
1/2 cup apple cider vinegar
3/4 cup ketchup
1/2 cup sweet chili sauce
1 Tbsp. Worcestershire sauce
1 Tbsp. liquid smoke
1/4 cup pomegranate molasses
2 Tbsp. blackstrap molasses
1/3 cup honey
1/4 cup dark brown sugar
1 habanero pepper, minced (remove seeds before using, and don't forget to use protective gloves while handling your pepper!)

Directions
1. Heat the olive oil in a medium saucepan. Add the onions, bell peppers, and garlic and saute until onions are translucent, about 5 minutes. Add dry mustard and chili powder, and stir to incorporate.
2. Lower the heat to a simmer, and add all the remaining ingredients. Stir well, then simmer on low, covered, for at least an hour, stirring occasionally.
3. Let cool, then use either a regular blender or an immersion blender to puree the sauce. Sauce can be stored in an airtight container for about 2 weeks in the fridge, or stored in mason jars in the fridge for longer.

Monday, June 28, 2010

Asian Chicken Meatball Salad


This recipe was invented right smack in the middle of me preparing it! In other words, I set out one day to make a specific dish, but by the end of my meal preparation, I had come up with something completely different! And I must say, I like what I've invented here. It sounds strange, perhaps, but it was a seriously delicious little Frankenstein of a dish. Here, let me take you through it.


It all started with these chicken meatballs. I just had a hankering for chicken meatballs. I finally found 99% lean ground chicken at my local grocery store, and I was very excited. I hadn't found this in the stores near where I live up until now, so I had to stock up. At first, when pondering what I should make, I came up with buffalo chicken meatballs. It sounded really good. I thought it may be fun, then, to throw the meatballs on top of a salad, and have it be a fun spin on buffalo chicken salad. So far, still sounding good.

So I mixed the chicken meat with some panko breadcrumbs, some smoked paprika, garlic powder, salt, and pepper, and formed and baked my meatballs. While they were baking away, I went to my fridge to find the buffalo sauce. But once I found it, my heart sank. It was nearly empty! And I had not bought a backup bottle! Wait a minute, though. All was not lost. I suddenly remembered that I did have a bottle of something else I've been wanting to try.


I found this Frank's RedHot Sweet Chili Sauce not too long ago, and bought it eagerly. It just sounded so good. It's made with fresh chilis, it's slightly hot and sweet and sticky all at once, and it was on sale! It was meant to be. So, armed with this bottle of RedHot and a fresh idea in my head, I took the meatballs and tossed them with the sauce. Now, I was on a roll! I'd turn my salad into an Asian-y one, with fresh spinach and carrot and some sliced almonds. I'd top it off with a simple Asian salad dressing, and crown it all with these meatballs. It sounded too good to be true.


I fell madly in love with this salad upon first bite. It was a fantastic blend of sticky-sweetness, salty bite (from the Asian dressing I used), crispness (from the spinach), crunch (from the almonds), and meaty goodness (the meatballs!).

Sure, there were things I could have done differently. It wasn't absolutely perfect. For starters, I had seasoned the meatballs before I knew that they were going to be housed in an Asian-themed salad. Therefore, when I make this again (and I will), I will put more Asian flavors into the meatballs. I could see ginger in there, along with maybe some 5-spice and a touch of soy, or even hoisin sauce. They probably could use a bit of heat, too, since the RedHot just isn't, well, hot enough for our tastes. If I had had different salad ingredients on hand, I could have improved upon the salad portion of things, as well. I could have thrown in radishes, sugar snap peas, bean sprouts. I thought the presentation was screaming for some sesame seeds sprinkled on top, but I couldn't find any. However, I used all ingredients that I had on hand at the time, and I was satisfied with this meal. Isn't that what really matters, in the end?


Asian Chicken Meatball Salad
recipe by Bri
makes 4 servings

Ingredients
1 lb. ground chicken (I used a 50/50 mix of lean ground chicken and ground chicken breast, which are different in their calorie/fat content)
1 cup panko breadcrumbs
1 tsp. garlic powder
1 tsp. smoked paprika (I thought this was good, but you may want to use ginger or 5-spice powder in place of this)
1/2 tsp. ground black pepper
1/4 tsp. kosher salt
1/3-1/2 cup Frank's RedHot Sweet Chili Sauce
1 (9 oz.) bag fresh spinach
1/2 cup sliced almonds
1 cup baby carrots, coarsely chopped
1/4 cup soy sauce
1/4 cup rice wine vinegar
1 clove garlic, minced
1/2 tsp. ground ginger (or 1 tsp. fresh grated ginger)
1/4 tsp. sesame oil
1 Tbsp. honey
1 Tbsp. water

Directions
1. Preheat the oven to 400 degrees F. Mix the chicken with the breadcrumbs, paprika, garlic powder, salt, and pepper, and form meatballs (I shaped mine by using a large cookie scoop). You should end up with about 2 dozen. Place on a lightly oiled or nonstick-sprayed cookie sheet lined with foil, and bake for 18-20 minutes, turning once halfway through.
2. While the meatballs bake, gather the salad ingredients. Divide the spinach evenly into 4 bowls, followed by the carrots and almonds. In a small bowl, combine the soy sauce, vinegar, garlic, ginger, sesame oil, honey, and water. Set aside.
3. When the meatballs are done, remove them from the baking sheet immediately and place in a medium-sized bowl. Add the RedHot sauce, and toss gently to coat the meatballs evenly.
4. Divide the meatballs among the 4 salad bowls, drizzle the salad dressing evenly over each, and serve.

Sunday, June 27, 2010

Chocolate-Black Pepper Cookies


I definitely have a thing for unusual flavor combinations. When I hear or read about new and exciting ways to mix flavors, I usually want to try them right away. These cookies do fall into that category, but I waited a long time to make them. I'd had my eye on them ever since I first saw them in Martha Stewart's Cookies. I just never got around to making them. Perhaps it is because I tried baking sugar cookies with black pepper a few years ago, and I really did not like them.


Well, I think I waited way too long to try these cookies! I say that because I am in love with them. They are perfectly chocolatey, like a brownie, with an exotic and delightful blend of spices that give them a hint of warmth. It's so hard to explain them; you should just try them!


The cookie dough was supposed to be shaped into a round log, which was then rolled in coarse sanding sugar (I used turbinado sugar). The whole log was chilled in the refrigerator, then sliced into round cookies. The cookies were then sprinkled with freshly ground black pepper before being baked in the oven. As I'm sure you can tell from the picture, I need some work on my log-rolling skills! My cookie pieces hardly turned out round; they're all flat on one side and domed on the other. I darsay that the shape of these cookies hardly matter, though. One taste and you won't care what they look like. They are that scrumptious.


The most amazing thing about these cookes, aside from their taste, is the fact that the fat content isn't that high. That's why I chose to make them finally. I was looking for a good cookie that wouldn't break the fat-gram bank, and these fit my criteria perfectly. If you slice the dough log evenly into three dozen cookies, each cookie only has about 65 calories and 3 grams of fat. Not bad for a decadent chocolate cookie! Keep in mind, I'm not saying they're healthy, exactly! But there are worse things you could be eating when you're looking for a sweet treat that cures your cravings.


Chocolate-Black Pepper Cookies
from Martha Stewart's Cookies
makes 36 cookies

Ingredients
1 1/2 cups all-purpose flour
3/4 cup unsweetened, Dutch-process cocoa powder
1/4 tsp. coarse salt
1/4 tsp. finely ground black pepper, plus more for sprinkling
1 Tbsp. plus 1 tsp. good-quality instant espresso powder
1/2 tsp. ground cinnamon
3/4 cup unsalted butter, softened
1 cup granulated sugar
1 large egg
1 1/2 tsp. pure vanilla extract
coarse sanding sugar, for rolling (I used turbinado sugar)

Directions
1. Sift together the flour, cocoa powder, salt, pepper, espresso powder, and cinnamon into a medium bowl. Set aside.
2. Put butter and sugar together into the bowl of an electric stand mixer fitted with the paddle attachment. Beat on medium speed until pale and fluffy, about 3 minutes. Mix in egg and vanilla. Reduce speed to low. Slowly add flour mixture; mix until just combined.
3. Turn out dough onto a piece of parchment paper, and roll into a log that is 2 inches in diameter. Roll log in the parchment. Refrigerate at least 1 hour or overnight.
4. Preheat oven to 350 degrees F. Remove log from parchment paper. Let soften slightly at room temperature, about 5 minutes. Roll log in sanding sugar, gently pressing down to adhere sugar to dough. Transfer log to a cutting board, and slice into 1/4-inch-thick rounds. Place rounds on baking sheets lined with parchment paper, spacing 1 inch apart. Sprinkle each round with freshly ground black pepper.
5. Bake cookies until there is slight resistance when you lightly touch centers, about 10 minutes. Transfer to wire racks to cool completely. Cookies can be stored in airtight containers at room temperature for up to 2 days.

Thursday, June 24, 2010

CEIMB: Chicken Paella with Sausage and Olives


Mmm, paella! This week's Craving Ellie in My Belly recipe was Chicken Paella with Sausage and Olives, chosen by Margaret of Tea and Scones. It seems that CEIMB will be able to live on, after all! Marthe of Culinary Delights has taken over the blogging group, so we are definitely moving forward and continuing to cook fantastic dishes week after week. Very exciting!


Now, onto this week's dish. This was a great one, possibly one of my favorites to come out of Ellie's So Easy cookbook so far. First of all, paella is something I usually think of in my mind as something that will be very labor intensive and take forever to make. I think it's been a couple years since I have attempted to make a paella, and I do recall it taking quite a while. It's a Spanish dish, and I believe it is traditionally cooked in a special paella pan, which makes the rice in the dish kind of crisp and crunchy on the bottom.

Fortunately, you do not need any special equipment for Ellie's version, and you do not have to slave over a hot stove all day, either. This relatively simple chicken and rice dish is a one-pot wonder that just requires some chopping, sauteeing, and a final cook in the oven. It's worry-free and tastes like it was a lot more complicated than it was.


For the sausage in the dish, you would normally use a chorizo. I found some "Soy-rizo" at Trader Joe's that I decided to use in its place. One big difference between regular chorizo and my meatless version was the casings. Ellie has you remove the casings and slice the chorizo into thin slices. My "Soy-rizo" had a thin plastic casing on it, and once removed the sausage underneath was crumbly, much like ground meat. So you can't really see any of my sausage in the pictures of the dish, but it is there. It's just tiny and finely ground. It was delicious, though; the meatless sausage worked out great! I also used chicken breast instead of chicken thighs, and I didn't really miss the thighs.


I'm so glad I used the olives; I was wary of them because I haven't been the hugest fan of them in the past. They really added something this time, though. I loved them. I loved the peas, too; they imparted a nice texture to the proceedings, a bright pop in your mouth every now and then.

This dish is seasoned relatively sparsely, but it has such a fabulous flavor. You throw in some salt, pepper, turmeric, and a pinch of saffron threads. And that's really all you need. The dish has a slow-cooked, rich flavor that I just didn't feel the need to improve upon. All in all, very satisfying and a big success!

Next week will be my pick for the group! I'm really looking forward to that. In the meantime, this recipe can be found here. I had to do a quick Google search to find that link, because I couldn't find it on Food Network's site like I normally can with Ellie's recipes. You can also check the CEIMB site to find out how the other members fared this week. And a big thank you to Margaret for the excellent choice!

Tuesday, June 22, 2010

Strawberry "Julius"


We love that store in the mall, Orange Julius, that sells all those yummy, fruity shakes and smoothies. It's one of the few ways I can get fruit into the kids. Xander requests a "julius" nearly every time we hit the mall, and he loves them so much he doesn't even care that he's drinking something that isn't completely bad for him!

I still have all these strawberries to use (sorry if you're getting sick of all these strawberry-centric blog posts, but that's just what I've been using a lot of lately). This time, when thinking of new ways to use them, I remembered that I had: 1) been nagged by Xander recently to make some "julius" at home, and 2) seen a nifty recipe on Recipezaar for a strawberry variation on the original orange drink. I love that this recipe uses real berries, rather than using a fruit juice concentrate. I'd done that several times in the past to duplicate these beverages at home, and while it works, it's not entirely feasible all the time.

First things first: I wanted to strain out the seeds from the berries. I whirled them up in the blender with a bit of water, and pushed the puree through a sieve.


After all the straining was done, I had this lovely, bubblegum-pink, frothy liquid that was both gorgeous and seed-free! I threw this back into the blender, along with some milk, sugar, and a bit of vanilla extract. I tossed in about 5 ice cubes, let it rip, and just like that I had Strawberry "Julius!"

Seriously, this is about as simple as it gets. The only way I could have made it simpler would have been to save myself the trouble of straining out those pesky seeds. Most people would probably leave them in, but I'm just strange and happen to hate them. Plus, I figured the kids would probably appreciate the effort, and the silky-smooth consistency.


I think you can probably tell, these little smoothies were a huge hit with my kids! Above is Evan, relishing the last few drops of his glass.

Below is Xander, enjoying the remains of his serving. He posed especially for this picture; he wanted an action shot of him drinking. Very cute!


These went over so well, in fact, that there was none left for Daddy when he got home from work. Oops. No worries, though. I do believe I see more of these Strawberry "Julius"-es (how do you pluralize that? Who knows?) in our near future. Next time, there may even be enough for all of us!

Strawberry "Julius"

from Recipezaar

makes 2 (6-ounce) glasses


Ingredients

1 cup strawberries, sliced (can use fresh or frozen; it's also equivalent to 100-125 g on a kitchen scale)

1/2 cup milk (any kind is ok)

1/2 cup water (or use half water, half ice, as I did)

1/4 cup superfine sugar (since I did not have this, I used 2 Tbsp. granulated sugar)

1/2 tsp. vanilla


Directions

1. Place strawberries in blender. If you wish to strain seeds, add about 2-4 Tbsp. water to the blender, puree, and then pass the puree through a mesh sieve to collect the seeds. Place strawberry puree back into the blender. Proceed with step 2.

2. Add all the remaining ingredients to the blender. (If you've already strained the seeds, you need only add water until the total you have used, both before and after step 1, equals 1/2 cup. Otherwise, I found that 1/4 cup total water, plus 5 ice cubes, was perfect for an icy, frothy consistency.)

3. Blend until smooth. Pour into glasses and serve.


Sunday, June 20, 2010

Strawberry Coffee Cake


So it turns out that we bought way too many strawberries last week. It's a shame, really. The strawberries have been looking great this year, and I don't eat them. I wish I liked them straight up, by themselves. I would like to like them. But I just can't do it. I can't get past the seedy exterior. To me, the seeds are such a distraction on the tongue that I can't enjoy the tart fruit underneath. It's sad. Hence, the need to find some yummy recipes that I can bake strawberries into! Fortunately, I can handle them as long as they are contained inside a baked good. Go figure.


Sometime later this week I will post another recipe I tried using strawberries, and that one I actually did eat myself. However, this Strawberry Coffee Cake was sent straight to work with Andy the other day and I didn't get a drop. That's okay, though: the glowing reviews of this one kept me giddier than if I had been on a real sugar rush from actually eating the cake!


The method is fairly simple. You whip together a quick coffee cake batter made with butter and cream cheese, granulated sugar, flour, et al. You spread half the batter into a square cake pan, spread sliced strawberries across the batter, and then dollop the remaining batter onto the strawberries. Sprinkle a simple brown sugar/nut topping on top, bake, and allow the delicious aroma of the cake baking away to tempt you like crazy!

One thing I should mention about this recipe: for some reason, I had to bake mine in a differently-sized pan than what was called for. I was supposed to use a 9x13 pan, but when I spread half the batter into the pan (since only half was needed on the bottom, then the strawberries, then more batter), it didn't fit! I couldn't even get half the batter to spread thinly across the bottom; there just wasn't enough of it. So, I took out the batter and tried it out in an 8x8 pan. That was perfect! I was kinda concerned that it would overflow the pan and drip out in the oven, but I needn't have worried. The cake rose beautifully, and it did clear the top of the pan. Once the cake had been out of the oven to cool, it settled back down and was roughly at the level of the top of the pan (as you can see from my pictures).

Since Andy didn't cut into this until he was at work that day, I insisted that he bring the camera to the office so I could see what it looked like inside! That is why the lighting looks all different in the picture of the single slice of cake. Sorry; it's all I had! Anyway, I really would like to make this again for company sometime, and actually try it. Until now, take Andy's word for it: this cake was a huge, delicious hit!


Strawberry Coffee Cake

from Recipezaar

serves 12


Ingredients

8 oz. cream cheese, softened

1/2 cup (1 stick) butter, softened

3/4 cup granulated sugar

1/4 cup milk

2 eggs

1 tsp. vanilla

2 cups all-purpose flour

1 tsp. baking powder

1/2 tsp. baking soda

1/4 tsp. salt

2 cups strawberries, sliced (Original recipe used 3 cups.)

1/4 cup brown sugar

1/2 cup nuts, coarsely chopped (I used pecans. I'm sure walnuts or even almonds would work.)

1/2 tsp. cinnamon (Original recipe did not use, but I thought it needed this.)


Directions

1. Preheat oven to 350 degrees F. Beat together cream cheese, butter, and granulated sugar in the bowl of an electric mixer, until light and fluffy, 2-3 minutes. Stir in milk, eggs, and vanilla.

2. Sift together flour, baking powder, baking soda, and salt. Add to cheese/butter mixture and mix until just smooth.

3. Spread half the batter into the bottom of a greased (I used nonstick cooking spray) 8x8 pan. (Again, this recipe indicated that a 9x13 pan should be used here, but I just couldn't make that work for me.) Spread the strawberries across surface of batter, followed by the rest of the batter, dropping it in dollops. Once all the batter has been dropped on top of the strawberries, spread it gently to cover the berries.

4. In a small bowl, mix together the brown sugar, chopped nuts, and cinnamon. Sprinkle across the top of the batter. Bake at 350 for 30-35 minutes, until a toothpick inserted comes out mostly clean, with just a bit of crumb. (Mine baked up in about 33 minutes, and a 9x13 should be kept in until 40 minutes.) Serve warm.

Saturday, June 19, 2010

Mexican-Style Pizza


I recently had a hankering for a pizza night, but I am trying to eat healthier and wanted my pizza to reflect that. I immediately thought of making a Mexican pizza, so I decided to sort of invent my own variation. I started out with my favorite bread machine pizza dough recipe, a whole wheat dough that isn't terribly dry and dense like some whole wheat breads can be.


I looked in the fridge for a sauce-type thing that I could spread on the dough as my base. I didn't want to go with tomato sauce; that would be too much like a traditional pizza. I found a little bit of tomatillo salsa that needed to be used up, as well as some medium taco sauce. That would do. I mixed them both together and came up with my pizza base.


Next came the meat. I browned some ground turkey, added taco seasoning to it, and crumbled that over the pizza. Yum. After that, I sprinkled some black beans and spooned on some delicious tomato-less salsa that I had gotten at Trader Joe's not too long ago. This salsa is a corn and chile variety, and I love it. It's mildly sweet, has a bit of a kick, and tastes wonderful. I threw on the rest of a green bell pepper I had laying around, a touch of pepper jack cheese, and some crumpled-up tortilla chips for a crunchy garnish. I was in heaven.


Andy had a dollop of sour cream on the top of each of his slices. He loved it that way. I loved mine with just a sprinkling of Cholula across the top. Either way, we both agreed that this was a great pizza. It was exotic enough to be a departure from the same ol' pizza, but it was still a pizza. It was crazy filling, too. We had leftovers for two days, I think. It definitely wasn't bad, for something I had just made up on the fly. I'd make it again!


Mexican-Style Pizza

Recipe by Bri

makes 3-4 servings


Ingredients

1 whole wheat pizza dough

1/4-1/3 cup salsa or taco sauce, any kind

1/2 lb. lean ground turkey

1 Tbsp. taco seasoning

1/4 cup water

1/2 a green bell pepper, thinly sliced

1/4-1/3 cup corn salsa, or cooked, shucked corn

1/2 cup black beans, rinsed and drained

1/2 cup reduced-fat pepper jack cheese

8-10 tortilla chips, lightly crushed

cornmeal, for dusting

sour cream, to taste

hot sauce, to taste


Directions

1. Preheat a medium-sized skillet to medium-high heat. Spray with nonstick cooking spray, then add the ground turkey. Cook for 8-10 minutes, until browned, crumbling up the mixture as it cooks. Add the taco seasoning and water, lower the heat, and simmer for an additional 8-10 minutes, until all liquid is absorbed. Set aside to cool.

2. Preheat oven to 400 degrees F. Lightly dust a flat surface with cornmeal. Place the dough on the cornmeal and stretch into a 12-inch round. To the dough, add the taco sauce, spreading to just about 1/2-inch from the edges of the circle.

3. Next, add the cooked turkey, then the green peppers, black beans, corn or corn salsa, and the pepper jack cheese. Sprinkle the tortilla chips over the top. Bake at 400 for about 12-15 minutes. Watch for the cheese to melt, and the chips to brown just slightly. Remove from oven, cut into 6-8 wedges, and serve with sour cream and hot sauce, to taste.

Thursday, June 17, 2010

CEIMB: Chicken Florentine and Quinoa Pilaf with Pine Nuts


We're still flying without an official leader in the Craving Ellie in My Belly group. However, this week a recipe was chosen by Kayte of Grandma's Kitchen Table. She chose Salmon Florentine with the Quinoa Pilaf, from Ellie's So Easy cookbook. I have to say, I chickened out with the salmon. I've never eaten it, and I didn't know if I was ready to try it just yet. But after reading the recipe in its entirety, I decided that this would work out fine with chicken.


I was right! This was superb with chicken. And (as the title of her cookbook would indicate) it was easy! The recipe called for frozen spinach; I wilted down a bunch of fresh, and I thought it was great. To the spinach you add sun-dried tomatoes, shallot (red onion, in my case), garlic, and ricotta cheese, plus some salt, pepper, and crushed red pepper. I baked my chicken for 20 minutes, then removed it from the oven, piled this spinach topping on each breast, and continued to bake for another 15 minutes. This worked out perfectly. The chicken was super moist, and the flavors of the spinach topping were incredible with it.


The quinoa pilaf was loosely interpreted by me. I did have pine nuts on hand, but no parsley or regular onion. Instead, I used some leftover rosemary, and half a red onion. The pilaf was great the way I made it, and I'm sure it would have been great the recipe's way, as well. The great thing about grain dishes, including quinoa, is how well they lend themselves to variety. This one was no exception.


I served a simple green bean side dish with all this. I steamed the beans until they were tender, and then I tossed them in some salt, pepper, and red wine vinegar. It went along with the "so easy" theme nicely!


You can find the original versions of Ellie's recipes here and here. I'm looking forward to next week's dish, which I just found out will be paella. I haven't made that in forever, so it'll be great to try again.

Tuesday, June 15, 2010

First MSC Post: Strawberry Cupcakes!


I am very excited to announce that I have joined yet another blogging group! This one is the Martha Stewart Cupcakes Club, and is dedicated (obviously, hence the title) solely to cupcakes baked from Martha's Cupcakes Cookbook. I am really looking forward to cooking along with the other members; this is a group I have been following ever since they started out, nine or so months ago. However, this group had filled up with eager members very quickly in the beginning, so by the time I wanted to join, the club was closed to new bloggers. There was a waiting list, but I didn't sign up for it. Instead, I would read the blogs each month and enjoy other people's results, virtually.


But now the group is open for anyone to join! So I decided that it was time. You only need to bake along once a month, so it seems completely possible to keep up. Plus, I have been looking forward to using my Martha Stewart Cupcakes book more often; now is my chance!


For my debut outing, I made Strawberry Cupcakes (found on p. 146), which were chosen by Sherry of Sherry Starts Cooking. This is a great recipe; you incorporate real, finely chopped strawberries into a vanilla cake batter. The result is a light, sweet little cake studded with tart, red flecks that give it this extra pop. So good! I don't even eat strawberries, but I loved them in these cupcakes!


The recommended frosting was a Strawberry Swiss Meringue Buttercream, which could also be found in the book. Here's where my problems began! It's been years since I have made this type of frosting; it's very tricky. I recently tried my hand at Italian Meringue Buttercream, with great results. I felt confident that I could pull off the Swiss variety.

Well, my confidence waned after my first attempt, when I began whipping an egg white/sugar mixture that had been heated on the stovetop, over a saucepan of simmering water. Instead of forming stiff, meringue-y peaks as the recipe called for, I got.....well, I don't know what I got, exactly. It looked like taffy, the kind you can get on the Jersey boardwalks of my youth, watching it pull and stretch on a machine in the storefront window. It was thick and sticky, almost like chewing gum after it's been chewed awhile. I was baffled. I chucked that batch and started over.

This time, pretty much the same thing happened. I got goop; it proved to not be usable; I scrapped that batch. By now, I was ready to give up and run to the grocery store for some canisters of whipped cream. It was only because of Andy that I tried one more time. He had been helping with the whisking stage of the proceedings, and he convinced me that if we tried again, we would be successful, darnit! I was skeptical, but I plunged onward.

I am so glad I listened to him! Our third attempt was a wild success. This buttercream is to die for! The consistency is that of silk; smooth and light on the tongue. The added pureed strawberries give it the right amount of fruit flavor and tartness. The frosting piped onto the cupcakes like an absolute dream. It was wonderful. We were victorious, and it was worth all the hassle! A garnish of fresh sliced strawberry perched on top completed these little cuties.

So, what went wrong? Andy thinks I made an error by setting my egg white/sugar mixture over a COLD pot of water, then heating it to a simmer. By the time the egg whites had come to the temperature they needed to in order to remove them from the heat, I had overcooked them. The third time we did this, Andy started with an already-simmering pot of water, and we were fine. So I'm gonna go with him on this. Now I know for next time! And there will be a next time, because these were an enormous hit! I sent Andy to work with 2 dozen cupcakes, and he returned that evening with one left. People loved them! I'm glad, because now that I'm in this blogging group, they get to sample cupcakes once a month from now on!


We don't post recipes as part of this group, but you can find the cake recipe on Martha's website, here. You can find the (devil) frosting recipe here.

Once again, I am thrilled to be a part of the group and can't wait to keep baking! If you want more cupcake goodness, check out the MSC website to find out how all the other members made out this month.

Sunday, June 13, 2010

My Everyday Granola Bars


Well, I have finally found it. Yes, here it is. It's the granola bar recipe that could easily be the only granola bar recipe I'll ever use again. Now, this is a very bold statement, coming from me. I love to try out different variations of just about everything, from chocolate chip cookies, to brownies, to frosting. It's hard for me to imagine settling on just one version of any of those. However, this granola bar recipe has made me a believer. Now, I know I can settle for just one of something, because I am in love with these bars. I don't see a reason to look any further!


I found this recipe on Recipezaar, as is the case with so many fantastic recipes I've found over the last few years. I have over 40 different granola bar recipes saved in my own breakfast bar file on that site, and I chose this one because it had dark chocolate in the title. What can I say? If it has chocolate, I'm there! Also, there was a minimal amount of fat, and the fat that is present is the good kind; healthy fats from the peanut butter and nuts, plus the dark chocolate (which of course, is the "healthier" chocolate!).


Oops, sorry for that shot of hubby's foot! This was one of the best shots of the bars, and I figured nobody would mind that the foot ended up in there too. Anyway, one of the greatest things about this recipe is how easily it all comes together. There is a long ingredient list, but everything is basically mixed up in a huge bowl, pressed into a 9x13 pan, and baked for just 20 minutes. Then, voila! You have an easy, on-the-go snack or meal bar that tastes great and actually fills you up! For my money, that can't be beat. So often, granola bar recipes taste good but leave you feeling hungry afterward. With these, I actually do feel as though I have eaten a meal, and that is just what I need. I eat these for lunch almost every day!


It's great how forgiving the recipe is, too. You can substitute ingredients in the recipe and the bars will still turn out wonderfully. You can use any type of nut; you can use any flavor chips in place of dark chocolate. You can use regular or reduced fat peanut butter. You can use any dried fruit in place of dried cranberries. The variations go on and on!

I've made these probably 5 or 6 times now in the last few months. I bake them up, cut them into 12 bars, wrap each in plastic wrap, and freeze them in a Ziploc bag. It's so easy to just grab one an hour or so before I want to eat it; it's thawed by the time I'm ready for it. Then you don't have to worry about them going bad, etc. They're always just as good as fresh! If you're looking for a homemade granola or breakfast bar recipe, I highly, highly recommend these! Although, you'll have to forgive me if you ever catch me posting yet another granola bar recipe someday. Even though this bar is IT, that doesn't mean I won't ever try another one again! Sometimes I'm funny like that.


The original recipe for Dark Chocolate Granola Bars can be found here.
Below is my favorite variation. Feel free to use whatever you want, though!

Dark Chocolate Granola Bars
adapted from Recipezaar
makes 12 bars

Ingredients
1/4 cup sugar (or 2 Tbsp. Splenda Sugar Blend, which I currently use)
1/4 cup maple syrup (I have been using light corn syrup, just to use it up)
1/4 cup honey
2 Tbsp. any kind peanut butter
1 egg white
1 Tbsp. fat-free evaporated milk (regular 2% milk is fine)
1 tsp. vanilla extract
1 cup whole-wheat flour
1/2 tsp. baking soda
1/2 tsp. ground cinnamon
1/4 tsp. ground allspice
2 cups old-fashioned oats
1 1/2 cups crispy rice cereal
1/3 cup dark chocolate chips
1/4 cup dried cranberries
1/4 cup chopped walnuts

Directions
1.Preheat oven to 350 degrees F. In a very large bowl, combine the first 7 ingredients. Mix well. Next, combine the following 4 ingredients (flour through allspice) in a separate bowl. Add this to the first 7 ingredients. Add the rest of the ingredients, stirring well to coat everything with the wet ingredients.
2. Line a 9x13 pan with parchment paper or aluminum foil. If using foil, spray it with nonstick cooking spray. Press the granola mixture into the pan, being careful to smooth out the top so that the granola is evenly placed. It is easier if you use the extra pieces of parchment or foil that hang over the edges to help press everything down. Simply fold the excess over the top of the mixture, press down firmly to spread it all out, then peel the parchment/foil back from the mixture. The mixture should now be even.
3. Bake for 18-20 minutes (20 is my magic number for this), then remove from oven and score surface immediately with shallow cuts. Allow to cool completely on a wire rack, then cut and separate into bars.

Saturday, June 12, 2010

Asparagus and Scallion Pasta with Bacon and Walnuts


Since pasta is my ultimate go-to pantry staple, sometimes I realize that I have been preparing it the same old 3 or 4 ways. I need to branch out, try new things with the pasta. Don't get me wrong; I could still eat pasta every night of the week and not get tired of it. It would just be nice to have a very wide range of pasta recipes at my fingertips for quick weeknight meals.

Enter Cooking Light....and Ellie Krieger. I can always count on both to bring me new ideas and satisfy flavor-wise. This time, I found one recipe from each of these sources, mashed them together, added a bit of my own inspiration, and produced this awesome dinner!


It started with lots of fresh scallions, and a bit of fresh asparagus. We had received both from Andy's parents, and had to use them up pretty quickly. I had bookmarked a Cooking Light recipe for a pasta dish with asparagus, pancetta, and pine nuts that sounded good. At the bottom of that recipe, the magazine indicated that walnuts (instead of the pine nuts) would be delicious in this, too. Sounded good to me. I only had bacon on hand, no pancetta. I decided that this would be fine. I also figured I would use up all the asparagus I had, and then I would throw in a generous helping of scallions at the end. Sounds very spring-y, no?


Then I remembered that Ellie Krieger has a recipe in her book, The Food You Crave, for fettuccini with walnuts and parsley. So I decided to combine her technique with the one listed in Cooking Light, and the outcome was, well, fabulous! This stuff was great warm. This stuff was great cold the next day as leftovers. I mean, it was just good. The nuts were the one thing in this recipe that I was unsure of, but I shouldn't have been worried. They provided welcome texture and crunch, and the toastiness of them couldn't be beat. Combined with the bacon and the fresh veggies, they made for a wonderfully unique addition to my pasta. We loved it.


The original Cooking Light recipe can be found here.
The original Ellie Krieger recipe can be found here.

Here is the recipe the way I made it:

Asparagus and Scallion Pasta with Bacon and Walnuts
adapted from Cooking Light and Ellie Krieger
makes 4-6 servings

Ingredients
1 lb. pasta, any shape you like
1/2 lb. - 1 lb. asparagus, trimmed and cut into 2-inch pieces
6-8 scallions, chopped
4-5 cloves garlic, minced
1/4 cup walnuts, chopped and toasted
2 oz. (about 4 slices) bacon
2 Tbsp. fresh lemon juice
1/2 cup chicken broth
1 Tbsp. extra-virgin olive oil
1/2 tsp. kosher salt
1/2 tsp. freshly ground black pepper
Parmesan cheese, optional

Directions
1. Preheat oven to 375 degrees F. Place bacon on a slotted sheet (You can also line a baking sheet with aluminum foil, place a cooling rack on top of the foil, and then drape the bacon across the rack. It's the method I use, and the fat drips off the bacon to the sheet underneath, so it's less greasy.) and bake for 17-20 minutes, or until cooked through and crispy. Place on a paper towel-lined plate and let cool. Break up into small pieces.
2. Meanwhile, set a large pot of water on the stove to boil. Once boiling, add the pasta and cook according to package directions. During the last 2 minutes of cooking, add the asparagus. Drain the pasta and asparagus, reserving 1/4-3/4 cup of cooking liquid in case you want to make your pasta wetter at the end of preparation.
3. In the pot the pasta was cooked in, heat olive oil over medium heat. Add the garlic and cook until fragrant, 3 to 4 minutes, being careful not to burn it. Return the pasta and asparagus to the pot, along with the lemon juice, broth, salt, and pepper. Toss to combine. Add in the scallions, bacon, and walnuts, and toss again. If you need the extra pasta water, add it in at this time. Serve grated or shaved Parmesan at the table, if desired.