Thursday, September 30, 2010

CEIMB: Blueberry Almond French Toast Bake


This week's Craving Ellie in My Belly recipe was chosen by Heide of Chez Zero. It was Ellie's Blueberry Almond French Toast Bake, from her book So Easy. Ok, I have to be completely honest here: we did not love this. Not at all. It's a shame, really, because we were looking forward to this one. And it turned out so pretty, too!


Now, there are a couple reasons why I think this did not work out for us, and I would love to try making this again with a few changes. For starters, the bread that I used was way too soft. I know I was supposed to use crusty, or day-old, bread. However, the bread I bought for this was this crazy soft bread that remained soft for three days! I bought it early enough that I thought for sure it would be stale by the time I needed it, but no dice. It's ironic, isn't it? The one time I really wantd my bread to become hard, and it wouldn't! Oh, well.


So that was my biggest problem. The finished product was really soggy, and I just don't like my french toast casseroles to come out that mushy. I like them to be firm and solid on the inside, with a nice crispy crust on the outside. I feel like there were too many eggs in this recipe. If I were to do it all over again, I would not use 8 (8!) whole eggs plus 8 egg whites. Instead I would probably use half that, at least. Both my hubby and I felt like the inner texture of this dish was just weird. It contained both qualities of cooked, soft scrambled eggs and mushy bread all at the same time. The taste itself was not bad, but it wasn't great enough to redeem the whole thing.


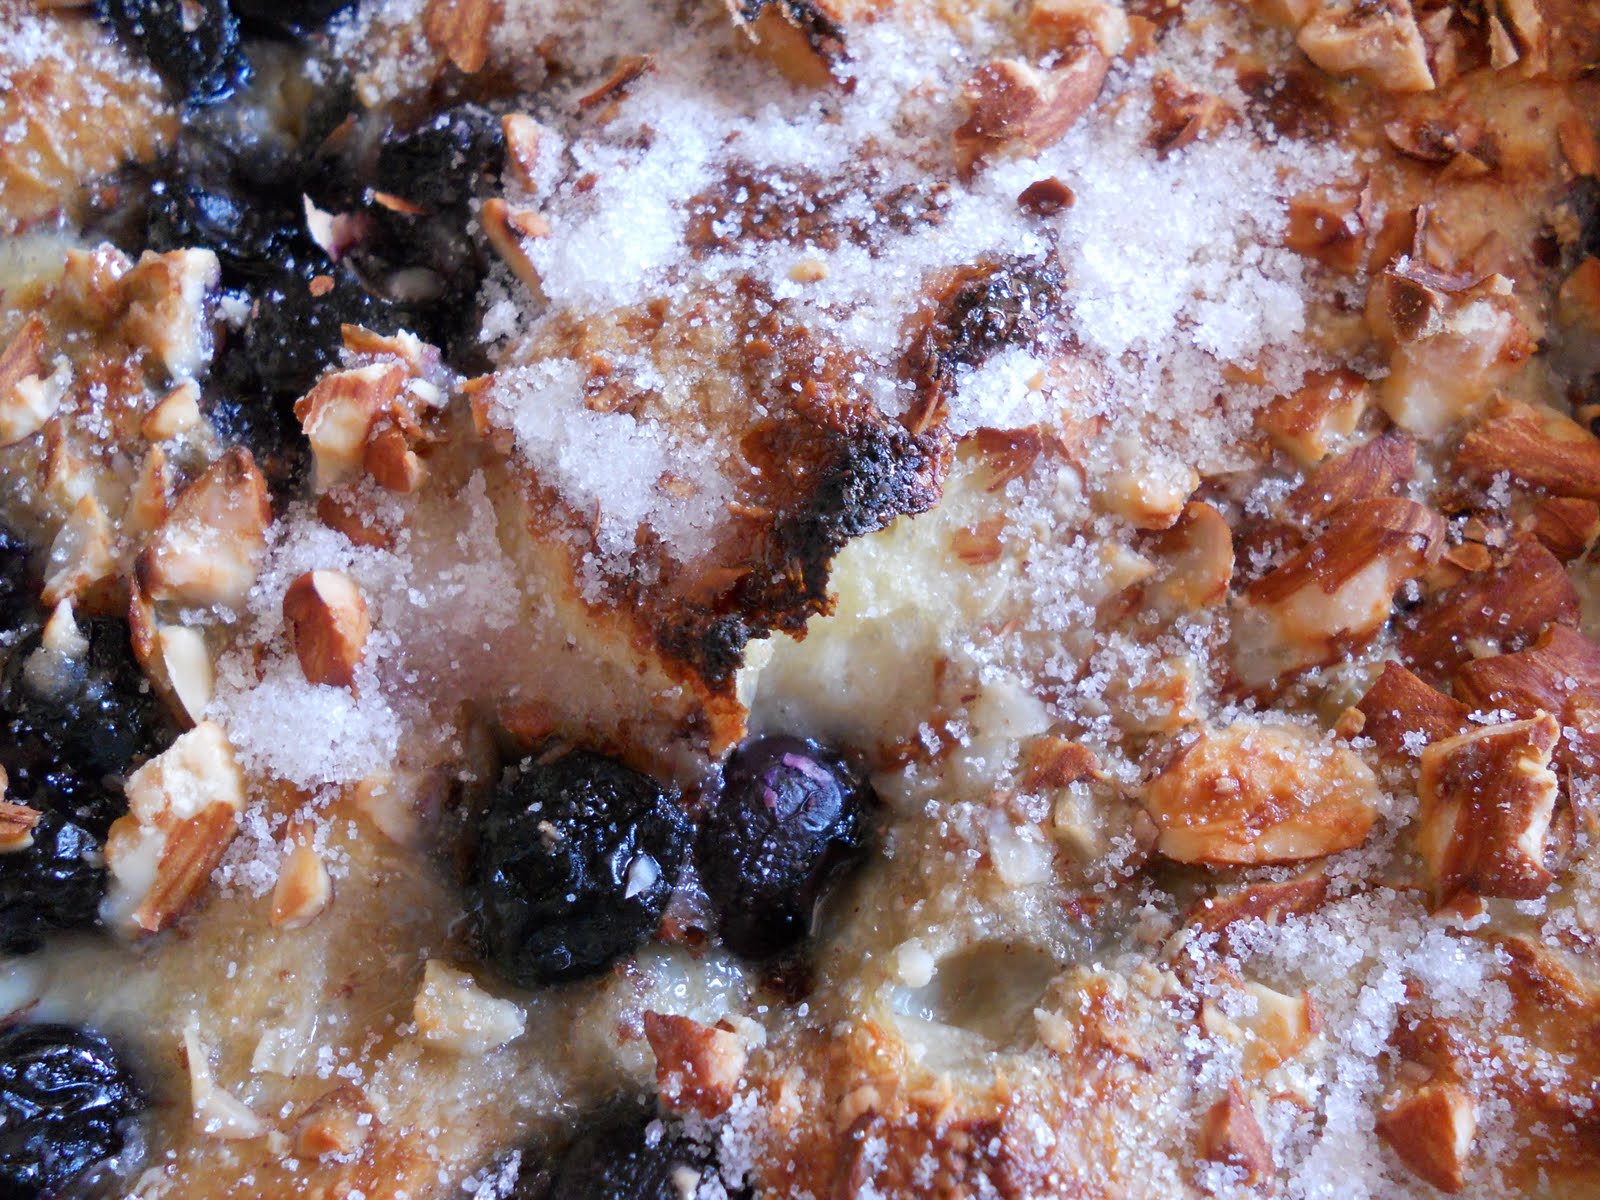
One fun thing I should mention, though: I decided to brulee the top, just for kicks. The top turned out to be the best thing about the french toast bake! It was easy; I just removed the dish from the oven when the bake time was complete, and sprinkled it lightly with granulated sugar. I switched the oven to broil and put the dish back in for a few minutes. The top became slightly charred-looking in some spots and extra crispy all over. The almonds got super-toasty, too. I thought it was really tasty, and it's a fun way to finish off a dish like this.

Thanks to Heide for the pick this week. I'm glad I got to try it, success or not. Besides, like I said, I'm now motivated to make this recipe again, but hopefully with improvements! Maybe the other CEIMBers made out better than me; you can check out the blogroll here.

Wednesday, September 29, 2010

Apple Cinnamon Rolls


Well, I am proud to say that I have now made cinnamon rolls, from scratch, without the aid of a bread machine or any other type of "cheating." It's a miracle! Of course, never one to stick to the traditional, I opted to make these ooey gooey Apple Cinnamon Rolls, and they were divine.


These rolls incorporate a sweet, sticky filling of caramel and finely chopped apples into the proceedings, rather than the standard butter/sugar/cinnamon mixture. Just before baking, the rolls are sprinkled with cinnamon and sugar, but without all that butter inside, these rolls actually are a little bit better for you, too!


Of course, they certainly don't taste healthy. These are oozy, melty, and decadent just as they are. The apples add just enough tart texture to make them complementary to the sweetness, rather than detract from it. If you're looking for an excuse to use up some fall apples this year, I highly recommend these rolls. Plus, as far as yeast dough-type things to make, I found this to be very doable and not difficult at all.


I'm so happy that I'm finally beginning to conquer my fear of yeast, and these rolls are baked proof that the results are well worth the effort. The recipe makes two pans' worth of rolls, so I was able to bake one pan after an overnight rise, and then I froze the other pan for a rainy day. Oh, and one final note: the caramel/apple mixture that serves as the filling is to die for, and has become the inspiration for yet another decadent treat that you will be seeing me blog about in the near future. Look for it soon!


Apple Cinnamon Rolls
from Breadworld
makes 24 rolls (2 pans)


Ingredients
For the rolls:
5 to 5 1/2 cups all-purpose flour
1/2 cup sugar
4 1/2 tsp. RapidRise yeast (2 envelopes)
1 tsp. salt
1/2 cup water
1/2 cup milk
1/4 cup butter or margarine
3 large eggs

For the apple filling:
2 large cooking apples, peeled and chopped
2 Tbsp. all-purpose flour
3/4 cup sugar
1/4 cup butter or margarine
1 tsp. ground cinnamon
1/2 tsp. nutmeg

For the cinnamon sugar topping:
3/4 cup sugar
1 tsp. ground cinnamon
1/2 tsp. nutmeg


Directions
Make the apple filling: 1. Combine the apples, flour, sugar, and butter or margarine in a medium saucepan. Bring to a boil over medium-high heat; cook for 3 minutes. Reduce heat to medium-low; cook 10 minutes, stirring constantly, until thick. Remove from the heat. Stir in the cinnamon and nutmeg; cool completely.

Make the rolls: 1. In a large bowl, combine 1 cup flour, sugar, undissolved yeast, and salt. In a saucepan on the stove, heat the water, milk, and butter until very warm (120 to 130 degrees F). Gradually add to flour mixture. Beat 2 minutes at medium speed with an electric mixer, scraping bowl occasionally. Add eggs and 1 cup flour; beat 2 minutes at high speed, scraping bowl occasionally. Stir in enough remaining flour to make a soft dough. Knead on lightly floured surface until smooth and elastic, about 8 to 10 minutes. Cover; let rest 10 minutes.

2. Divide dough into 2 equal portions. Roll each portion into 12x8-inch rectangle. Spread Apple Filling evenly. Beginning at long end of each, roll up tightly, jelly-roll style. Pinch seams to seal. Cut each roll into 12 equal pieces. Place, cut sides up, in greased 9-inch round pans. Cover; let rise in warm, draft-free place until doubled in size, about 45 minutes. (After covering the pans, they can be frozen at this point, or if you're preparing this in the evening for the next morning, you can refrigerate these overnight.)

Prepare cinnamon sugar topping and bake rolls: 1. In a small bowl, combine all of the cinnamon sugar ingredients, then stir well to fully incorporate.

2. Sprinkle the risen rolls with the cinnamon sugar topping. Bake in a 375 degree oven for 25 to 30 minutes, until browned on top. Remove from pans; serve warm.

Sunday, September 26, 2010

Caramelized Onion, Spinach, and Bacon Quiche


Mmm, quiche. It combines two wonderful things, a pie with an egg dish, to make a great meal that can be enjoyed pretty much any time of day. It took me years to figure out just how much I really love quiche, and I think it's because when I was growing up I didn't care too much for Swiss cheese. Probably all of the quiches I had when I was a kid contained Swiss, so I just dismissed quiche as being just okay.


Now, of course, I realize that 1) Swiss cheese is yummy! and 2) quiche can be made just about any way you can think of, with any ingredients your heart desires. It's versatile like that. And this quiche in particular is, I think, just a fantastic mash-up of flavors and textures.


When I found this recipe online, I was struck by the interesting realization that this Caramelized Onion, Spinach, and Bacon Quiche was made with a refrigerated pizza crust, and not the traditional pie crust. Since I had a pie crust in my fridge and I needed to use it, I decided to forego the pizza crust option, but I tucked it into my back pocket for another day. I just followed the recipe and used pie crust where it said to use dough, and we were good.


What I liked about this quiche was the layering of flavors. You've got a nice layer of spinach, made creamy by sour cream (who knew? Sour cream was such a brilliant addition here, and that's saying a lot because I don't like sour cream unless it's baked into a coffee cake or something.). Then you have a nice, sweet layer of caramelized onions. This is topped by a salty bacon and cheese layer, and then your egg mixture is poured all over the top. One note about the bacon: I used turkey bacon, but the original recipe called for Canadian bacon. I'm sure this would be good no matter what bacon you choose. Obviously, regular old bacon would be the tastiest, but I really liked the turkey variation in this.


Caramelized Onion, Spinach, and Bacon Quiche
adapted from Cooking Light
serves 6

Ingredients
1 refrigerated ready-made pie crust
1 large onion, thinly sliced
2 tsp. olive oil
1/2 Tbsp. sugar
1 (10-ounce) package frozen, chopped spinach (thawed, drained, and squeezed dry)
1/4 cup low-fat sour cream
2 Tbsp. minced onion
1 cup evaporated skim milk
1/4 tsp. salt
1/8 tsp. pepper
2 large egg whites
1 large egg
5-6 slices turkey bacon, cooked and chopped into pieces
1/4 cup (1 ounce) reduced-fat Mexican blend cheese, shredded

Directions
1. Heat a medium nonstick skillet over medium heat. Add the olive oil, then the onions. Cook for about 10 minutes, stirring occasionally. Add the sugar, then continue to cook for another 15-20 minutes, stirring every 5 minutes. Once the onions have browned and caramelized to your liking, remove from the heat and set aside to cool.

2. Preheat the oven to 350 degrees F. In a 9-inch pie plate, unroll your refrigerated pie crust and flute the edges, if desired. Set aside.

3. In a small bowl, combine the spinach, sour cream, and minced onion. In a medium bowl, combine the evaporated milk, salt, pepper, egg whites, and egg; stir well with a whisk. Stir 1/3 cup milk mixture into spinach mixture. Spoon the spinach mixture into the bottom of the prepared crust. Add the caramelized onions, and top with the bacon and cheese. Pour the remaining milk mixture over the top.

4. Place the pie plate on a baking sheet, and bake for about 15 minutes, or until the mixture looks set enough to remove the baking sheet (otherwise the mixture may leak out into your oven). Take the baking sheet out of the oven, but leave the pie plate in. Bake for another 30-35 minutes or until a toothpick inserted into the center comes out clean. Let quiche stand 10 minutes before serving.

Thursday, September 23, 2010

CEIMB: Energy Bars


This week's Craving Ellie in My Belly recipe was very exciting for me; I'd been wanting to try these bars for a long time. These Energy Bars, selected by Liz of My Table, Their Table from Ellie's The Food You Crave book, are a tasty, healthy way to get a granola bar fix.


I am definitely no stranger to the fun of making homemade granola bars. I do it quite often; in fact, I always have a bag of them individually wrapped in my freezer, ready to be taken out in the morning whenever I need one. And it just so happened that I was beginning to run low when this fabulous Ellie recipe came up in the rotation! So, I eagerly embarked on the preparation for these bars.


I never knew you could prep all the ingredients by simply throwing them all in the food processor! Seriously, I thought this was genius. It could not possibly have been easier! No chopping of nuts and dried fruits, and no big chunks of anything in the finished bars. Everything is tiny and uniform in these bars, and the flavors all come together and meld wonderfully.


Now, normally I am the only one in my household who takes advantage of the full stock of granola bars I keep in the freezer. However, that all changed with these bars. My 22 month-old son is addicted to these things! He scarfs down half of a bar, then shoves the other half into his mouth all at once, so eager is he to get to all of that goodness. I'm so happy to be able to share my granola bar love with him. My husband thinks they're awesome, too, so I have to make sure I keep my eye on the rest of this batch!


I do have a confession to make, though. I didn't stick exactly to Ellie's recipe. Based on my own preferences and what I had on hand when I made them, the add-ins changed a bit. I used golden raisins, dried cranberries in place of dried apricots, pumpin seeds in place of sunflower seeds, and then I threw in a bit of dark chocolate and a touch of butterscotch chips. I know, I know, that made them slightly less healthy than they were intended to be, but my, were they scrumptious!


If I had any complaints about this recipe at all, it would be that the bars are way too small to be satisfying. That was our opinion, anyway. I cut 18 bars instead of the 24 Ellie called for, and I still found them to be super tiny. Still, if that's the worst thing I can say about this recipe, then I'd say this was a great success!


Many thanks to Liz for the superb pick this week. If you'd like to view the original recipe, it's here. And if you'd like to check the CEIMB blogroll, it's here.

Tuesday, September 21, 2010

Spicy Oatmeal Crisps (with Hershey's Kisses "Frosting")


The urge to do some baking that was somewhat fall-themed hit me big time recently. Among other things, I wanted to make some oatmeal cookies that had nice, warm, fall-ish spices in them. I had found an intriguing recipe some time ago in Cooking Light magazine that called for freshly ground black pepper as one of the ingredients.


Meanwhile, I had gone shopping at Target while I was brainstorming cookie ideas. There, I found some awesome Hershey's Kisses in a couple different fall flavors. Since I have a weakness for Hershey's Kisses, particularly the ones in unique flavors, I picked up a couple bags. After I got them home, though, I decided that I didn't really want all that candy just lying around the house. I needed to be able to do something with them that would use up a whole lot at once.


Suddenly, inspiration struck! I could make the oatmeal cookies, and then place a Kiss in the center of each, just like those yummy peanut butter cookies that you see a lot around the holidays. I was excited to see if it would work.

Well, it didn't turn out exactly as I had dreamed. Turns out that because the Kisses (in Pumpkin Spice and Caramel Apple flavors) were filled with a creamy center, they did not really hold up well to being placed on a freshly-baked cookie. I had taken plenty of pictures of the Kisses melting on top of the cookies, but....well, they actually looked a little bit offensive! These oatmeal cookies spread out a lot while they are baking, so just one Kiss on top of each cookie looked silly, considering how wide the cookies are. However, when I started putting two Kisses on top of each cookie, it just looked even funnier. Plus, they were melting into two little puddles and just generally not obeying my wishes at all! Sigh.


But then, I had a fantastic idea. If the Kisses were going to have a mind of their own, well, then I was just going to have to work with it. So I turned the Kisses into frosting! I just took out a little spatula and started spreading out the Kisses while they were still warm and gooey. The goo easily covered the surface of each cookie, and after a while the Kiss "frosting" hardened up enough that the cookies could be stacked on top of one another. Despite their shiny appearance, the finished cookies I photographed are completely dry.

As for the taste? Well, if I do say so myself, I came up with a pretty inspired pairing! The warm spices in the cookies were just a great foil for all the sweetness of the Kisses. Plus, the pumpkin and apple flavors of the candy were a perfect match for the cinnamon, and the cloves, and the allspice, and even the pepper! The cookies were fabulous on their own, as well. Just spicy enough to be interesting without being distracting. Plus, they're from Cooking Light! Bonus.


Spicy Oatmeal Crisps (with Hershey's Kisses "Frosting")
adapted from Cooking Light
makes 24-30 cookies


Ingredients
3/4 cup all-purpose flour
1 tsp. ground cinnamon
1/2 tsp. baking soda
1/2 tsp. ground allspice
1/2 tsp. grated whole nutmeg
1/4 tsp. salt
1/4 tsp. ground cloves
1/4 tsp. freshly ground black pepper (optional, but it makes such a difference)
1 cup packed brown sugar
4 Tbsp. unsalted butter, softened (the original recipe called for 5 Tbsp.)
1 tsp. vanilla extract
1 large egg
1/2 cup regular oats (I used quick oats)
24-30 Hershey's Kisses, any flavor (Pumpkin Spice and Caramel Apple work very well)


Directions
1. Preheat oven to 350 degrees F. Lightly spoon flour into dry measuring cups; level with a knife. Combine flour and next 7 ingredients (flour through pepper) in a medium bowl.

2. Beat butter, sugar, and vanilla in a large bowl with a mixer on medium speed until light and fluffy. Add egg; beat well. Stir in flour mixture and oats.

3. Drop by level tablespoons two inches apart on a baking sheet lined with parchment paper. Bake at 350 for 12 minutes, or until crisp (they will spread out a lot). Cool on pan 2-3 minutes, or until firm. Remove cookies from pan to a wire rack.

4. While the cookies are still warm, place two Hershey's Kisses on top of each. Allow them to melt and soften for about 5 minutes, then spread the Kisses all over the surface of the cookie. Allow cookies to cool completely, and for the Kisses to dry and harden. Store cookies at room temperature.

Sunday, September 19, 2010

Chicken and Cheese Enchiladas


Here's a great, easy recipe that can either be made in advance (even frozen ahead of time), or made and eaten all in the same day. It can be done in stages, or prepared all at once. It's very versatile like that! The recipe itself can be modified and altered to your tastes, as well. I've made this dish with various fillings, and even with different cheeses or sauces on top. There are plenty of possibilities with this.


Funny thing, but I had never eaten an enchilada until about two years ago. To this day, I've only ever eaten enchiladas that I've made myself. I'm not sure why that is, exactly. It probably has something to do with the fact that I like to have complete control over what goes into my enchiladas. Now that I make them every few months or so, I like to experiment with different variations on the same basic recipe.


These Chicken and Cheese Enchiladas were hands down the biggest success I've had with making these, at least so far. They were such an awesome combination of creamy, hearty, cheesy, and spicy. It was comfort food, Mexican style! I prepared a very basic filling of shredded, cooked chicken mixed with some reduced-fat cream cheese, cumin, a bit of enchilada sauce, shredded cheese, onions, and garlic. This yumminess was rolled inside flour tortillas, and then the whole deal was smothered in more shredded cheese and enchilada sauce.


After you've assembled the tortillas with their filling all nestled inside, they can be flash frozen and then stored in the freezer until you're ready to bake them. They thaw easily in the fridge the morning of the day you plan on baking them. Otherwise, these can just be put in the oven right away. They bake up fairly quickly, and the recipe makes enough to feed 3 or 4 people easily (or more if you serve it with a couple of side dishes). This meal is also great when you add things like cooked veggies or black beans to the filling. It makes it more of a one-dish dinner. No matter what you do with them, they're delicious and simple. I highly recommend them!


Chicken and Cheese Enchiladas
adapted from several sources
serves 3-4


Ingredients
1 lb. cooked boneless, skinless chicken breast, shredded
1 medium onion, chopped
3 cloves garlic, minced
1 tsp. cumin
2 (10-oz.) cans enchilada sauce, any kind, divided
4 oz. reduced-fat cream cheese, cubed
1 cup reduced-fat sharp cheddar or Mexican cheese, shredded (4 oz.)
6-8 (6-inch) flour tortillas
Nonstick cooking spray
sour cream, for garnish
salsa, for garnish


Directions
1. Coat a large nonstick skillet with cooking spray, and cook the onions on medium heat until soft, about 5 minutes. Stir in garlic and cook for one more minute.

2. Meanwhile, in a medium bowl, mix together the chicken, cumin, 1/4 cup of the shredded cheese, and about 1-2 to 3-4 cup of the enchilada sauce. Add this to the onion mixture on low heat, just to warm through. Throw in the cubed cream cheese pieces and stir until melted. Turn off the heat.

3. Preheat oven to 350 degrees F. Spray a 9x13-inch baking dish with cooking spray, then add a very thin layer of enchilada sauce, to just coat the bottom.

4. Warm the tortillas, using either one of two methods. 1) Place them on a plate in the microwave and warm for about 20-30 seconds. 2) Heat a dry, nonstick skillet on medium heat and add each tortilla one at a time, heating just until warm on both sides. (This method may blister them slightly, which of course is just tasty!)

5. Spoon about 1/3-cup filling onto each tortilla and roll up. Making sure the seam side is down, place each rolled tortilla into the prepared baking dish. Finish the dish by drizzling the remaining enchilada sauce all over the tortillas, and sprinkle the remaining shredded cheese all over as well.

6. These can either be refrigerated/frozen at this point to be cooked later, or placed in the preheated oven for about 15-20 minutes, until nice and bubbly and gooey.

7. If you assemble this and have it in the fridge ahead of time, remove it from the refrigerator at least an hour before baking to allow it to come to room temperature. I did this, and I covered mine in foil before baking for 20 minutes. Then, I removed the foil and baked for another 15 minutes, until the cheese was completely melted.

8. Serve enchiladas with a nice green salad. Pass sour cream and salsa at the table to garnish.

Thursday, September 16, 2010

CEIMB: Whole-Wheat Waffles with Strawberry Sauce


This week's Craving Ellie in My Belly recipe was supposed to be Whole-Wheat Pancakes with Strawberry Sauce, chosen by Melissa of It's Melissa's Kitchen. However, since I've already made (and loved) these pancakes before, I thought it would be fun to transform the recipe into waffles this time! I wasn't sure it would work, but I assumed that the pancake batter would turn out equally as well in a waffle maker as it would on a stovetop griddle.


Guess what? The waffles were as good as the pancakes, if not better! In my opinion, they rank right up there with some of the best waffles we've ever made at home. I followed the recipe exactly, but I did throw in the zest of one small lemon. What a difference it made! The fragrant lemon zest could be detected both in the smell of the waffles cooking and in the tender, fluffy finished product. It worked great with the tart strawberry sauce as well.

Speaking of that sauce. In my version, I wanted no strawberry seeds, so I ran my strawberry puree through a fine mesh sieve before setting it on the stovetop to warm. It was just perfect. With the generous dusting of confectioners' sugar that we sprinkled on our waffles, there were great contrasts of flavor in this dish. We just loved it.


So it was yet another Ellie winner for us! Of course, I knew waffles would most likely be a hit here, but the fact that these were completely delicious, yet deceptively healthy, was just icing on the cake. Or waffle?

You can find Ellie's pancake recipe here. And be sure to check out the CEIMB blogroll to see the other members' versions.

Wednesday, September 15, 2010

MSC: Cookies and Cream Cheesecakes


This month's Martha Stewart's Cupcakes Club recipe is Cookies and Cream Cheesecakes, chosen by Nina of Nina's Cupcakes. This was the second time I've made these mini cheesecakes. I made them back in January for my father in-law's birthday (and you can find the full recipe in my post about them), and they went over very well. So when I realized I had an opportunity to make them again with the group, I was pretty excited. However, I decided to switch things up a bit, and use inside-out Oreos! The cookies I chose to use were vanilla cookies on the outside, chocolate filling on the inside. Yum.


One cookie is placed in the bottom of each cupcake liner, serving as the tasty crust to the mini cheesecake. Then, a very simple filling is mixed together and dispersed among the cupcake cups.


There's even more cookie goodness contained inside the cupcake batter, which really adds some great texture to the creamy cheesecake. These were loved by everyone who tried them (my husband brought them to work with him). It's always fun to surprise people with the Oreo cookie crust, and the fact that they had the chocolate in the center certainly didn't hurt, either!


Thank you so much, Nina, for choosing these cupcakes this month! It was great to revisit such a fantastic recipe. I'm even thinking about how good these would be with peanut butter-filled Oreos, or mint-filled Oreos at Christmastime. You've got options with this one. No matter what flavor Oreo you use, these are awesome! Make sure to check out the blogroll to see how the other MSC members fared.


Monday, September 13, 2010

Fennel, Onion, and Pepper Pizza


I came up with the idea for this pizza one day when I was trying to decide on a meatless dinner. I like the idea of doing Meatless Mondays, which is a non-profit initiative with a goal of reducing meat consumption by 15%. We do go meatless at least once a week already, I believe, so it definitely would not be difficult to manage. I haven't officially signed up to be a part of the Meatless Mondays movement, but as of right now I'm giving it a trial run on my own! This is my first blog post about my efforts.


I had some very attractive red onions and sweet green peppers on hand, and when I ran by the grocery store, I saw that fennel was only 99 cents a pound. Score! The idea for this pizza was born then. I went home and got to work. I sauteed the veggies together in a skillet until they were all soft and sweet. Meanwhile, I had set up a basic whole-wheat pizza dough to form in the bread machine. When that was ready, I spread it out to fill a round pizza pan. The next step, I admit, is a strange one, but bear with me here!


I was trying to make this a bit lower in fat, so I decided to try spreading some soft cheese all over the crust of the pizza. I had a bunch of Laughing Cow spreadable cheese that I had been wanting to use up. It's only 2 grams of fat per wedge, but I have found that if I just spread it on crackers or something, it tastes a bit synthetic and fake. I thought perhaps I could mask this by throwing a bunch of delicious vegetables on top of it! I used about 2 wedges to spread on the crust, and then I diced another wedge to scatter across the top.

Crazily enough, this actually worked! I thought the cheese was creamy, tasty, and blended well with the other flavors on the pizza. I had used the French Onion variety of the cheese, but I'm sure any of the other flavors would work just fine.


Fennel, Onion, and Pepper Pizza

recipe by Bri

serves 3-4


Ingredients

1 whole-wheat pizza dough

1 small bulb fennel, sliced thinly (discard the green tops, but reserve some of the fronds)

1 red onion, sliced thinly

1-2 sweet green peppers, sliced thinly

2 cloves garlic, minced

Salt and pepper, to taste

Nonstick cooking spray

Cornmeal, for dusting

3-4 wedges Laughing Cow spreadable cheese, any variety


Directions

1. Preheat oven to 400 degrees F. Heat a large skillet to medium heat. Spray with nonstick cooking spray and add the fennel, onion, and green pepper. Saute for about 5 minutes, stirring occasionally. Add salt and pepper as desired, as well as the garlic. Cook for an additional 3 or 4 minutes, until the veggies are softened. Turn the heat off and set the skillet aside.

2. Dust a foil-lined pizza pan with cornmeal, then stretch the pizza dough into a circular shape, to fit the pan. Spread 2 or 3 wedges of the cheese across the surface of the crust, leaving a 1/2-inch border around the edge. Scatter your veggies evenly around the pizza, and then add an additional wedge or so of the cheese, cut into small pieces, across the pizza.

3. Bake the pizza in the oven for about 15 minutes or so, until the pizza dough is cooked through and the cheese has become slightly browned on top. Cut into wedges and serve.

Friday, September 10, 2010

Mini Madeleines


You know you go to Starbucks way too often when your sons become cookie snobs. In other words, my boys are being brought up on Starbucks' delectable French madeleine cookies, these tender, cakey little beauties. Many times when I drag them in to get my morning coffee (or my afternoon coffee, or even my evening coffee...), they request a package of these cookies. Now, I've long been a fan of the madeleine, having started my Starbucks career back in 2000 and trying them shortly thereafter. I've been hooked ever since. They're fluffy, yet dense. Light, yet buttery. Pretty, yet not too pretty to eat! And now my kids are addicted, too.


When I was pregnant with my first son, I was not the cook in our household. My husband did pretty much all the cooking back then, and he did a bit of baking, as well. For Christmas that year, I had bought him a mini madeleine pan from Williams Sonoma, a nice fancy one. Maybe I was actually buying it for myself, since I knew he'd be baking me some yummy cookies! But either way, we were glad to have our own pan for creating madeleines.


Now that my sons are hooked on them, too, I get requests to make them every now and again. Nothing beats the homemade version of these cookies. However, they are a bit fussy, what with me only having the one little pan. I have to bake a batch, then let the pan cool, then re-grease and flour the pan to bake the next batch, and so on. Furthermore, these cookies need to be eaten the same day they are made. And although they are completely addictive and very easy to continuously pop into your mouth like pieces of popcorn, I don't always need that on my waistline! We've tried refrigerating them and eating them the next day, but it's really not the same.


In the past I've used a Martha Stewart recipe for madeleines, but this time I decided to try a Dorie Greenspan version. Hers had a bit of brown sugar and honey added in, so I was intrigued. Man, these did not disappoint. At all. Sure, I overfilled my little madeleine molds and caused my cookies to have some cute fringe around the edges, but so what? It hardly affected the taste. It gave them personality, I think! And this time I just kept the bowl of batter in the fridge and made my family a small batch at a time over the course of 2 days. It's perfect that you can chill the batter and keep it on hand. Now we don't have to worry about eating 3 dozen cookies in one day. Not that it's stopped us before...


Mini Madeleines
from Dorie Greenspan
makes 36 cookies

Ingredients
2/3 cup all-purpose flour
1 tsp. baking powder
Pinch of salt
2 large eggs, at room temperature
6 Tbsp. sugar
1 Tbsp. light brown sugar, packed
1/8 tsp. pure vanilla extract
Grated zest of 1/2 lemon
3/4 stick (6 Tbsp.) unsalted butter, melted and cooled
1 tsp. honey
Confectioners' sugar, for dusting (optional)


Directions
1. Whisk together the flour, baking powder, and salt.

2. In a medium bowl, whisk together the eggs and sugars until smooth. Gently whisk in the melted butter and, finally, the honey. You'll have a thick, smooth, shiny batter. Press a piece of plastic wrap against the surface of the batter and refrigerate for at least 30 minutes, up to 2 days.

3. Center a rack in the oven and preheat to 425 degrees F. Generously butter mini madeleine pan(s), dust the insides with flour, and tap out the excess. Or, if you have a nonstick pan, just spray the interior with vegetable cooking spray. Silicone pans can be used just as they are. Put the pan(s) on a baking sheet.

4. Fill each little madeleine mold with about a teaspoon of batter; the molds should be about three-quarters full. Don't worry about leveling the batter - it will do it by itself in the oven.

5. Bake the cookies for 8 to 10 minutes, or until they are puffed and golden brown around the edges. Remove the sheet from the oven and give the madeleine pan(s) a hearty rap against the counter. Gently pry out any cakes that don't want to leave their nests with your fingers or a butter knife. You can serve the madeleines immediately or put them on a rack to cool.

6. Repeat the process with any remaining batter, making certain to cool and rebutter and flour or respray the pan(s). Just before serving, dust the madeleines with confectioners' sugar if desired.

Thursday, September 9, 2010

CEIMB: Baked Falafel Sandwiches


This week's Craving Ellie in My Belly recipe was an incredibly welcome surprise. I say that because I tried something totally new, and I really loved it! These Baked Falafel Sandwiches, chosen by Elina of Healthy and Sane, really epitomized what being in this blogging group means to me. It's all about stepping away from making my tried and true favorite foods, and attempting to prepare things I've never made before. The bonus here is that I found something I've truly been missing out on all my life.


Seriously, how have I never tried falafel before? This stuff is yummy! Not only that, it's way easier to prepare than I expected it to be. A can of chickpeas is drained and rinsed, then added to a food processor. Next, in goes some cumin, some coriander, onion, garlic, salt, cilantro, parsley, and some olive oil. Whir it all up briefly, and there you have it! A nice, easily malleable mixture that you can shape into little falafel balls. They bake up in about 35-40 minutes, and then they're ready to be pita-fied!


So you stuff four of these little balls into one pita bread, and then you can add your other sandwich ingredients. There's the lettuce and the cucumber, and then there's tomato, which I did not have on hand. Personally, I felt like this was fine without them. Finally, you make a simple sauce of tahini (sesame paste), lemon juice, and a bit of water to thin it out to the right consistency. I was a bit stingy with the sauce on my falafel (I don't know, I just didn't want mine too saucy), but my husband loooved the tahini sauce! He couldn't stop dunking his sandwich into the sauce, which he had both inside the pita and in a dish on the side.


I was so excited to find something new that we loved so much. I think in the past I shied away from falafel because it is made from chickpeas, and I was always wary of chickpeas. Now I know that I have nothing to fear! This was an extremely tasty and satisfying meal, and it went great with a simple side of orzo tossed with pine nuts, coriander, and a bit of olive oil and balsamic vinegar. Very delicious.

Thank you so very much, Elina, for this week's pick. This recipe cannot be found in Ellie's cookbooks, so I don't know if I ever would have found, let alone made, this if you hadn't chosen it. The full recipe can be found on Food Network's website, here.

Tuesday, September 7, 2010

Snickerdoodle Blondies


Cinnamon is a popular flavor here at my house. In fact, I now keep a sealed container of cinnamon sugar right on top of my toaster oven, so often does my oldest son ask for cinnamon toast at breakfast. Considering the cinnamon love around these parts, you would think I make snickerdoodle cookies pretty frequently, but I only make them around the holidays. However, now that I've made these decadent Snickerdoodle Blondies, I'll be looking at different incarnations of the mighty snickerdoodle to make in the future. Turns out cinnamon sugar's pretty much good on everything!


The greatest thing about making blondies is the ease of preparation. They're kind of like a brownie's lighter-hued cousin, or something. In the case of these particular blondies, you most likely already have the ingredients on hand. The usual suspects are here: flour, brown sugar, butter, eggs, vanilla. You basically throw together a cookie dough for these, then press the dough down into a 9x13-inch pan instead of shaping cookies. A very healthy sprinkling of cinnamon sugar goes down over the top. Then the pan visits the oven for about 25-30 minutes.


These are utterly addictive. They are dense, sweet, and wonderfully cinnamon-y. In fact, I'd venture to say that they'd be even more dynamite if they had cinnamon in the dough itself, rather than just on top. Hmm, maybe next time. But as far as this batch is concerned, I thought they were pretty stellar. The kids and the hubby agreed. I made these on a Friday afternoon, and they were polished off by the end of the weekend. That normally doesn't happen around here! I'd make these again in a heartbeat, and I can only imagine what kinds of add-ins I could play around with next time to make these even tastier. They are the perfect thing to make when you need to take a quick, easy dessert to a potluck or something. Or, you could just make them for your family to plow through over a lazy weekend!


Snickerdoodle Blondies

from Dozen Flours

makes 20-24 bars, depending on the size of your bars


Ingredients

2 2/3 cups all-purpose flour

2 tsp. baking powder

1 tsp. kosher salt

2 cups packed brown sugar

1 cup butter, at room temperature

2 eggs, at room temperature

1 Tbsp. vanilla extract

2 Tbsp. white sugar

2 tsp. cinnamon


Directions

1. Preheat oven to 350 degrees F. Lightly grease a 9x13 pan (I lined my pan with foil). Sift together flour, baking powder, and salt and set aside. In large bowl, beat together butter, sugar, egg, and vanilla until smooth.

2. Stir in the flour mixture until well-blended. Spread evenly in prepared pan (mixture will be somewhat cookie batter-ish). Combine white sugar and cinnamon in a small bowl. Evenly sprinkle cinnamon sugar mixture over the top of the batter.

3. Bake 25-30 minutes or until surface springs back when gently pressed. Cool slightly. While still warm, cut into bars with a sharp knife.