
Okay, first of all, I should apologize for the lighting in these photos. Boy, it really makes everything look unnaturally bright and washed out. These pictures were taken late at night before my son's 5th birthday, and I found that the cake looked even worse in the morning light the next day. Go figure! So I'm presenting you with the lesser of two evils.
This cake was the capper on a week of Scooby-Doo treats that I had prepared for his special day. There were the cookies, then there were the cupcakes. He wanted everything to be Scooby-themed; even most of his gifts this year were Scooby-related. This cake was the piece de resistance, the crowning touch to end the festivities.

We were fortunate enough to find this cake pan at a Michael's store about 5 months ago. I made Xander promise me that he would not change his mind about wanting a Scooby-themed birthday party this year, and he kept his word. Hard to believe, but he is still just as much in love with Scooby now as he was 5 months ago! Anyway, we grabbed the cake pan that day at Michael's because they don't usually carry it, and it was on clearance. I've never seen another one since, so I'm glad to have found it.

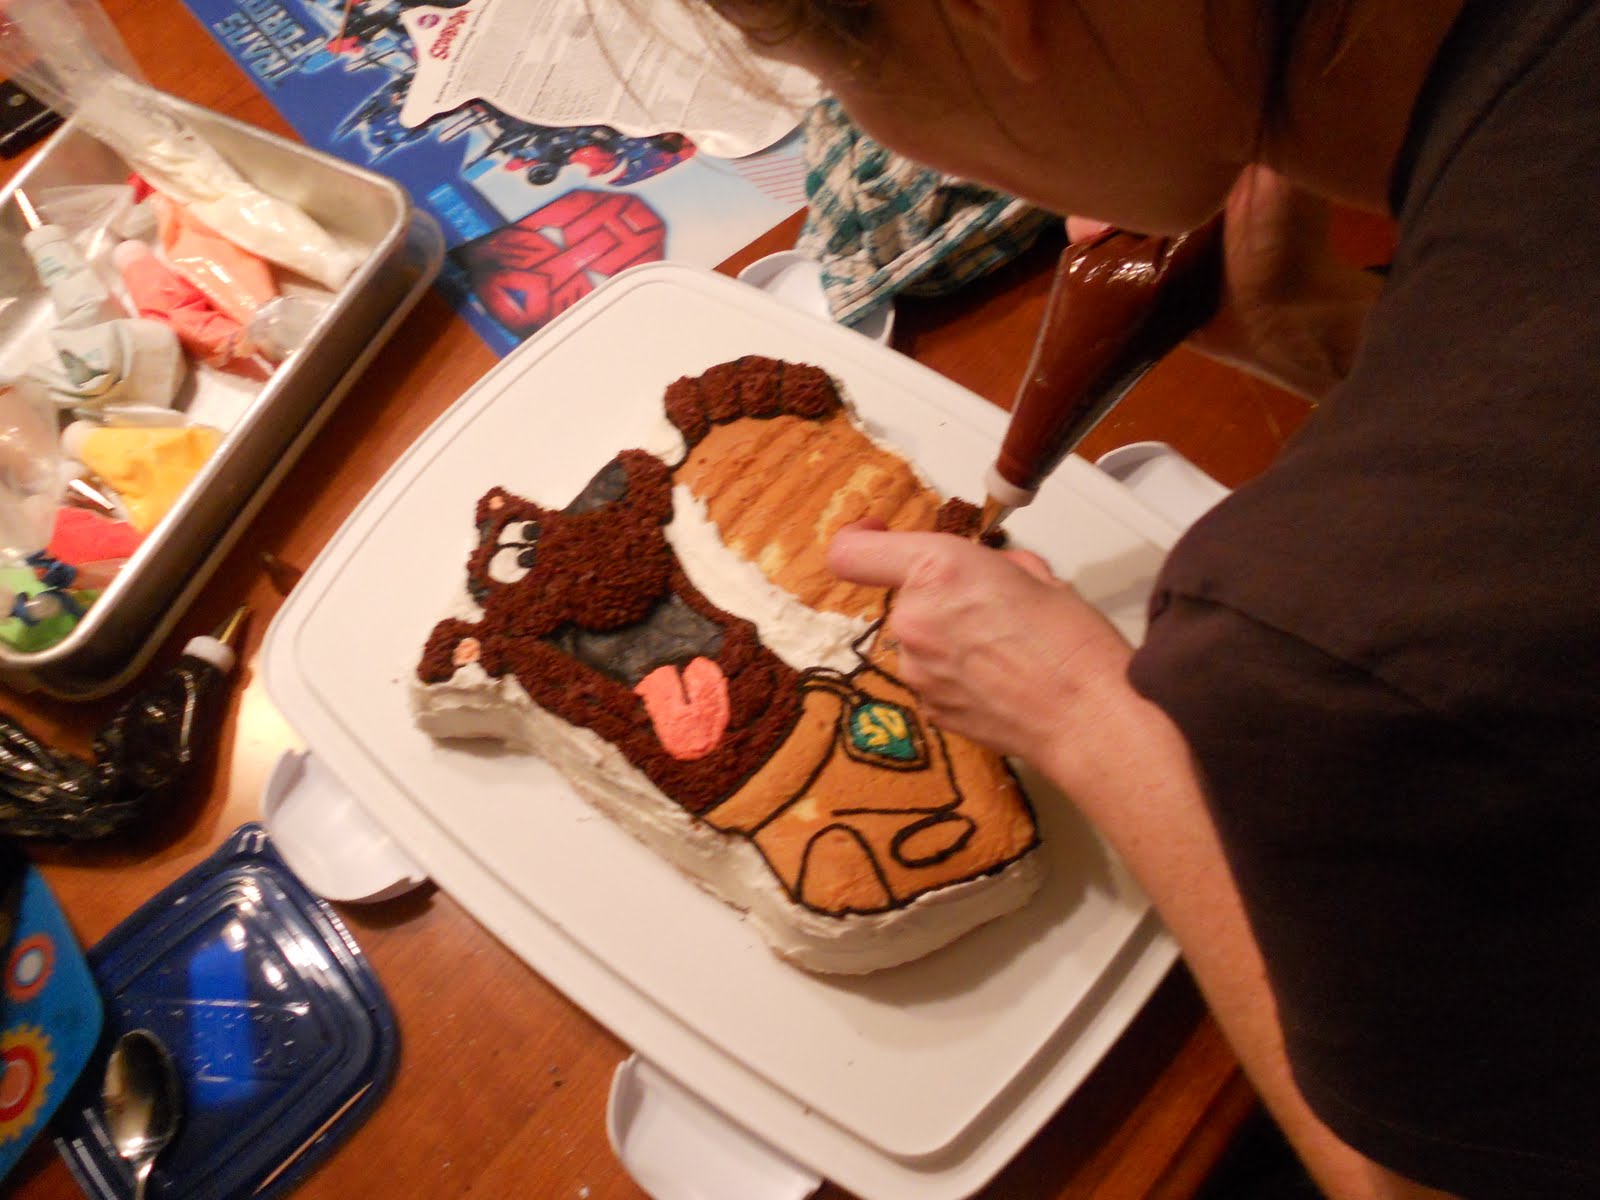
This was hard, intricate work, let me tell ya. I've done a pirate ship-shaped cake before, so I was familiar with this style of decorating. This was much more difficult, though. It required you to first frost the sides and background sections with plain white frosting. Then, you had to trace Scooby's entire outline in black frosting. Andy helped me do Scooby's nose and mouth, while I worked on his tongue and eyes. Next, you could fill in the brown fur sections and his dog tag and collar. Finally, I did Scooby's hamburger, and then I outlined the entire cake with a bunch of orange stars (Xander's favorite color is orange, and I thought it went just fine with the rest of the cake).

I used a new cake recipe for this one, and I was really happy with it. It comes from a cookbook I've come to really enjoy lately, The Craft of Baking. It's for a basic yellow layer cake with a milk chocolate buttercream, but obviously I went in a different direction with my frosting. This cake almost reminds me of sponge cake; by folding egg whites into the batter before baking, you produce a light, airy cake that holds together incredibly well, and is tender and moist at the same time. Best of all, it is not too sweet, so the buttercream I used paired well with the cake.
In case you're wondering about the frosting, it's actually the Wilton recipe for buttercream. It's sinful, I know, because it contains some shortening. I justified this by reasoning that since I was using up all the Crisco I had in the house (which I had bought when I took Wilton's cake decorating classes), and because it was a special occasion, it'd be okay. And it does work very well for this type of decorating project. To make the brown for Scooby's fur (I think I made it a bit too dark) and the black for his outline, I added some cocoa powder to some of the frosting, then added a bit of water to thin it out. Then I just tinted the rest of my white frosting with various shades of gel-paste food coloring.
I'm including the recipes for the yellow cake and the Wilton frosting below. I would love to try this cake next time with the frosting in the cookbook, though. I have no doubt it would be sublime. Until then, here you go!
Yellow Layer Cake
from The Craft of Baking
makes one 10-inch layer cake (or one Scooby-Doo cake plus about 4 cupcakes!)
Ingredients
2 Tbsp. unbleached all-purpose flour
12 Tbsp. (1 1/2 sticks) unsalted butter, very soft, plus extra for the pans
1 3/4 cups sugar
1 1/2 tsp. pure vanilla extract
7 large egg yolks
3 cups cake flour
1 tsp. kosher salt
3/4 tsp. baking powder
3/4 tsp. baking soda
1 cup plus 2 Tbsp. sour cream
7 large egg whites
Directions
1. Butter the bottoms and sides of three 8-inch cake pans and line the bottoms of the pans with rounds of parchment paper. Butter the tops of the paper liners, and then dust the pans with the all-purpose flour, tapping off any excess. Preheat the oven to 350 degrees F.
2. In the bowl of an electric mixer fitted with the paddle attachment, mix the butter, 1 1/2 cups of the sugar, and vanilla extract on medium speed, scraping down the sides of the bowl several times, until pale and fluffy, 5 minutes. Add the egg yolks, one at a time, letting each become incorporated into the batter before adding the next.
3. In a separate bowl, sift together the cake flour, salt, baking powder, and baking soda. Reduce the mixer speed to low and alternate adding the flour mixture and the sour cream to the butter mixture, adding one third of each at a time and letting them fully mix in before adding the next. When all of the flour mixture and sour cream have been added, turn the mixer to medium-high speed and mix for about 2 minutes, to fully incorporate the ingredients and help build the structure.
4. Scrape the batter into a large mixing bowl. Clean the bowl to the mixer well and, using the whisk attachment, whip the egg whites on low speed until frothy, about 5 minutes. (Instead of doing this, I just used a hand mixer and whipped the egg whites in a smaller bowl, then proceeded with the recipe.) Add the remaining 1/4 cup sugar and increase speed to medium high. Whip whites to soft peaks, then fold them into the batter in 3 additions.
5. Divide the batter between the three prepared cake pans and spread it out evenly with a spatula. Place pans on two baking sheets. Bake the cakes, rotating the pans and switching the cakes between the upper and lower racks of the oven halfway through, until they are lightly golden on top, gently bounce back when touched, and a cake tester inserted in the center of the cake comes out clean, 30 to 35 minutes. (Mine obviously took about 15 to 20 minutes longer, due to the size of the Scooby pan.)
6. Transfer the cake pans to a wire rack and let the cakes cool for 30 minutes. Then remove them from the pans and let them cool completely, at least 3 hours, before frosting.
Buttercream Icing
from Wilton
makes about 3 cups
Ingredients
1/2 cup solid vegetable shortening
1/2 cup (1 stick) butter or margarine, softened
1 tsp. clear vanilla extract
1 Tbsp. meringue powder
4 cups sifted confectioners' sugar (about 1 lb.)
2 Tbsp. milk
3 Tbsp. cocoa powder
1-2 Tbsp. water
Gel-paste food coloring
Directions
1. In large bowl, cream shortening and butter with an electric mixer. Add vanilla, then the meringue powder. Gradually add sugar, one cup at a time, beating well on medium speed. Scrape sides and bottom of bowl often. When all sugar has been mixed in, icing will appear dry. Add milk and beat on medium speed until light and fluffy. Keep bowl covered with a damp cloth until ready to use.
2. For best results, keep icing bowl in refrigerator when not in use. Refrigerated in an airtight container, this icing can be stored 2 weeks. Rewhip before using.
3. For chocolate buttercream, proceed through the confectioners' sugar addition, then add cocoa powder. Add water gradually, a bit at a time, then the milk, until the desired consistency is achieved. Add more or less than the recipe calls for, depending on how thick/thin you'd like your icing to be.


Beautifully decorated Bri!!
ReplyDelete