Thursday, March 31, 2011
CEIMB: Creamed Spinach
This week's Craving Ellie in My Belly recipe is Creamed Spinach, which apparently is in the So Easy book even though I have never noticed it before. This dish was chosen by a good blogging friend of mine, Liz of The Not So Skinny Kitchen. I can honestly say that this was my first time ever trying Creamed Spinach, and I think it's mostly because I'm scared of things that have "creamed" in the title. I dislike creamed corn, I'm not normally a fan of "cream of" soups, and on top of that I try to use as little cream in my savory dishes as possible. But this was Liz; I had to forge on and make this dish for her!
This was ridiculously easy to make, which I loved. Chop up some shallots and briefly cook them in a bit of oil. Thaw a box of frozen spinach, squeeze it out very well. Add a bit of flour to the pan and cook it out, then add some milk and chicken broth and bring to a simmer. Once this has thickened slightly, you add the spinach and simmer it for about 5 minutes. Finally, you add evaporated milk (just a bit, and since I had none on hand I decided to just skip that little step), some nutmeg, salt, and pepper. And you're done!
So, it turns out that I really liked this! I know, what a shocker, right? I went into it almost dreading it, and I ended up enjoying it. I'm not the biggest frozen spinach fan, but if I'm going to eat it, this is the way I'd like to do it. The spinach was just creamy enough, had tons of flavor, and got super bonus points for its ease of preparation. I wouldn't eat spinach this way every day, but I do think it'd be nice for a change of pace every now and then.
Thank you, Liz! I know now that I really would have been missing out on something delicious if I had been too scared to try this. Silly me; I had nothing to fear! For the recipe, head on over to Food Network's website, here. To see the CEIMB blogroll, click here.
Monday, March 28, 2011
Meatless Mondays: Macaroni and Four Cheeses
This Macaroni and Four Cheeses recipe was one of the very first Ellie Krieger dishes to ever catch my eye. I watched her make it on her show several years ago. She takes the classic, delicious, but insanely unhealthy mac and cheese and converts it to something much easier on the waistline. The secret ingredient here is frozen winter squash. Its bright, yellow-orange color is similar to that of Cheddar cheese, and its texture is virtually undetectable in the dish because the squash is pureed before it is frozen. A blend of Cheddar, Monterey Jack, ricotta, and Parmesan cheeses are added to the mix (the Parmesan is actually added to the bread crumb topping, rather than to the rest of the cheeses) to create a dish that is still plenty cheesy, but much, much lower in calories and fat.
Despite my fascination with the dish, the first time I ever saw it I thought, "Well, there's no way I'm ever going to make that!" For one thing, back then I had never tried squash. The idea of blending it into the mac and cheese was just scary. Besides this, the reviews on Food Network's website for this one are very polarized. People seem to feel very strongly about this one; they either really love it or really hate it. So add that fact to my skepticism about it, and I put this one to the back of my mind.
But times, they have changed. These days, I am much more willing to try things than I was a few years ago, or even just a year ago. I've eaten squash, and lived to tell about it. I'm still constantly trying to find ways to healthify dishes that my family enjoys. Mac and cheese ranks among my five year-old's very favorite dishes, so I thought I would try to put one over on him and give this one a shot. I made it even more nutritious by throwing in a couple different veggies, fresh spinach and broccoli, for added heft and bulk. I think this may have been a mistake, at least where my son was concerned. There was no hiding the big, green vegetables from him; they were right out there in the open! So he decided he didn't like this mac and cheese, simply based on appearances. Oh, well. We can't win them all, especially with picky kids.
As for the adults in the house, you can place us in the camp of huge fans of this meal! I only used one box of the frozen squash (Ellie uses two) because I was a bit wary, but I'm sure I could have gotten away with two. I really didn't notice its flavor too much, and as far as lowfat mac and cheese go, this one is pretty generous. You get plenty of cheesiness per serving, as well as the homey, yummy bread crumb topping we all expect from scratch-made mac and cheese. Color me converted!
Macaroni and Four Cheeses
adapted from Foodnetwork.com
makes 8 servings
Ingredients
Cooking spray
1 pound elbow macaroni
1 (12-ounce) box frozen pureed winter squash (Ellie uses 2 boxes, 10 ounces each)
2 cups 2% milk
4 oz. extra-sharp Cheddar cheese, grated (about 1 1/3 cups)
2 oz. Monterey Jack cheese, grated (about 2/3 cup)
1/2 cup part-skim ricotta cheese
1 tsp. kosher salt
1 tsp. powdered mustard
1/8 tsp. cayenne pepper
1-2 cups cooked broccoli florets, cut into bite-size pieces
3-4 cups fresh spinach, wilted
2 Tbsp. grated Parmesan cheese
2 Tbsp. unseasoned bread crumbs
1 tsp. olive oil
Directions
1. Preheat the oven to 375 degrees F. Coat a 9x13-inch baking pan with cooking spray. Bring a large pot of water to a boil. Add the macaroni and cook until tender but firm, about 5 to 8 minutes. Drain and transfer to a large bowl.
2. Meanwhile, place the frozen squash and the milk into a large saucepan and cook over a low heat, stirring occasionally and breaking up the squash with a spoon until defrosted. Turn the heat up to medium and cook until the mixture is almost simmering, stirring occasionally. Remove the pan from the heat and add the Cheddar, Jack cheese, ricotta cheese, salt, mustard, and cayenne pepper.
3. Stir the cooked broccoli and spinach into the pasta, then pour the cheese mixture over the pasta and vegetables. Stir to combine, then transfer the mixture to the prepared baking dish.
4. Combine the Parmesan, bread crumbs, and oil in a small bowl. Sprinkle the mixture over the top of the macaroni and cheese. Bake for 20 minutes. Switch the oven to the broil setting and broil the macaroni and cheese for 3 minutes, until the top is crisp and nicely browned.
Labels:
broccoli,
cheese,
Ellie Krieger,
Meatless Mondays,
pasta,
spinach,
squash
Sunday, March 27, 2011
Baked Sunday Mornings: Malted Crisp Tart
This week's assignment for Baked Sunday Mornings was the Malted Crisp Tart, and marked my first-ever time making a tart. I just received a tart pan for Christmas this past year, and just have not had an opportunity to use it until now. I was excited to finally break it in!
I was concerned initially that this tart would not be very well-received, because as soon as my husband heard that this tart was "malted," he was pretty disgusted. He claims to hate anything that contains malt and despises the Whoppers candy that adorns this. However, I was pretty confident that if anybody could turn him around on the whole malt issue, it would be the guys of Baked.
Although there are many steps involved in making this tart, it is actually very easy to put together. The malted brown sugar crust is whipped up quickly in the food processor, then baked until golden brown. The malted milk chocolate ganache is then poured into the cooled crust, topped with caramelized crisped rice cereal and crushed malted milk balls, and left in the fridge to set. The malted diplomat cream (another first for me) is made while the tart chills, and was much easier to make than I thought it would be. It was also easily my favorite part of the dessert.
The diplomat cream is comprised of a pastry cream (seen above) that is pushed through a fine-mesh sieve and placed in the refrigerator to chill for at least an hour. Then, you whip some heavy cream to soft peaks and fold that into the chilled pastry cream. The resulting cream is thick but light, and definitely delicious enough to just eat straight with a spoon. Not that I did that or anything.
Finally, the tart comes together. The diplomat cream goes over the chilled ganache/rice cereal/crushed malt ball layer, and then more crisped rice is sprinkled on top. Whole malt balls are arranged, fancy-like, around the tart, and there you have it. One of the more elaborate desserts I've made to date, but completely worth every step. Everyone who tried this loved it....and that includes my malt-hating hubby! Yep, he ate a few slices, and actually raved about the tart. So, smugly, I pointed out that the Baked guys can, indeed, make the impossible happen.
So, it was another great recipe from Baked Explorations! Please make your way over to the Baked Sunday Mornings blog to check out all the other wonderful tarts the other members made!
Thursday, March 24, 2011
CEIMB: Blueberry Coffee Cake
It was my turn to pick the recipe for Craving Ellie in My Belly again this week, and I was craving something sweet! I have been recording old episodes of Ellie's cooking show, which now air on Cooking Channel, and recently saw an episode where she made this Blueberry Coffee Cake. As soon as I saw it, I knew that it would be my next choice for the group.
It's a lower-fat variation on an old classic: moist, lightly sweetened coffee cake, with a middle layer of fresh blueberries, cinnamon, sugar, and walnuts. The cake batter is topped with more streusel, and then baked until nice and golden brown.
Since I will look for just about any opportunity to use my silly brownie pan (the one that pre-slices the brownies/cake/granola bars for you), I decided to utilize it here. What can I say, I just happen to take my portion control seriously! I like the peace of mind of knowing that each slice of cake is evenly cut; that way, when I calculate the calories and such, I can feel more confident that it'll be the same with each slice. The drawback to using this pan is that I think once the slices are cut, they don't stay as fresh as they would if you just cut slices as you ate through the cake.
That said, I think this cake actually kept very well. I had it in an airtight container for about 5 days, and the cake was still very good on the last day. I preferred eating it warm to room temperature. Microwaving the cake for just about 20 to 30 seconds before eating it really served to wake up the flavors better.
I did love this cake, although you could definitely tell it was healthier than "regular" coffee cake. It lacked the sweetness of other coffee cakes, but that was just fine with me. It just helped you experience the other flavors better. I adore cinnamon, so of course I loved it here. The blueberries really brought a welcome tangy punch to the table, and the walnuts were just perfect. I could see this being a coffee cake that I revisit when I have overnight guests, or even just when the boys and I might be in the mood for something different thrown into our breakfast routine.
Labels:
blueberries,
CEIMB,
cinnamon,
coffee cake,
Ellie Krieger,
nuts
Wednesday, March 23, 2011
Chicken and Shrimp Corn Chowder
I kinda threw this soup together not long ago when I was suddenly struck with a chowder craving. You know, it's funny that I had such a craving. I never really ate chowder growing up, and I haven't even eaten it that much as an adult. But we had recently visited a restaurant in St. Louis that served this amazing chowder, and I was smitten.
Rich and creamy, and loaded with shrimp, chorizo, andouille sausage, and peppers and onions, this chowder was a knockout. I couldn't resist finishing the entire bowl, despite the fact that we had already eaten a couple of courses before this one. I spared myself the embarrassment of licking the bowl when I was done, but I assure you that I would have if I'd been in the privacy of my own home!
So I knew I would not be able to fully recreate this wonderful chowder, but I set out to at least satisfy my urges with something that would be substantially lower in calories and fat, but still yummy. I think I was pretty successful. The chowder I made used a Food.com recipe as its point of reference, but I changed it up here and there. I posted my full recipe below, and I'm pretty happy with it. It hit the spicy notes, thanks to jalapeno and cayenne peppers. It hit the sweet corn notes, with pureed whole kernel corn and frozen corn added to the mix. It was full of textures, it was creamy, and it was very satisfying. It's a much more affordable way to enjoy the chowder, so I'd like to continue to tweak this and work on it some more. After all, sometimes you just have to improvise when faced with cravings for delicious, yet expensive, things!
Chicken and Shrimp Corn Chowder
adapted from Food.com
makes 4 servings
Ingredients
1/2 Tbsp. olive oil
1/2 yellow onion, diced
3-4 stalks celery, diced
2 jalapeno peppers, seeded and diced
2 Tbsp. all-purpose flour
2 cups 2% milk
1 cup low-sodium chicken broth
1 cup cooked, diced boneless, skinless chicken breast (1 small breast half)
1 cup small, cooked shrimp, tails removed and diced (about 1/2 lb. shrimp)
1 cup frozen kernel corn
1/2 tsp. ground thyme
1/2 tsp. ground cumin
1/4 tsp. ground cayenne pepper
1/2 tsp. kosher salt
Freshly ground black pepper, to taste
1 (15-0z.) can whole-kernel corn
1 oz. Canadian bacon, cooked and sliced thinly into strips, for garnish
Radishes, thinly slivered, for garnish
Directions
1. In a Dutch oven, heat the olive oil over medium heat. Add the onion, celery, and jalapeno and cook until soft, about 5-7 minutes.
2. Stir in the flour and cook for 1 minute, stirring constantly. Slowly pour in the milk and chicken broth, and then add the chicken, shrimp, frozen corn, and salt and pepper. With a blender (or immersion blender), puree the can of whole corn, then stir into the soup.
3. Bring the chowder to a boil, reduce the heat, and allow to simmer, from 10-20 minutes. The chowder should thicken somewhat.
4. When ready to serve, ladle the soup into bowls, then top with strips of Canadian bacon and a couple slices of radish.
Monday, March 21, 2011
Meatless Mondays: Thai Bulgur Salad with Almond Dressing
It's been a few weeks since I've been able to do a Meatless Monday, and I have to say that I've missed it. It's not that I haven't been going meatless, at all, though. In fact, when trying to decide which recipe to blog about today, I realized that I had lots of meatless options to choose from!
In the end, though, I really wanted to talk about this Thai Bulgur Salad with Almond Dressing. This was my first time working with bulgur, and my first time eating it, too. It's quick-cooking, cracked wheat that pretty much behaves like barley or rice in a dish. It's surprisingly hearty and loaded with protein and fiber. The kind I purchased also had roasted soy chips, for an extra punch of soy protein. It's pretty tasy, and very versatile. I'm converted!
This salad is made up of a bunch of fresh veggies, the bulgur, and a tasty almond dressing that is sort of reminiscent of a peanut satay sauce. The secret ingredient is almond butter, another one of my new loves. If you like peanut butter, I recommend trying almond butter just for a change. It's got a very rich, almost sweet flavor, despite containing virtually no sugar. It's better for you than peanut butter; rich in antioxidants and monounsaturated fats, it's also good for your heart and can even aid in controlling your weight. You can get it in smooth or chunky, just like peanut butter. It's great on toast and fabulous in this dressing. I'm planning on baking it into some cookies in the near future!
The dressing also contains rice wine vinegar, soy sauce, garlic, ginger, honey, and sesame oil, and it is delicious. It was a truly satisfying meal, despite the fact that it was, well, a salad, and contained no meat. By adding protein in varied and unexpected ways, you really don't miss it. This one's a keeper; give it a try!
Thai Bulgur Salad with Almond Dressing
adapted from a Better Homes and Gardens Special Interest Publication
makes 4 servings
Ingredients
1 cup water
1/2 cup bulgur
2 cups frozen edamame, thawed and shelled
1 cup sweet red bell pepper, cut into julienne strips (about 1 medium pepper)
1/2 cup diced carrot (about 1 medium)
1/2 cup chopped radish (about 7-8 radishes)
1/2 cup thinly sliced, quartered red onion
4 cups packaged fresh spinach leaves
1/4 cup rice wine vinegar
3 Tbsp. natural almond butter
1 Tbsp. honey
1 Tbsp. fresh ginger, minced
1 tsp. low-sodium soy sauce
1 tsp. toasted sesame oil
1 garlic clove, minced
Lime wedges, for garnish (optional)
Directions
1. In a medium saucepan, bring the water to boiling; stir in the uncooked bulgur. Return to boiling; reduce heat. Simmer, covered, 15 minutes or until bulgur is tender and most of the liquid is absorbed. Drain if necessary; transfer to a large bowl.
2. While the bulgur is cooking, make the dressing. In a small bowl, combine the dressing ingredients (rice vinegar through garlic) and whisk thoroughly to combine. Set aside.
3. Add the edamame, bell pepper, carrot, radish, and red onion to the bulgur. Divide the spinach leaves among four shallow bowls. Top with bulgur mixture; drizzle with the almond dressing. If desired, garnish with lime wedges.
Labels:
almond butter,
bell peppers,
edamame,
Meatless Mondays,
salad,
spinach
Sunday, March 20, 2011
Irish Potato Leek Soup with Soda Bread
So I bought a 10-pound bag of potatoes last week and then realized that I would actually need to find ways to use them all. I knew that some of them were earmarked for a potato project my kindergartener had to do for school (he was tasked to make a Mr. Potato Head using a real potato. This turned out to be the perfect project for both my kids, as both adore Mr. Potato Head!). But then what was I going to do with the other 9 or so pounds of spuds?
Around the same time that I bought them, I decided I wanted to give Irish cuisine another try. I had made an Irish dinner last year for St. Patrick's Day, and I had a lot of fun making something that represented my heritage, finally! I wanted to make something else this year, so I settled on an Irish Potato Leek Soup.
I made this on a day where it was most covenient for me to pull out the slow cooker and put it to some good use, so that's exactly what I did. After perusing different variations on an Irish Potato Soup, I finally decided to basically tweak them all and make it my own. I added cauliflower to mine, as well as caraway seed. There's just something about caraway; I tend to associate it with Irish food and thought it would work well here. I let the soup simmer away for hours, then I lifted the lid and pureed the whole thing with my immersion blender. Since I knew that the soup would lose tons of heat from removing the lid, I let it cook for another hour or so. Then, I lifted the lid just before we were ready to eat and poured in a cup of milk. I figured it would make the soup even more creamy, and just a tad more indulgent. I did make it on St. Patrick's Day, after all. We could afford just a bit of indulgence!
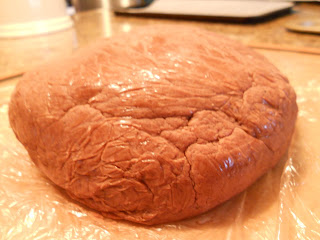
To go with it, I whipped up a very simple, basic Irish Soda Bread. This one's just flour (one part white, 3 parts whole-wheat), baking soda, salt, and caraway seed (my own addition), mixed gently with buttermilk until the dough comes together. The dough is then formed into a rustic, imperfect mound and baked for about 40-45 minutes.
The bread, we thought, was kinda blah. It was dense, but it was great for sopping up the soup. The soup itself was interesting and made for a good late-winter warmer, but I have to say it needed a little something more. I wish I knew what it needed, but it's just an inexplicable sort of lacking. Some salt seemed to help for my husband; I agree that this may have been a culprit. Still, I am glad to venture into Irish cooking again, even if it's just for one day out of the year. Now I feel like I'm good for another year!
Irish Potato Leek Soup
recipe by Bri
makes about 9 cups of soup
Ingredients
3 large baking potatoes (about 2 1/2 to 3 lbs.), coarsely chopped
2 medium leeks, sliced into half-moons and rinsed of all grit
1/2 to 1 small head cauliflower, chopped into small florets
6 cups low-sodium chicken broth
1/2 to 1 Tbsp. caraway seeds
1/2 tsp. kosher salt
Freshly ground black pepper, to taste
1 cup milk (I used 2%)
Optional garnishes: chopped scallions or chives, sour cream, bacon, cheese, etc.
Directions
1. In a slow cooker, combine the potatoes, leeks, and cauliflower. Pour the chicken broth over the vegetables, then add the caraway seeds. Place the lid on the slower cooker and turn it on to low. Let it go for at least 4-5 hours.
2. After about 4-5 hours, remove the lid and puree the soup with an immersion blender. Add salt and the pepper. Pour in the cup of milk, then replace the lid and let the soup warm back up thoroughly before turning the crockpot to warm (or turning it off) and serving.
Irish Soda Bread with Caraway
adapted from Food.com
makes a 1 1/2 lb. loaf
Ingredients
1 cup all-purpose flour
3 cups whole-wheat flour
1 tsp. baking soda
3/4 tsp. kosher salt
1/2 Tbsp. caraway seeds (can use more; I felt like that was not enough)
1 to 1 1/2 cups buttermilk
Directions
1. In a large bowl, combine all ingredients except for the buttermilk. Slowly pour in 1 cup of the buttermilk, mixing the entire time. Add in the other 1/2 cup buttermilk as needed, 1 Tbsp. at a time, until the dough has been gently worked into a ball that holds together.
2. Preheat the oven to 425 degrees F. Turn the dough out onto a baking sheet lined with parchment paper and mound into an 8-inch circle. Using a small knife, slash an X 1/2-inch deep over the top of the loaf.
3. Bake for about 40-45 minutes, until the top is very crusty and browned, and a toothpick inserted into the center comes out clean. Serve warm; hot is even better.
Thursday, March 17, 2011
CEIMB: Savory Chinese Chicken Salad
This week's Craving Ellie in My Belly recipe was Savory Chinese Chicken Salad, hosted by Danica of Danica's Daily. I found that this salad could not have come at a better time. I've been eating out way too much this past week, so a nice, refreshing homemade salad such as this was just what I needed. On the evening I prepared it, putting everything together was a snap, and I think that had something to do with the fact that we had roasted a whole chicken two days prior and I had set some aside specifically for this recipe. It definitely helped to already have the chicken cooked.
The rest of the ingredients for this salad are easy to assemble, too. It's cabbage (I used a whole head of Napa cabbage and skipped the two cabbages in the original recipe), carrots, scallions, a can of sliced water chestnuts, a can of sliced mandarin oranges, and some almonds to garnish. Even though Ellie said to slice the almonds, I decided they would be nice on there whole so I just served it that way.
The dressing is a mash-up of so many of my favorite Asian flavors. There's soy sauce and rice vinegar, ginger and garlic, brown sugar, sesame oil, and sriracha (our new favorite condiment). I actually left the canola oil out of the dressing, and I loved it. I am usually decreasing the oils in my homemade dressings just to make them lower in fat, but here I really liked just having sesame oil in there for the flavor aspect. I only used 1 Tablespoon, and I felt like it was plenty of oil. I do wish I had spinkled some sesame seeds over the finished salad, but overall I loved this. I adore the ease, the lack of cooking required, and it packs a huge punch of flavor for something so healthy and quick. I'm pretty excited that I get to have the leftovers for lunch tomorrow!
Thanks to Danica for the perfect pick this week. I feel silly now for overlooking this Ellie recipe for so long! I think the mandarin oranges were scaring me away, since I don't really eat them. Now I know I have nothing to fear! They almost melted away in the salad, leaving only that great citrus flavor. I'm happy I didn't leave them out like I was tempted to do.
If you'd like this recipe, you can find it on Food Network's website, here. For the CEIMB blogroll, click here.
Labels:
cabbage,
CEIMB,
chicken,
Ellie Krieger,
nuts,
oranges,
salad,
vegetables
Wednesday, March 16, 2011
Absinthe Macarons
In honor of St. Patrick's Day, I wanted to make something green. Call me crazy, but I didn't really care what it was I made. It could have been just about anything, as long as it was bright green and festive-looking. I wanted to show my Irish spirit! And since I have been wanting to give macarons a second go (I attempted them for the first time back in July, with great success), I decided to kill two birds with one stone recently and make green macarons.
My husband is a fan of absinthe, or green fairy. It's a French liqueur, strong in fragrance and potent in its licorice-like flavor, known for supposedly causing hallucinations in people (such as artists) to enhance creativity. I don't care for it at all myself, but the hubby definitely has acquired a taste for it. He made a not-so-subtle request not long ago, telling me he would like me to create a dessert for him that incorporated absinthe as an ingredient. He did a bit of Internet research and found that somebody had made Absinthe Macarons.
The blog post he found about this, on Baker of Brighton, describes absinthe well and gives a bit of history on it. The recipe follows at the end of her post. I think she created the macaron recipe herself, and it's a great recipe. She utilizes ground anise seed in her macaron shells, for the abinsthe flavor (since both absinthe and anise have that distinctive licorice flavor). Then, she uses matcha powder (green tea powder) for the green absinthe color. For the filling, she whips up an absinthe swiss meringue buttercream, tinted green with food coloring.
I was very happy with the way my first tray of macaron shells turned out. I did everything exactly as I had before (with the exception of using pre-ground almond flour I bought from the store, rather than grinding my own almonds like I did last time). I folded my ingredients carefully and got the proper consistency. I allowed my shells to sit, unbaked, for over an hour to help develop their firm exterior. When I removed them from the oven, they looked gorgeous and I was thrilled with them. The problems really began when I baked my second full baking sheet. With those, the baking sheet was much larger and could hold many shells. I piped about 2 dozen macarons onto that sheet. When I went to check on them in the oven, they seemed to be taking a lot longer to bake. I was nervous and did not want to overbake, so I ended up taking them out of the oven too soon.
About 15 minutes later, I attempted to peel them off the parchment, and disaster struck. They wouldn't budge. The bottom part, or belly, of the shell was firmly stuck on the parchment. When I went to remove each one, the top of the shell would crack and basically crumble apart. They were so fragile, so delicate, that there really wasn't anything I could think to do to save them. In the end, I managed to salvage nearly 2 dozen shells total, which allowed me to make a dozen sandwich cookies. Not a total failure, but it left a lot to be desired. Fortunately, we didn't really want a huge batch of these lying around because Andy is the only one who would be eating them.
There's a few things I think I may have done wrong. The first and biggest is overloading the baking sheet. I read somewhere that this can create too much humidity in the oven. It could have been avoided by leaving the oven cracked while they baked, but I didn't know that beforehand. The next problem was that I tried to remove them from the parchment without giving them time to really, fully dry out. Because they were underbaked, it would have been helpful to leave them sitting out, undisturbed, overnight and then attempt to peel them from the parchment the next day. And finally, raising the oven's temperature a few degrees or allowing them to bake a few minutes longer might have salvaged things, too.
Now that I've troubleshooted (or is it troubleshot? I never know) what may have gone wrong, I'm eager to try again. I hope the third time I make macarons is a charm! But at least this time I did manage to put together enough macarons to make Andy happy. He loved them. He couldn't believe how much they really did taste like his favorite liqueur. The absinthe buttercream was pretty amazing, even if I did put a smidge too much green food coloring into it. It's justified, though. You can never have too much green on St. Patty's!
I like to use Tartelette's guide to macarons, which can be found here. The Baker of Brighton's take on Absinthe Macarons can be found here.
Labels:
absinthe,
cookies,
macarons,
nuts,
swiss meringue buttercream
Tuesday, March 15, 2011
MSC: Candied Hazelnut Cupcakes
I'm finally posting another Martha Stewart's Cupcakes Club entry this month! I skipped last month's selection because I had already made the assigned cupcakes and blogged about them in the past. But now I'm back and ready to talk about Candied Hazelnut Cupcakes!
These nutty little gems were chosen by Jeannette of The Whimsical Cupcake. The cupcakes themselves are a tasty mix of flours (all-purpose flour and cake flour), along with finely ground almonds and hazelnuts. This cake recipe also incorporates the use of egg whites whipped to soft peaks and then folded into the batter, which aids in preventing the cupcakes from being dense and heavy. I was excited about these cupcakes, particularly the cake part because I love nuts and had just recently bought almond flour. I couldn't wait to use it in these. The cake turned out wonderfully, with great flavor, texture, and a surprising nuttiness (well, it's only surprising if you're not the baker, I guess, but I still found it pleasant!). They were a snap to make and I prepared them the day before I worked on the candied nut and the frosting.
Everything was going along just swimmingly until I attempted to make the caramel for the candied hazelnuts. I say "attempted" because I never actually succeeded in making my caramel. I'm not quite sure what happened here. I tried making the caramel twice. Both times, the sugar syrup never quite turned the medium amber color indicated in the book. The first batch actually transformed from clear sugar syrup back into solid sugar, right before my very eyes, and hardened and crystallized onto the bottom of my pot and became an impenetrable mass. I had to fill the pot up with water, put it on the stove to boil, and then basically chisel the mass off the pot.
Once that mess was cleared up, I tried again. I was getting a bit frustrated at this point but I just thought I had cooked it too long or something. I watched it very, very carefully the second time, and this time I took the pot from the heat earlier than the previous try. I plunged it into the ice water bath as the directions indicate. About two minutes later, I noticed that the sugar syrup had crystallized again! I tried to start dipping the hazelnuts into it before it got too hard, but within moments the mass had re-formed, and I was out of luck. It was incredibly frustrating, especially because I have made caramel in the past and had success. I'm still not too sure what went wrong. My best guess is that there wasn't enough water in proportion to the sugar. I'm dying to see how everyone else made out with this; maybe it'll give me a clue as to what happened to mine.
What I finally did was I added extra water to my crystallized mass, put it back on the stove, and heated it back up until it was syrupy. Then, I dipped the hazelnuts into the syrup and let them sit for a while. They never hardened up, but at that point I didn't even care anymore. The nuts had a nice, shiny coat on them, and they still looked pretty on top of the cupcakes. They weren't the showstoppers I had hoped they would be, but I can live with that.
The frosting is an Italian meringue buttercream with chocolate. I could have made the dark chocolate frosting Martha suggests to use, but frankly I was a little wary of using that one because of all the butter and chocolate that goes into it. I know someday I will eventually make that frosting, because it sounds amazing. My original plan was to make an IMB and then turn it into caramel IMB by pouring in the leftover caramel. Obviously, my plans were thwarted when the caramel never turned out. It all worked out okay, though. I really enjoy making IMB and was eager to try a chocolate version. It turned out light, like mousse, not too sweet, and just perfect on these cupcakes, I thought.
Head on over to the MSC blogroll to see if the other bakers had better luck with those candied hazelnuts. I'm dying to see everyone's cupcakes! Hopefully nobody had the kinds of problems I did. If anyone's got any suggestions about my kitchen disaster, I'd be happy to hear them!
Labels:
chocolate,
cupcakes,
Italian meringue buttercream,
Martha Stewart,
MSC,
nuts
Sunday, March 13, 2011
Baked Sunday Mornings: Salt and Pepper Sandwich Cookies
It's yet another Baked Sunday Morning, and I'm very proud to present this week's delicious baked good. Our assignment this time around was Salt and Pepper Sandwich Cookies, which hold the distinction of being half of the cookies on the book's cover (the other cookies on the cover are the Malted Milk Sandwich Cookies, which are on my to-do list!). The best description for these cookies is this: a grown-up Oreo. An Oreo that is made way more interesting with the addition of (hence the title) salt and pepper. Uh-huh, for real.
I must admit, I had pretty high hopes for this one. I do love playing with flavors, and I especially love sweet/salty combos and sweet/spicy combos. Since this one incorporates all of that, I thought I couldn't lose here.
The cookies are simple enough to make. It's a chocolate cookie dough with the salt and pepper added into the batter (salt is also added to the tops of the cookies before baking). I skipped rolling out the dough, because that particular day I just did not have the patience to do so. Instead, I split my dough into four equal portions, and then cut those into even pieces and shaped them into balls that I flattened on the baking sheets. It worked out pretty well, although my cookies turned out kinda thick. I don't know how much thinner they would have been if I had cut circles like I was supposed to, but I didn't mind the outcome at all.
Okay, I don't know if my expectations were just really high for these cookies or what, but I was ever so slightly underwhelmed by them. They were very good, don't get me wrong. I enjoyed the not-too-sweet chocolate cookie, with its salty exterior and its subtle afterburn from the pepper. The filling was pretty much spot-on, in terms of replicating the traditional Oreo cookie's filling. It complemented the cookies well. However, I guess I was just anticipating more. I honestly don't know what the problem was. Maybe it's just me; that's very possible. Andy took them to work and returned home empty-handed, so clearly they went over well there. I think if I were to make these again, I would go to the trouble of rolling out the dough and making the cookies skinnier. I think that would have made a difference.
Nonetheless, I'm still glad I made them. I've had my eye on this recipe for quite some time, literally! These cookies stare up at me from the book's cover every time I pull it out. I'm anxious to see how the other Baked Sunday Mornings members liked these cookies. To see for yourself, click on over to the blogroll, here. That is where you will also find the full recipe. Have a great Sunday!
Thursday, March 10, 2011
CEIMB: Aromatic Pork Stew with Butternut Squash
It's time for Craving Ellie in My Belly again, and this one is really a treat. Kayte of Grandma's Kitchen Table chose the Aromatic Beef Stew with Butternut Squash, from Ellie's So Easy cookbook. Although I do not eat beef, I knew that it would be simple enough to sub in pork for the beef. I do that quite frequently, and I always have good results. This stew is an interesting spin on an old standby. Ellie takes beef and browns it up briefly before removing it and setting it aside. Then, onions are cooked up with a bit of ginger and garlic, and then tomato sauce, broth, butternut squash, and a medley of warm spices are added into the pot. The beef goes back in, and then you let everything simmer away until the squash is nice and tender and the meat is fully cooked through. The stew is served on a bed of couscous and then garnished with chopped almonds and parsley (I didn't have parsley, though).
Because I had a ton of stuff to do the day I made this, I decided to brush the dust off the slow cooker and make the stew in there. It came together just perfectly. I browned my pork in a skillet, then briefly cooked the onions and garlic in its juices. I transferred everything to the slow cooker, along with the other stew ingredients, and turned the power on to the low setting. About 5 hours later, I had the most fragrant and tasty dinner! All I had to do was cook up some couscous and I was golden. I went with Israeli couscous for this (the big, pearl-shaped couscous) and mixed half white, half whole wheat. I loved this! It was warming, satisfying, and absolutely essential on the rainy evening we ate it.
Best of all, I realized just how much I like butternut squash! I haven't really worked with it much, and now I wonder why. I thought it was a great alternative to plain old potatoes in the stew, and it really enhanced the whole exotic feel of the dish.
Thank you, Kayte! I am so grateful to you for choosing this. Often when looking through Ellie's cookbooks, I just skip right past the beef dishes since I do not cook or eat it. Now I realize I should be giving them a second glance, because if I am able to substitute other proteins in place of the beef, I can find hidden gem recipes such as this one! If you'd like the full recipe, check it out over here. And for the CEIMB blogroll, click on over here.
Labels:
CEIMB,
Ellie Krieger,
Israeli couscous,
nuts,
pork,
sauce,
squash,
vegetables
Wednesday, March 9, 2011
Chicken-Mushroom Quesadillas
Now that I love mushrooms, I admit I have been looking for nearly any opportunity to use them. This recipe for Chicken-Mushroom Quesadillas, from the always reliable Ellie Krieger, is a dish that I knew would have me feeling nostalgic. When I was growing up, my dad would make the best homemade quesadillas. They put restaurant quesadillas to shame! They were full of chicken and ooey gooey cheese, and they contained mushrooms. That would not seem particularly revelatory, except for the fact that this was the only way I would ever eat mushrooms. I guess if they were all wrapped up in a cheesy, chickeny package, I could be more easily persuaded to eat them!
These quesadillas are like a kicked-up version of the original that I was brought up eating. With the addition of sauteed onions, shredded baby spinach, and a good dash of cumin, chili powder, and oregano, Ellie's quesadillas are truly some of the most scrumptious ones I've ever had. I love the fact that the spices add so much flavor. The veggies make it even heartier, and the cheese is not excessive, yet it's more than enough. Simple and perfect.
I deviate slightly from Ellie's cooking method, just to keep up my old traditions. My childhood version was baked in the oven, so I choose to do that here instead of pan-frying them. I fill one flattened tortilla with all the quesadilla innards, then top it all off with another tortilla, making a quesadilla sandwich. I count one whole quesadilla as a serving, while Ellie counts just half as a serving. What can I say? We like our quesadillas around these parts!
Chicken-Mushroom Quesadillas
adapted from Ellie Krieger, via foodnetwork.com
makes 4 quesadillas
Ingredients
1 Tbsp. olive oil
1 large onion, chopped (about 2 cups)
8 oz. white buttom mushrooms, sliced (about 3 cups)
3 cloves garlic, minced
2 cups chopped cooked, boneless and skinless chicken breast (1 breast half)
1 tsp. ground cumin
1 tsp. chili powder
1 tsp. dried oregano
2 cups baby spinach leaves, sliced into ribbons
1/2 tsp. salt
1/4 tsp. freshly ground black pepper
8 (8-inch) flour tortillas
1 cup shredded Mexican or cheddar cheese
Nonstick cooking spray
1/2 cup salsa, optional
1/4 cup reduced-fat sour cream, optional
Directions
1. Heat the oil in a large skillet over medium heat. Add the onions and mushrooms and cook until the mushroom liquid has evaporated and they begin to brown, 5 to 7 minutes. Add the garlic and cook for 1 minute more. Add chicken, cumin, chili powder, and oregano and stir until all the spices are incorporated. Add spinach, salt, and pepper and cook until spinach is wilted, about 2 minutes.
2. Preheat the oven to 375 degrees F. Lay 1 tortilla on a flat work surface and sprinkle 1/4 of the chicken/veggie mixture over the tortilla. Sprinkle 1/4 cup cheese over the mixture, then top with another tortilla. Spray the top of the quesadilla with nonstick cooking spray. Place the quesadilla on a baking sheet that has been sprayed with nonstick cooking spray. Repeat with remaining tortillas, until you have four quesadilla, two per baking sheet.
3. Bake the quesadillas for about 8-10 minutes, until the filling is very hot and the cheese has completely melted. The top of the tortilla should be nicely browned on the edges. Using a pizza cutter, slice each quesadilla into 4-6 wedges. Arrange on a plate, garnish with salsa and sour cream (if using), and serve.
Labels:
cheese,
chicken,
Ellie Krieger,
mushrooms,
onions,
quesadillas,
spinach,
vegetables
Tuesday, March 8, 2011
200th Post!! Homemade Strawberry Marshmallows
I can't believe it! I have actually made it to 200 posts! When I first started blogging, I honestly never in my wildest dreams imagined I could make it this long, or this far. Back when I first began, it was sometimes hard for me to find the motivation just to write one blog post a month! Now I do at least 3-4 posts a week, have joined 3 different food blogging groups that I love participating in, and I have accomplished so much! I'm so excited to keep going, and to continue this crazy food journey I have been on!
I couldn't just post about any ol' thing for the 200th. No, I had to do something different. Something unexpected. Something like....Homemade Strawberry Marshmallows! Oh, how I have been wanting to make marshmallows from scratch. I'm always hearing, or reading, about them and how you haven't truly tasted a marshmallow until you've tasted one that's homemade. Then, a couple weeks ago, the family and I stopped into a local confectioner's shop, and they had homemade strawberry marshmallows that were out as samples. I think those marshmallows changed my life.
I know, I know. That's a bold claim to make. However, I can assure you that it was love at first bite. They are so perfect! They're pillowy-soft, sweet without being overly so, and they've got the prettiest pink hue from the real strawberries they're made with. Just blissful. From then on, I was impatiently waiting for an opportunity to make some of my own.
Just as though it was fated, I picked up an issue of Sauce Magazine the other day, and contained in its pages was a recipe for homemade Blackberry Marshmallows. In the St. Louis area, Sauce Magazine is a local food publication that you can find and pick up for free in many various food establishments all around the city. We read it every month; there's always a great tidbit or two in there about local food, and there's usually some mouthwatering recipes, too. I hit the jackpot with this particular recipe. I couldn't believe my luck. So, I finally got my chance, and I grabbed it. I made them! And they are every bit as wonderful as I imagined they'd be.
I was worried that they wouldn't turn out well, because sometimes it takes me a couple of tries before I get my candy-making right. But the instructions in the recipe are laid out very clearly, and I was patient and followed each step slowly and carefully. And it was easy! I was surprised at just how easy this was. Why have I waited so long to do this? Everybody should be making marshmallows at home! Why not?
By the way, the fruit-tinged variety is just sublime. Using fresh strawberry puree is such a brilliant idea. Any fruit puree, of course, would be fantastic, but I just really loved the strawberry. As indicated earlier in the article, you make your puree by blending about 20-24 oz. fresh or thawed frozen strawberries in a food processor or blender. Then, you pass the puree through a strainer to eliminate the seeds and chunks, and measure out the amount of puree you need from the strained liquid. Simple!
Thank you to everybody who reads this little blog. Thank you for listening to me for 200 posts! I love writing, I love cooking and baking, and I truly appreciate being able to share my thoughts and recipes with you. I hope you'll stick around for 200 more posts!
Homemade Strawberry Marshmallows
adapted from Sauce Magazine
makes 48-60 marshmallows (depending on the size you cut them)
Ingredients
4 Tbsp. unflavored gelatin
1 1/4 cups plus 2/3 cup strawberry puree, divided
1/2 cup water
1 1/4 cups light corn syrup
2 cups granulated sugar
2 Tbsp. cornstarch
1/3 cup confectioners' sugar
Directions
1. Prepare the "bloom" by placing the gelatin in a small bowl. Add 1 1/4 cups strawberry puree and stir well. The mixture will begin to thicken quickly. Set aside.
2. Mix the remaining 2/3 cup puree with the water, corn syrup, and granulated sugar in a large saucepan over medium-high heat. Clip a candy thermometer onto the pot and cook until the mixture reaches 250 degrees, about 10 or so minutes.
3. Remove the pan from the heat and quickly stir in the bloom. The mixture will foam up, so stir carefully until the bloom is completely incorporated. Pour the batter into the bowl of an electric mixer fitted with the whisk attachment. Mix on a low speed, then gradually increase the speed to medium-high. Let the mixture whip for 5 to 10 minutes, or until it is fairly stiff but still spreadable. Immediately pour the mixture into a well-oiled 9x13-inch pan (I lined my pan with nonstick aluminum foil, then sprayed the foil, just to be safe).
5. Cut the slab into bite-sized pieces (I did 8 rows of 6 squares, for 48 total squares), then toss the pieces into a bowl with the remaining cornstarch/sugar mixture. Store the coated marshmallows between layers of waxed paper in an airtight container at room temperature. They should keep for several days, up to a week. Do not refrigerate!
Subscribe to:
Posts (Atom)