Showing posts with label apple. Show all posts

Sunday, September 11, 2011

Baked Sunday Mornings: Caramel Apple Cake


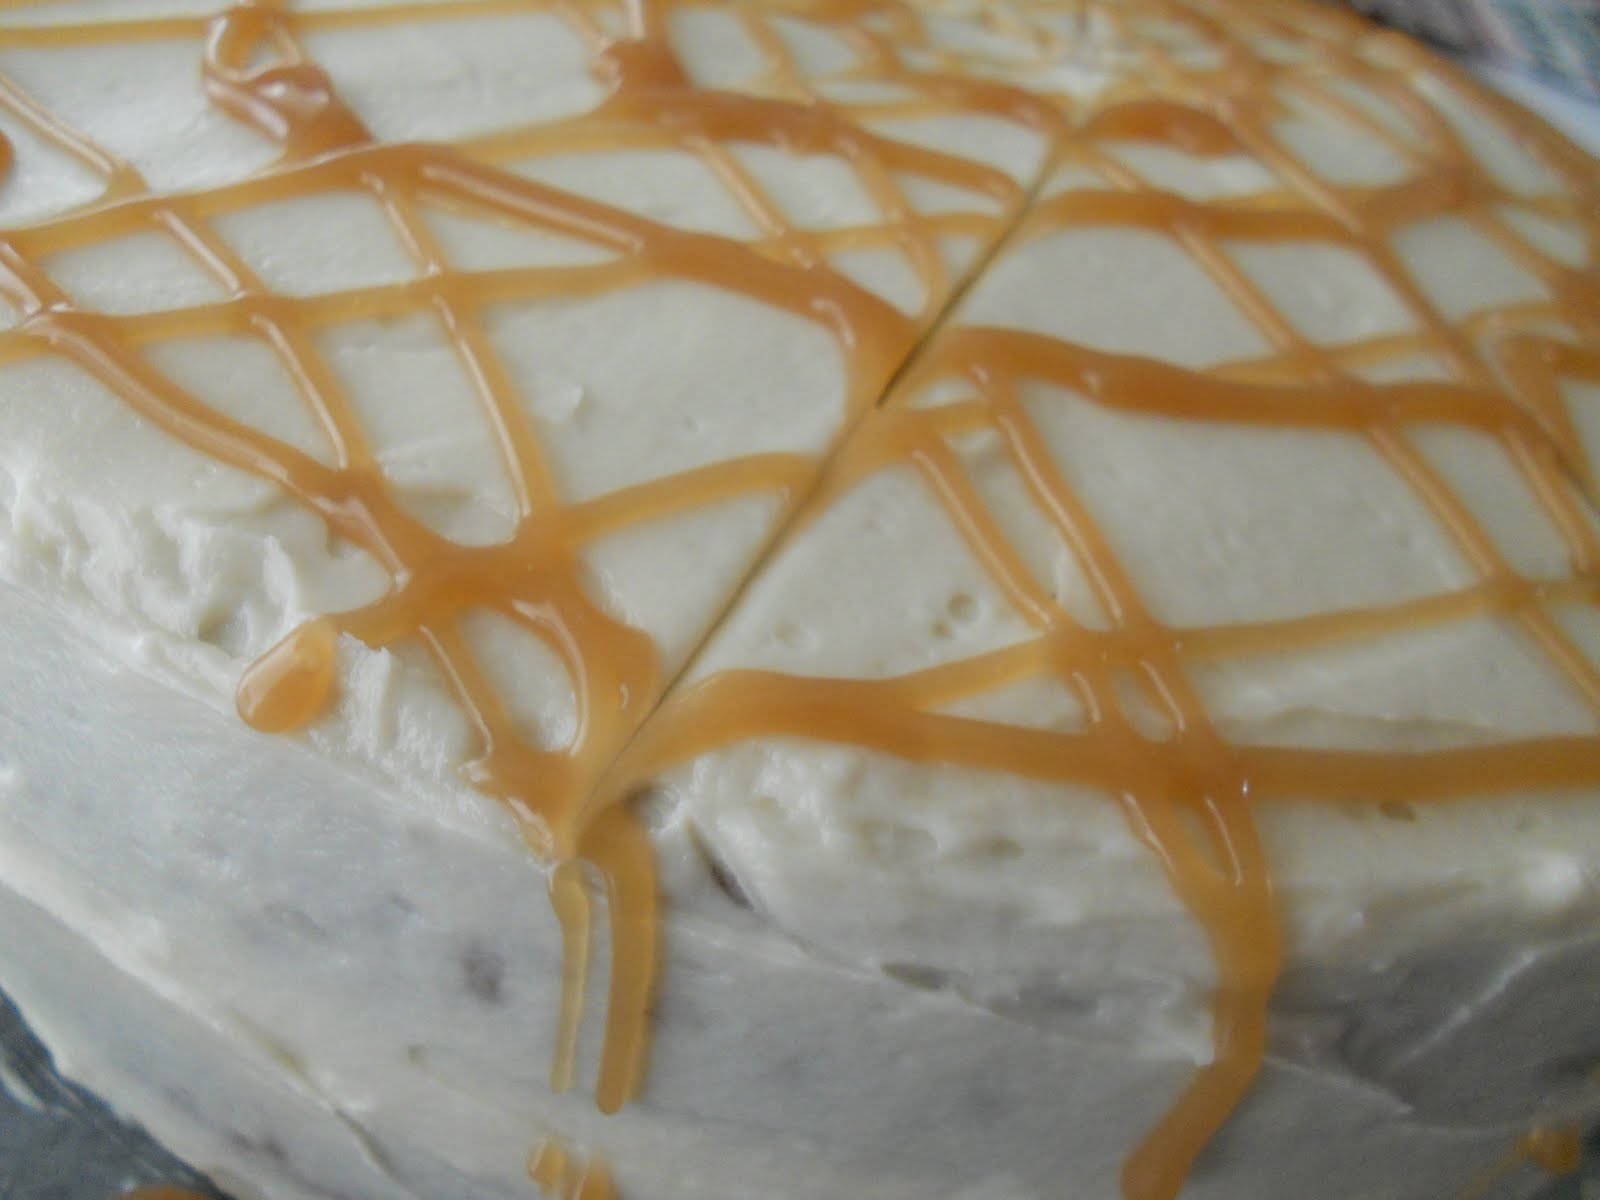
I had the privilege of making the Baked Explorations book's Caramel Apple Cake last weekend for my Baked Sunday Mornings group. Boy, what an undertaking! This was not your simple, thrown-together kinda cake. This was much more of a clear-your-calendar, spend the whole day covered in flour and frosting cake. But let me tell you, it was worth every second spent on it! It was nothing short of magnificent.


I broke the recipe up into steps; it made the whole thing so much easier and more manageable. I made the homemade applesauce, which goes into the cake batter, about two days before I was going to bake the cake. I made the homemade caramel, which is incorporated into the frosting as well as drizzled on top of the finished cake, about three or four days prior to baking day. I have to say, my confidence was totally boosted by making both the applesauce and the caramel; I had great success with both! I tend to mess up when making caramel, but this particular batch turned out pretty perfect. The applesauce was my first ever attempt at making it from scratch. It was completely easy to do and came together beautifully.


For the cake itself, I decided to cut the whole recipe in half. I was serving this for my brother-in-law's birthday, and there were going to be 7 of us eating the cake. Since this is a very decadent cake and I didn't really want there to be tons of leftovers lingering for days later, I thought a two-layer cake instead of a three-layer cake would be best. The cake was easy to whip up; I used two 9-inch round pans for it. The baking time was a bit less than the book indicated, but I am pretty sure it's because I switched things up.


The frosting, which is a cooked flour frosting, turned out way better than I expected it to. I've made this type of frosting before, and both times I have hit a bump in the road. Not this time. This batch came out great; satiny, luxurious, with a perfect hint of caramel flavor. Addictive stuff! I reduced the amount of frosting I made to just a third of the original amount, and it wasn't actually enough to frost the top and sides and fill the middle layer. So, I improvised. I had some leftover butterscotch frosting from my son's birthday cake, so I used that to fill the middle of the cake. It worked beautifully! The butterscotch complemented the spice cake so well, and the pale orange color coordinated nicely as well.


The cake was a huge hit, needless to say. Everyone really loved it. It was impressive to look at (even though my cake decorating skills need some work) and tasted unbelievably delicious. The cake was so moist from all that applesauce, and the spices were gentle but present. Everything comes together wonderfully in this cake; I don't know what else I can say about it!

But maybe there are some other people who have different things to say about it. Go check out the Baked Sunday Mornings blogroll to see the group's thoughts on this cake.

Thursday, June 9, 2011

CEIMB: Apple Pecan Muffins


Wow, I almost completely spaced on this week's Craving Ellie in My Belly this week! I must really still be on vacation or something! But I managed to pull it together long enough to snap some photos of this week's recipe, Apple Pecan Muffins, chosen by Joanne of Apple Crumbles.


If you're wondering how I could have produced muffins to photograph when I could barely even manage to remember to post about them, the answer is very simple. I always, always have these muffins on hand in my house. Out of all of Ellie Krieger's recipes that I have tried (and I've probably tried over a hundred by now), this one is the hands-down household fave. In fact, my husband eats two every single work day! I freeze single and double batches of these muffins, so that he can easily thaw and tote some to work each and every day. I've even tried varying the basic formula, but he just likes the muffins the way Ellie intended them; no bells and whistles are needed here! It's probably the first recipe I've ever committed to memory; I could crank these puppies out in my sleep by now. One quick note: I can usually get at least 15 muffins per batch, rather than the yield of 12 listed in the book.

It's been about 3 years now since the first time I have made the Apple Pecan Muffins, and I still have not been able to bake my husband a muffin that he prefers over these. So I probably would have eventually chosen these as my weekly pick, but Joanne beat me to it! I'm so glad the group is finally making these, because in my opinion the whole world should know about these! Thanks to these muffins, I am no longer afraid to eat apple in baked goods. Not only that, but they've taught me how to transform any old muffin recipe into a lower-fat version, and for that I will always be grateful to Ellie.


If you made these muffins this week, I'm dying to hear how you liked them! Everybody's results can be found by heading over to the blogroll, here. And for the full, glorious recipe, you can go to Food Network's website and find it here.

Friday, October 22, 2010

Caramel Apple Cupcakes with Apple Cider Caramel Sauce


These cupcakes were the product of my imagination, running wild, and trying to come up with the perfect way to use a really awesome caramel sauce that I made recently. Funny how something as multi-step as a cupcake could be born from something so simple as caramel, but that's exactly what happened. Of course, there are many, many things you could do with this caramel sauce; it's actually quite versatile. But for my blogging purposes today, we're just going to talk about it in this recipe.


So what is this magical caramel I speak of, anyway? Well, it's Apple Cider Caramel Sauce, and it is heaven. Instead of making this caramel with lots of butter or cream, or both, you add lots of fresh apple cider. Then, to make it even more apple-y, you throw in a bunch of diced apple pieces and allow them to get all soft and mushy in there. Once the caramel has had a chance to come together, you puree the mixture, so the apple pieces actually become part of the sauce. Oh, my, is it good! After it's had a chance to chill in your fridge, it thickens up nicely, almost becoming a cross between a caramel sauce and an applesauce. Then, you're ready to use it!


The cupcakes I decided to make were from Cooking Light. I found a special issue that I snatched right up at the bookstore; it was a Fall Baking edition! I flipped through it before purchasing and realized I could see myself making over half of the recipes; I thought it would be a good investment! (Okay, that's what I told myself so I'd feel better about buying the more expensive special edition.) I'd probably have to put these cupcakes in the sorta cupcake/sorta muffin category. I mean, they're delicious and everything. They're moist, with nice chunks of apple throughout, but they did remind me of a muffin more so than a cupcake. Still, I suppose that's to be expected when it's a "light" recipe. And, besides, the frosting would more than make up for the healthiness! So I forged on.


I whipped up a Swiss Meringue Buttercream for the cupcakes, using Martha Stewart's basic recipe as my guide. I did have a little bit of trouble with the buttercream, as is usually the case when I make this tricky frosting. But I managed to get everything under control, and the frosting came together quite nicely.


So now it was time to add my Apple Cider Caramel Sauce! I wanted to transform my ordinary, muffin-y apple cupcakes into Caramel Apple Cupcakes, and I knew that adding the caramel to the frosting would be divine. I wasn't sure how much caramel to add to the buttercream at first, so I started out with about 2/3 cup and kept checking the flavor. It took a little over 3/4 cup caramel total before you could really taste the sauce in the frosting. Once I had enough caramel in there, the frosting turned a lovely light caramel color. It was silky and smooth, and you could detect the hint of apple flavor in the caramel sauce. It was pretty amazing.


Just to take these over the top, I finished them off with a drizzle of the caramel sauce over the buttercream. The piping on some of these were really weird, sorry about that (I was trying a thing. It didn't work), but I think for the most part these were a rousing success. I love it when a crazy notion in my head turns into delicious reality!


Caramel Apple Cupcakes

cupcakes adapted from Cooking Light (the original recipe had a streusel topping and a glaze, which I omitted due to my addition of buttercream frosting)

makes 12 cupcakes


Ingredients

6.75 oz. all-purpose flour (about 1 1/2 cups)

1/2 tsp. baking powder

1/4 tsp. salt

1/4 tsp. baking soda

3/4 cup granulated sugar

1/4 cup (2 oz.) 1/3-less-fat cream cheese, softened

1/4 cup butter, softened

2 Tbsp. amaretto (you can use 2% milk, which I did)

1 tsp. vanilla extract

1 large egg

1/2 cup reduced-fat sour cream

1/4 cup 2% reduced-fat milk

3/4 cup finely chopped Gala apple

1 Tbsp. all-purpose flour


Directions

1. Preheat oven to 350 degrees F. Place muffin cup liners in 12 muffin cups; coat with cooking spray. Weigh or lightly spoon 6.75 oz. flour into dry measuring cups; level with a knife. Combine this flour with baking powder, salt, and baking soda in a small bowl; stir with a whisk.


2. Combine granulated sugar, cream cheese, and 1/4 cup butter in a large bowl; beat with a mixer at high speed until well blended. Add amaretto or 2 T. milk, vanilla, and egg to sugar mixture, and beat with a mixer at high speed until well blended. Combine sour cream and 1/4 cup milk in a small bowl, and stir with a whisk until well blended. Combine apple and 1 T. flour in a small bowl, and toss well.


3. Add flour mixture and sour cream mixture alternately to sugar mixture, beginning and ending with flour mixture. Beat just until blended. Fold in apple mixture. Divide batter evenly among muffin cups. Bake at 350 for 27 minutes or until a wooden pick inserted in center comes out clean. Cool in pan for 15 minutes on a wire rack; remove the cupcakes from pan and allow to cool on racks.


Caramel Swiss Meringue Buttercream

adapted from Martha Stewart (I made just half the recipe)

makes about 2.5-3 cups


Ingredients

1/4 cup plus 1 Tbsp. sugar

3 large egg whites

Pinch of salt

1/2 pound (2 sticks) butter, softened and cut into tablespoon-sized pieces

1/2 tsp. pure vanilla extract

3/4 (or more as needed) Apple Cider Caramel Sauce, recipe follows


Directions

1. Whisk together the sugar, egg whites, and salt in the heatproof bowl of a standing mixer. Set bowl over a pan of simmering water, whisk until sugar is dissolved and mixture registers 140 degrees on an instant read thermometer.


2. Return bowl to mixer; fit mixer with whisk attachment. Beat on medium-high speed until stiff. Reduce speed to medium-low; add butter, a few tablespoons at a time. Continue whisking until smooth.


3. Switch to paddle attachment. Add caramel and vanilla; beat on lowest speed until combined, 3 to 5 minutes. The buttercream can be made several days ahead and stored in the refrigerator. Before using, bring buttercream back to room temperature; return to mixer and beat with the paddle attachment until smooth.


4. To assemble cupcakes, pipe the frosting onto each cupcake in the desired pattern. Drizzle with leftover caramel sauce and serve. (The frosted cupcakes do keep well in the fridge; just bring to room temperature before serving.)


Apple Cider Caramel Sauce

from The Craft of Baking

makes about 2 cups


Ingredients

2 1/4 cups sugar

1/2 cup light corn syrup

1/4 vanilla bean, split lengthwise, seeds scraped out, bean and seeds reserved

2 small tart baking apples, such as Mutsu, Cortland, or Granny Smith, cored, and cut into 1-inch pieces

3/4 cup apple cider

1/4 tsp. kosher salt


Directions

1. Combine the sugar, corn syrup, 1/2 cup water, and the vanilla bean and seeds in a medium saucepan. Cook over high heat until the sugar becomes a medium golden caramel, about 15 minutes. Add the apples and stir to combine. Reduce the heat to low and cook until the apples have softened, 2 to 3 minutes. Carefully add the cider and stir to combine. Continue to cook until the sauce is sticky, about 5 minutes more.


2. Remove the pan from the heat and remove the vanilla bean. Rinse and recycle the vanilla bean for another use. Whisk the salt into the mixture.


3. Transfer the mixture to a blender and puree until smooth. Strain it through a fine mesh sieve into a bowl. Serve immediately, or store in an airtight container in the refrigerator for up to 2 weeks. Reheat the sauce in a saucepan over low heat.
Thursday, October 14, 2010

CEIMB: Apple Brown Betty


This week's Craving Ellie in My Belly selection was the Apple Brown Betty from Ellie's So Easy book. It was chosen by Jess of Learning to Love Vegetables, and it could not have come at a better time for me. I've been knee-deep in freshly picked apples lately, and have been coming up with all kinds of different recipes to put them into. This one, it turns out, was a fantastic addition to my repertoire of apple dishes.


First of all, it was a snap to put together. I decided to make them into individual servings and cut the recipe down to just a third of the full amount. This made enough to fill two little ramekins, which was perfect. I was able to assemble these in about 15 minutes, including the time the apples spent on the stove, and then all I had to do was wait for them to bake. I did bake the dishes for about 10 minutes less then the recipe indicated, since I was not baking a full 9-inch pie plate's worth of Brown Betty.


Second of all, it turned out delicious! My husband is a huge fan of apple crisp, and I make it for him every fall. But with this recipe, I've found a way to make him a similar treat, but with lots less butter and sugar! The use of whole-wheat bread crumbs in place of oats or flour for the topping is pretty genius, I thought. The walnuts provide welcome texture, and there's just enough sweetness and spice from the cinnamon. I could see how adding nutmeg or a dab of ginger to the topping could be great, too. Unfortunately, I didn't think of that until just now! Well, there's always next time, right?


I'm sure there will be a next time with this easy, scrumptious fall dessert. It's great on its own, would probably be even better with a scoop of vanilla ice cream and a drizzle of caramel sauce on top, and requires very little of you in the kitchen. I'm glad it was chosen this week; otherwise, I may have just skimmed right over this one in the book. Thanks, Jess! Be sure to check out the blogroll for everybody else's results. The original recipe can be found here.

Monday, October 11, 2010

Apple Cider Muffins


I had a bunch of apples left over from going apple picking with my boys, and I have been busy putting them to good use! Since we all eat muffins at my house, I finally had an excuse to try out a recipe from one of my baking cookbooks, The Craft of Baking. I love buying a big gallon of fresh apple cider each fall and drinking it warm on occasion, but I find myself with a lot of it that doesn't always get a chance to be used. So, these Apple Cider Muffins seem like a great solution! It utilizes those apples and the apple cider at the same time.


Okay, so the pictures of my boys don't necessarily have anything to do with this recipe, but I think I was overdue to show them off here on the blog! I haven't posted pictures of them in months, and I know there are people who have been wanting me to. So, here they are, eating their mid-afternoon snack, which I believe consisted of Halloween-shaped marshmallows, dried fruit strips, and these muffins. Eclectic!


Now, I wanted to share a little trick with you for making baked goods just a bit healthier. I purchased a bag of ground flax seeds a while back, thinking I'd just look it up later and find creative ways of slipping the flax into things I would make. I knew they were rich in Omega-3 fatty acids, and high in dietary fiber, and that they can even lower your cholesterol. It seemed like a great ingredient to use in place of other, less healthy ones.

As it turns out, you can actually use ground flax seed in place of oil or butter in a baked good recipe! I was floored when I read this on the back of the bag. It's a 3:1 ratio, meaning if a recipe called for 1/2 cup butter, you would use 1 1/2 cups of ground flax seed in its place. I was pretty skeptical about the substitution, because it seemed like it wouldn't work. You're basically replacing a "wet" ingredient with a "dry" ingredient, which seemed doomed to fail. But I practiced this trick on some other muffins I made the week before, by replacing half the fat with flax seeds, and guess what? It really did work!

The flax seeds give the muffin an extra texture and heartiness, as well as some darker flecks that are visible when you bite into it. The muffin was, amazingly, still moist and not heavy like a brick, as I feared it would be. It does taste a bit healthier, if that makes sense, and less indulgent. But I suppose that is the point here, anyway, so it was a welcome flavor!


These muffins are delicious and disappeared very quickly. They were a hit at my house and a hit at Andy's work, too. I'm so glad I've found such an awesome way to incorporate ground flax seed into our diet; we hardly eat any fish at my house, or any other foods that are well-known for their Omega-3s. Now I know we can still sneak it in, and it won't affect the taste! Just one note: the recipe below is written as I made it, not the way the book did. The changes I made are listed, and then the book's original ingredient is listed in parentheses after.


Apple Cider Muffins
adapted from The Craft of Baking
makes 12 muffins, plus 5-6 mini muffins

Ingredients
Unsalted butter or nonstick cooking spray, for greasing muffin tins
3/4 cup granulated sugar (the book used 1 cup)
3/4 cup packed dark brown sugar (the book used 1 cup)
3 large eggs
1/2 cup applesauce (the book used 3/4 cup grapeseed oil; I used applesauce and flax seed)
2 1/4 cups unbleached all-purpose flour
3/4 cup ground flax seed
1 1/2 tsp. baking soda
1 tsp. kosher salt
1 tsp. ground cinnamon
1 cup apple cider
3/4 cup sour cream
1 1/2 tsp. pure vanilla extract
2 crisp baking apples, such as Granny Smith or Mutsu, peeled, cored, coarsely grated (I used my food processor with the shredding attachment), and drained, juices reserved and used as part of the cider measurement
1 Tbsp. turbinado sugar (the book used Demerara sugar)


Directions
1. Preheat the oven to 350 degrees F. Generously butter or spray a standard 12-cup muffin tin (plus a mini muffin tin, if using), or line with paper liners (I used paper liners, but the muffins like to stick to those).

2. In a medium bowl, whisk together the granulated sugar, brown sugar, and applesauce. Add the eggs and whisk to combine. In another bowl, sift together the flour, flax seed, baking soda, salt, and cinnamon. In a third bowl, whisk together the apple cider, sour cream, and vanilla.

3. Add one third of the flour mixture and one third of the apple cider mixture to the sugar mixture, folding with a spatula just to combine. Add the rest of the flour and cider mixture in two additions. Fold in the grated apple, and then divide the batter evenly among the prepared muffin cups, filling each cup three quarters of the way. Sprinkle the tops of the muffins with the turbinado sugar.

4. Bake, rotating the muffin tin halfway through, until the muffins spring back to the touch, 25 to 30 minutes (mine took about 3-5 minutes longer). Transfer the pan(s) to a wire rack and let cool for 10 minutes. Then turn out the muffins from the pan(s) and let them cool completely on the wire rack. These muffins are best the second day, and will keep in an airtight container at room temperature for up to 3 days.

Sunday, October 3, 2010

Baked Samosas with Quinoa Pilaf


I had the opportunity to make a couple more recipes created by The Next Food Network Star winner, Aarti Sequeira. It's funny; I actually stumbled upon this awesome recipe for Baked Samosas with Mint Chutney when I was perusing Aarti's blog. It's a cute blog, one I had never found before her stint on the Food Network. I recommend checking it out if you have a free moment and are looking for some innovative Indian dishes to make!

Anyway, I found this recipe and knew right away that I wanted to make it. Then, a couple days later, I looked at the TV listings and discovered that Aarti was going to be making those very same samosas on her show that weekend! It was fate. I had to make them. I had such great success with the other dish of hers that I'd made, so I was excited.


So, onto the recipe itself! It does take a bit of time, and there are a lot of steps. However, I am here to tell you that it was all worth it. We loved every bite of these, and I had leftover filling that my hubby threw into a tortilla for lunch leftovers. He said it was awesome!

I'll back up, though. What exactly is a samosa? Well, it's an Indian pastry filled, in this case, with chicken, potato, and apple. Aarti made these with mango on her show, but I had tons of apple on hand and decided to sub that in instead. I was aware that it might not work out, but I was pleasantly surprised. It was a great alternative to the mango, although I'm sure it'd be great both ways.


You prepare the filling, and then you make a simple dough of flour, buttermilk, oil, and salt. Aarti's blog post about these samosas contained instructions for this method, so I was surprised when I watched the episode and found out she was making them with puff pastry on the show. The Network must have told her to simplify the recipe, or something. The Food Network website has the recipe done both ways, though, so you have the choice of making it with or without the puff pastry. I decided to make my own dough, since that's what I was already going to do after looking at her blog.

The dough was easy to make, and I think I did okay with forming the samosas. A couple of them looked a little funny, but that's fine. I just didn't take a picture of those, ha ha! The samosas are then baked after forming them, which I am always a big fan of. I would much rather bake then deep-fry any day. While these were in the oven, I made a quinoa pilaf for the side dish.


Now, I've been preparing quinoa in different incarnations for several years now, and my husband said that this dish was the first he actually really, really liked. That's not to say that our previous adventures with quinoa were horrible, but this dish was just exceptional. I had to agree; it was delicious! Aarti incorporates Indian spices, pine nuts, and dried fruit into her quinoa, and then finishes the whole thing off with some fresh citrus zest and juice. Yum!

I'm sorry to say, I didn't manage to get a picture of the mint chutney that went along with the samosas. I don't know how that happened! It was scrumptious, and quite easy to toss together. There's a cool little flourish at the end, after you blend all the ingredients in the food processor. You sizzle some mustard seeds in oil and then throw them into the chutney. It makes the whole concoction sizzle and hiss, and the seeds infuse the oil with their tanginess and just enhance the flavor of the chutney. Plus, it's very showy, so if you're looking to impress someone with your culinary skills, it's a great way to do that! This whole meal is impressive, though. I highly recommend it for a lazy weekend day when you have the time to prepare it.


Baked Samosas with Mint Chutney
adapted from Aarti Sequeira, via
Food Network.com
makes 8 samosas

Ingredients
For the filling:

1 large russet potato
Water
Salt
2 bay leaves
1 1/2 tsp. coriander seeds
1/2 tsp. black peppercorns
1/2 tsp. red chili flakes
3 oz. boneless, skinless chicken breast
1 apple, peeled and finely diced (Aarti used a mango)
Juice of 1/2 lime
5 Tbsp. chipotle sauce (I used Chipotle Cholula)
1/2 tsp. cumin seeds (I omitted)
Big handful cilantro leaves, minced
Salt and freshly ground black pepper

For the pastry:
1 cup all-purpose flour
1/4 cup buttermilk
1/4 cup vegetable/canola oil
Big pinch salt
1/2 tsp. ajwain seeds, optional (I omitted)
1 egg
1 tsp. water

For the mint chutney:
1 cup mint leaves
1/2 cup cilantro leaves and soft stems
1 Tbsp. fresh ginger, chopped
1/2 lime, juiced, plus more to taste
About 1/4 cup water
Salt and freshly ground black pepper
1 Tbsp. vegetable/olive oil
1 tsp. brown mustard seeds


Directions
Make the filling: 1. In a small saucepan, add the potato and enough cold water to cover. Add a generous pinch of salt and bring to a boil over medium heat, then reduce the heat and simmer until tender, 12 to 15 minutes.

2. In a second small saucepan, bring 4 cups water to a simmer and add a generous pinch of salt, bay leaves, 1 tsp. coriander seeds, peppercorns, chili flakes, and chicken breast. Simmer until cooked through, 8 to 10 minutes.

3. Mash the potato and finely shred the chicken and put into a large bowl. Combine with apple, lime juice, chipotle sauce, remaining coriander seeds, cumin, cilantro, and salt and pepper, to taste. Mix with a spoon or your hands until well incorporated. Taste for seasoning and adjust, if necessary. Set aside.

Make the samosa pastry: 1. Preheat the oven to 425 degrees F. In a large bowl, combine the flour, buttermilk, oil, salt, and ajwain seeds, if using. Bring the ingredients together until a dough forms. Knead until it has softened a bit, about 5 minutes. Allow to rest, at room temperature, for about 15 minutes. You can put this in the refrigerator, but make sure you let it sit at room temperature for 20 minutes or so, in order for it to soften.

2. Roll the dough into a short cylinder. Slice in half, then slice each half into two pieces, so you have 4 bits. Roll each bit into a ball. Flatten the balls into disks and then, on a floured surface, roll them each into a 1/8-inch thick, 7-inch wide circle. Cut in half to form 2 semicircles.

Assemble the samosas: 1. Put a tablespoon or so of the filling in the center of a semicircle. Have a small bowl of water handy. Dip your finger in the water and run it along the edges of the semicircle. Arrange each samosa so the flat side is facing away from you. Grab the left corner and fold it over the dough in a triangular motion, so that this corner lands on the bottom right side of the filling. Do the same with the other corner.

2. Squeeze bottom shut, and fold over, sealing with water. If you like, seal using a fork. Repeat with remaining dough and filling. Arrange the 8 samosas on a lightly greased baking sheet.

3. In a small bowl, whisk the egg and 1 tsp. water with a fork until thoroughly combined. Brush the tops of the samosas with the egg wash. Bake for 15 minutes at 425 degrees, then turn the heat down to 375 degrees and bake for 10 more minutes. You can flip them over before turning the heat down, if you like.

Make the chutney: 1. In a food processor, whiz together the mint, cilantro, ginger, lime juice, and water until it all comes together as a sauce. There'll probably still be little bits of leaf in the sauce, but no worries. Pour the chutney into a bowl.

2. In a small pan over medium heat, warm the oil until it shimmers. Add mustard seeds; they should sizzle. Immediately cover with a lid until they stop spluttering. Make sure they don't burn! If they do, just start over. Immediately add the seeds and oil to the chutney. It will sizzle, so stand back. Once you've poured in all the oil, you can spoon a bit of the chutney into the pan so that you can capture all the oil. Pour into the bowl with the chutney. Serve the samosas hot, with the chutney alongside, as well as the quinoa pilaf (recipe follows).


Quinoa Pilaf
adapted from Aarti Sequeira, via
Food Network.com
makes 4 servings

Ingredients
1 1/2 cups water
1 cup quinoa, rinsed well and drained (I used half red, half white)
2 Tbsp. olive oil
1 medium red onion, finely chopped
1/2 tsp. turmeric
1/4 tsp. ground coriander
1/4 tsp. ground ginger
1/4 tsp. garam masala
1 Tbsp. pine nuts
2 Tbsp. chopped dried cranberries (Aarti used cherries)
Kosher salt and freshly ground black pepper
1 orange, zested, plus 2 Tbsp. juice (Aarti used grapefruit)

Directions
1. Bring the water and quinoa to a boil in a small saucepan over medium heat. Reduce the heat and simmer, covered, until quinoa is cooked and the white curly germ shows, about 20 minutes.

2. Meanwhile, warm the olive oil in a large skillet over medium heat. When the oil is shimmering, add the onion and spices, and saute until the onion has softened and the spices are very fragrant. Stir in the pine nuts and cranberries and saute for 1 to 2 minutes.

3. Add the cooked quinoa (all the water should have been absorbed) to the skillet. Stir in the orange zest and orange juice. Taste, and season with salt and pepper as needed. Allow to sit, off the heat, for 10 minutes so the flavors seep into the quinoa. Serve alongside the samosas.

Wednesday, September 29, 2010

Apple Cinnamon Rolls


Well, I am proud to say that I have now made cinnamon rolls, from scratch, without the aid of a bread machine or any other type of "cheating." It's a miracle! Of course, never one to stick to the traditional, I opted to make these ooey gooey Apple Cinnamon Rolls, and they were divine.


These rolls incorporate a sweet, sticky filling of caramel and finely chopped apples into the proceedings, rather than the standard butter/sugar/cinnamon mixture. Just before baking, the rolls are sprinkled with cinnamon and sugar, but without all that butter inside, these rolls actually are a little bit better for you, too!


Of course, they certainly don't taste healthy. These are oozy, melty, and decadent just as they are. The apples add just enough tart texture to make them complementary to the sweetness, rather than detract from it. If you're looking for an excuse to use up some fall apples this year, I highly recommend these rolls. Plus, as far as yeast dough-type things to make, I found this to be very doable and not difficult at all.


I'm so happy that I'm finally beginning to conquer my fear of yeast, and these rolls are baked proof that the results are well worth the effort. The recipe makes two pans' worth of rolls, so I was able to bake one pan after an overnight rise, and then I froze the other pan for a rainy day. Oh, and one final note: the caramel/apple mixture that serves as the filling is to die for, and has become the inspiration for yet another decadent treat that you will be seeing me blog about in the near future. Look for it soon!


Apple Cinnamon Rolls
from Breadworld
makes 24 rolls (2 pans)


Ingredients
For the rolls:
5 to 5 1/2 cups all-purpose flour
1/2 cup sugar
4 1/2 tsp. RapidRise yeast (2 envelopes)
1 tsp. salt
1/2 cup water
1/2 cup milk
1/4 cup butter or margarine
3 large eggs

For the apple filling:
2 large cooking apples, peeled and chopped
2 Tbsp. all-purpose flour
3/4 cup sugar
1/4 cup butter or margarine
1 tsp. ground cinnamon
1/2 tsp. nutmeg

For the cinnamon sugar topping:
3/4 cup sugar
1 tsp. ground cinnamon
1/2 tsp. nutmeg


Directions
Make the apple filling: 1. Combine the apples, flour, sugar, and butter or margarine in a medium saucepan. Bring to a boil over medium-high heat; cook for 3 minutes. Reduce heat to medium-low; cook 10 minutes, stirring constantly, until thick. Remove from the heat. Stir in the cinnamon and nutmeg; cool completely.

Make the rolls: 1. In a large bowl, combine 1 cup flour, sugar, undissolved yeast, and salt. In a saucepan on the stove, heat the water, milk, and butter until very warm (120 to 130 degrees F). Gradually add to flour mixture. Beat 2 minutes at medium speed with an electric mixer, scraping bowl occasionally. Add eggs and 1 cup flour; beat 2 minutes at high speed, scraping bowl occasionally. Stir in enough remaining flour to make a soft dough. Knead on lightly floured surface until smooth and elastic, about 8 to 10 minutes. Cover; let rest 10 minutes.

2. Divide dough into 2 equal portions. Roll each portion into 12x8-inch rectangle. Spread Apple Filling evenly. Beginning at long end of each, roll up tightly, jelly-roll style. Pinch seams to seal. Cut each roll into 12 equal pieces. Place, cut sides up, in greased 9-inch round pans. Cover; let rise in warm, draft-free place until doubled in size, about 45 minutes. (After covering the pans, they can be frozen at this point, or if you're preparing this in the evening for the next morning, you can refrigerate these overnight.)

Prepare cinnamon sugar topping and bake rolls: 1. In a small bowl, combine all of the cinnamon sugar ingredients, then stir well to fully incorporate.

2. Sprinkle the risen rolls with the cinnamon sugar topping. Bake in a 375 degree oven for 25 to 30 minutes, until browned on top. Remove from pans; serve warm.

Thursday, May 13, 2010

CEIMB: Whole-Wheat Apple Pancakes with Nutty Compote


For this week's Craving Ellie in My Belly recipe, we made these wonderful Whole-Wheat Apple Pancakes. This was chosen by Dishin', and I was really looking forward to it. I could probably eaet pancakes for breakfast every single day; that's how much I love them. Waffles run a close second, but they require a little bit more effort. Once I finally learned how to make pancakes, a few years back, I have enjoyed preparing them in different ways. This way, to sprinkle apples on top of the pancakes while they cooked on the griddle, was one I hadn't tried before.


The preparation was simple. An easy pancake batter is put together, made with half whole-wheat and half all-purpose flours. You chop up an apple into small chunks and gently heat the chunks in the microwave. Once the pancakes are on the griddle, you sprinkle about a tablespoon of apple onto each pancake. When you flip them, the apple continues to heat through, and they are served (or at least, we served them) with the apple on the bottom.


But wait, that's not all. Next, you make a nutty compote, which of course is really just a fancy way of saying "nutty topping." I loved the nutty topping, but I have to admit that I modified Ellie's recipe. It was partially out of laziness (not wanting to go to the store for some things) and partially because I thought we would like it better if we altered it a bit. Instead of the sunflower seed-pumpkin seed-almond mix that was called for, we used only almonds. We did use the sesame seeds, wheat germ, and pure maple syrup that was part of the original recipe.


Altogether, this made for a wonderful breakfast. The compote worked so well with the pancakes. The nutty crunch was an unexpected, but welcome contrast to the soft pancakes. I have to admit, I did add some additional syrup, mostly because the compote didn't contribute that syrupy coating that I love so much. Even so, this recipe was fabulous, and I believe I'll be making it again. Even Xander, my picky eater, admitted that this was good. Score!

The recipe for these pancakes, and their topping, can be found here. Thank you to Dishin' for a great meal!