Showing posts with label frosting. Show all posts

Thursday, September 15, 2011

MSC: Peanut Butter (No Jelly!) Cupcakes


I'm so happy to be back blogging along with the Martha Stewart's Cupcakes Club again this month! I skipped out last month but now I'm back and ready to talk about some Peanut Butter Cupcakes! The original recipe was for Peanut Butter and Jelly Cupcakes, but I just decided to leave out the jelly. I dunno, maybe it's un-American of me or something, but I just don't eat the peanut butter/jelly combo. I know, what a weirdo! If you give me anything peanut butter/chocolate, I'm yours, but for some reason I just don't really love jelly all that much.


I halved this recipe and made 10 cupcakes. I came across some reduced-fat natural peanut butter, so I used that in place of standard natural peanut butter in the batter. I don't know if my reduced-fat pb was the culprit for this, but my cupcakes turned out super dense. Like, must grab a big glass of milk to wash this cake down with dense! Also, I left out the chopped peanuts. It was good, peanut buttery cake, it just felt thick in your mouth.

For the frosting, I wanted to reduce some of the fat there, too. Sooo, I used fat-free cream cheese. Again, not the most perfect frosting in the world. It was a bit grainy in texture, and not very sweet. That was okay with me, but I don't think I would have served it to company or anything. I think putting the dollop of jelly on top could have masked the frosting's texture a bit, but obviously I will never know.


My verdict on these? They are good, especially if you're a die-hard peanut butter fan (which I am). But they do need a little something else. They need a contrasting flavor/texture to balance out all that pb. I ate these with a little splotch of chocolate sauce on the top, and that really did help out. Some ice cream alongside would probably improve these, too.

Thanks to Karen of Karen's Cookies, Cakes, and More for the selection! Check out the MSC blogroll to see how the others fared with these cupcakes!

Sunday, September 11, 2011

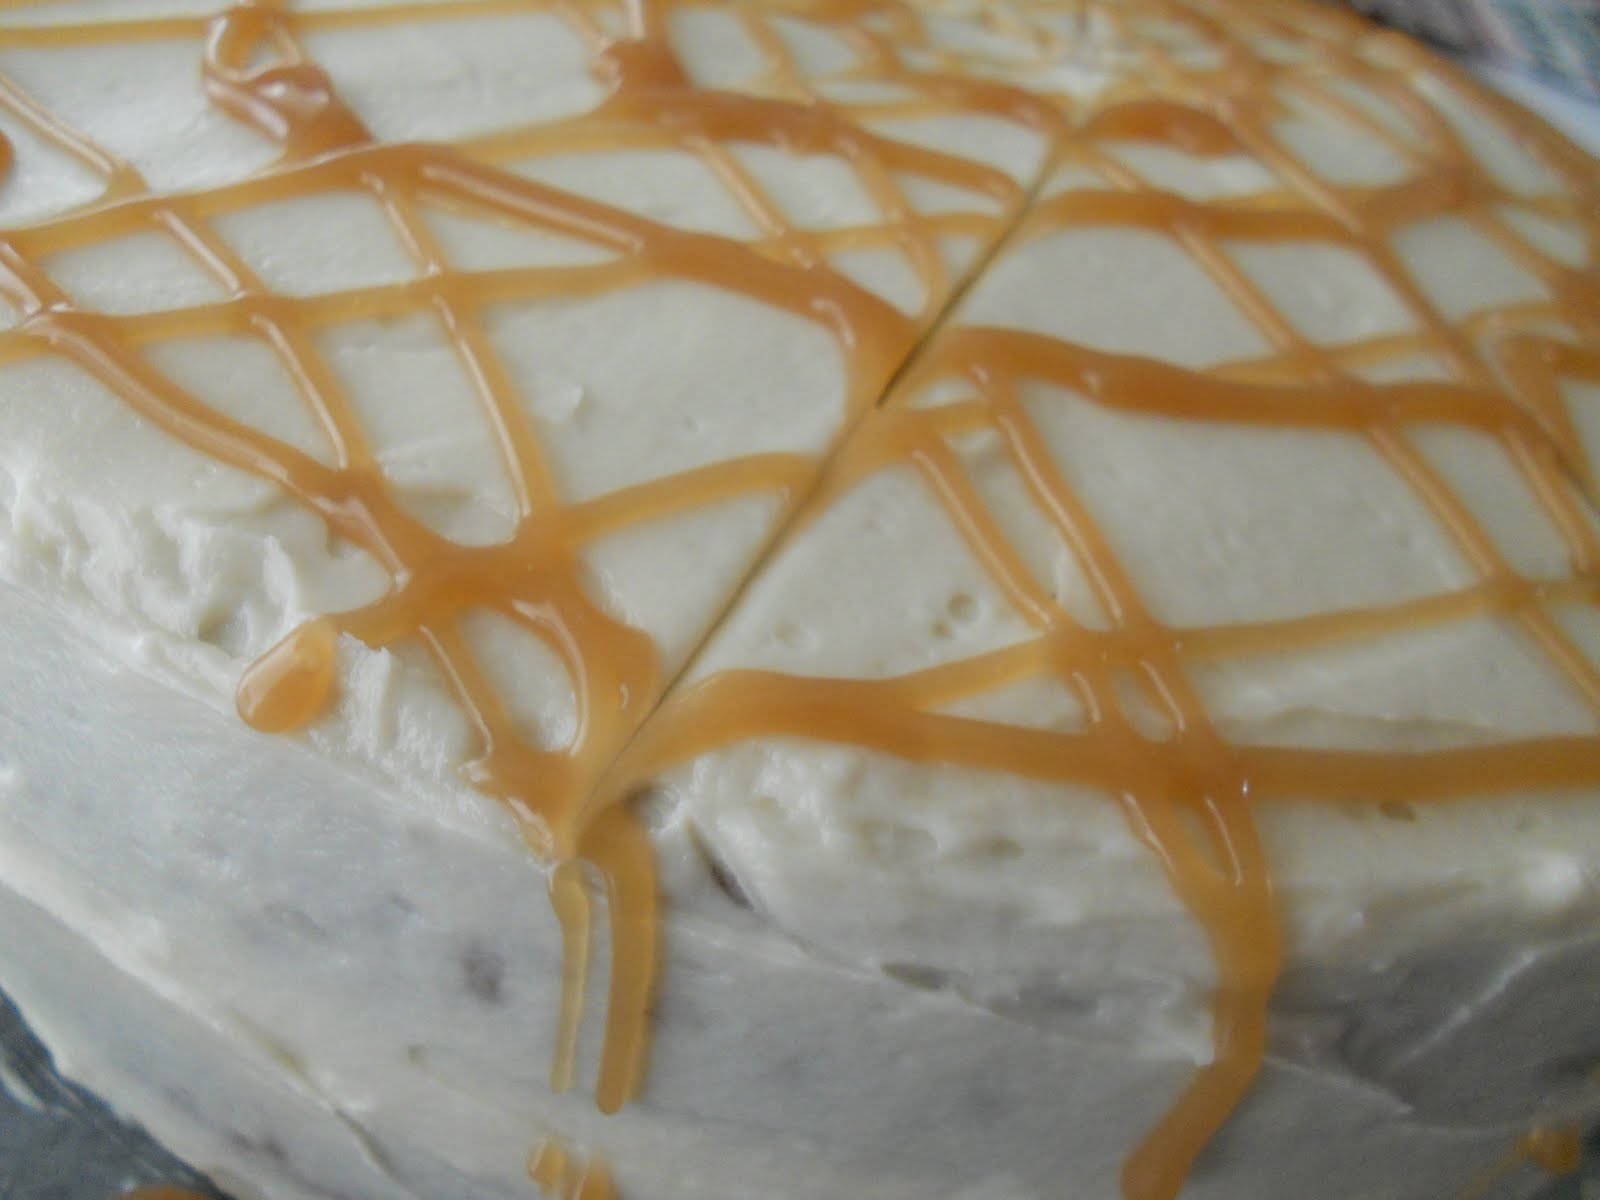
Baked Sunday Mornings: Caramel Apple Cake


I had the privilege of making the Baked Explorations book's Caramel Apple Cake last weekend for my Baked Sunday Mornings group. Boy, what an undertaking! This was not your simple, thrown-together kinda cake. This was much more of a clear-your-calendar, spend the whole day covered in flour and frosting cake. But let me tell you, it was worth every second spent on it! It was nothing short of magnificent.


I broke the recipe up into steps; it made the whole thing so much easier and more manageable. I made the homemade applesauce, which goes into the cake batter, about two days before I was going to bake the cake. I made the homemade caramel, which is incorporated into the frosting as well as drizzled on top of the finished cake, about three or four days prior to baking day. I have to say, my confidence was totally boosted by making both the applesauce and the caramel; I had great success with both! I tend to mess up when making caramel, but this particular batch turned out pretty perfect. The applesauce was my first ever attempt at making it from scratch. It was completely easy to do and came together beautifully.


For the cake itself, I decided to cut the whole recipe in half. I was serving this for my brother-in-law's birthday, and there were going to be 7 of us eating the cake. Since this is a very decadent cake and I didn't really want there to be tons of leftovers lingering for days later, I thought a two-layer cake instead of a three-layer cake would be best. The cake was easy to whip up; I used two 9-inch round pans for it. The baking time was a bit less than the book indicated, but I am pretty sure it's because I switched things up.


The frosting, which is a cooked flour frosting, turned out way better than I expected it to. I've made this type of frosting before, and both times I have hit a bump in the road. Not this time. This batch came out great; satiny, luxurious, with a perfect hint of caramel flavor. Addictive stuff! I reduced the amount of frosting I made to just a third of the original amount, and it wasn't actually enough to frost the top and sides and fill the middle layer. So, I improvised. I had some leftover butterscotch frosting from my son's birthday cake, so I used that to fill the middle of the cake. It worked beautifully! The butterscotch complemented the spice cake so well, and the pale orange color coordinated nicely as well.


The cake was a huge hit, needless to say. Everyone really loved it. It was impressive to look at (even though my cake decorating skills need some work) and tasted unbelievably delicious. The cake was so moist from all that applesauce, and the spices were gentle but present. Everything comes together wonderfully in this cake; I don't know what else I can say about it!

But maybe there are some other people who have different things to say about it. Go check out the Baked Sunday Mornings blogroll to see the group's thoughts on this cake.

Saturday, August 13, 2011

Roasted Red Pepper and Feta Spread (Plus a Birthday Cake!)


This weekend is my oldest son's sixth birthday. I can't, for the life of me, believe that I have a child going into first grade! It seems like only moments ago, he was born and I was holding a little baby (okay, maybe not so little. He was nearly 9 pounds when he came into the world!). But enough of me strolling down memory lane. We have a cake to discuss here!


I blogged about this Butterscotch Krimpet cake a couple months ago, and I mentioned how much my son loved it. Turns out, he loved it enough to request it as his birthday cake this year! It actually works out great, because orange is his favorite color, and the butterscotch frosting is naturally orange. I did add a couple drops of orange gel food coloring to make it pop a bit more, and I think it turned out nice and vibrant. I baked the cake in two round 9-inch cake pans, slathered a generous helping of frosting in between the layers, and piped a teal border around the top and bottom of the cake. Since his favorite TV show is Scooby Doo, he wanted there to be some sort of Scooby theme. So, orange and teal represent Scooby, and just before serving the cake we pressed a few of his Scooby Doo action figures onto the top. Voila!


Now, I promised you a Roasted Red Pepper and Feta Spread recipe, and I did not forget about it. This is my own, made-up version of a white bean hummus with a nice chunk of feta and a roasted red pepper thrown in for good measure. I decided to make it to go along with my CEIMB recipe this past week, since I was too chicken-y to try the assigned feta spread. I really loved it; give it a try and see if you agree!


Roasted Red Pepper and Feta Spread
recipe by Bri
makes about 2 cups

Ingredients
1 (15-ounce) can cannellini beans, preferably low-sodium, drained and rinsed
1 roasted red pepper, drained and coarsely chopped
1/4 cup (1 ounce) feta cheese, crumbled
Juice of 1 lemon
2 Tbsp. tahini (sesame seed paste)
1/2 tsp. ground cumin
1/2 tsp. dried oregano
1 jalapeno pepper, seeded and coarsely chopped
Salt and freshly ground black pepper, to taste

Directions
1. In the bowl of a food processor, combine the cannellini beans, roasted red pepper, and feta cheese. Pulse a few times to break up the ingredients. Add the remaining ingredients, turn on the food processor, and blend until very smooth. Transfer to an airtight container; store in the refrigerator.

Wednesday, June 29, 2011

Chocolate Whoopie Pies with Malted Buttercream Filling


Now that I've become familiar with malted milk powder as an ingredient in my baking (thanks to the Baked cookbooks!), I decided it was time to test it out in some whoopie pies. Why not, right? So I toyed with several different ideas, such as whether or not I should put the malt flavor into just the cookie shells themselves, the filling, or both. Finally, I settled on doing a basic chocolate whoopie pie shell with malted buttercream filling.


I can't really explain the deliciousness of these cookies to you. I think you just need to try it for yourself! The chocolate cookie part is pure comfort food, all soft and pillowy with a dark, not too sweet chocolate taste. Then, the malted buttercream offsets the dark chocolate with its sweet, unique flavor and perfect smoothness. It was love at first bite! The crowning touch was rolling the sides of the pies in crushed Whoppers candy. Heaven! I know it has been a while since I've made whoopie pies, but I plan on turning that around. I'm gonna be making them way more often from here on out. It's a tragedy, I tell ya, that I almost forgot just how great they could be!


Chocolate Whoopie Pies
adapted from Whoopie Pies
makes 48 cookies (24 sandwich cookies)

Ingredients
Nonstick cooking spray
1 3/4 cups all-purpose flour
2/3 cup natural, unsweetened cocoa powder
1 1/2 tsp. baking soda
1/2 tsp. kosher salt
4 Tbsp. unsalted butter, softened
4 Tbsp. vegetable shortening
1 cup dark brown sugar, packed
1 egg
1 tsp. vanilla extract
1 cup milk
Malted Buttercream Filling (see below)
Whoppers candy, crushed (optional)

Directions
1. Preheat oven to 375 degrees F. Line a few baking sheets with parchment paper (or spray a whoopie pie pan with nonstick cooking spray). In a medium bowl, sift together the flour, cocoa powder, baking soda, and salt. Set aside.

2. In the bowl of an electric mixer fitted with the paddle attachment, beat together the butter and shortening until uniform and creamy. Add in the brown sugar and beat well for another 3 minutes on medium, until everything is well-incorporated and the mixture is fluffy. Add egg and vanilla, and beat for another 2 minutes.

3. To the mixer, add half the flour mixture and half the milk; beat on low until incorporated. Repeat with the remaining flour and remaining milk and beat until combined.

4. Using a tablespoon (or a small ice cream or cookie scoop), drop batter onto cookie sheet, spacing drops two inches apart. Bake each sheet for about 10 minutes, rotating them halfway through. They are done when each pie springs back when touched lightly in the center. Cool the pies on baking sheets for five minutes before transferring to a wire rack to cool completely.

5. Fill whoopie pies with Malted Buttercream Filling; recipe is below. Roll the sides of the filled pies in crushed Whoppers candy, if desired.


Malted Buttercream Filling
adapted from Whoopie Pies
makes enough to fill 24 small whoopie pies

Ingredients
4 Tbsp. unsalted butter, softened
1 3/4 cups confectioners sugar, sifted
3 Tbsp. milk
1/2 tsp. vanilla extract
4 Tbsp. malted milk powder (or you can use Ovaltine)

Directions
1. In the bowl of a standing mixer fitted with the paddle attachment, beat the butter and sugar together until light and fluffy, about 3-4 minutes. Scrape down the sides of the bowl. Add the milk, vanilla, and malted milk powder. Continue to beat on medium speed for another 3-4 minutes. Use to fill chocolate whoopie pie shells; yum!

Sunday, May 15, 2011

MSC: Tiramisu Cupcakes


This month's selection for the Martha Stewart Cupcakes Club was the Tiramisu Cupcakes with Mascarpone Frosting. These were chosen by Jennifer of The Rookie Baker, whom I am in both this group and the Craving Ellie group with. I was intrigued by these cupcakes, because while I am not too familiar with tiramisu in general, I did wonder how it would translate into cupcake form.


My understanding of tiramisu is that it is a dessert composed of ladyfinger cookies that have been soaked in wine and/or coffee. The dessert is topped with a whipped cream (I think; see, my knowledge of actual tiramisu is limited!) frosting and then dusted with cocoa powder. Since I am not usually a fan of desserts that taste like booze, I wasn't sure if I'd like these, though I was certainly open to trying it!


The cupcakes themselves are not too difficult to make; they just require a bunch of different steps. You infuse milk with vanilla bean flavor by heating it up on the stovetop with a vanilla bean pod. Some butter is stirred into this at the end of the heating process. Meanwhile, you beat together some eggs, egg yolks, and sugar until combined, then heat that up on the stove, as well. You just want the sugar to dissolve, and for the mixture to become warm. Next, you beat the eggs/sugar on high speed until the mixture becomes very thick and the batter is almost ribbon-like when drizzled from a spoon.

You blend in cake flour, baking powder, and salt next to form a cake batter. Once everything is combined, you divide it into cupcake tins and bake. Once the cupcakes have baked and cooled completely, you brush each with a simple mixture of brewed coffee or espresso, marsala wine, and a bit of sugar. I was concerned that these would become too soggy, so I stuck the baked cupcakes inside a second cupcake liner each to minimize the possibility of them leaking all over. As it turned out, it wasn't really a problem, but at least I was prepared!

You allow this mixture to soak in for a while, and then your cupcakes are ready to be frosted. I was eager to taste this frosting, because last week I made a different mascarpone frosting for the Tomato Soup Cupcakes that I didn't care for too much. This one's made with whipped heavy cream, mascarpone cheese, and some confectioners' sugar. Just those three ingredients. And I have to say, this one really worked for me! True, I did not really taste the mascarpone when all was said and done, but it did add some body to the otherwise light and airy frosting. It was smooth and divine. A sprinkling of cocoa powder over the top of this, and these are ready.


I'm still glad I tried these, but I have to admit that they are not my absolute favorite. There's just something about the soggy, soaked cupcake tops that jut does not appeal to me. However, my husband took these in to his office and they received rave reviews, so clearly I am in the minority here. That said, they were a lot of fun to make and were very impressive.

Thank you, Jennifer, for giving me the opportunity to branch out and try something new. I wonder how everybody else liked these? Click on over to the MSC blogroll to see all the other results, here!

Sunday, May 8, 2011

Baked Sunday Mornings: Tomato Soup Cupcakes


Yes, you read that title correctly. For this week's Baked Sunday Mornings assignment, we were to make the Tomato Soup Cupcakes with Mascarpone Frosting. As bizarre as this cupake may sound, I actually have heard about these before reading the Baked book. I can't say that I ever thought I'd be baking them, though! Lucky for me, then, that this cupcake came up in the rotation for the group.


I've gotten used to setting aside huge chunks of time to make the Baked recipes, and I'm fine with that. However, if you're looking for a nice, easy recipe that is still just as elegant as the other offerings in this book, I definitely recommend that you give these a try. I was able to throw this whole thing together, including frosting the cupcakes, within my two year-old's naptime! I can't beat that!


So, what's up with the whole tomato soup thing, anyway? Where did this originate? Who ever thought to put a can of tomato soup in their cake batter, and then feed it to their loved ones? I really don't know, but they must have been on to something. This is one of those oldey-timey cake recipes that has been passed down for years, and I'm sure a lot of people hold this cake near and dear to their hearts. It is basically a spice cake, almost reminiscent of a carrot cake, without the carrot. The "secret" ingredient (not so secret if you know the title of the recipe, though!) dyes the batter a pale, pretty orange hue that still does not betray its identity. I mean, who would ever guess that the cake is orange because it contains some Campbell's?


As I said before, the cake itself came together in no time flat, and baked up beautifully. I loved the nice, domey tops on these! Next comes the frosting, which was a Mascarpone/Butter combo. I've made many a cream cheese frosting, but this was my inaugural batch of mascarpone frosting. While I've heard mascarpone described as a "fancy cream cheese," I actually think it's kind of its own thing. It's good, don't get me wrong. It just was not what I had expected. The frosting, to me, tasted very sweet, almost like a buttercream. Again, that's fine, but I supposed I was in for a tangy, tart/sweet topping to my cake and instead it tasted just sweet. Also, I think that maybe I just whipped this up wrong, because I accidentally threw the butter and mascarpone in the mixer at the same time. Only after this did I read in the book that the butter was supposed to be mixed first, all by its lonesome. Oops. My frosting, as a result of this (perhaps?) seemed a bit thin or something. It was not at all fluffy, but it spread just fine.


I'm glad I tried these, but I can't make any promises that I would bake them again. If I wanted a spice cake, I would probably just make a regular spice cake, sans soup. As for the frosting, if I absolutely had to make the cupcakes again, I would sub in just a cream cheese frosting for the mascarpone. Later this week, I'll be making Martha Stewart's Tiramisu Cupcakes, and they call for a mascarpone frosting as well! The preparation and ingredients differ from this one, so we'll see if I like that one better. Check out how the other members of Baked Sunday Mornings felt about this recipe by clicking on the link here.

Friday, April 15, 2011

MSC: Chai Tea Cupcakes


This month, for the Martha Stewart Cupcakes Club, our assignment was to make the Chai Tea Mini Cupcakes with Condensed Milk Glaze. This month's cupcake is being hosted by Rachel of Simple Girl, since the blogger who originally chose for us to make these had to take some time off from her blog. I decided to make half mini cupcakes, and half regular-sized cupcakes this time. I just wanted to have both options available, and my first plan had been to do two different frostings (although that ended up changing).


So my husband loves to drink chai lattes from Starbucks, but he adds a twist to his. He orders them with two shots of espresso added in, and the slang for this is a "dirty chai." So in the spirit of experimentation, I thought it would be fun to make a frosting that sort of paid homage to his "dirty chai" habit. Plus, it was a great excuse to use up some heavy whipping cream I had hanging out in my fridge! So, I threw together some Espresso Whipped Cream to top my cupcakes.

I gotta say, this stuff was outstanding! I found it over on Epicurious; it's super easy and takes only minutes to make. You whip your cream to soft peaks, add in a touch of powdered sugar and 1 teaspoon of instant espresso powder, and continue whipping until stiff peaks form. There you go! I was so impressed with the whipped cream frosting that I wound up abandoning the condensed milk frosting that accompanies these cupcakes in Martha's book. I know it was probably delicious, but I don't think we really missed it. I topped the frosted cupcakes with just a dash of ground cinnamon, which I thought made the cupcakes look more latte-ish.

These ended up being loved by everybody who tried them; the pairing of cupcake and frosting worked very well! I loved the method of steeping the tea bags in milk and then using that milk as the liquid in the cake recipe. This would really be a fun thing to experiment a little bit more with. I dug the spices in the cake, as well. It truly was reminiscent of chai, but a little bit like a pumpkin-spiced cake, too. Not that I'm complaining!


Be sure to see what the other MSCers did with this month's cupcake recipe, by checking out the blogroll, here. Oh, and there's a bonus cupcake recipe this month, Martha's Easter Egg Cupcakes, but I made and blogged about those last year! So if you'd like to see how they turned out, you can see them here.

Saturday, January 15, 2011

MSC: Black Forest Cupcakes


It feels so good to be participating in the Martha Stewart Cupcakes Club again this month! I've been MIA for the last two assignments, for various reasons, but this time I'm back and ready to bake! This time around, we were to make Martha's Black Forest Cupcakes, chosen by Janine of Janine's Crazy World. I almost did not participate this time, either, because I'm not really a fan of cherries. However, I decided to go for it and to take on the challenge of adapting this to better fit my personal taste.


The cupcake part was made exactly as the recipe was written. Well, I did cut the recipe in half, and I used low-fat sour cream, but other than that it was very faithful to Martha's original take. I didn't want to mess with the cupcake; it sounded so good just the way it was! But then I got to the filling part, and I just had to start tampering with it.

You see, even though I am not a fan of eating whole cherries, I could totally see myself eating some yummy frosting that tasted like cherries. So I decided I would slice my cupcakes in half, through the middle like Martha indicates. However, instead of filling them with pastry cream and cherries, I thought I would make a cherry buttercream filling for this. Then, instead of brushing the cut cupcake sides with the cherry liquor/syrup, I just brushed some cherry preserves on each side. The buttercream was a delicious combination of butter, confectioners' sugar, and cherry preserves. The preserves contained pieces of cherry, but once they joined the butter and sugar in my stand mixer they got all chopped up. They were able to leave the frosting mostly smooth, with streaky bits of cherry throughout.


Finally, I topped the cupcakes with the indicated chocolate ganache glaze. Yum! That is all I have to say about the topping. I sent these to work with my husband and he returned home with just one left (which was for him since he did not get a chance to eat one at the office), so I am assuming that these were well-received by everybody! I thought they were delicious, and I really enjoyed my variation. It made the cherry flavor way more palatable for me, and I loved the way they looked. They almost reminded me of a chocolate parfait or something; lovely layers of goodness!


I'm glad these were chosen for this month because if I hadn't been assigned to make these, I probably never would have. Now I've discovered a new flavor combo that I previously would have been skeptical to try. Thanks, Janine, for the great choice! The full recipe (Martha's way) can be found on Martha's website, here. And to see how the other bakers in the group did, check out the Martha Stewart's Cupcakes Club blogroll, here.

Monday, November 15, 2010

Chocolate Chip Sesame Street Cupcakes


Usually, on the 15th of each month, I will post a cupcake that has been chosen by a member of the Martha Stewart Cupcakes Club. This month, I just had too much going on, what with throwing my youngest son and his cousin a birthday party this past weekend. I decided to skip the MSCC for this month, as much as it pained me to do so. However, it just wouldn't be the 15th without a new cupcake recipe to post here! So I'm going to tell you about the cupcakes I made for my son's birthday.


Since the birthday boys were turning 2 and 1 this year, I decided to throw a Sesame Street-themed party, and to decorate some cupcakes to look like a few Sesame Street characters. In honor of the Cookie Monster (my son's favorite), I made some of Martha Stewart's Chocolate Chip Cupcakes. I'd been itching to try them anyway, and now I finally had a bona fide excuse to do so! I browsed the internet briefly, just to see what other creative souls had done to design Sesame Street character cupcakes. In this post, you see the results of my searches, adapted to represent my own style. I'm pretty proud of these little guys, because when it came time to actually decorate them, I did it all freehand, without a picture in front of me as a guide.


Here's the lowdown: I whipped up 2 dozen regular-sized cupcakes and 3 cupcakes that were baked in oversized muffin cups (because the recipe yield was 30 cupcakes, and each jumbo cupcake was the equivalent of 2 regulars). Meanwhile, I had tinted some of Martha's Fluffy Vanilla Frosting (which I love, and have posted about before, here) in various colors, to represent Elmo, Cookie Monster, Oscar the Grouch, and Ernie. I sliced some large marshmallows in half, and these served as eyeballs for Elmo and Cookie, as well as for jumbo Oscar. I would use mini marshmallows for Oscar's and Ernie's eyes, and jumbo marshmallows, sliced thinly, to represent the eyes of jumbo Elmo and jumbo Cookie.

When it came time to decorate, I used a Wilton piping tip that is used to create "hair" (tip 233) for Elmo, Cookie, and Oscar. For Ernie, I just piped medium-sized dots for his skin, but I used the hair tip again to give him his black patch of hair on top of his head. Then came eyes, noses, and mouths. Instead of a mouth on Cookie Monster, I inserted half a chocolate chip cookie into the cupcake, to make it look like he was in the middle of eating a cookie. Those ended up being the biggest hit, and were the first to disappear. I can see why; you get a cupcake and half a cookie, all in one fell swoop!


I gave the giant Elmo cupcake to my one year-old nephew, and the giant Cookie Monster to my two year-old son. I wish I had a picture of him actually sticking his face right down into the cupcake (because he totally did that) but this picture of his blue mug will have to suffice. He loved the cupcakes, but I think he loved the cookie more!

I know they're not perfect, and I have a long way to go before my cupcakes look bakery-ready, but I was happy with these. More importantly, the birthday boys enjoyed the whole experience, so my goal was accomplished. Oh, and the cupcakes were pretty delicious, although I have to say that they almost reminded me more of chocolate chip muffins than cupcakes. That was fine with me, but just be warned about Martha's recipe. Good, but not super light and fluffy.


Chocolate Chip Cupcakes with Fluffy Vanilla Frosting
from Martha Stewart's Cupcakes
makes 30 cupcakes (or in my case, 24 cupcakes and 3 jumbo cupcakes)


Ingredients
3 1/4 cups plus 1 Tbsp. sifted cake flour (not self-rising)
4 1/2 tsp. baking powder
1/4 tsp. salt
1 Tbsp. pure vanilla extract
1 cup plus 2 Tbsp. milk
1/2 cup plus 6 Tbsp. (1 3/4 sticks) unsalted butter, room temperature
1 3/4 cups sugar
5 large egg whites, room temperature
2 cups (12 oz.) semisweet chocolate chips
Fluffy Vanilla Frosting (recipe found here)
Gel-paste food coloring
Various-sized marshmallows (mini, large, jumbo)
3 small chocolate chip cookies, halved (or more, if you want to make more Cookie Monsters)


Directions
1. Preheat oven to 350 degrees F. Line standard muffin tins with paper liners. Whisk together 3 1/4 cups cake flour, the baking powder, and salt. Stir the vanilla into the milk to combine.

2. With an electric mixer on medium-high speed, cream butter until smooth. Adding the sugar in a steady stream, beat until pale and fluffy. Reduce speed to low. Add flour mixture in three batches, alternating with two additions of milk mixture, and beating until just combined after each.

3. In another bowl, with an electric mixer on medium speed, whisk the egg whites until stiff peaks form (do not overmix). Fold one-third of the egg whites into the batter to lighten. Gently fold in the remaining whites until just combined. Toss chocolate chips with remaining tablespoon cake flour, and gently fold into batter.

4. Divide batter evenly among lined cups, filling each three-quarters full. Bake, rotating tins halfway through, until a cake tester inserted in centers comes out clean and the tops are springy to the touch, about 22-24 minutes. Transfer tins to wire racks to cool completely before removing cupcakes (although I removed mine after 10 minutes). Cupcakes can be stored overnight at room temperature, or frozen up to 2 months, in airtight containers.

5. Prepare Fluffy Vanilla Frosting. Divide the frosting into 1/2 cup black, 1/4 cup brown, 3/4 cup orange, 1 cup red, 3/4 cup blue, and 3/4 cup green. Using a Wilton 233 tip (or hair/grass tip), pipe fur onto 6 cupcakes in green, 6 cupcakes in blue, and 6 cupcakes in red. Using a Wilton 21 tip, pipe skin onto 6 cupcakes in orange. (I then piped fur onto 3 jumbo cupcakes to make one Elmo, one Cookie, and one Oscar.)

6. Using the Wilton 3 or 4 tip in black, pipe smiles onto the red, green, and orange cupcakes. Place halved large marshmallows on the red and blue, and mini marshmallows (whole) on the green and orange for eyes. Pipe small black dots onto the marshmallows for pupils. (When I did my jumbo cupcake characters, Elmo and Cookie had jumbo marshmallows, sliced thin, for their eyes. Oscar had large halved marshmallow eyes.)

7. Complete Elmo by placing an orange nose underneath the eyes. Complete Cookie Monster by placing half a chocolate chip cookie towards the bottom of the cupcake, to look as though it is sticking out of his mouth. Complete Oscar by piping his brown eyebrows over his eyes with a Wilton 16 tip. Complete Ernie by piping his nose with a Wilton 21 tip in red, and give him some black hair with the Wilton 233 tip. There you have it: Sesame Street cupcakes!

Friday, October 22, 2010

Caramel Apple Cupcakes with Apple Cider Caramel Sauce


These cupcakes were the product of my imagination, running wild, and trying to come up with the perfect way to use a really awesome caramel sauce that I made recently. Funny how something as multi-step as a cupcake could be born from something so simple as caramel, but that's exactly what happened. Of course, there are many, many things you could do with this caramel sauce; it's actually quite versatile. But for my blogging purposes today, we're just going to talk about it in this recipe.


So what is this magical caramel I speak of, anyway? Well, it's Apple Cider Caramel Sauce, and it is heaven. Instead of making this caramel with lots of butter or cream, or both, you add lots of fresh apple cider. Then, to make it even more apple-y, you throw in a bunch of diced apple pieces and allow them to get all soft and mushy in there. Once the caramel has had a chance to come together, you puree the mixture, so the apple pieces actually become part of the sauce. Oh, my, is it good! After it's had a chance to chill in your fridge, it thickens up nicely, almost becoming a cross between a caramel sauce and an applesauce. Then, you're ready to use it!


The cupcakes I decided to make were from Cooking Light. I found a special issue that I snatched right up at the bookstore; it was a Fall Baking edition! I flipped through it before purchasing and realized I could see myself making over half of the recipes; I thought it would be a good investment! (Okay, that's what I told myself so I'd feel better about buying the more expensive special edition.) I'd probably have to put these cupcakes in the sorta cupcake/sorta muffin category. I mean, they're delicious and everything. They're moist, with nice chunks of apple throughout, but they did remind me of a muffin more so than a cupcake. Still, I suppose that's to be expected when it's a "light" recipe. And, besides, the frosting would more than make up for the healthiness! So I forged on.


I whipped up a Swiss Meringue Buttercream for the cupcakes, using Martha Stewart's basic recipe as my guide. I did have a little bit of trouble with the buttercream, as is usually the case when I make this tricky frosting. But I managed to get everything under control, and the frosting came together quite nicely.


So now it was time to add my Apple Cider Caramel Sauce! I wanted to transform my ordinary, muffin-y apple cupcakes into Caramel Apple Cupcakes, and I knew that adding the caramel to the frosting would be divine. I wasn't sure how much caramel to add to the buttercream at first, so I started out with about 2/3 cup and kept checking the flavor. It took a little over 3/4 cup caramel total before you could really taste the sauce in the frosting. Once I had enough caramel in there, the frosting turned a lovely light caramel color. It was silky and smooth, and you could detect the hint of apple flavor in the caramel sauce. It was pretty amazing.


Just to take these over the top, I finished them off with a drizzle of the caramel sauce over the buttercream. The piping on some of these were really weird, sorry about that (I was trying a thing. It didn't work), but I think for the most part these were a rousing success. I love it when a crazy notion in my head turns into delicious reality!


Caramel Apple Cupcakes

cupcakes adapted from Cooking Light (the original recipe had a streusel topping and a glaze, which I omitted due to my addition of buttercream frosting)

makes 12 cupcakes


Ingredients

6.75 oz. all-purpose flour (about 1 1/2 cups)

1/2 tsp. baking powder

1/4 tsp. salt

1/4 tsp. baking soda

3/4 cup granulated sugar

1/4 cup (2 oz.) 1/3-less-fat cream cheese, softened

1/4 cup butter, softened

2 Tbsp. amaretto (you can use 2% milk, which I did)

1 tsp. vanilla extract

1 large egg

1/2 cup reduced-fat sour cream

1/4 cup 2% reduced-fat milk

3/4 cup finely chopped Gala apple

1 Tbsp. all-purpose flour


Directions

1. Preheat oven to 350 degrees F. Place muffin cup liners in 12 muffin cups; coat with cooking spray. Weigh or lightly spoon 6.75 oz. flour into dry measuring cups; level with a knife. Combine this flour with baking powder, salt, and baking soda in a small bowl; stir with a whisk.


2. Combine granulated sugar, cream cheese, and 1/4 cup butter in a large bowl; beat with a mixer at high speed until well blended. Add amaretto or 2 T. milk, vanilla, and egg to sugar mixture, and beat with a mixer at high speed until well blended. Combine sour cream and 1/4 cup milk in a small bowl, and stir with a whisk until well blended. Combine apple and 1 T. flour in a small bowl, and toss well.


3. Add flour mixture and sour cream mixture alternately to sugar mixture, beginning and ending with flour mixture. Beat just until blended. Fold in apple mixture. Divide batter evenly among muffin cups. Bake at 350 for 27 minutes or until a wooden pick inserted in center comes out clean. Cool in pan for 15 minutes on a wire rack; remove the cupcakes from pan and allow to cool on racks.


Caramel Swiss Meringue Buttercream

adapted from Martha Stewart (I made just half the recipe)

makes about 2.5-3 cups


Ingredients

1/4 cup plus 1 Tbsp. sugar

3 large egg whites

Pinch of salt

1/2 pound (2 sticks) butter, softened and cut into tablespoon-sized pieces

1/2 tsp. pure vanilla extract

3/4 (or more as needed) Apple Cider Caramel Sauce, recipe follows


Directions

1. Whisk together the sugar, egg whites, and salt in the heatproof bowl of a standing mixer. Set bowl over a pan of simmering water, whisk until sugar is dissolved and mixture registers 140 degrees on an instant read thermometer.


2. Return bowl to mixer; fit mixer with whisk attachment. Beat on medium-high speed until stiff. Reduce speed to medium-low; add butter, a few tablespoons at a time. Continue whisking until smooth.


3. Switch to paddle attachment. Add caramel and vanilla; beat on lowest speed until combined, 3 to 5 minutes. The buttercream can be made several days ahead and stored in the refrigerator. Before using, bring buttercream back to room temperature; return to mixer and beat with the paddle attachment until smooth.


4. To assemble cupcakes, pipe the frosting onto each cupcake in the desired pattern. Drizzle with leftover caramel sauce and serve. (The frosted cupcakes do keep well in the fridge; just bring to room temperature before serving.)


Apple Cider Caramel Sauce

from The Craft of Baking

makes about 2 cups


Ingredients

2 1/4 cups sugar

1/2 cup light corn syrup

1/4 vanilla bean, split lengthwise, seeds scraped out, bean and seeds reserved

2 small tart baking apples, such as Mutsu, Cortland, or Granny Smith, cored, and cut into 1-inch pieces

3/4 cup apple cider

1/4 tsp. kosher salt


Directions

1. Combine the sugar, corn syrup, 1/2 cup water, and the vanilla bean and seeds in a medium saucepan. Cook over high heat until the sugar becomes a medium golden caramel, about 15 minutes. Add the apples and stir to combine. Reduce the heat to low and cook until the apples have softened, 2 to 3 minutes. Carefully add the cider and stir to combine. Continue to cook until the sauce is sticky, about 5 minutes more.


2. Remove the pan from the heat and remove the vanilla bean. Rinse and recycle the vanilla bean for another use. Whisk the salt into the mixture.


3. Transfer the mixture to a blender and puree until smooth. Strain it through a fine mesh sieve into a bowl. Serve immediately, or store in an airtight container in the refrigerator for up to 2 weeks. Reheat the sauce in a saucepan over low heat.

Saturday, August 21, 2010

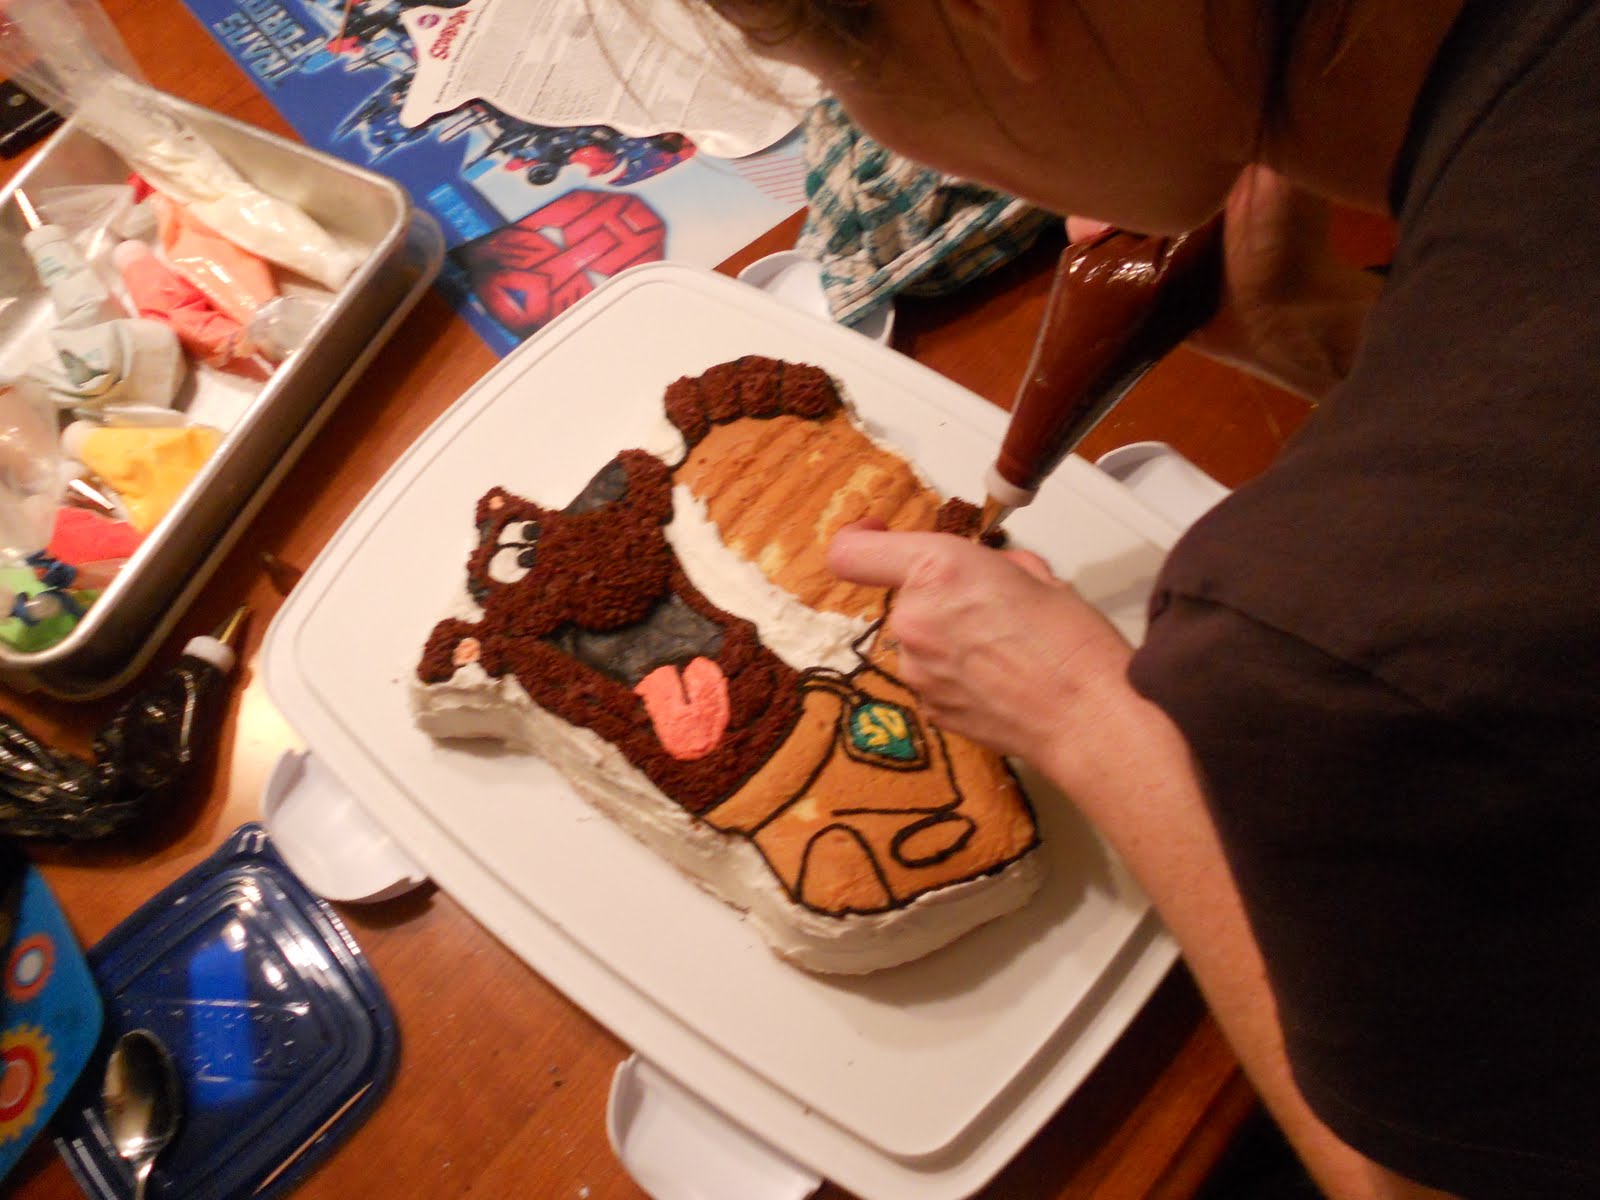
Scooby-Doo, and a Recipe Too!


Okay, first of all, I should apologize for the lighting in these photos. Boy, it really makes everything look unnaturally bright and washed out. These pictures were taken late at night before my son's 5th birthday, and I found that the cake looked even worse in the morning light the next day. Go figure! So I'm presenting you with the lesser of two evils.


This cake was the capper on a week of Scooby-Doo treats that I had prepared for his special day. There were the cookies, then there were the cupcakes. He wanted everything to be Scooby-themed; even most of his gifts this year were Scooby-related. This cake was the piece de resistance, the crowning touch to end the festivities.


We were fortunate enough to find this cake pan at a Michael's store about 5 months ago. I made Xander promise me that he would not change his mind about wanting a Scooby-themed birthday party this year, and he kept his word. Hard to believe, but he is still just as much in love with Scooby now as he was 5 months ago! Anyway, we grabbed the cake pan that day at Michael's because they don't usually carry it, and it was on clearance. I've never seen another one since, so I'm glad to have found it.


This was hard, intricate work, let me tell ya. I've done a pirate ship-shaped cake before, so I was familiar with this style of decorating. This was much more difficult, though. It required you to first frost the sides and background sections with plain white frosting. Then, you had to trace Scooby's entire outline in black frosting. Andy helped me do Scooby's nose and mouth, while I worked on his tongue and eyes. Next, you could fill in the brown fur sections and his dog tag and collar. Finally, I did Scooby's hamburger, and then I outlined the entire cake with a bunch of orange stars (Xander's favorite color is orange, and I thought it went just fine with the rest of the cake).


I used a new cake recipe for this one, and I was really happy with it. It comes from a cookbook I've come to really enjoy lately, The Craft of Baking. It's for a basic yellow layer cake with a milk chocolate buttercream, but obviously I went in a different direction with my frosting. This cake almost reminds me of sponge cake; by folding egg whites into the batter before baking, you produce a light, airy cake that holds together incredibly well, and is tender and moist at the same time. Best of all, it is not too sweet, so the buttercream I used paired well with the cake.

In case you're wondering about the frosting, it's actually the Wilton recipe for buttercream. It's sinful, I know, because it contains some shortening. I justified this by reasoning that since I was using up all the Crisco I had in the house (which I had bought when I took Wilton's cake decorating classes), and because it was a special occasion, it'd be okay. And it does work very well for this type of decorating project. To make the brown for Scooby's fur (I think I made it a bit too dark) and the black for his outline, I added some cocoa powder to some of the frosting, then added a bit of water to thin it out. Then I just tinted the rest of my white frosting with various shades of gel-paste food coloring.

I'm including the recipes for the yellow cake and the Wilton frosting below. I would love to try this cake next time with the frosting in the cookbook, though. I have no doubt it would be sublime. Until then, here you go!


Yellow Layer Cake

from The Craft of Baking

makes one 10-inch layer cake (or one Scooby-Doo cake plus about 4 cupcakes!)

Ingredients

2 Tbsp. unbleached all-purpose flour

12 Tbsp. (1 1/2 sticks) unsalted butter, very soft, plus extra for the pans

1 3/4 cups sugar

1 1/2 tsp. pure vanilla extract

7 large egg yolks

3 cups cake flour

1 tsp. kosher salt

3/4 tsp. baking powder

3/4 tsp. baking soda

1 cup plus 2 Tbsp. sour cream

7 large egg whites


Directions

1. Butter the bottoms and sides of three 8-inch cake pans and line the bottoms of the pans with rounds of parchment paper. Butter the tops of the paper liners, and then dust the pans with the all-purpose flour, tapping off any excess. Preheat the oven to 350 degrees F.

2. In the bowl of an electric mixer fitted with the paddle attachment, mix the butter, 1 1/2 cups of the sugar, and vanilla extract on medium speed, scraping down the sides of the bowl several times, until pale and fluffy, 5 minutes. Add the egg yolks, one at a time, letting each become incorporated into the batter before adding the next.

3. In a separate bowl, sift together the cake flour, salt, baking powder, and baking soda. Reduce the mixer speed to low and alternate adding the flour mixture and the sour cream to the butter mixture, adding one third of each at a time and letting them fully mix in before adding the next. When all of the flour mixture and sour cream have been added, turn the mixer to medium-high speed and mix for about 2 minutes, to fully incorporate the ingredients and help build the structure.

4. Scrape the batter into a large mixing bowl. Clean the bowl to the mixer well and, using the whisk attachment, whip the egg whites on low speed until frothy, about 5 minutes. (Instead of doing this, I just used a hand mixer and whipped the egg whites in a smaller bowl, then proceeded with the recipe.) Add the remaining 1/4 cup sugar and increase speed to medium high. Whip whites to soft peaks, then fold them into the batter in 3 additions.

5. Divide the batter between the three prepared cake pans and spread it out evenly with a spatula. Place pans on two baking sheets. Bake the cakes, rotating the pans and switching the cakes between the upper and lower racks of the oven halfway through, until they are lightly golden on top, gently bounce back when touched, and a cake tester inserted in the center of the cake comes out clean, 30 to 35 minutes. (Mine obviously took about 15 to 20 minutes longer, due to the size of the Scooby pan.)

6. Transfer the cake pans to a wire rack and let the cakes cool for 30 minutes. Then remove them from the pans and let them cool completely, at least 3 hours, before frosting.


Buttercream Icing

from Wilton

makes about 3 cups


Ingredients

1/2 cup solid vegetable shortening

1/2 cup (1 stick) butter or margarine, softened

1 tsp. clear vanilla extract

1 Tbsp. meringue powder

4 cups sifted confectioners' sugar (about 1 lb.)

2 Tbsp. milk

3 Tbsp. cocoa powder

1-2 Tbsp. water

Gel-paste food coloring


Directions

1. In large bowl, cream shortening and butter with an electric mixer. Add vanilla, then the meringue powder. Gradually add sugar, one cup at a time, beating well on medium speed. Scrape sides and bottom of bowl often. When all sugar has been mixed in, icing will appear dry. Add milk and beat on medium speed until light and fluffy. Keep bowl covered with a damp cloth until ready to use.

2. For best results, keep icing bowl in refrigerator when not in use. Refrigerated in an airtight container, this icing can be stored 2 weeks. Rewhip before using.

3. For chocolate buttercream, proceed through the confectioners' sugar addition, then add cocoa powder. Add water gradually, a bit at a time, then the milk, until the desired consistency is achieved. Add more or less than the recipe calls for, depending on how thick/thin you'd like your icing to be.

Friday, August 13, 2010

Yellow Buttermilk Cupcakes with Fluffy Vanilla Frosting


Well, the Scooby-Doo theme continues! The other day I posted about my Scooby-Doo Dog Tag Sugar Cookies, and now I'm going to tell you about my Scooby-Doo Cupcakes! For my son's 5th birthday party at a local children's bouncey house, I decided to go with cupcakes because they're easy, they're kid-friendly, and it would give me an excuse to once again whip out my trusty Martha Stewart's Cupcakes book!


I knew the birthday boy would want cupcakes that were as plain and simple as could be. Therefore, this was the perfect opportunity to finally try out Martha's Yellow Buttermilk Cupcakes with Fluffy Vanilla Frosting. My son's kinda strange, for a 5 year-old. He does not like chocolate cake, only vanilla. He absolutely hates frosting; I had to serve him a plain, "naked" cupcake with no frosting on top. And I wouldn't even dream of offering him ice cream with his cake; he won't even touch the stuff. I thought I'd be safe with the yellow cupcakes, and I could give the vanilla frosting to his party guests, but not to him.


I was lucky enough to find these adorable Scooby-Doo cupcake papers on Ebay, and I originally contemplated frosting each cupcake with two different-colored frostings at once. However, that made me nervous because I've never done something like that before. I decided I didn't want to risk there being a cupcake disaster the morning of the party! So in the end I kept it simple and did half the cupcakes bright orange (Xander's favorite color) and half the cupakes teal. The colors were great, really vivid, and I thought they represented the colors on Scooby and the gang's Mystery Machine quite nicely! I used Wilton gel-paste food colors for the frosting.


The cupcakes were delicious. They were light, tender, and very moist. They were like the quintessential kids' birthday party cupcakes. I can definitely see why so many other people say that these are their go-to yellow cupcakes.

And the frosting was fabulous, too! So often, American buttercream icing can be so cloyingly sweet that you get sick from eating it. That's not the case with this frosting. The technique Martha employs, of alternating between beating it at a very high speed for short bursts, and beating it at a lower speed for longer periods, really made the frosting super fluffy (hence the name). It wasn't a dense, heavy frosting; rather, it was light as air and almost felt, texturally, like whipped cream. I even got compliments about it; one person said they don't normally like frosting, but she liked this frosting. I wonder what she'd think of Swiss Meringue Buttercream...

So these were a tremendous hit, cake, frosting, all of it. The little party favors adorning the cupcakes were a hit, too! I found these little Scooby-Doo rings that I was excited to use. It was so easy; I just nestled them right into the frosting. The kids got to take them home with them. My younger son, the 20 month-old, used his ring as his fork. He kept dipping his ring into the frosting, and then ate the frosting off. I thought it was creative!

There will be even more cupcake fun later on this week. The Martha Stewart Cupcakes Club will be making Triple Citrus Cupcakes!


Yellow Buttermilk Cupcakes
from Martha Stewart's Cupcakes
makes 36 cupcakes

Ingredients
3 cups cake flour (not self-rising)
1 1/2 cups all-purpose flour
3/4 tsp. baking soda
2 1/4 tsp. baking powder
1 1/2 tsp. coarse salt
1 cup plus 2 Tbsp. (2 1/4 sticks) unsalted butter, room temperature
2 1/4 cups sugar
5 large whole eggs plus 3 egg yolks, room temperature
2 cups buttermilk, room temperature
2 tsp. pure vanilla extract
Fluffy Vanilla Frosting (recipe follows)
Gel-paste food coloring, optional
Colored sprinkles, optional


Directions
1. Preheat oven to 350 degrees F. Line standard muffin tins with paper liners. Sift together both flours, baking soda, baking powder, and salt.


2. With an electric mixer on medium-high speed, cream butter and sugar until pale and fluffy. Reduce speed to medium. Add whole eggs, one at a time, beating until each is incorporated, scraping down sides of bowl as needed. Add yolks, and beat until thoroughly combined. Reduce speed to low. Add flour mixture in three batches, alternating with two additions of buttermilk, and beating until combined after each. Beat in vanilla.


3. Divide batter evenly among lined cups, filling each three-quarters full. Bake, rotating tins halfway through, until cupcakes spring back when lightly touched and a cake tester inserted in centers comes out clean, about 20 minutes. Transfer tins to wire racks to cool 10 minutes; turn out cupcakes onto racks and let cool completely. Cupcakes can be stored overnight at room temperature, or frozen up to 2 months, in airtight containers. (I froze these the week before the party, and what I did worked well. I place them back in the muffin tins after they were cool, then triple-wrapped each muffin tin in saran wrap. I placed all the tins inside a large plastic bag and pushed as much air out of the bag as I could. Then I tied it off and placed the whole bag in the freezer. When it was time to defrost, I took them out, unwrapped everything, and took the cupcakes out of the tins. Then I allowed them to thaw. They were perfect!)


Fluffy Vanilla Frosting
from Martha Stewart's Cupcakes
makes 4 cups


Ingredients
1 1/2 cups (3 sticks) unsalted butter, room temperature
1 lb. (4 cups) confectioners' sugar, sifted
1/2 tsp. pure vanilla extract


Directions
1. With an electric mixer, beat butter on medium-high speed until pale and creamy, about 2 minutes.

2. Reduce speed to medium. Add the confectioners' sugar, 1/2 cup at a time, beating well after each addition and scraping down sides of bowl as needed; after every two additions, raise speed to high and beat 10 seconds to aerate frosting, then return to medium. This process should take about 5 minutes. Frosting will be very pale and fluffy.

3. Add vanilla, and beat until frosting is smooth. If not using immediately, frosting can be refrigerated up to 10 days in an airtight container. Before using, bring to room temperature, and beat on low speed until smooth again, about 5 minutes. (If coloring your frosting, it can either be done right after beating, or after storing in the refrigerator and beating again. Add gel-paste food coloring until you reach the desired shade. Frost and decorate cupcakes as desired.)