Showing posts with label Baked. Show all posts

Sunday, September 25, 2011

Baked Sunday Mornings: Honey Corn Muffins


I'm back with another Baked Sunday Mornings post today! This time around, we made Honey Corn Muffins, an easy, delicious muffin if ever there was one. Perfect for breakfast, lunch, or as an accompaniment with dinner, these little cuties taste like cornbread with a glossy sheen from the honey. They're good at room temperature, but they're phenomenal when they're warm.


I have really grown to love cornbread lately, but making these muffins made me realize something; I think I like my cornbread savory, rather than sweet. These were scrumptious, don't get me wrong. But I had to think of them like a sweet muffin in order to fully embrace them. When I thought of them as a corn muffin, I found myself wishing I had cut down the sweetness in the recipe. If I make these again, I think I will still add the honey, but omit the brown sugar. I just don't think they need both.


I'm really glad I made these; otherwise, if it weren't for the blogging group, I may have overlooked them completely. And that would have been a shame! To see if the other members of the group liked these, head on over to the blogroll, here.

Sunday, September 11, 2011

Baked Sunday Mornings: Caramel Apple Cake


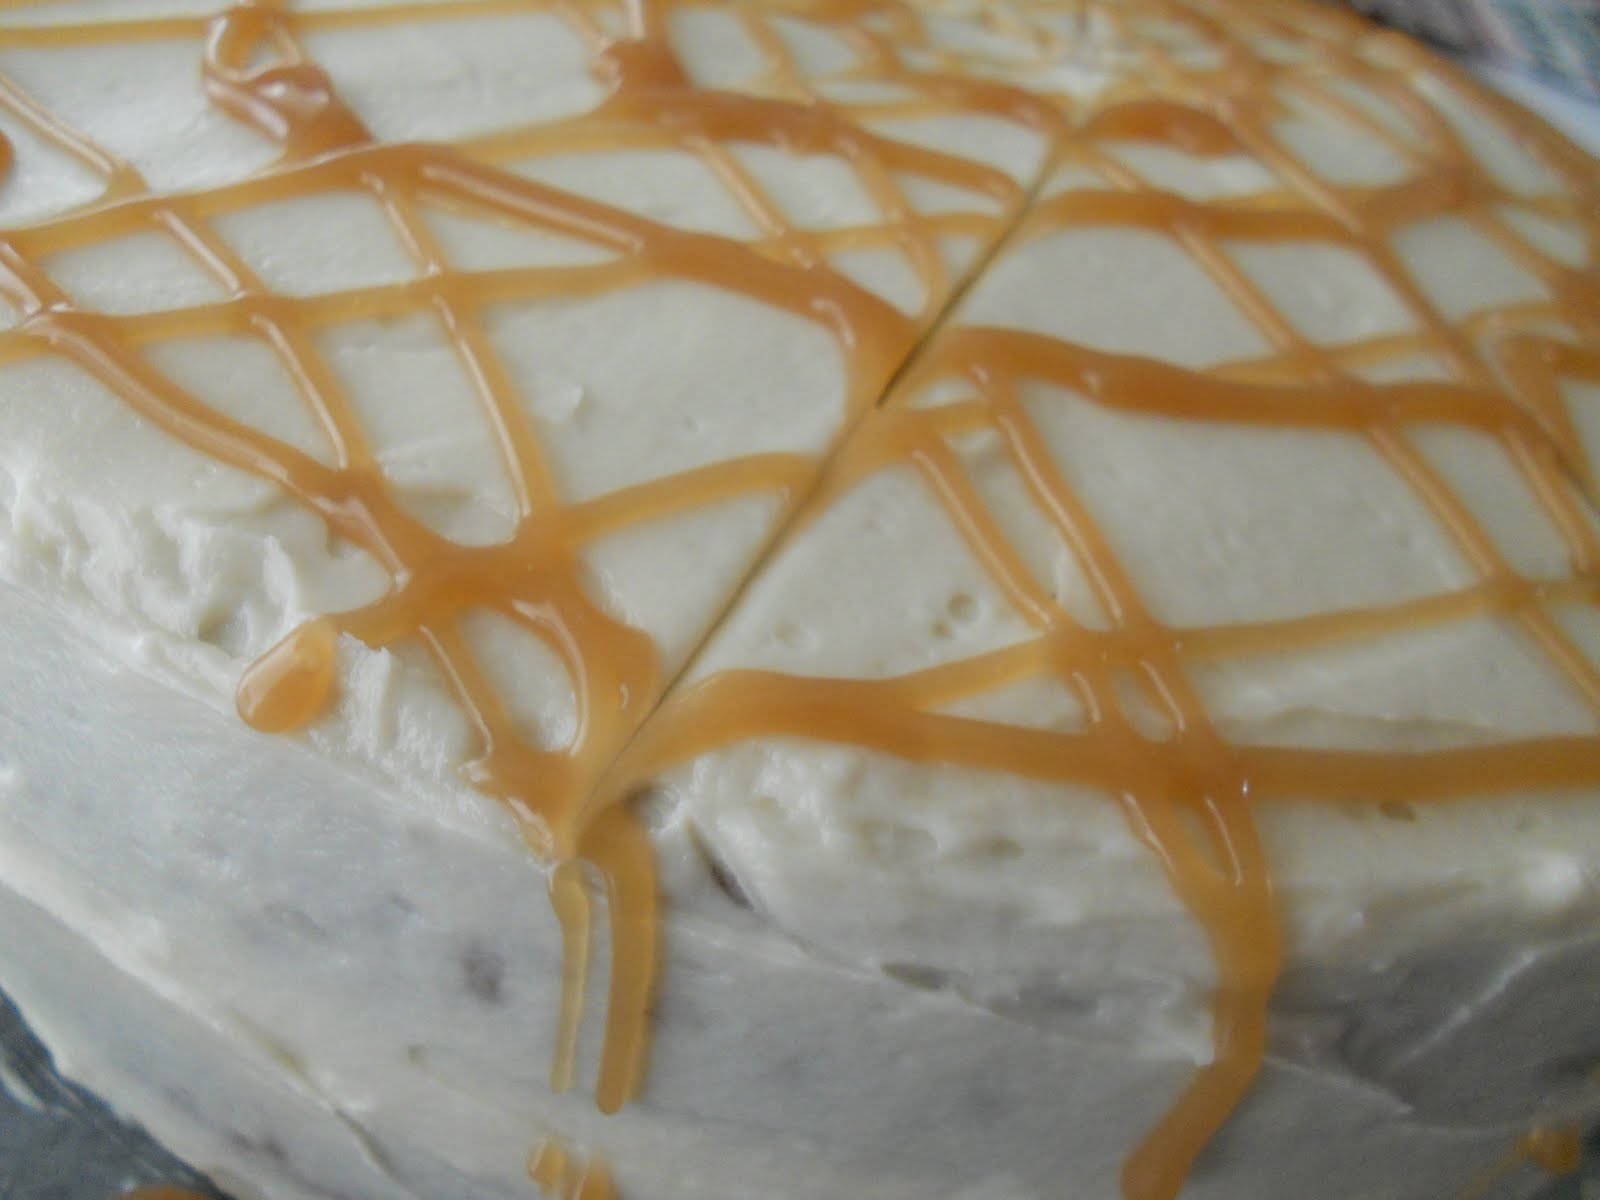
I had the privilege of making the Baked Explorations book's Caramel Apple Cake last weekend for my Baked Sunday Mornings group. Boy, what an undertaking! This was not your simple, thrown-together kinda cake. This was much more of a clear-your-calendar, spend the whole day covered in flour and frosting cake. But let me tell you, it was worth every second spent on it! It was nothing short of magnificent.


I broke the recipe up into steps; it made the whole thing so much easier and more manageable. I made the homemade applesauce, which goes into the cake batter, about two days before I was going to bake the cake. I made the homemade caramel, which is incorporated into the frosting as well as drizzled on top of the finished cake, about three or four days prior to baking day. I have to say, my confidence was totally boosted by making both the applesauce and the caramel; I had great success with both! I tend to mess up when making caramel, but this particular batch turned out pretty perfect. The applesauce was my first ever attempt at making it from scratch. It was completely easy to do and came together beautifully.


For the cake itself, I decided to cut the whole recipe in half. I was serving this for my brother-in-law's birthday, and there were going to be 7 of us eating the cake. Since this is a very decadent cake and I didn't really want there to be tons of leftovers lingering for days later, I thought a two-layer cake instead of a three-layer cake would be best. The cake was easy to whip up; I used two 9-inch round pans for it. The baking time was a bit less than the book indicated, but I am pretty sure it's because I switched things up.


The frosting, which is a cooked flour frosting, turned out way better than I expected it to. I've made this type of frosting before, and both times I have hit a bump in the road. Not this time. This batch came out great; satiny, luxurious, with a perfect hint of caramel flavor. Addictive stuff! I reduced the amount of frosting I made to just a third of the original amount, and it wasn't actually enough to frost the top and sides and fill the middle layer. So, I improvised. I had some leftover butterscotch frosting from my son's birthday cake, so I used that to fill the middle of the cake. It worked beautifully! The butterscotch complemented the spice cake so well, and the pale orange color coordinated nicely as well.


The cake was a huge hit, needless to say. Everyone really loved it. It was impressive to look at (even though my cake decorating skills need some work) and tasted unbelievably delicious. The cake was so moist from all that applesauce, and the spices were gentle but present. Everything comes together wonderfully in this cake; I don't know what else I can say about it!

But maybe there are some other people who have different things to say about it. Go check out the Baked Sunday Mornings blogroll to see the group's thoughts on this cake.

Sunday, August 28, 2011

Baked Sunday Mornings: Mom's Olive Oil Orange Bundt (Better Late than Never)


After mixing up my dates for two of Baked Sunday Mornings' selections, I am now finally posting about the Olive Oil Orange Bundt that the rest of the group made nearly a month ago. I am so glad I decided not to just skip it; it was so worth the wait!


It is a pretty straightforward bundt cake recipe. The only major difference between this cake and bundt cakes I have made before is the incorporation of olive oil. It takes the place of butter or any other oil in the cake, so its presence is definitely noticed in the finished product. Fresh orange zest is added to the batter, and it gives the cake such a fresh, bright flavor. Finally, the method of separating the egg whites from the yolks and whipping them before adding them to the batter makes it a bit lighter in texture than other, denser bundt cakes.


I was kinda grateful that others had made this before me, because I could learn something from their tips. The most important lesson I learned from the other bloggers was that I should cut down on the baking time, just slightly. I believe I checked the cake around 37 minutes, and it was just right. The recipe, as written, indicates more like 40-50 minutes. I don't know how much of a difference it made for my cake, but mine was perfect as is.


I hope the other members of Baked Sunday Mornings enjoyed making the Coffee Ice Cream that I made by mistake last month! You can see their results on the main blog, here. To see how everybody liked this Olive Oil Bundt, you can click on the blog post about it over on the main blog, here.

Sunday, August 14, 2011

Baked Sunday Mornings: Grasshopper Bars


This week's Baked Sunday Mornings selection is a blast from my past. I actually made these Grasshopper Bars all the way back in December, and have resisted blogging about them until now. That's why, in the above picture, you can just sorta kinda make out Rudolph's little hooves in the background. He was presiding over the kitchen that day!


I love all things minty, so I was absolutely sure I would go crazy for these. The bars are basically the Baked brownie, with a cool mint layer of frosting on them, covered with a dark chocolate layer on top. I mean, yum, right? So why didn't I totally adore these?


Maybe it's me. Other people tried them, and enjoyed them very much. This was probably the first Baked recipe I've made that didn't totally blow me away. Maybe I expected the mint layer to be more minty than it was, or perhaps it was the creme de menthe in particular that I didn't really dig. I couldn't put my finger on it. It's still a good brownie, just not one I would make again.


So, Merry Christmas in August, and head on over to the Baked Sunday Mornings blogroll for a second (and third, and fourth, and....) opinion! I hope everybody else liked them a whole lot more than I did!

Sunday, July 31, 2011

Baked Sunday Mornings: Coffee Ice Cream


This week's Baked Sunday Mornings selection was supposed to be Olive Oil Orange Bundt Cake. Somehow, I got my dates mixed up. I never actually went back and checked the recipe schedule, I just assumed I knew what this week's pick was. Then, this morning, when I went over to the blogroll to link up, I realized that I had made the wrong recipe! Oops. It was a tasty mistake, though, and now I'll be making the bundt cake on the week that the recipe I did make is scheduled to be on.

So, here's my offering: Coffee Ice Cream! I was really excited about this; I have recently begun to embrace my little home ice cream maker, and I knew this recipe would just have to be wonderful. Coffee, Kahlua, custard base? Count me in!


I decided to reduce this recipe to half the amount, since I was going to have to make it in small batches either way. I only have a half-pint ice cream machine, and it really isn't very powerful, anyway. Plus, I knew only my hubby and me would be eating this; no coffee or booze for the kiddos, of course!


The custard base was very easy to assemble and didn't take very long to make. It required a bit of stirring while on the stove, but otherwise it wasn't labor intensive. The base is cooled down to room temperature, and then set in the refrigerator for a long chill. I made my base the day before we were going to make the ice cream. I think it aged well, because it tasted even better the next day (yes, I know this because I tasted the base after I first made it. Wouldn't you?). I found out after the fact that I had forgotten to reduce the salt measurement by half, so my ice cream did turn out a tad salty. Lucky for us, we like salty/sweet desserts!


I discovered that it's hard to get a decent picture of ice cream for food blogging purposes, so here's my weak attempt at getting a good shot. I think you get the gist; it was very creamy, with a nice solid coffee flavor, and the alcohol really wasn't noticeable at all to us. I would certainly make this again and again! If you'd like to find out what everybody else in the group thought of the bundt cake, check out the blogroll, located here. I'll be making it at the end of August; in the meantime, try the ice cream!

Sunday, July 17, 2011

Baked Sunday Mornings: Peaches and Dream Pie


This weekend's Baked Sunday Mornings selection was another great, summery pie: The Peaches and Dream Pie. Isn't that a fabulous title? Once again, the Baked guys have taken something that is traditional and garden-variety, such as a peach pie, and turned it on its head.


It all starts out with a generous pile of peaches (the recipe gives you the option to use either canned or fresh, but I went fresh because the peaches are peaking right now and they looked fabulous!), diced and spread out in a standard pie crust. Next, you mix up an interesting mix of eggs, honey, sour cream, salt, flour, and dark brown sugar, and pour it all over the peaches in the crust.


Finally, you make up a topping made only of flour, dark brown sugar, and cold butter that is worked into the other ingredients until you have, basically, sand. It is pretty much the same type of topping you would put on top of a crumb or coffee cake, and it is divine. That was the smell that pervaded my house while this pie was baking, and it really made me want to pick at the hard, yummy crust that formed on top of the pie when it came out of the oven. But I resisted, because I was serving this to my husband's family the next day and I didn't want to have to explain why there was a big hole on the top of the pie!


When everything was said and done, this pie baked up beautifully, was very easy to make, and received rave reviews by everybody who tried it. What more could you ask for? Please check out the results of the other members of Baked Sunday Mornings by clicking on the blogroll, here.

Thursday, July 7, 2011

Mississippi Mud Cake


This is my birthday cake. At least, I think I can call it a cake. It's sort of a cake, sort of a pie. It's part pudding. All delicious, though. And decadent. I mean, just look at the thing. Chocolate, on top of chocolate, smothered with even more chocolate. Love!


It all starts with a chocolate cookie crust. The original recipe has you grind up a bunch of Oreo cookies and turn them into a cookie crust (oh, did I mention that the original recipe is from the Baked Explorations cookbook? Yeah. So I knew I was in good hands with this one.). However, I actually prefer the flavor of chocolate graham crackers, so I made my crust with those instead. It was a wise decision; I mean, the cake has enough sweetness (and calories!) without adding Oreo cookies to the mix. And those chocolate graham crackers are tasty.


So, once you have assembled and baked the cookie crust, you're ready to make the next layer: a flourless chocolate cake. Could you just die? It's an amazingly rich, gooey, almost molten cake. It closely resembles a brownie, actually, but I think it's even richer. It's very delicate, too, and it cracks on top while it's being baked. Then, while it's cooling on your counter, it deflates and sinks. It looks pretty cool, when all is said and done. So, once you have cooled your flourless cake layer, it's time to stick it in the fridge and let it set up for a few hours (overnight works even better, as it allows the coffee flavor to mellow out some).

Next, you make a dark chocolate pudding, and that is supposed to go on top of the flourless cake. Now, maybe I messed up on the pudding (and that is most likely what happened), but the pudding layer turned out very runny, at least the first night we ate the cake. I got a phone call while I was stirring the pudding over the stove, and I think the distraction proved to be my undoing. The pudding tastes phenomenal; rich, sweet, yet delicate. It just wouldn't set up and form a solid layer for me. So, as you can see below, as soon as we cut the cake into slices the pudding ran all over the place. An avalanche of yumminess. It was still totally edible. And addictive. And by the next evening, the pudding was much sturdier and held up on top of the cake very well.

The book suggests a whipped cream layer to go on top, but I decided that it was going to be good enough with just the three layers I made. I know it seems ridiculous given the sinfulness of this dessert, but I figured I really didn't need a fourth layer comprised pretty much completely of heavy whipping cream! Call me crazy. This cake is a chocoholic dream. It is not for the faint of heart, and it does take a bit of time to put together. However, I guarantee that you will absolutely love this cake if you are a huge fan of chocolate. It is worth the effort!


Mississippi Mud Pie (B), aka Muddy Mississippi Cake
adapted from Baked Explorations
makes one 9-inch round cake

Ingredients
For the Chocolate Cookie Crust:
24 full sheets chocolate graham crackers, broken into pieces
4 Tbsp. unsalted butter, melted and cooled
1 egg white

For the Flourless Chocolate Cake:
4 Tbsp. unsalted butter
6 ounces good-quality dark chocolate (60 to 70%), chopped
2 Tbsp. plus 1 tsp. instant espresso powder
1/4 cup strong coffee, at room temperature
1/4 tsp. salt
1 Tbsp. pure vanilla extract
6 large eggs, separated, at room temperature
1 cup sugar

For the Chocolate Pudding:
1/2 cup plus 2 Tbsp. sugar
1/2 cup dark, unsweetened cocoa powder (I used Scharffen Berger)
1/4 cup cornstarch
1/4 tsp. salt
4 large egg yolks
2 1/2 cups whole milk
3 Tbsp. unsalted butter
2 tsp. pure vanilla extract
3 ounces good-quality dark chocolate (60 to 70%)

For the Simple Whipped Cream (which I omitted):
1 1/4 cups heavy whipping cream
2 Tbsp. granulated sugar


Directions
Make the Chocolate Cookie Crust: 1. Preheat the oven to 300 degrees F. Lightly spray a 9-inch springform pan with nonstick cooking spray. Line the pan with parchment paper and lightly spray the parchment and sides of the pan.

2. In a food processor, grind the graham crackers to a very fine crumb. You should have about 3 cups. With the food processor running, stream in the melted butter and the egg white. Continue to blend until the liquids have mixed in.

3. Turn the crumb mixture into the prepared pan and press it into the bottom and up the sides, leaving about 1/2 inch between the top of the crust and the top of the pan. Use the back of a large spoon (the bottom of a heavy glass works, too) to get an even layer of crust. Place the pan in the freezer and let the crust set for about 10 minutes.

4. Bake the crust in the oven until it is dry to the touch, about 10 minutes. Transfer the pan to a wire rack and let cool.

Make the Flourless Chocolate Cake: 1. Increase the oven temperature to 350 degrees F. Using a double boiler or microwave, melt the butter and chocolate together. Set aside to cool.

2. In a small bowl, whisk together the espresso powder, coffee, salt, and vanilla. Set aside. In the bowl of a standing mixer fitted with the whisk attachment, beat the egg yolks with 1/2 cup of the sugar until the mixture is light and has almost doubled in volume, about 5 minutes.

3. Add the chocolate mixture to the yolk mixture and beat until just combined. Scrape down the sides and bottom of the bowl and mix on low speed for 5 seconds. Add the coffee mixture and beat until just combined. Scrape down the sides and bottom of the bowl and mix on low for 5 seconds.

4. In a clean bowl fitted with the whisk attachment, beat the egg whites until foamy. Gradually increase the speed to high and add the remaining 1/2 cup sugar, beating until soft peaks form.

5. Scoop 1 cup of the egg whites into the chocolate mixture. Use a rubber spatula to gently fold in the egg whites. After about 30 seconds of folding, add the remaining egg white and continue folding until they are almost completely combined. Do not rush the folding process, work gently, and take care not to overmix.

6. Pour the batter into the cooled cookie crust and bake for 38 to 42 minutes, until the cake is set but still jiggles slightly. It might not appear to be completely cooked. Transfer it to a wire rack to cool completely. (As it cools, the cake will deflate in the center and look sunken. Do not despair, this is just the way it settles.) Tightly wrap and refrigerate the cake for at least 3 hours or overnight.

Make the Chocolate Pudding: 1. In a medium saucepan, whisk together the sugar, cocoa powder, cornstarch, and salt. Add the egg yolks and whisk until combined. The mixture will look like a thick paste. Slowly pour in the milk, whisking constantly.

2. Place the saucepan over medium heat on the stove and bring the mixture to a boil, whisking constantly to prevent it from burning on the bottom of the pan. Boil for 30 seconds, then transfer it to a medium bowl. Add the butter, vanilla, and chocolate and whisk until combined.

3. Continue to whisk for a few more minutes to cool the mixture slightly. Let the pudding stand for 15 minutes at room temperature. Press a piece of plastic wrap directly onto the surface of the pudding to prevent a skin from forming, and chill it for at least 3 hours.

Assemble the Mississippi Mud Pie: 1. Stir the pudding to loosen it, then pour it on top of the cake, making sure to stay inside the cookie-crust border. Use an offset spatula to spread the pudding into an even layer. Return the cake to the refrigerator for at least 30 minutes while you prepare the whipped cream topping.

2. Pour the cream into a chilled metal bowl and beat with a chilled whisk for about 1 minute or until soft peaks form. Sprinkle the sugar on the cream and continue whisking vigorously until stiff peaks form.

3. Remove the cake from the fridge and spread the whipped cream across the pudding layer, all the way out to the sides. Unmold the cake, and serve it immediately. The cake can be kept, covered, in the refrigerator for up to 2 days.

Sunday, July 3, 2011

Baked Sunday Mornings: Blackberry Pie


For this installment of Baked Sunday Mornings, we had the pleasure of baking a Blackberry Pie. I'm not too familiar with baking pies that have a fruit or berry filling; this was my very first berry pie, actually! I've made apple pies before, and I've made key lime, but otherwise I prefer to make non-fruit pies, such as pecan. That said, I was really looking forward to switching things up a little!


The filling is a very simple mixture of fresh blackberries, butter, granulated and dark brown sugar, lemon juice and zest, flour, and salt. It smelled amazing before it even went into the oven. Plus, it only took about 10 minutes to assemble (not including the pie dough, of course).


Speaking of the pie dough, I do find this one pretty easy to work with. Granted, I don't have a ton of experience with dough (mostly because I haven't entirely overcome my fear of working with it!), but I have never had a problem with the Baked version. It baked up flaky and tender, just as it always does.

The finished product was aromatic, perfectly brown and bubbly, and tasted wonderful. I confess; I made this a while back, for Easter dinner. I saw that it was coming up in our recipe rotation for July, and I decided it would be a good thing to bring. I think this would be just the thing for a Fourth of July barbecue or party, though. It's a very summery pie, and I think it could only be enhanced by some vanilla ice cream on top!


Please do check out the other Baked Sunday Mornings blog posts this week; the blogroll can be located here.

Sunday, June 19, 2011

Baked Sunday Mornings: Rosemary Apricot Squares


This week's Baked Sunday Mornings project was to make these Rosemary Apricot Squares, a pleasant surprise if ever there was one. Why? Well, I guess I just didn't think I'd like these bars very much; they don't sound quite as exciting as most of the other Baked recipes do. I'll be honest with you; I don't eat apricots. I don't buy fresh apricots, and I don't buy dried apricots. I've also never turned a dried fruit into a jam filling, so this recipe marked a couple firsts for me. I'm glad I took the plunge, because these bars were simply delightful.


You start out with a pretty simple shortbread crust. The addition of fresh, minced rosemary lends specks of color to this otherwise blond layer, and gives it a nice, floral dimension that I really liked.


The next layer is a fruit filling layer, and it actually couldn't have been much easier to make. I cooked a bunch of dried apricots down in a mixture of water, honey, brandy, sugar, and a pinch of salt. They did take forever to get to what I considered the "ready" stage, but it was all worth the time spent on the stove. The mixture is transferred to a food processor and pureed until smooth. I tasted it, and I was surprised at how good it was. Maybe apricots deserve another try, I thought.

This fruit filling is then spread over the cooled shortbread crust and evened out. A final layer of delicious topping is sprinkled over the top of the fruit. It's just flour, dark brown sugar, flour, a bit of salt, some butter, and chopped pecans. It tastes like crumb cake topping, but mine was a lot sandier and less chunky than crumb cake topping. Plus, I patted mine down so that the top layer looks more smooth and uniform, with just the lumps of pecan visible.


The squares were so fragrant while they were in the oven; my curiosity was officially piqued. Before making these, I didn't even know if I was going to try them. I figured the whole batch would be sent off to work with Andy, never to be seen again. But now I wanted to eat one!

When it came time to cut these into squares, I trimmed the edges from the outer sides of the block. The apricot had seeped out a bit and burned on the sides, and it just wasn't as attractive as the rest of the bars were. So I snacked. I tried those edges, and I loved them. The shortbread is tender (maybe a bit too tender and crumbly, but still delicious!), the apricot layer is sweet and smooth and wonderful, and the topping is the perfect nutty, salty foil to the rest of the bar. This cookbook has done it again; it's taken flavors that are an odd pairing, and transformed them into an amazing, cohesive dessert that seems to work on every level. I am very impressed with the Rosemary Apricot Squares. Now I think I better make sure the rest of them do make it to work with Andy, because they are dangerous to keep around!


Find out if everybody else in the group was impressed with these bars, too. The blogroll can be found right here.

Sunday, June 5, 2011

Baked Sunday Mornings: Orange Creamsicle Tart


This weekend's recipe for Baked Sunday Mornings is getting us back to what we know and love about this ever-expanding group: an eye-catching, complicated confection that requires many steps and hours to make. What with us making Tomato Soup Cupcakes and Cowboy Cookies most recently, I was beginning to think those Baked boys had gone soft on us! The last two treats were easy to make, it's true, but finally with this week we're back with something showy and grand!


So, it's time for me to talk about this Orange Creamsicle Tart. What a project! It's basically a tart with a sweet crust infused with lots of orange zest. Next comes the bright, citrusy curd made from, among other things, real orange juice and lemon juice, plenty of citrus zest, and orange cream soda. The cream soda really gives it a wonderful flavor that you just would not get from a regular citrus curd. It was pretty divine; eating the curd straight reminds you of eating a melted creamsicle pop.


The next step was listed in the margin of this recipe in the book, and therefore optional, but I decided to go whole hog here and add it in. They instruct you to melt some white chocolate and then brush it all over the baked, cooled tart shell before adding any curd. It's supposed to prevent the crust from becoming soggy. In my opinion, it added a whole other layer of flavor that would have been missed here. It was truly inspired, I thought. As a crowning touch, fresh whipped cream that has been sweetened with a bit of sugar and a couple tablespoons of orange cream soda is spread over the top of the tart.


Though the tart took me the better part of an entire day to complete, it was totally worth every single step. The tart is divine, unique and delicious and a real conversation piece. If I'm not going for a chocolate dessert, my default is always something citrus. I can see this dessert coming to mind plenty in the future if I ever want to make something dreamy and luscious and non-chocolate. I hope everybody who made this agreed that it was a real doozy (and I mean that as a compliment!). Make sure to check out the blogroll, here.

Sunday, May 22, 2011

Baked Sunday Mornings: Cowboy Cookies


For this week's Baked Sunday Mornings, we got to make something we don't usually make for this group: cookies. Cowboy Cookies, to be exact. And I have to tell you, I was really excited for these cookies! Yet another play on sweet/salty flavor pairings, these are unique and delicious.


At first glance, these may just appear to be your standard, everyday chocolate chip cookies. No, sir, that would not be entirely accurate! In fact, these are chocolate chips cookies, but enhanced. They are enhanced with a heavy dose of oats and my personal new favorite cookie ingredient, salty pretzel sticks. This has to be one of the greatest ideas ever! I'm telling you, the first time you bite down on a bit of pretzel, it's a surprise. But it's an incredibly pleasant one. The crunch, the salt, the flavor; it all just works so well! If you are a fan of chocolate covered pretzels, consider this your cookie.


I love the addtion of the oats, too, although I would not have thought to put them in there if the Baked boys hadn't told me to. It's definitely not your grandma's oatmeal raisin cookie, that's for sure! In fact, I'm glad there are no raisins or nuts in these cookies, because neither are needed at all. This cookie is different, but familiar. It's indulgent, but hearty enough to seem at least a little bit good for you. I don't think I need to do any more convincing here; you just need to make them!


I'm eager to see if everybody else in the group were as blown away by these cookies as I was. I hope so! You can see all the yummy results over at the blogroll, here.

Sunday, May 8, 2011

Baked Sunday Mornings: Tomato Soup Cupcakes


Yes, you read that title correctly. For this week's Baked Sunday Mornings assignment, we were to make the Tomato Soup Cupcakes with Mascarpone Frosting. As bizarre as this cupake may sound, I actually have heard about these before reading the Baked book. I can't say that I ever thought I'd be baking them, though! Lucky for me, then, that this cupcake came up in the rotation for the group.


I've gotten used to setting aside huge chunks of time to make the Baked recipes, and I'm fine with that. However, if you're looking for a nice, easy recipe that is still just as elegant as the other offerings in this book, I definitely recommend that you give these a try. I was able to throw this whole thing together, including frosting the cupcakes, within my two year-old's naptime! I can't beat that!


So, what's up with the whole tomato soup thing, anyway? Where did this originate? Who ever thought to put a can of tomato soup in their cake batter, and then feed it to their loved ones? I really don't know, but they must have been on to something. This is one of those oldey-timey cake recipes that has been passed down for years, and I'm sure a lot of people hold this cake near and dear to their hearts. It is basically a spice cake, almost reminiscent of a carrot cake, without the carrot. The "secret" ingredient (not so secret if you know the title of the recipe, though!) dyes the batter a pale, pretty orange hue that still does not betray its identity. I mean, who would ever guess that the cake is orange because it contains some Campbell's?


As I said before, the cake itself came together in no time flat, and baked up beautifully. I loved the nice, domey tops on these! Next comes the frosting, which was a Mascarpone/Butter combo. I've made many a cream cheese frosting, but this was my inaugural batch of mascarpone frosting. While I've heard mascarpone described as a "fancy cream cheese," I actually think it's kind of its own thing. It's good, don't get me wrong. It just was not what I had expected. The frosting, to me, tasted very sweet, almost like a buttercream. Again, that's fine, but I supposed I was in for a tangy, tart/sweet topping to my cake and instead it tasted just sweet. Also, I think that maybe I just whipped this up wrong, because I accidentally threw the butter and mascarpone in the mixer at the same time. Only after this did I read in the book that the butter was supposed to be mixed first, all by its lonesome. Oops. My frosting, as a result of this (perhaps?) seemed a bit thin or something. It was not at all fluffy, but it spread just fine.


I'm glad I tried these, but I can't make any promises that I would bake them again. If I wanted a spice cake, I would probably just make a regular spice cake, sans soup. As for the frosting, if I absolutely had to make the cupcakes again, I would sub in just a cream cheese frosting for the mascarpone. Later this week, I'll be making Martha Stewart's Tiramisu Cupcakes, and they call for a mascarpone frosting as well! The preparation and ingredients differ from this one, so we'll see if I like that one better. Check out how the other members of Baked Sunday Mornings felt about this recipe by clicking on the link here.