Showing posts with label salad. Show all posts

Thursday, August 25, 2011

CEIMB: Saffron Chicken, Lemon, and Green Bean Salad


This week's Craving Ellie in My Belly recipe is Saffron Chicken, Lemon, and Green Bean Salad, chosen by Sarah of Sarah's Kitchen Adventures. I'm so glad I was tasked with making this salad; I've read over the recipe in Ellie's book so many times, but never mustered up enough courage to go for it.

You may ask me why I would need courage for this particular salad; it sounds perfectly normal and innocent by the title, right? But don't be fooled; the lemon in the salad is actual chunks of boiled, cooled, diced lemon rind! As you can see in the photo below, the lemon becomes an essential ingredient in the salad itself, rather than simply being a part of the salad dressing (which it is, too, of course).


Now, I felt slightly silly taking a whole lemon, scrubbing its waxy outer coating, stabbing it with a fork several times, and sticking it in a pot of boiling water for close to an hour. But that's exactly what I did. I mean, if I can't trust Ellie by now, something's wrong. She's barely ever steered me wrong; I wasn't (too) worried.

Well, she was right. Again. This salad is nothing short of spectacular! Along with the crisp, snappy fresh green beans, fresh thyme, saffron-laced chicken, and the tart/sweet dressing, the lemon rind was totally tender, intoxicatingly fragrant, and actually, amazingly, tasty! So even though this may sound like quite an unconventional ingredient preparation, I promise you that it is worth a try. Don't be afraid; the results are fresh, exciting, and very delicious!


Thanks to Sarah for the awesome selection! If you would like to see this crazy-good recipe for yourself, click here. For the CEIMB blogroll, click here.

Monday, August 22, 2011

Meatless Mondays: Quinoa Sliders with Spicy Roasted Corn Salad


I keep reading and seeing blog posts about quinoa being used as the primary ingredient in burger patties, and I finally decided it was time to stop reading and start doing! I love making vegetarian burgers, and this seemed like a great twist on an old favorite. Plus, it could not be any simpler.


Let me back up a second, though, and tell you about the side dish I made to go along with the Quinoa Sliders: Spicy Roasted Corn Salad. This is a fun way to use up your fresh corn on the cob; it's tangy and spicy, with some great contrasting textures in the form of black beans, scallions, and sweet corn. It can be made in advance and served cold, and it keeps well for days. As you can see above, the ingredients are combined with a delicious chipotle vinaigrette, then tossed well and chilled before eating. I like my food spicy, but of course this recipe could be modified and made with less (or no) chipotle peppers.


The slider recipe I used came from another blog, and the author fried her slider patties on the stovetop. Then, she served the burgers with a quail egg on top. I didn't go quite so fancy; below I included a link to her original recipe. Because I was trying to make these a bit healthier, I chose to bake my patties in the oven and I skipped the egg. Because I baked them, they did turn out just a tad rubbery, which I think is due to the fact that there are several eggs in the slider patties (there to bind the ingredients).

I love these because they are a blank canvas for virtually any flavors you like. If you wanted a Tex Mex burger, you could add some chili powder to the slider base. If you were to go Asian next time, they would taste great with some soy sauce, fresh lime juice, ginger, etc. For this go-round, I did a slightly Middle Eastern thing. I sprinkled plenty of ground sumac (our new favorite spice) into the slider ingredients, which lends foods a slightly sour, acidic flavor. No matter how you dress them up, I suggest you give them a go if you like quinoa, or even if you need an introduction to them. Simple and lovely!


Quinoa Sliders
adapted from food+words
makes 12 sliders

Ingredients
2 1/2 cups cooked quinoa
2 eggs (lightly beaten)
2 egg whites (lightly beaten with whole eggs)
1/2 tsp. kosher salt
2 slices whole wheat bread, processed into crumbs
1 jalapeno pepper, seeded and finely minced
1/2 a small onion, finely diced
2 garlic cloves, minced
1 tsp. ground sumac (found in international supermarkets and spice shops)
Freshly ground black pepper, to taste
Slider buns (we used pretzel buns, yum!)
Sriracha sauce, for drizzling
Spinach leaves

Directions
1. Preheat oven to 400 degrees F. Combine the cooked quinoa with the beaten eggs and egg whites, the salt, bread crumbs, jalapeno, onion, garlic, sumac, and black pepper. Using your hands or a large cookie scoop, form slider patties and place on a nonstick baking sheet (or a sheet lined with parchment or silpat). Flatten slightly to form your burgers.

2. Bake the sliders for 20-25 minutes, flipping them halfway through the cooking time. (If desired, you can also fry them in some olive oil on the stovetop, about 2 minutes per side.)

3. Serve the quinoa sliders on slider buns with spinach leaves and a drizzle of sriracha sauce.


Spicy Roasted Corn Salad with Black Beans and Feta
adapted from Fine Cooking
makes 6-8 servings

Ingredients
3 ears fresh corn
1 small red onion, diced
1 (15-oz.) can black beans, drained and rinsed
2-3 oz. (1/2-3/4 cup) reduced-fat feta cheese, crumbled
1 Tbsp. chopped fresh oregano
2 scallions, sliced
3 Tbsp. olive oil
2 Tbsp. apple cider vinegar
1 small canned chipotle pepper, seeded and minced, plus 1 Tbsp. adobo sauce (from the can)
Salt and freshly ground black pepper, to taste

Directions
1. Preheat oven to 375 degrees F. Place the ears of corn, still in their husks, directly on the center rack in the oven. Roast for 30 minutes. Remove from oven and allow to cool; remove husks and silk. Slice the corn kernels from the cob and place in a large bowl.

2. To the bowl, add the red onion, black beans, feta cheese, scallions, and oregano. In a separate bowl, whisk together the olive oil, vinegar, chipotle pepper and sauce, and salt and pepper. Alternatively, you can blend the ingredients together with an immersion blender, or inside a standard blender.

3. Pour the dressing over the corn mixture and stir well to combine. Refrigerate the salad for several hours before serving. This will keep in the fridge for several days.

Monday, July 25, 2011

Meatless Mondays: Tabbouleh and Batata Harra (Spiced Potatoes)


As promised, here is the other half of my Middle Eastern meal from the other night. I figured it would be smart to blog today about the meatless side dishes I served, in honor of Meatless Mondays! I had the pleasure of making a Tabbouleh for the first time for this meal. Although I mostly used Cat Cora's recipe, I did make some changes to her formula.


I want to try her version soon, but I loved this one! Mine was more what you would consider a standard Tabbouleh, with tomatoes and cucumbers and parsley. Cat Cora's swapped out the tomatoes for red grapes, and fresh mint in place of the parsley. Yum! But I happened to have the tomatoes and parsley on hand already, so that is what I went with. It's a very easy side salad to make; the bulgur literally prepares itself once you pour boiling water over top. Once all your veggies are prepped and chopped, everything just gets tossed together with olive oil and lemon juice.


For the Batata Harra, or Lebanese Spiced Potatoes, I had to do a little bit of research. A couple weeks ago, my family ate dinner at a Middle Eastern restaurant, and there was a very big menu. I finally opted for a large tasting plate for my entree, but I had my eye on the Batata Harra as well. Since I did not order the potatoes in the end, I decided I would just find out how to make them myself; they sounded too good to pass up! And they were simple and very delicious. They have quite a kick; I used both a fresh jalapeno and cayenne pepper, and you could definitely feel the heat.

My preparation method was different from the recipe I found; I made mine a bit healthier. In the original recipe, the potatoes are deep fried, and then all the aromatics are tossed in more oil. I decided to bake my potato pieces, and then I tossed the aromatics in a much smaller amount of oil. I'm happy to say that my dish still turned out extremely flavorful, and the potatoes were deliciously crispy. I don't know what the restaurant version of these tastes like, but I'll be making these at home again for sure!


Tabbouleh
adapted from Cat Cora's Classics with a Twist
makes 8 to 10 servings

Ingredients
1 2/3 cups boiling water
1 cup bulgur
1/4 cup extra-virgin olive oil
1/4 cup fresh lemon juice
1 cup chopped scallions
1 cup chopped fresh flat-leaf parsley
1/4 cup chopped fresh oregano
1 cup halved cherry tomatoes
1 cup diced cucumber (about 1 medium)
Kosher salt and freshly ground black pepper
2 Tbsp. pine nuts, toasted

Directions
1. Pour the boiling water over the bulgur in a large bowl and stir just until all the grains are moistened. Cover and let sit for 1 hour at room temperature.

2. Pour the oil and lemon juice into the soaked bulgur. Add the scallions, parsley, oregano, tomatoes, and cucumber; toss to combine. Season to taste with salt and pepper.

3. Cover and refrigerate tabbouleh for at least 1 hour so the flavors have a chance to meld. Top with the pine nuts just before serving.


Batata Harra (Lebanese Spiced Potatoes)
adapted from Food.com
makes 1 lb. potatoes

Ingredients
1 1/2 Tbsp. extra-virgin olive oil, divided
Nonstick cooking spray
1 1/2 lbs. red potatoes, peeled and cut into 1-inch pieces
1/2 cup scallions, chopped
1 clove garlic, minced
1 jalapeno pepper, seeded and diced
1/4 tsp. cayenne pepper
1/2 tsp. ground coriander
Coarse salt and freshly ground black pepper, to taste
1/4 cup fresh flat-leaf parsley, chopped
1 tsp. fresh lime juice

Directions
1. Preheat oven to 400 degrees F. Toss the potatoes with some salt and pepper, and 1 Tbsp. of the olive oil. Spread on a nonstick baking sheet, or a baking sheet coated with nonstick cooking spray, and bake for about 30-40 minutes, until potatoes are fork tender.

2. Heat a medium skillet over medium heat. Add the remaining 1/2 Tbsp. olive oil. Add the scallion, garlic, jalapeno, cayenne pepper, coriander, salt and pepper. Saute the mixture for about 2 minutes, stirring constantly to prevent burning. Toss the potatoes in the scallion mixture until well coated. Take the skillet from the heat; stir in the parsley and lime juice. Transfer to a serving dish and serve.

Tuesday, June 21, 2011

Greek Panzanella Salad


I don't make the Barefoot Contessa's recipes very often, but it has very little to do with how I feel about her. I actually like her very much; she's such a soothing television host, and her food always looks accessible and drool-worthy. Therein lies the problem; her food isn't exactly fat-free! It usually has a high calorie content, although I wouldn't call her an unhealthy cook. So, I think the best thing I can do when I'm craving one of Ina's recipes is to go for it, but alter it to better fit my calorie needs. As Ina herself might say, "How easy is that?"


So I embarked upon the task of making her Greek Panzanella Salad, because it looked insanely delicious, and quite frankly I was craving bread. This seemed like the perfect way to turn bread into a one-dish meal that is also packed full of fresh vegetables, feta cheese, and a scrumptious dressing. I've made panzanella once before, and it was Ellie Krieger's recipe. That one was wonderful, too; this one is just a different spin on the formula.

This one has spinach, onions, bell peppers, cucumbers, kalamata olives, grape tomatoes (which I roasted first so they would get all soft and concentrated in flavor), and feta cheese. I used a five-grain bread for my toasted bread cubes, which added a nice nutty dimension to the salad. The dressing is a pretty simple red wine vinaigrette; I just used a lot less oil than Ina did. I also decreased my feta to about 2 oz., and used a reduced-fat variety. That said, I think it could have used a bit more feta, so I wrote the recipe below with the option of using 3 or 4 oz. of cheese. Use the amount you feel comfortable with. Even with all my changes, this salad was absolutely wonderful! I didn't feel like I was depriving myself of anything; all the flavors were there, and a serving was definitely filling enough to pass for an entree. Now that I've made this recipe with such rousing success, I can hardly wait to get my hands on some more of Ina's recipes!


Greek Panzanella Salad
adapted from Foodnetwork.com
makes 6-8 servings

Ingredients
Nonstick cooking spray
1 (12-0z.) loaf whole grain, crusty bread, cut into cubes
1/4-1/3 cup kalamata olives, chopped
2 cups grape tomatoes, halved (or roasted, like I did)
1/2 a cucumber, seeded and chopped into cubes
1 orange bell pepper, seeded and diced
1 green bell pepper, seeded and diced
1/2 a red onion, sliced into thin strips
3 cups lightly packed baby spinach leaves
3/4-1 cup reduced-fat feta cheese, cubed
1/4 cup plus 2 Tbsp. red wine vinegar (I use a pomegranate red wine vinegar; yum!)
1 tsp. Dijon mustard
1/4 tsp. kosher salt
1/2 tsp. freshly ground black pepper
1 garlic clove, minced
1 tsp. dried oregano
1/4 cup extra-virgin olive oil

Directions
1. Preheat oven to 375 degrees F. Arrange the bread cubes on a large baking sheet and lightly coat with nonstick cooking spray. Bake the cubes in the oven for about 10 minutes, turning once halfway through cooking. Check for doneness; they should feel stale, like croutons. Adjust cooking time if they need a bit longer.

2. Toss the olives and the next 7 ingredients (through feta cheese) together in a large salad bowl. Set aside. In a small bowl, combine the red wine vinegar, the mustard, salt, pepper, garlic, and oregano. Slowly stream in the olive oil, whisking constantly.

3. Pour the dressing over the vegetables; toss well to combine. Add in your reserved, cooled bread cubes and toss again to coat the cubes with dressing. Serve in shallow bowls.

Monday, March 21, 2011

Meatless Mondays: Thai Bulgur Salad with Almond Dressing


It's been a few weeks since I've been able to do a Meatless Monday, and I have to say that I've missed it. It's not that I haven't been going meatless, at all, though. In fact, when trying to decide which recipe to blog about today, I realized that I had lots of meatless options to choose from!

In the end, though, I really wanted to talk about this Thai Bulgur Salad with Almond Dressing. This was my first time working with bulgur, and my first time eating it, too. It's quick-cooking, cracked wheat that pretty much behaves like barley or rice in a dish. It's surprisingly hearty and loaded with protein and fiber. The kind I purchased also had roasted soy chips, for an extra punch of soy protein. It's pretty tasy, and very versatile. I'm converted!


This salad is made up of a bunch of fresh veggies, the bulgur, and a tasty almond dressing that is sort of reminiscent of a peanut satay sauce. The secret ingredient is almond butter, another one of my new loves. If you like peanut butter, I recommend trying almond butter just for a change. It's got a very rich, almost sweet flavor, despite containing virtually no sugar. It's better for you than peanut butter; rich in antioxidants and monounsaturated fats, it's also good for your heart and can even aid in controlling your weight. You can get it in smooth or chunky, just like peanut butter. It's great on toast and fabulous in this dressing. I'm planning on baking it into some cookies in the near future!

The dressing also contains rice wine vinegar, soy sauce, garlic, ginger, honey, and sesame oil, and it is delicious. It was a truly satisfying meal, despite the fact that it was, well, a salad, and contained no meat. By adding protein in varied and unexpected ways, you really don't miss it. This one's a keeper; give it a try!


Thai Bulgur Salad with Almond Dressing
adapted from a Better Homes and Gardens Special Interest Publication
makes 4 servings

Ingredients
1 cup water
1/2 cup bulgur
2 cups frozen edamame, thawed and shelled
1 cup sweet red bell pepper, cut into julienne strips (about 1 medium pepper)
1/2 cup diced carrot (about 1 medium)
1/2 cup chopped radish (about 7-8 radishes)
1/2 cup thinly sliced, quartered red onion
4 cups packaged fresh spinach leaves
1/4 cup rice wine vinegar
3 Tbsp. natural almond butter
1 Tbsp. honey
1 Tbsp. fresh ginger, minced
1 tsp. low-sodium soy sauce
1 tsp. toasted sesame oil
1 garlic clove, minced
Lime wedges, for garnish (optional)

Directions
1. In a medium saucepan, bring the water to boiling; stir in the uncooked bulgur. Return to boiling; reduce heat. Simmer, covered, 15 minutes or until bulgur is tender and most of the liquid is absorbed. Drain if necessary; transfer to a large bowl.

2. While the bulgur is cooking, make the dressing. In a small bowl, combine the dressing ingredients (rice vinegar through garlic) and whisk thoroughly to combine. Set aside.

3. Add the edamame, bell pepper, carrot, radish, and red onion to the bulgur. Divide the spinach leaves among four shallow bowls. Top with bulgur mixture; drizzle with the almond dressing. If desired, garnish with lime wedges.

Thursday, March 17, 2011

CEIMB: Savory Chinese Chicken Salad


This week's Craving Ellie in My Belly recipe was Savory Chinese Chicken Salad, hosted by Danica of Danica's Daily. I found that this salad could not have come at a better time. I've been eating out way too much this past week, so a nice, refreshing homemade salad such as this was just what I needed. On the evening I prepared it, putting everything together was a snap, and I think that had something to do with the fact that we had roasted a whole chicken two days prior and I had set some aside specifically for this recipe. It definitely helped to already have the chicken cooked.


The rest of the ingredients for this salad are easy to assemble, too. It's cabbage (I used a whole head of Napa cabbage and skipped the two cabbages in the original recipe), carrots, scallions, a can of sliced water chestnuts, a can of sliced mandarin oranges, and some almonds to garnish. Even though Ellie said to slice the almonds, I decided they would be nice on there whole so I just served it that way.

The dressing is a mash-up of so many of my favorite Asian flavors. There's soy sauce and rice vinegar, ginger and garlic, brown sugar, sesame oil, and sriracha (our new favorite condiment). I actually left the canola oil out of the dressing, and I loved it. I am usually decreasing the oils in my homemade dressings just to make them lower in fat, but here I really liked just having sesame oil in there for the flavor aspect. I only used 1 Tablespoon, and I felt like it was plenty of oil. I do wish I had spinkled some sesame seeds over the finished salad, but overall I loved this. I adore the ease, the lack of cooking required, and it packs a huge punch of flavor for something so healthy and quick. I'm pretty excited that I get to have the leftovers for lunch tomorrow!


Thanks to Danica for the perfect pick this week. I feel silly now for overlooking this Ellie recipe for so long! I think the mandarin oranges were scaring me away, since I don't really eat them. Now I know I have nothing to fear! They almost melted away in the salad, leaving only that great citrus flavor. I'm happy I didn't leave them out like I was tempted to do.

If you'd like this recipe, you can find it on Food Network's website, here. For the CEIMB blogroll, click here.

Thursday, February 3, 2011

CEIMB: Four Cheese Baked Penne (Or Three Cheese Baked Rigatoni!)


This week's much-anticipated Craving Ellie in My Belly recipe was Four Cheese Baked Penne, chosen by Lindsey of 71 Cookbooks. I have been waiting for this one. We are big baked pasta eaters here at my house. It's basically my go-to meal, one of the first things I learned how to cook, and one of my childhood comfort foods. I figured I was going to be in for a big treat.


Of course, it seems I never follow one of Ellie's recipes exactly, and this one was no different. Instead of using all four of the cheeses Ellie did, I omitted the cottage cheese and made up the difference by using extra ricotta. I had rigatoni on hand, not penne, so that was the pasta I used. Otherwise, I did follow the recipe just as written. I also decided to make the salad that accompanies the pasta in her cookbook, but I did not use romaine hearts as she indicates. Instead, I made a spinach salad with all the other ingredients in her recipe.


I have to be honest. I wasn't totally blown away by this meal. I did really enjoy it, but the pasta dish definitely needed a little something extra. I think for me, I like the baked pasta to be saucier, as in tomato sauce. When I usually make it, it has about twice the tomato sauce and I normally use enough crushed red pepper flakes to give it a bit of a kick. However, I wanted to follow Ellie's method because 1) I'm always up for trying something her way, because her way is probably healthier, and 2) if I had followed my instincts and added more sauce, it would have ended up being my version of baked pasta and not Ellie's anymore! Oh well. I'm glad I know for sure now that I like it the tried and true way.

As for the spinach salad, it was tasty. I felt like the dressing, which was simply lemon juice, oil, salt, pepper, and oregano, was a bit too acidic. I made the same salad the next evening with the pasta leftovers, except with white balsamic vinegar in place of the lemon juice. What a difference that made! We loved the balsamic version, probably because it was slightly sweeter and far less tart. I really did love how the salty kalamata olives offset the sweet red onions so nicely. It was a pleasant surprise.


Thanks to Lindsey for choosing this dish! If you'd like the full recipe, it's on Food Network's site, here. The blogroll for the CEIMB can be found here.

Thursday, December 16, 2010

CEIMB: Turkey Taco Salad with Tomato Dressing


For this week's Craving Ellie in My Belly recipe, Peggy from Pantry Revisited chose for us to make the Beef Taco Salad with Chunky Tomato Dressing, from Ellie's So Easy cookbook. As you can see from the title of this post, I revamped this recipe a bit! Okay, more than a bit. I took two of the main components of the salad, the beef and the chunky tomatoes, and omitted them completely. The results were mixed, but mostly very, very good!


Since I don't eat beef, it was a no-brainer that I would just use ground turkey instead, and of course it worked out just fine. For the dressing, however, I had to get a little more creative. I basically had to remove the main component from the dressing, which was of course the chopped tomato pieces, in order to satisfy my aversion to chunks of raw tomato in my salads. I recalled that I had made a dressing once before that was a maple and lime combination, and it was really tasty. Since there was lime juice in this one, I went with a sweet/tart theme. This time, I added a squeeze of honey, some tomato paste, and I eyeballed the olive oil. After a quick taste, I decided that the lime juice plus the tomato paste was making it taste way too acidic, so I added a bit of sugar. That really helped, but I don't necessarily think I'll go making this made-up salad dressing on a regular basis! Not my favorite. That's totally my fault, though, and not Ellie's.


The salad itself was incredibly delicious. I had this whole meal thrown together in record time, too, so that's always a big plus! Personally, I'm a huge fan of throwing crushed-up tortilla chips on salads and soups, so it was a pretty safe assumption that I would like this. The simple seasoning on the meat and beans was just enough, and I threw in some chopped carrot and scallion to brighten up the salad just a bit. Overall, this was a great salad and I would absolutely make it again. Thank you, Peggy! For the original recipe, click over here. And to check out the CEIMB blogroll, click here.

Thursday, October 28, 2010

CEIMB: Spaghetti Frittata with Salad Presto


As much as I love being in the kitchen, and as fun as it can be to make a complicated, elaborate meal for my family, sometimes it's great to have an old standby recipe like this one. For this week's Craving Ellie in My Belly recipe, chosen by Marthe of Culinary Delights, I made Spaghetti Frittata with Salad Presto. Both recipes can be found in Ellie's So Easy book; they're listed on facing pages, and they're meant to be served together to make a full meal.


We love frittatas around these parts; they make frequent appearances on our breakfast table on the weekends. The thing is, they're usually prepared by my husband, and not by me. When I am in charge of breakfast, we end up with muffins, pancakes, waffles. You know, something nice and carb-y! When the hubs makes the food, however, we will more often than not eat eggs of some kind, preferably with bacon or sausage on the side. It's nice; we balance each other out that way!


Anyhow, I knew I could definitely use the practice with my frittata-making abilities, so I was happy to make this for dinner and give Andy a break. I was really excited for this one. Come on: pasta, eggs, cheese, sundried tomatoes, and spinach, just to name a few ingredients. There was no way I was not gonna love this! It's like comfort food on top of comfort food to me. It's full of flavor, it's very filling, and it doesn't take much effort to get it on the table. The salad is almost ridiculously simple, so it made a great counterpart to the egg/pasta dish. I was able to whip this together in no time flat, and it was gobbled up almost as fast.


So, thank you, Marthe! We loved this meal, and I already told my husband to move over, because there's a new frittata-maker in town! I intend to make this one over and over again. I can't wait to try this with different variations thrown in. I think it would be great with so many things added; just let your imagination run wild!


The original recipes can be found here and here. And of course, the CEIMBers' various interpretations of these recipes can be found by checking out the blogroll, here.

Tuesday, July 27, 2010

Homemade Taco Shell Salad


This is one of those meals that was extra fun to make because I took several ideas from different places and kinda smushed them all together into one thing. The idea for a nice salad served in a cute little taco shell cup originally came about when I was thumbing through my latest issue of Cooking Light and saw a recipe for a shrimp salad. I had chicken to use up, so I decided to go with that instead. The recipe also used premade taco salad bowls, but I thought it might be fun to make my own. How hard could it be, I figured? Plus, I had just bought myself some ramekins, and I wanted to break them in. Sure, it would have been nice to break them in by actually baking a little cake or souffle in them, but this would do!


More on making the actual taco bowls later, though. For my salad, I just used what I had on hand (as usual). I tossed together some romaine lettuce, fresh radishes, and red onion. In the same issue of Cooking Light that I had found the taco salad in (the August issue), there was an advertisement for Kashi and they had a couple recipes in the ad. The chicken recipe they had listed really caught my eye, so I decided to use their ideas for a chicken marinade and a vinaigrette.


I sliced up my chicken into long strips, then marinated them for 30 minutes in a mixture of lime juice, cilantro, garlic, olive oil, salt, and pepper. Once they were done marinating, I cooked them on my indoor grill pan for roughly 5 minutes per side, until cooked through. While that was cooking, I made the vinaigrette.


Oh, this vinaigrette. It was so easy, so fresh, and yet it just created so much flavor. We thought it was amazing. I had to alter it slightly; it's not exactly the original version. That is mostly because the original is a poblano spinach vinaigrette, and I had no poblanos! I did, however, have serrano peppers, so I used them instead. It made the dressing spicy, but that was fine with us. If you read this blog somewhat occasionally, you've probably caught on by now that we love our spicy food!


Now, for the taco bowls. I admit I was sort of winging it, and I didn't really figure out how to do it properly until I had already made most of them. I'll tell you what I did, both right and wrong, so hopefully you won't make the same mistakes if you ever try this!


With the help of my 4 year-old son, I would take a flour tortilla, squish it down into a ceramic ramekin, and then spray it with nonstick cooking spray. A little sprinkle of salt and pepper, and they were ready for the oven (the above picture shows this method). I baked them at 350 degrees for around 12 minutes.


Well, this did work...sorta. What happened was this: at 12 minutes, the tops of the shells were crisp and slightly browned. The insides, however, were still very soft. This may have to do with the fact that my son really sprayed these a lot, so they may have been too wet. The other issue these had was that they were a little too scrunched up, so they were pretty hard to fill up with the salad. Oops.


Then I tried them a different way, and it worked much better! I flipped the ramekins over, so they bottoms were facing up. I sprayed the ramekins with cooking spray, as well as the flour tortillas. Then, I molded the tortillas to the ramekins, and they adhered pretty well because of the spray. While they baked, they maintained that nice shape, and once they were finished they were crispy throughout (though maybe they could have used an extra 4-5 minutes in the oven this way). The finished product picture below shows the bowls made the second (and much smarter!) way.


This was a fun experiment, and the meal turned out scrumptious. The salad was light and yummy, the vinaigrette was a welcome pop of flavor, and topping everything off with a dollop of sour cream and a dash of fresh salsa never hurt anything! It was a blast to eat, and I'm always grateful when I can make something that my picky son can enjoy!


The original inspiration for the taco bowl salad (titled Chipotle-Rubbed Shrimp Taco Salad) can be found here. You can find the full recipe for the Cilantro Lime Chicken on Kashi's website, here. I've included it below, since I did change it slightly.


Grilled Cilantro Lime Chicken Taco Salad
adapted from Chef Keith Snow's recipe for Kashi and from Cooking Light
makes about 4 servings


Ingredients
For the chicken:
2 boneless, skinless chicken breasts, sliced thin
1 Tbsp. extra virgin olive oil
1 lime, juiced and zested
2 cloves garlic, minced
2 Tbsp. fresh cilantro, chopped
1/4 tsp. kosher salt
pinch black pepper

For the vinaigrette:
2 serrano peppers, roasted and skin removed
1 cup fresh spinach, steamed for 2 minutes and squeezed to remove excess liquid
1 clove garlic, minced
1/4 of a red onion, minced
1/2 cup fresh cilantro, minced
4 Tbsp. fresh lime juice (about 2 limes)
1 heaping Tbsp. Dijon mustard
3-4 Tbsp. extra virgin olive oil
1/4 cup chicken broth
pinch kosher salt
pinch black pepper

For the salad:
1 head romaine lettuce, torn into pieces
1 bunch radishes, thinly sliced
1 red onion, thinly sliced
4 flour tortillas
nonstick cooking spray
salt and pepper, to taste
salsa, for garnish
sour cream, for garnish


Directions
Assemble the marinade: 1. Whisk together the olive oil, lime juice and zest, garlic, cilantro, salt, and pepper in a small bowl. Combine marinade with the chicken in a shallow dish or sealable ziploc bag, coating chicken thoroughly. Allow to marinate in the refrigerator for 30 minutes.


Make the vinaigrette: 1. Combine all ingredients in a blender (I used my immersion blender) and puree until smooth. Keep at room temperature until ready to use. The leftover dressing can be refrigerated (and is great on just about anything).


Make the taco bowls: 1. Preheat oven to 350 degrees F. Turn 4 ramekins or heatproof bowls over so the bottoms face up, and place them on a baking sheet. Spray each with nonstick cooking spray.
2. Take each of your 4 tortillas and, one at a time, arrange them on a ramekin or bowl so that they are draped over them. Spray the tops of the tortillas with cooking spray and sprinkle each with salt and pepper. Bake for 12-17 minutres, until crispy and lightly browned all over.


Assemble the salad: 1. Preheat a grill or indoor grill pan to medium-high. Spray with cooking spray. Cook the chicken strips for approximately 5 minutes per side. Remove to a plate.
2. Meanwhile, toss together the romaine lettuce, radishes, and red onion. Divide the salad among the taco bowls, add some chicken strips to each, and drizzle with as much vinaigrette as desired. Garnish salads with sour cream and salsa, and serve.


Wednesday, July 21, 2010

CEIMB: Chicken Sliders with Warm Tomato-Corn Salad (and Israeli Couscous)


This week, Craving Ellie in My Belly is making Chicken with Warm Tomato-Corn Salad, chosen by Danica of Danica's Daily. I decided to deviate just a bit from Ellie's original recipe this time. I took a look at the chicken part of the recipe and decided I wanted to jazz things up a little. I love a simple piece of grilled chicken just as much as the next healthy-eating gal, but I took this opportunity to put a yummy rotisserie chicken to good use. I'll be using half my (albeit slightly anti-healthy) store-bought chicken for another meal this week, so I decided the other half would make some very delicious barbecue pulled chicken sliders.


As for the tomato-corn salad portion of the recipe, I didn't change a thing! This was so fresh, so bright, so colorful and flavorful and just perfect. I was fortunate enough to be able to use home-grown corn (thanks again to Andy's parents!) that was so sweet and tender, it was hard not to just eat it by the cob. The cherry tomatoes were fantastic; as I've been saying on my blog for a little while now, I have really come to embrace them when they are cooked exactly this way.


The cilantro was just enough pop for me, the lime juice was a welcome taste of acid, and as for the avocado...well, everybody enjoyed it but me! I have tried (and failed) in the past to like avocado, but so far I can only eat it if it is blended into something else. I guess I like the flavor, but not the texture. I'm admittedly weird when it comes to food textures, and I'm working on it! This group really does help with that. Look at me and tomatoes, BFFs now!

Anyway, we decided to serve the avocado alongside everything in slices. I heard that the slices were really good on the pulled chicken sandwiches, too. For my other side dish, I served a simple pilaf of Israeli couscous (a favorite around here) that went over well. My mother in-law had never eaten this before, and she loved it. We like introducing people to Israeli couscous, because everyone seems to enjoy it once they've had it. It's sort of a cross between regular, smaller couscous, pearled barley, and orzo. It's easy to make and so versatile! If you ever find it in your grocery store, I highly recommend giving it a try.


But back to the Warm Tomato-Corn Salad! It was a huge hit at our dinner table; even "the picky one" devoured it without a single complaint. That right there speaks volumes about this dish. I mean, it was veggies, and it was embraced by my 4 year-old! Thanks again, Ellie, and thank you, Danica, for the great pick! It was summery and perfect!

You can find the full recipe, complete with Danica's fun Cajun variation on the chicken, on her blog, here.

Thursday, July 15, 2010

CEIMB: Panzanella with Chicken Sausage


Wow, this is the first time I've had to write two blog posts in one day! I knew it would have to happen eventually. I had both my Martha Stewart's Cupcakes Club post to do, as well as my regular Thursday Craving Ellie in My Belly post. Phew! Fortunately, this is the kind of busy that I like to be! Having to do some extra time in the kitchen is not a problem for me.


Now, onto this week's CEIMB recipe! This week's pick was Panzanella with Chicken Sausage from Ellie's So Easy book, chosen by Peggy of Pantry Revisited. I was glad she picked this one, because panzanella is something that has always intrigued me. I'd never made it, and never eaten it until now. I love salad, and I love bread, but for some reason the idea of an actual bread salad always seemed too bizarre to me.


As it turns out, I love bread salad! In fact, we all did here at my house. My hubby and I scarfed this down, and even my picky 4 year-old thought the idea of bread in his salad was pretty cool. I used some chicken sausages from Sam's Club (and hey, by the way, I'm kinda mad at Sam's Club right now. After I got the sausage home, I removed the outer cardboard liner and discovered that it had an expiration date of May 24th! We had to return it, and buy some more, and it turned out that almost every single package in their store was past date! We found one of maybe 2 or 3 packs that were good. Argh! And don't even get me started on the Sam's Club bleach stain incident of 2 weeks ago....).

Anyway, the sausages ended up being pretty tasty! They were provolone and sun-dried tomato flavor, and I did enjoy them in the end. As for the salad, I really was surprised at how much I loved it.


I've talked several times before in various blog posts about how I have come to love roasted or burst tomatoes, but haven't yet been able to fully embrace tomatoes in their raw form. So, I made my salad with burst cherry tomatoes, and I made the rest of the salad with regular cherry tomatoes. I think it worked out well. The dressing was simple but so good, and I used half a loaf of roasted garlic fougasse (which I haven't figured out how to pronounce, but it sure is good!) bread I found at the grocery store. I loved how the bread did soak up the other flavors in the salad, but it was a nice sturdy bread that held up well to the dressing and did not get soggy or mushy at all.

So once again, Ellie Krieger has made a believer out of me! She has proven that if I merely try something I've been skeptical about, chances are I will like it very much. This one exceeded my expectations. Thank you, Peggy, for taking me out of my comfort zone! The recipe for this one can be found here, on her blog.


Monday, June 28, 2010

Asian Chicken Meatball Salad


This recipe was invented right smack in the middle of me preparing it! In other words, I set out one day to make a specific dish, but by the end of my meal preparation, I had come up with something completely different! And I must say, I like what I've invented here. It sounds strange, perhaps, but it was a seriously delicious little Frankenstein of a dish. Here, let me take you through it.


It all started with these chicken meatballs. I just had a hankering for chicken meatballs. I finally found 99% lean ground chicken at my local grocery store, and I was very excited. I hadn't found this in the stores near where I live up until now, so I had to stock up. At first, when pondering what I should make, I came up with buffalo chicken meatballs. It sounded really good. I thought it may be fun, then, to throw the meatballs on top of a salad, and have it be a fun spin on buffalo chicken salad. So far, still sounding good.

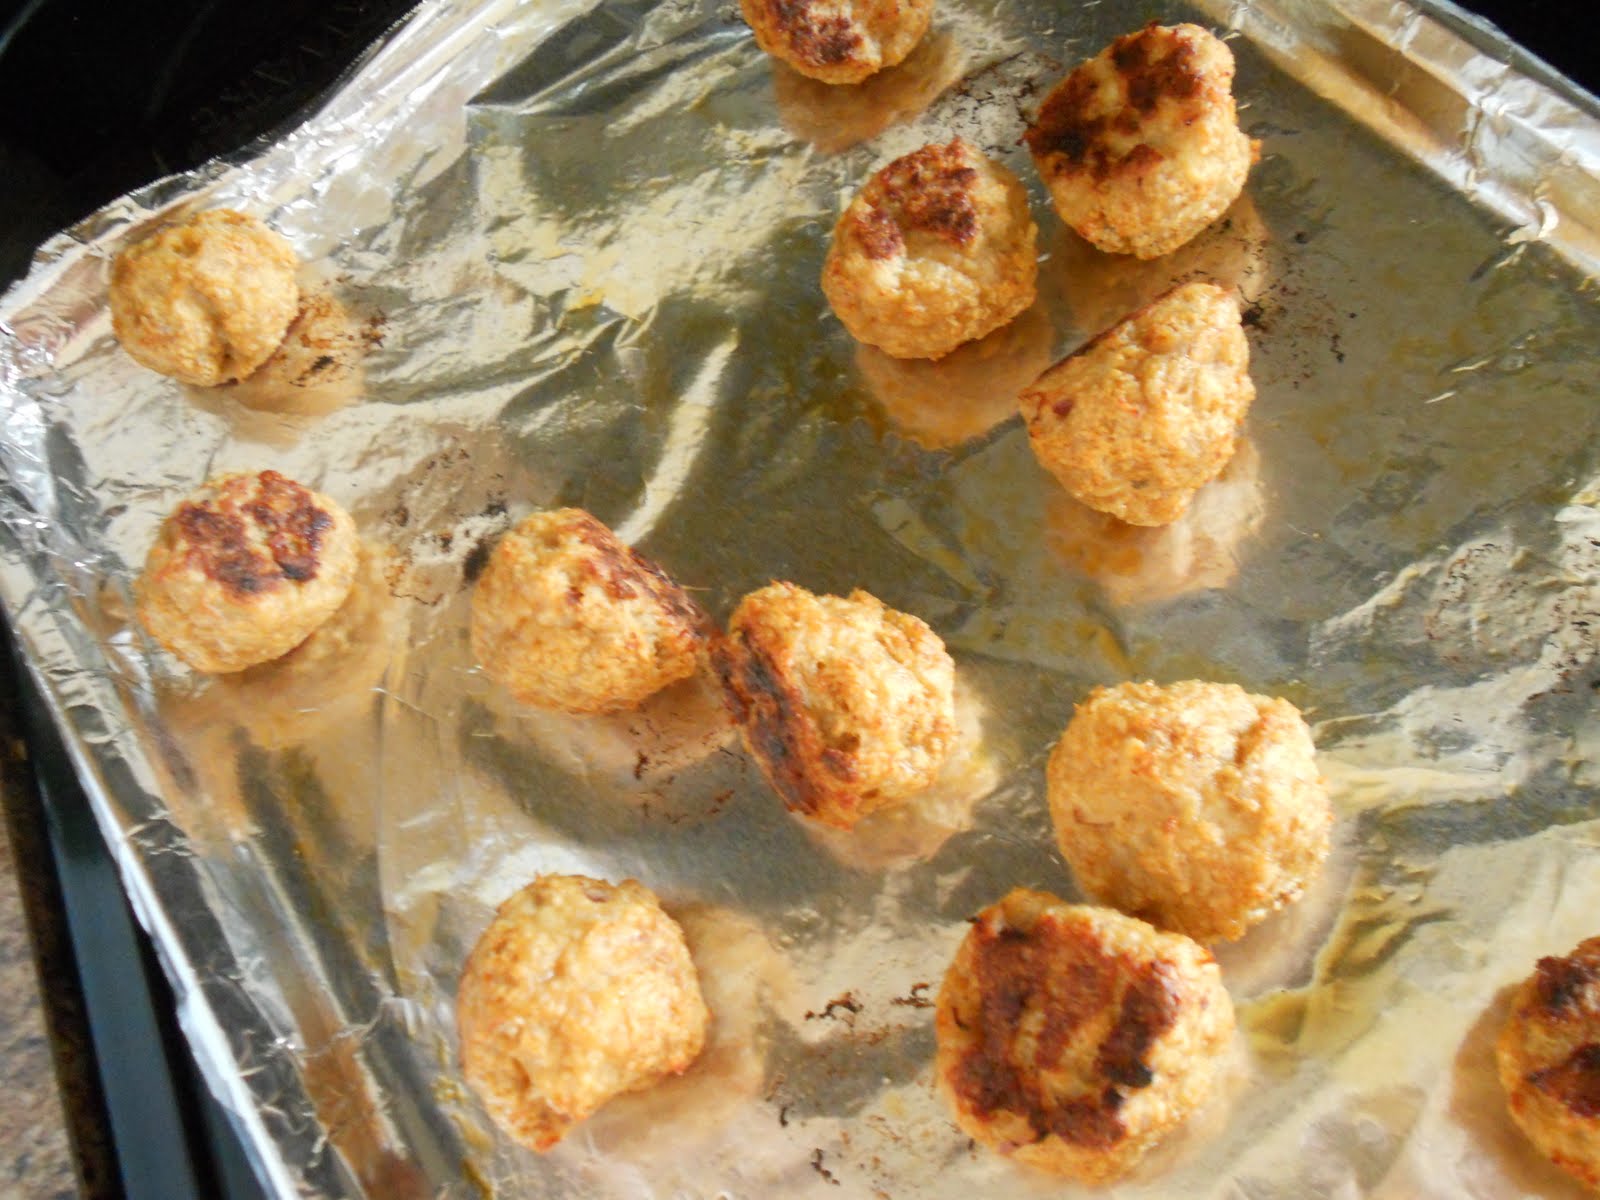
So I mixed the chicken meat with some panko breadcrumbs, some smoked paprika, garlic powder, salt, and pepper, and formed and baked my meatballs. While they were baking away, I went to my fridge to find the buffalo sauce. But once I found it, my heart sank. It was nearly empty! And I had not bought a backup bottle! Wait a minute, though. All was not lost. I suddenly remembered that I did have a bottle of something else I've been wanting to try.


I found this Frank's RedHot Sweet Chili Sauce not too long ago, and bought it eagerly. It just sounded so good. It's made with fresh chilis, it's slightly hot and sweet and sticky all at once, and it was on sale! It was meant to be. So, armed with this bottle of RedHot and a fresh idea in my head, I took the meatballs and tossed them with the sauce. Now, I was on a roll! I'd turn my salad into an Asian-y one, with fresh spinach and carrot and some sliced almonds. I'd top it off with a simple Asian salad dressing, and crown it all with these meatballs. It sounded too good to be true.


I fell madly in love with this salad upon first bite. It was a fantastic blend of sticky-sweetness, salty bite (from the Asian dressing I used), crispness (from the spinach), crunch (from the almonds), and meaty goodness (the meatballs!).

Sure, there were things I could have done differently. It wasn't absolutely perfect. For starters, I had seasoned the meatballs before I knew that they were going to be housed in an Asian-themed salad. Therefore, when I make this again (and I will), I will put more Asian flavors into the meatballs. I could see ginger in there, along with maybe some 5-spice and a touch of soy, or even hoisin sauce. They probably could use a bit of heat, too, since the RedHot just isn't, well, hot enough for our tastes. If I had had different salad ingredients on hand, I could have improved upon the salad portion of things, as well. I could have thrown in radishes, sugar snap peas, bean sprouts. I thought the presentation was screaming for some sesame seeds sprinkled on top, but I couldn't find any. However, I used all ingredients that I had on hand at the time, and I was satisfied with this meal. Isn't that what really matters, in the end?


Asian Chicken Meatball Salad
recipe by Bri
makes 4 servings

Ingredients
1 lb. ground chicken (I used a 50/50 mix of lean ground chicken and ground chicken breast, which are different in their calorie/fat content)
1 cup panko breadcrumbs
1 tsp. garlic powder
1 tsp. smoked paprika (I thought this was good, but you may want to use ginger or 5-spice powder in place of this)
1/2 tsp. ground black pepper
1/4 tsp. kosher salt
1/3-1/2 cup Frank's RedHot Sweet Chili Sauce
1 (9 oz.) bag fresh spinach
1/2 cup sliced almonds
1 cup baby carrots, coarsely chopped
1/4 cup soy sauce
1/4 cup rice wine vinegar
1 clove garlic, minced
1/2 tsp. ground ginger (or 1 tsp. fresh grated ginger)
1/4 tsp. sesame oil
1 Tbsp. honey
1 Tbsp. water

Directions
1. Preheat the oven to 400 degrees F. Mix the chicken with the breadcrumbs, paprika, garlic powder, salt, and pepper, and form meatballs (I shaped mine by using a large cookie scoop). You should end up with about 2 dozen. Place on a lightly oiled or nonstick-sprayed cookie sheet lined with foil, and bake for 18-20 minutes, turning once halfway through.
2. While the meatballs bake, gather the salad ingredients. Divide the spinach evenly into 4 bowls, followed by the carrots and almonds. In a small bowl, combine the soy sauce, vinegar, garlic, ginger, sesame oil, honey, and water. Set aside.
3. When the meatballs are done, remove them from the baking sheet immediately and place in a medium-sized bowl. Add the RedHot sauce, and toss gently to coat the meatballs evenly.
4. Divide the meatballs among the 4 salad bowls, drizzle the salad dressing evenly over each, and serve.

Saturday, May 22, 2010

Southwestern-Style Shrimp Taco Salad


Now that the weather has turned warmer, and the weekend days have turned a bit lazier, it's always nice to have some lighter meals on the menu. Salads, in particular, are one of those meals where if we haven't had one in a while, we forget how great they are. When done right, salads can be a completely satisfying, filling dish.

We couldn't believe how delicious this Southwestern-Style Shrimp Taco Salad was. I found this one in the May issue of Cooking Light Magazine. It was, as my husband put it, exquisite. So many flavors, but none of them competed with each other. The dressing was a sweet-tart delight that added a hit of smoky spice. The shrimp contributed a filling, tasty protein to the mix. The greens and tortilla chips were so crisp, and the roasted corn, burst tomatoes, and avocado were all so tender and unique in taste.


Were it not for the steps involved in the preparation, this would be a snap to make. It does take a bit of time, but I assure you that it is well worth every second you will spend on readying this salad for your dinner table. Trust me on this.


Once all the components have been gathered and prepared, you can assemble this any way you want to. The recipe, as written, instructs you to use the tortilla chips as a bed for the rest of the salad, but we framed our bowls with chips rather than throwing them on the bottom. Alternatively, you could crush the chips and sprinkle them on top. Then you can add the remainder of the ingredients any way you like. The dollop of sour cream is totally optional; I had mine without and loved it. Andy used the sour cream and thought it was a revelation. So it's really your call.


Best of all, this salad was fantastically filling, but it doesn't make you feel heavy or gross after you've eaten it. It's almost refreshing in a way; it feels so good to eat something comprised mostly of fresh ingredients that taste so great together. I can't stress this enough, but I'll try one more time: you should try this salad! It's a perfectly summery meal, and one that we can't wait to eat again.


The original recipe can be found here.

Southwestern-Style Shrimp Taco Salad

adapted from Cooking Light

makes 3-4 servings


Ingredients

1/4 cup fresh lime juice

2 Tbsp. extra-virgin olive oil

1 tsp. ground cumin

2 tsp. fresh minced garlic

2 tsp. pure maple syrup

2 tsp. chipotle hot sauce (we used Chipotle Cholula, yum!)

3/4 pound peeled, deveined raw shrimp

2 ears shucked corn

cooking spray

1 cup chopped romaine lettuce

1/2 cup chopped green onions

1/4 cup chopped fresh cilantro

1 (15-ounce) can black beans, rinsed and drained

3 plum tomatoes, chopped (we used 1/2 pint of cherry tomatoes, halved and slightly burst)

2 oz. baked tortilla chips (Cooking Light used blue corn chips, we didn't have those)

1/3 cup light sour cream

1/4 cup peeled, diced avocado

Lime wedges, for garnish (optional)


Directions

1. Prepare grill to medium-high heat. Combine lime juice, olive oil, cumin, garlic, maple syrup, and hot sauce in a small bowl, stirring with a whisk. Place shrimp in a shallow bowl. Drizzle 1 Tbsp. of lime mixture over shrimp, tossing gently to coat. Reserve remaining lime mixture. Thread shrimp onto metal skewers. Lightly coat corn with cooking spray. Place shrimp kebabs and corn on grill rack coated with cooking spray. Grill 8 minutes, turning kebabs once and turning corn frequently until browned. Remove from grill; cool slightly.

2. Remove shrimp from skewers and place in a large bowl. Cut kernels from the ears of corn. Add corn, chopped lettuce, green onions, cilantro, black beans, and tomatoes to shrimp. Drizzle reserved lime mixture over the shrimp mixture, and toss to combine.

3. Divide tortilla chips evenly among shallow serving bowls; top each chip serving with shrimp mixture, dividing evenly. Combine sour cream and avocado in a small bowl; mash with a fork until well blended. Top each serving with 1 Tbsp. sour cream mixture. Serve with lime wedges if desired.

Note: we didn't mix up the sour cream and avocado like the recipe indicates. Instead, we sprinkled the diced avocado and dolloped the sour cream on top. It worked great!

Older Posts Home