Showing posts with label coffee cake. Show all posts

Sunday, April 24, 2011

Baked Sunday Mornings: New York Style Crumb Cake


Happy Easter! I hope everyone is having a great day. I'm going to talk about a coffee cake that would actually be very appropriate for a holiday, especially if you're having houseguests over. Unfortunately, my coffee cake is long, long gone and will not be served this Easter. But who knows, maybe next year!


So for this week's Baked Sunday Mornings assignment, we made the New York Style Crumb Cake, which I've been drooling over ever since I first purchased this book. You see, this cake reminds me of the good ol' days, when I used to work at Starbucks. The New York Style Crumb Cake was so good there, but so evil. The crumb portion was thicker than the cake portion, which I quickly learned was why people loved it so much. But me? No, I actually preferred the cake to the crumb. I always wound up with a stomachache if I attempted to eat the entire piece of cake.


Well, after trying the Baked version of this cake, I can see why people love the crumbs so much. This coffee cake puts the Starbucks cake to shame. The cake is so moist and light, while somehow also being hefty enough to pass for breakfast food. The crumb topping is nothing short of amazing. It smells of heaven: cinnamon, brown sugar, and butter. I pretty much swooned when I finally took this thing out of the oven. I was originally going to cut this into squares, try a little piece, and send it in to work with my husband. However, once I started cutting, little crumbs started to fall off the cake. I tried one. Then another. Then another. So only a few pieces made it to the office; the rest were thoroughly enjoyed by myself and my two sons.

I have to say that it really is so worth the effort, the way you assemble the crumb top. I did what the book advised, and let the crumbs lay out after the ingredients had all been mixed in. By slightly drying them out, they were very easy to break off into chunks and scatter across the cake batter. After being baked, those crumbs were decadent, sinful, and addictive. I'm definitely a New York Crumb Cake convert!

I can't wait to see how the other Baked Sunday Morning members' cakes turned out! We have such great photographers in the group; I know that looking through all the pictures will just make me crave this cake all over again! You can check them out by clicking here for the blogroll.


Thursday, March 24, 2011

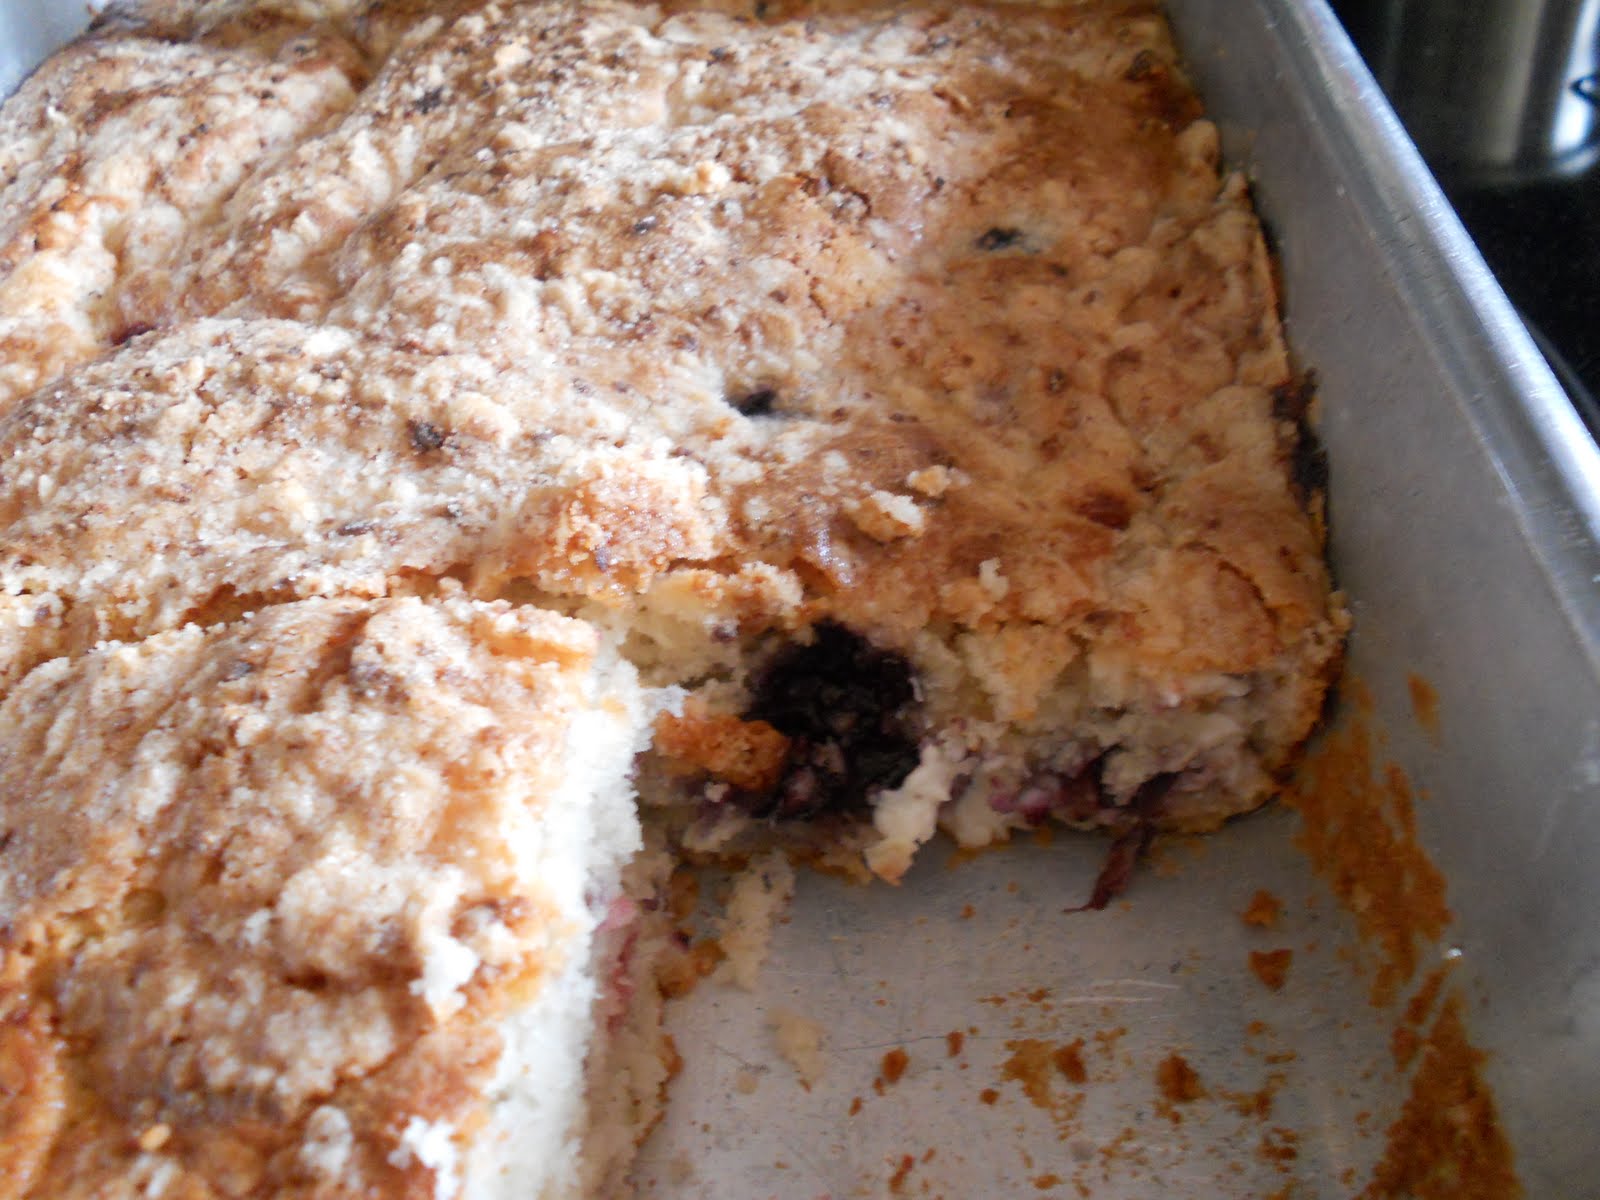
CEIMB: Blueberry Coffee Cake


It was my turn to pick the recipe for Craving Ellie in My Belly again this week, and I was craving something sweet! I have been recording old episodes of Ellie's cooking show, which now air on Cooking Channel, and recently saw an episode where she made this Blueberry Coffee Cake. As soon as I saw it, I knew that it would be my next choice for the group.


It's a lower-fat variation on an old classic: moist, lightly sweetened coffee cake, with a middle layer of fresh blueberries, cinnamon, sugar, and walnuts. The cake batter is topped with more streusel, and then baked until nice and golden brown.


Since I will look for just about any opportunity to use my silly brownie pan (the one that pre-slices the brownies/cake/granola bars for you), I decided to utilize it here. What can I say, I just happen to take my portion control seriously! I like the peace of mind of knowing that each slice of cake is evenly cut; that way, when I calculate the calories and such, I can feel more confident that it'll be the same with each slice. The drawback to using this pan is that I think once the slices are cut, they don't stay as fresh as they would if you just cut slices as you ate through the cake.


That said, I think this cake actually kept very well. I had it in an airtight container for about 5 days, and the cake was still very good on the last day. I preferred eating it warm to room temperature. Microwaving the cake for just about 20 to 30 seconds before eating it really served to wake up the flavors better.

I did love this cake, although you could definitely tell it was healthier than "regular" coffee cake. It lacked the sweetness of other coffee cakes, but that was just fine with me. It just helped you experience the other flavors better. I adore cinnamon, so of course I loved it here. The blueberries really brought a welcome tangy punch to the table, and the walnuts were just perfect. I could see this being a coffee cake that I revisit when I have overnight guests, or even just when the boys and I might be in the mood for something different thrown into our breakfast routine.


Thanks to everyone for baking along with me this week! For some reason, the link to this recipe over at the CEIMB site doesn't work anymore, but hopefully this one will. To check out the blogroll, click here.

Wednesday, December 8, 2010

Mixed Berry Cream Cheese Coffee Cake


Lately, I have been coming up with new and creative ways to use up some things that have been lurking in my freezer. I really need the freezer space right now; as I talked about in my last post, I am on a baking spree and I freeze whatever I make in anticipation of the holidays. However, I've been baking faster than I've been removing stuff to make from the freezer. It's not good! So over the weekend I pulled out a bag of mixed berries and set out to find a decent recipe to use them in.


I'm happy to tell you, this Mixed Berry Cream Cheese Coffee Cake is more than decent. It's pretty amazing, actually! I found a cream cheese coffee cake that solely used blueberries over on Food.com, but I knew I could most likely use my mixed berries instead and it would be fine. My husband had just mentioned last week or so that he tried a sample of cream cheese coffee cake at our local grocery store and fell in love. I wasn't really familiar with this concept, but I was totally on board!


This recipe is interesting because you actually make up the coffee cake batter, then fold in cubes of cream cheese along with the berries. I think it would work fine if you added the cream cheese, softened, to the rest of the wet ingredients when you're mixing them up. It would make the batter very creamy and luxurious, and I think it would be awesome. However, this time I tried it out the way it was written, just to see how it would work out.


The final verdict was divided at my house. One of my kids loved it, the other did not. My husband and I both loved the coffee cake, but I felt like the pockets of cream cheese inside were a bit distracting. He, on the other hand, really loved the cream cheese as a separate addition into the mix, and wouldn't have changed a thing. I provided my version of this recipe below, because I changed up a couple of the ingredients and rewrote the instructions to make them a little bit clearer. Just beware: one square of this cake is very filling, so it'll feed a crowd!


Mixed Berry Cream Cheese Coffee Cake
adapted from Food.com
serves 8-12

Ingredients
1 1/2 cups sugar, divided
1/2 cup softened, unsalted butter, plus 2 Tbsp. cold, cubed butter, divided
2 eggs
1/2 Tbsp. pure vanilla extract
2 1/2 cups all-purpose flour, divided
1 Tbsp. baking powder
1 tsp. salt
3/4 cup milk
2 cups assorted berries, fresh or frozen (I used frozen)
8 oz. cream cheese, cubed (I used Neufchatel)
2 tsp. fresh lemon zest, divided

Directions
1. Preheat oven to 375 degrees F. Cream together 1 1/4 cups of the sugar and 1/2 cup of the butter until light and fluffy, about 3 or 4 minutes. Add eggs one at a time, scraping down the sides of the bowl as needed. Mix well after each addition. Add vanilla, and beat until combined.

2. In a separate, medium-sized bowl, whisk together 2 cups of the flour with the baking powder and the salt. Add the flour mixture in two additions to the butter mixture, alternating with one addition of the milk.

3. Toss the mixed berries with 1/4 cup of the flour, then fold them into the batter. Gently mix in the cubed cream cheese and 1 tsp. of the lemon zest. Pour the batter into a greased and floured 9x13 baking pan.

4. In a small bowl, combine the remainng 1/4 cup sugar, the 1/4 cup flour, and the 1 tsp. lemon zest. Cut in the 2 Tbsp. cold butter until the mixture resembles coarse crumbs. Sprinkle mixture evenly over batter.

5. Bake in the preheated oven for about 1 hour, or until a cake tester inserted into the center comes out clean. Cut into squares and serve, preferably warm. The cake keeps in the fridge for about 3 or 4 days. Just reheat individual servings before enjoying!

Saturday, July 10, 2010

Sour Cream Coffee Cake with Chocolate Cinnamon Swirl


Once again, the Baked cookbook has proven to me why it (and the New York City bakery these recipes come from) is so popular. I really wanted to make a coffee cake for the weekend of my birthday; it gave me an excuse to indulge! This coffee cake is definitely a splurge, with 2 sticks of butter and a 16 oz. carton of regular sour cream (the cookbook advises you not to use low-fat or fat-free), not to mention 2 1/4 cups of sugar just in the cake alone. The crumb topping is a thing of pure decadence, and pure beauty. Made with dark brown sugar and finely chopped pecans, butter, flour, and salt, it smelled like heaven while it was baking and tasted even better.


The cake turns out huge. It's made in a 9x13 baking dish, and rises all the way to the very top of the pan. I don't know if I've ever eaten a coffee cake that was so very...tall. And every last inch of this cake is moist, flavorful, and just completely yummy. If you're having a lot of people over for breakfast or need to take something to a morning potluck, this would be perfect. It could probably feed a small army.


My favorite feature of the cake, and probably the deciding factor for me to finally make it, is the chocolate cinnamon swirl contained inside. It does require a little extra work while you're filling the baking dish with the batter, but it is worth every second. You simply mix together a bit of cocoa powder with a bit of cinnamon, then add some sugar, and you've got an amazing little ribbon of goodness that darts through your cake and provides an extra little dimension of flavor with every bite. It gave me an excuse to crack open my brand new Penzey's natural high fat cocoa powder, and it did not let me down. It's fantastic cocoa; I'd never baked with anything other than good old Hershey's before this. Now that I've tasted the high-quality stuff, I don't see how I could ever go back. I've been missing out, clearly!

I recommend that you find a reason to make this cake for company sometime soon. It's classic enough to be a welcome addition to a breakfast table (or, heck, even dessert!), but it's got that kick from the cocoa to make it a bit of a conversation piece. I'm already fantasizing about the next excuse I can possibly concoct for making it again myself....


Sour Cream Coffee Cake with Chocolate Cinnamon Swirl
makes 1 (9x13-inch) cake (serves 16-24 depending on the size of your slices)

Ingredients
For the crumb topping:
3/4 cup all-purpose flour
3/4 cup firmly packed dark brown sugar
1/2 tsp. salt
3/4 cup pecans, toasted
6 Tbsp. unsalted butter, cold, cut into 1-inch cubes

For the chocolate cinnamon swirl:
1/2 cup sugar
1 tsp. dark unsweetened cocoa powder
1 tsp. cinnamon

For the sour cream cake:
3 1/2 cups all-purpose flour
1 tsp. baking powder
1 1/2 tsp. baking soda
1/2 tsp. salt
1 cup unsalted butter, soft but cool, cut into 1-inch pieces
2 1/4 cups sugar
4 large eggs
16 oz. sour cream
1 1/2 tsp. pure vanilla extract


Directions
Make the crumb topping: 1. Put the flour, sugar, and salt in a food processor and pulse for 5 seconds to mix. Add the pecans and pulse until the pecans are finely chopped and thoroughly incorporated.
2. Add the butter and pulse until combined. The mixture will look like very coarse sand. Cover with plastic wrap and set aside in the refrigerator. (In my opinion, this was very important for the overall outcome of the crumb topping. I made mine the night before I assembled the cake, and having the topping in the fridge overnight made it firm enough that the crumbs were set already once sprinkled over the cake. They maintained their shape while in the oven and were large and extra bumpy on top of the cake. Yum!)

Make the chocolate cinnamon swirl: 1. In a small bowl, whisk together the sugar, cocoa powder, and cinnamon and set aside.

Make the sour cream cake: 1. Preheat the oven to 350 degrees F. Butter a 9x13-inch baking pan. If you use a metal pan, the edges of the cake will be crispy (not altogether a bad thing).
2. Sift the flour, baking powder, baking soda, and salt together into a medium bowl. In the bowl of an electric mixer fitted with the paddle attachment, cream the butter until smooth and ribbonlike. Scrape down the bowl and add the sugar. Beat until the mixture is smooth and starts to look fluffy. Add the eggs, one at a time, beating well after each addition. Scrape down the bowl and mix again for 30 seconds.
3. Add the sour cream and vanilla and beat just until incorporated. Add the dry ingredients in three additions, scraping down the bowl before each addition and beating only until each addition is just incorporated. Do not overmix.
4. Pour one third of the cake batter into the prepared pan (I used my kitchen scale to make sure each of my thirds was even). Use an offset spatula to spread the batter evenly. Sprinkle half the chocolate cinnamon swirl mixture over the batter, covering the entire surface of the batter. Spoon half of the remaining batter over the swirl mixture and spread it evenly. Top with the remaining swirl mixture, then the remaining batter, and spread the batter evenly. (I found that the spreading part was easier if I dropped smaller dollops of batter over the whole surface, then gently spread all the dollops together. Otherwise, the spatula would pick up the batter and the chocolate cinnamon swirl with it and become a mess.) Sprinkle the crumb topping evenly over the top of the batter.
5. Bake in the center of the oven, rotating the pan three times during baking, for 1 hour, or until a toothpick inserted in the center of the cake comes out clean. (I believe mine took 5 minutes more.) Let the cake cool in the pan on a wire rack for 30 minutes, then serve. The cake will keep for 3 days, tightly covered, at room temperature.


Sunday, June 20, 2010

Strawberry Coffee Cake


So it turns out that we bought way too many strawberries last week. It's a shame, really. The strawberries have been looking great this year, and I don't eat them. I wish I liked them straight up, by themselves. I would like to like them. But I just can't do it. I can't get past the seedy exterior. To me, the seeds are such a distraction on the tongue that I can't enjoy the tart fruit underneath. It's sad. Hence, the need to find some yummy recipes that I can bake strawberries into! Fortunately, I can handle them as long as they are contained inside a baked good. Go figure.


Sometime later this week I will post another recipe I tried using strawberries, and that one I actually did eat myself. However, this Strawberry Coffee Cake was sent straight to work with Andy the other day and I didn't get a drop. That's okay, though: the glowing reviews of this one kept me giddier than if I had been on a real sugar rush from actually eating the cake!


The method is fairly simple. You whip together a quick coffee cake batter made with butter and cream cheese, granulated sugar, flour, et al. You spread half the batter into a square cake pan, spread sliced strawberries across the batter, and then dollop the remaining batter onto the strawberries. Sprinkle a simple brown sugar/nut topping on top, bake, and allow the delicious aroma of the cake baking away to tempt you like crazy!

One thing I should mention about this recipe: for some reason, I had to bake mine in a differently-sized pan than what was called for. I was supposed to use a 9x13 pan, but when I spread half the batter into the pan (since only half was needed on the bottom, then the strawberries, then more batter), it didn't fit! I couldn't even get half the batter to spread thinly across the bottom; there just wasn't enough of it. So, I took out the batter and tried it out in an 8x8 pan. That was perfect! I was kinda concerned that it would overflow the pan and drip out in the oven, but I needn't have worried. The cake rose beautifully, and it did clear the top of the pan. Once the cake had been out of the oven to cool, it settled back down and was roughly at the level of the top of the pan (as you can see from my pictures).

Since Andy didn't cut into this until he was at work that day, I insisted that he bring the camera to the office so I could see what it looked like inside! That is why the lighting looks all different in the picture of the single slice of cake. Sorry; it's all I had! Anyway, I really would like to make this again for company sometime, and actually try it. Until now, take Andy's word for it: this cake was a huge, delicious hit!


Strawberry Coffee Cake

from Recipezaar

serves 12


Ingredients

8 oz. cream cheese, softened

1/2 cup (1 stick) butter, softened

3/4 cup granulated sugar

1/4 cup milk

2 eggs

1 tsp. vanilla

2 cups all-purpose flour

1 tsp. baking powder

1/2 tsp. baking soda

1/4 tsp. salt

2 cups strawberries, sliced (Original recipe used 3 cups.)

1/4 cup brown sugar

1/2 cup nuts, coarsely chopped (I used pecans. I'm sure walnuts or even almonds would work.)

1/2 tsp. cinnamon (Original recipe did not use, but I thought it needed this.)


Directions

1. Preheat oven to 350 degrees F. Beat together cream cheese, butter, and granulated sugar in the bowl of an electric mixer, until light and fluffy, 2-3 minutes. Stir in milk, eggs, and vanilla.

2. Sift together flour, baking powder, baking soda, and salt. Add to cheese/butter mixture and mix until just smooth.

3. Spread half the batter into the bottom of a greased (I used nonstick cooking spray) 8x8 pan. (Again, this recipe indicated that a 9x13 pan should be used here, but I just couldn't make that work for me.) Spread the strawberries across surface of batter, followed by the rest of the batter, dropping it in dollops. Once all the batter has been dropped on top of the strawberries, spread it gently to cover the berries.

4. In a small bowl, mix together the brown sugar, chopped nuts, and cinnamon. Sprinkle across the top of the batter. Bake at 350 for 30-35 minutes, until a toothpick inserted comes out mostly clean, with just a bit of crumb. (Mine baked up in about 33 minutes, and a 9x13 should be kept in until 40 minutes.) Serve warm.

Tuesday, February 23, 2010

A Success and a Kinda Failure

The above picture shows a mishy-mosh of baked goods I dabbled in over the weekend. I took a picture of both for two reasons. One, I wanted to show that I had one recipe that turned out quite successfully, and one that really turned out kinda terrible. Two, I was just too lazy to store these separately, so they went under the cake dome together and I just snapped a pic of both! It was fine, though. Anyway, the coffee cake was a recipe from my new Cooking Light Magazine.
It was for Sour Cream Coffee Cake, recipe found here, and I decided to take some liberties with it, so I didn't know what to expect when it came out of the oven. It was already made over by the magazine to be lower in fat and calories, but I lowered it even more. Where it said to use light sour cream, I used fat free. I used Smart Balance Butter Blend in place of real butter, and I omitted the nuts. Even with all those changes, this cake turned out incredibly moist, tender, and delicious. I was very happy with the results.

Those muffins, on the other hand, did not go over so well. I'd mentioned before that I've been making more baked goods because Evan loves them so much. I made these muffins specifically with him in mind. They were filled with oats, raisins, and were very low in sugar. Looking back, the small amount of sugar should probably have been a red flag, but I didn't think it seemed too odd. Turns out it was. They turned out a little weird. They look normal enough, I guess. They taste, um, okay-ish. But there is something sort of off about them. I guess if I had to sum it up, I'd say they were almost salty. Not necessarily a good thing for a muffin. I'm glad I tried out the recipe, though. Now I know what not to do!

Just as a final comment, I posted these pictures of my kids to show the stunning contrast between the one that hams it up for the camera now, and the one who has suddenly decided he hates having pictures taken of himself! Hope you enjoyed!