Showing posts with label breakfast. Show all posts

Monday, May 23, 2011

A Week of Muffins: Chocolate-Pomegranate Muffins


This week, my blog's going to be a little bit different. My family and I are traveling to Orlando, Florida to visit Universal Studios, and then Disney World, and we'll be gone 9 days. Initially, I was considering just skipping the idea of doing blog posts at all for the duration of my vacation. After all, what's the point of being on vacation if you're still cranking out 3 or 4 blog posts while you're away? But then I had this brainstorm, and it worked out really well.

In the May 2011 issue of Cooking Light, I found a section on muffins. I love muffins, and I make them quite frequently. Imagine my delight when I was given 5 new muffin recipes in the latest issue of my mag! I couldn't decide which ones I wanted to try; they all sounded so good, and so different from one another. Finally, I took this as a sign that the stars were to align with both these muffins and with my vacation. I decided to bake all 5 of the muffins, and then I could make my vacation week Muffin Week! I just wrote all the blog posts ahead of time, and now I'll be able to publish each one gradually as the week unfolds. And you, as the reader, gets the 5 new muffin recipes, too!


First up: these Chocolate-Pomegranate Muffins. I decided to alter the Cooking Light recipe in a few different ways. It's a fantastic base recipe to play with; feel free to be creative in your version, too. The original recipe called for warm water for most of the liquid in the batter, and then a big handful of mini chocolate chips. Half the chips went into the batter, and the rest were sprinkled on top.

For my variation, I substituted coffee for the half of the water in the batter. I wanted a nice, kicky punch to my muffins. Honestly, I think I could have subbed coffee for all the water, since I did not actually taste coffee in the finished product. I do like to think that it gave the muffins a more intense chocolate flavor, though. As for the mini chips, they still adorned the tops of my muffins. But for inside the batter, I decided to throw in some chocolate covered pomegranate seeds I recently found at Trader Joe's. I loved them in there; they added a bit of fruit, as well as a nice little tangy bite every so often. I'd highly recommend trying to get your hands on some of these, but if you can't find them any dried fruit would be nice in there. Chocolate and fruit for breakfast? What's not to love?


Chocolate-Pomegranate Muffins
adapted from Cooking Light
makes 12 muffins

Ingredients
7.9 oz. all-purpose flour (about 1 3/4 cups)
1/2 cup dark brown sugar
1/4 cup unsweetened cocoa powder
1 tsp. baking powder
1 tsp. baking soda
1/4 tsp. salt
1/2 cup warm brewed coffee
1/2 cup warm water (you can use 1 cup coffee and omit the water, too)
1/4 cup canola oil
1 Tbsp. red wine vinegar
1 tsp. pure vanilla extract
1 large egg, lightly beaten
1/4 cup chocolate covered pomegranate seeds (or just use dried pomegranate seeds)
1/4 cup semisweet mini chocolate chips
Nonstick cooking spray

Directions
1. Preheat oven to 400 degrees F. Weigh or lightly spoon flour into dry measuring cups; level with a knife. Combine flour and the next 5 ingredients (through salt) in a large bowl, stirring with a whisk.

2. Make a well in the center of the mixture. Combine the coffee, water, and the next 4 ingredients (through egg) in a bowl, stirring well with a whisk. Stir in the chocolate covered pomegranate seeds. Add the oil mixture to the flour mixture, stirring just until moist.

3. Place 12 muffin-cup liners in muffin cups, and coat liners with cooking spray (I coated my muffin tins with cooking spray, omitted the papers, and I was fine). Divide batter evenly among the muffin cups. Sprinkle the 1/4 cup mini chips evenly over the batter.

4. Bake for 15 minutes, or until a wooden pick inserted in the center of a muffin comes out clean. Cool for 5-10 minutes in the pan on a wire rack before turning them out onto the rack to cool completely.

Wednesday, May 11, 2011

CEIMB Rewind: Breakfast Cookies


There won't be any post about Ellie's Muesli Parfaits today, unfortunately. Those parfaits were the assigned recipe for today, chosen by Sarah of Sarah's Kitchen Adventures for Craving Ellie in My Belly. However, I opted to do an Ellie rewind instead.

Why? Well, the main reason is because I really, really dislike yogurt, and that is one of the main ingredients in the Muesli Parfaits. And while I have been known to forge ahead and make recipe of Ellie's that I don't think I'll like, I had to take exception with this one. I wish I could like yogurt, but there just seems to be no getting around it. I could have made this recipe for my husband, but I had actually just made Ellie's Breakfast Cookies late last week, and it just felt like doing a rewind here would be a good way for me to blog about them.


These Breakfast Cookies were made all the way back in the first week of July of 2009, nearly two years ago! I was not yet part of the group, and may never have known about this cookies, since they are not found in either of Ellie's cookbooks. But I've seen them on Food Network's website and they are reviewed very well, so I wanted to give them a shot. Plus, I'm building up a small arsenal of portable baked goods that I can take on my upcoming trip to Disney World (whoo-hoo!), and these fit the bill nicely.

The ingredients list for these cookies is long, but the recipe itself is very simple to put together. The cookies are made from, among other things, whole wheat and all-purpose flour, rolled oats, bran cereal, raisins, and walnuts. I substituted pistachios for the walnuts, and Fiber One Bran Cereal for the bran flakes. Also, I had no carrot baby food, so I just used some unsweetened applesauce. The cookies turned out hearty, tender, and just sweet enough. I think maybe two of these could suffice for a nice breakfast; one may not be quite enough. Still, I am very excited to take these on my trip for quick morning fixes!


Thanks to Sarah for hosting this week, and I do apologize for not making these along with everybody. If you're curious about whether the other members of the group liked their parfaits, be sure to check out the blogroll, here!

Thursday, January 20, 2011

CEIMB: Vanilla Spice Oatmeal


Okay, I'm not proud to admit it, but I almost did not participate in Craving Ellie in My Belly this week, and it was all because we were supposed to be making oatmeal. Ellie's Vanilla Spice Oatmeal, chosen by Mary of Popsicles and Sandy Feet, was not something I ever even considered making when I first purchased her So Easy cookbook. You see, here's another little-known bit of trivia about me: I can't stand oatmeal.

Yep, it's true. Or at least, I was pretty sure it was true up until this past weekend. I know I have been offered oatmeal in the past. I've turned it down every time. If I had to pinpoint my utter disgust concerning the mere presence of oatmeal, I'd say it's because of the texture. I'm just a big weirdo when it comes to food textures, and in particular I'm completely not a fan of mushy textures. Mashed potatoes are not my friend, and neither are grits, polenta, or even cream-based soups. So oatmeal certainly falls into that category for me.


When I first learned what we were to make this week, I told my husband, and then said that I would be choosing an Ellie rewind recipe from before I joined the group. I figured I would just make something else in place of the oatmeal. But then he asked me, "Why not just make it?" And you know what, I realized he was right. Why not? Neither of my children had ever eaten oatmeal (because I would never make them eat it, nor did I want to buy it and prepare it for them!), and it has been years since I last tried it. The truth is, my horizons have broadened so much in the last few years. I'm trying (and liking!) so many things now that I never dreamed I would. I've been pleasantly surprised so many times by foods that my former self could not palate.

And so, I decided right then and there, that I would make the oatmeal after all! At best, I would discover that I really did like it. At worst, I would just try it again and see that my suspicions were justified. Either way, no harm done.


In the end, I have to be honest. Me and oatmeal will probably never be bosom buddies. I loved the ease of making oatmeal from scratch (because I honestly had no idea it was so simple and fast!) and I did love Ellie's add-ins. She incorporates vanilla, cinnamon, brown sugar, and pecans for crunch. She added raisins to hers; I added dried cranberries. However, that darn texture is just not something I crave, or particularly enjoy consuming. I thought it tasted very good, but the mushiness is tough to deal with. Turns out, my husband is not a huge oatmeal fan either! I thought that was ironic and hilarious, considering he is the one who convinced me to make it! So he liked it okay, but wasn't in love. My five year-old son really did not care for it, but I had a feeling he wouldn't, so there were no shockers there.

I'm glad I revisited oatmeal, just so I could know for sure that it's just not our thing. Sorry I could not report some big culinary epiphany, though! I wanted it to work out better. Thank you to Mary for pushing me past my comfort levels! For the full recipe, you can go here, to Food Network's website. For the full CEIMB blogroll, click here.

Monday, October 11, 2010

Apple Cider Muffins


I had a bunch of apples left over from going apple picking with my boys, and I have been busy putting them to good use! Since we all eat muffins at my house, I finally had an excuse to try out a recipe from one of my baking cookbooks, The Craft of Baking. I love buying a big gallon of fresh apple cider each fall and drinking it warm on occasion, but I find myself with a lot of it that doesn't always get a chance to be used. So, these Apple Cider Muffins seem like a great solution! It utilizes those apples and the apple cider at the same time.


Okay, so the pictures of my boys don't necessarily have anything to do with this recipe, but I think I was overdue to show them off here on the blog! I haven't posted pictures of them in months, and I know there are people who have been wanting me to. So, here they are, eating their mid-afternoon snack, which I believe consisted of Halloween-shaped marshmallows, dried fruit strips, and these muffins. Eclectic!


Now, I wanted to share a little trick with you for making baked goods just a bit healthier. I purchased a bag of ground flax seeds a while back, thinking I'd just look it up later and find creative ways of slipping the flax into things I would make. I knew they were rich in Omega-3 fatty acids, and high in dietary fiber, and that they can even lower your cholesterol. It seemed like a great ingredient to use in place of other, less healthy ones.

As it turns out, you can actually use ground flax seed in place of oil or butter in a baked good recipe! I was floored when I read this on the back of the bag. It's a 3:1 ratio, meaning if a recipe called for 1/2 cup butter, you would use 1 1/2 cups of ground flax seed in its place. I was pretty skeptical about the substitution, because it seemed like it wouldn't work. You're basically replacing a "wet" ingredient with a "dry" ingredient, which seemed doomed to fail. But I practiced this trick on some other muffins I made the week before, by replacing half the fat with flax seeds, and guess what? It really did work!

The flax seeds give the muffin an extra texture and heartiness, as well as some darker flecks that are visible when you bite into it. The muffin was, amazingly, still moist and not heavy like a brick, as I feared it would be. It does taste a bit healthier, if that makes sense, and less indulgent. But I suppose that is the point here, anyway, so it was a welcome flavor!


These muffins are delicious and disappeared very quickly. They were a hit at my house and a hit at Andy's work, too. I'm so glad I've found such an awesome way to incorporate ground flax seed into our diet; we hardly eat any fish at my house, or any other foods that are well-known for their Omega-3s. Now I know we can still sneak it in, and it won't affect the taste! Just one note: the recipe below is written as I made it, not the way the book did. The changes I made are listed, and then the book's original ingredient is listed in parentheses after.


Apple Cider Muffins
adapted from The Craft of Baking
makes 12 muffins, plus 5-6 mini muffins

Ingredients
Unsalted butter or nonstick cooking spray, for greasing muffin tins
3/4 cup granulated sugar (the book used 1 cup)
3/4 cup packed dark brown sugar (the book used 1 cup)
3 large eggs
1/2 cup applesauce (the book used 3/4 cup grapeseed oil; I used applesauce and flax seed)
2 1/4 cups unbleached all-purpose flour
3/4 cup ground flax seed
1 1/2 tsp. baking soda
1 tsp. kosher salt
1 tsp. ground cinnamon
1 cup apple cider
3/4 cup sour cream
1 1/2 tsp. pure vanilla extract
2 crisp baking apples, such as Granny Smith or Mutsu, peeled, cored, coarsely grated (I used my food processor with the shredding attachment), and drained, juices reserved and used as part of the cider measurement
1 Tbsp. turbinado sugar (the book used Demerara sugar)


Directions
1. Preheat the oven to 350 degrees F. Generously butter or spray a standard 12-cup muffin tin (plus a mini muffin tin, if using), or line with paper liners (I used paper liners, but the muffins like to stick to those).

2. In a medium bowl, whisk together the granulated sugar, brown sugar, and applesauce. Add the eggs and whisk to combine. In another bowl, sift together the flour, flax seed, baking soda, salt, and cinnamon. In a third bowl, whisk together the apple cider, sour cream, and vanilla.

3. Add one third of the flour mixture and one third of the apple cider mixture to the sugar mixture, folding with a spatula just to combine. Add the rest of the flour and cider mixture in two additions. Fold in the grated apple, and then divide the batter evenly among the prepared muffin cups, filling each cup three quarters of the way. Sprinkle the tops of the muffins with the turbinado sugar.

4. Bake, rotating the muffin tin halfway through, until the muffins spring back to the touch, 25 to 30 minutes (mine took about 3-5 minutes longer). Transfer the pan(s) to a wire rack and let cool for 10 minutes. Then turn out the muffins from the pan(s) and let them cool completely on the wire rack. These muffins are best the second day, and will keep in an airtight container at room temperature for up to 3 days.

Thursday, September 30, 2010

CEIMB: Blueberry Almond French Toast Bake


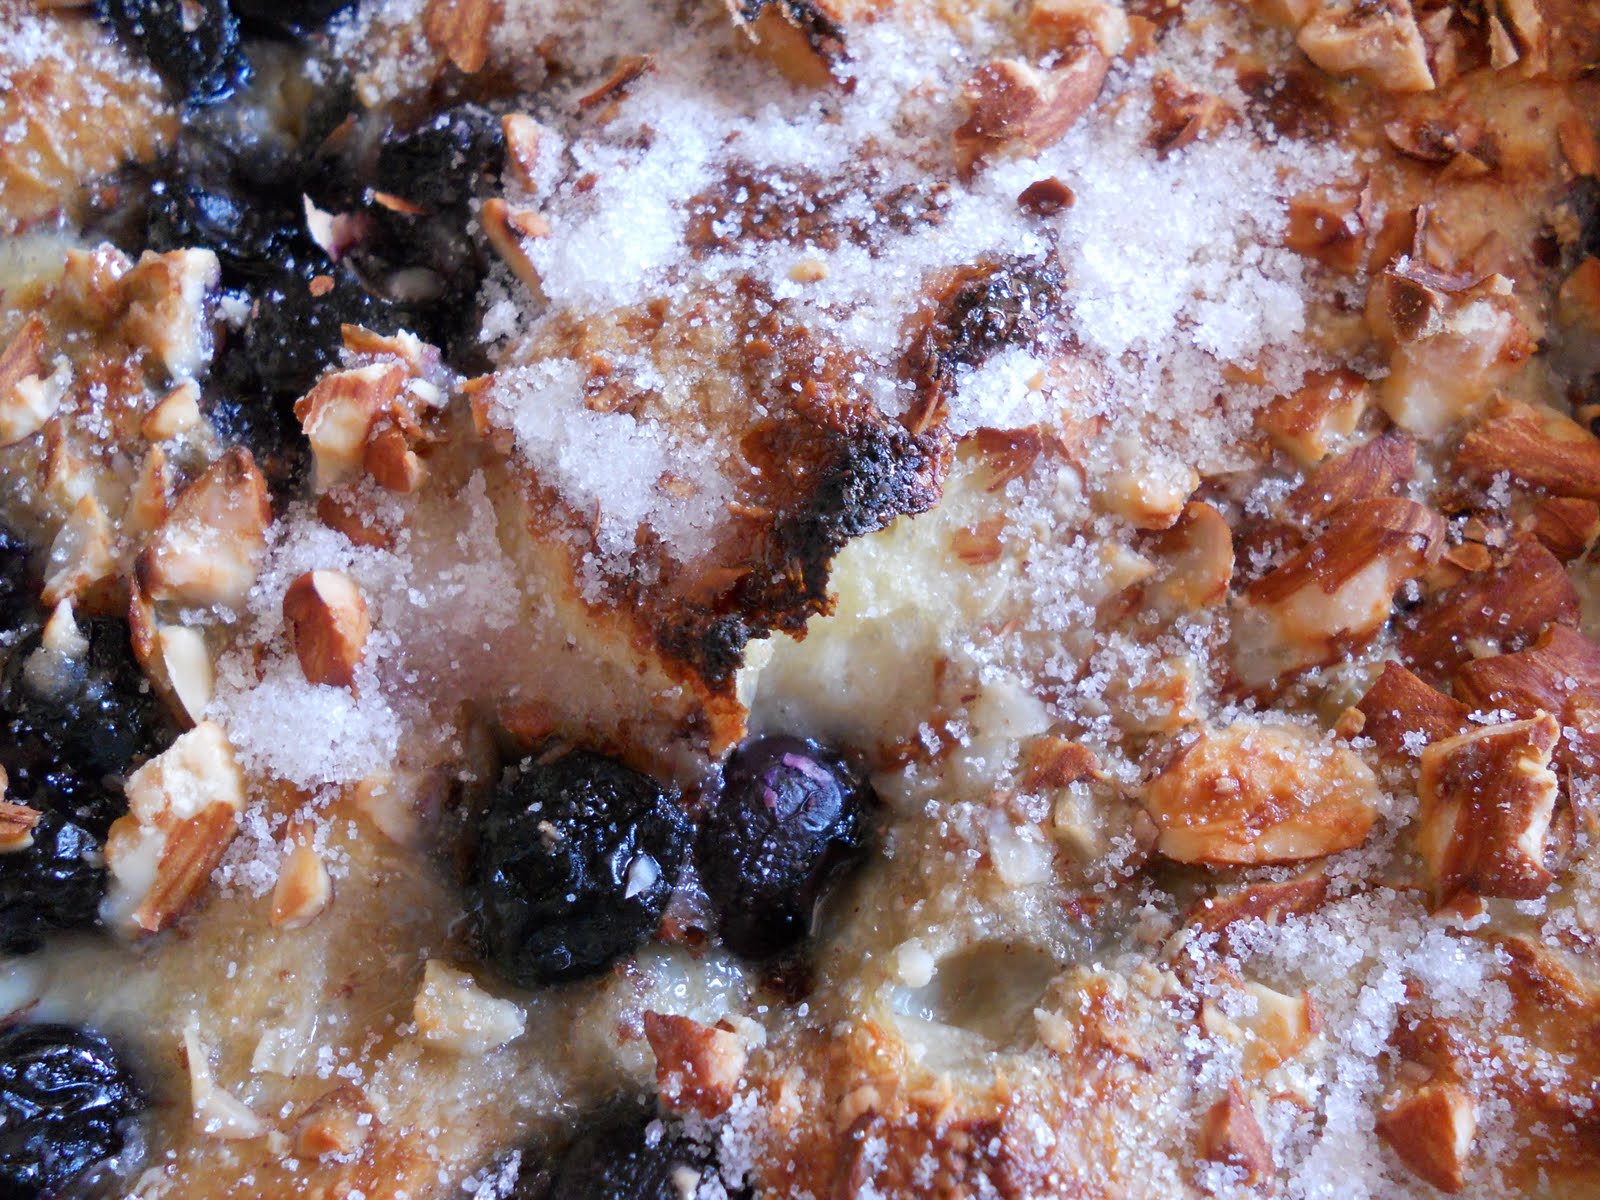
This week's Craving Ellie in My Belly recipe was chosen by Heide of Chez Zero. It was Ellie's Blueberry Almond French Toast Bake, from her book So Easy. Ok, I have to be completely honest here: we did not love this. Not at all. It's a shame, really, because we were looking forward to this one. And it turned out so pretty, too!


Now, there are a couple reasons why I think this did not work out for us, and I would love to try making this again with a few changes. For starters, the bread that I used was way too soft. I know I was supposed to use crusty, or day-old, bread. However, the bread I bought for this was this crazy soft bread that remained soft for three days! I bought it early enough that I thought for sure it would be stale by the time I needed it, but no dice. It's ironic, isn't it? The one time I really wantd my bread to become hard, and it wouldn't! Oh, well.


So that was my biggest problem. The finished product was really soggy, and I just don't like my french toast casseroles to come out that mushy. I like them to be firm and solid on the inside, with a nice crispy crust on the outside. I feel like there were too many eggs in this recipe. If I were to do it all over again, I would not use 8 (8!) whole eggs plus 8 egg whites. Instead I would probably use half that, at least. Both my hubby and I felt like the inner texture of this dish was just weird. It contained both qualities of cooked, soft scrambled eggs and mushy bread all at the same time. The taste itself was not bad, but it wasn't great enough to redeem the whole thing.


One fun thing I should mention, though: I decided to brulee the top, just for kicks. The top turned out to be the best thing about the french toast bake! It was easy; I just removed the dish from the oven when the bake time was complete, and sprinkled it lightly with granulated sugar. I switched the oven to broil and put the dish back in for a few minutes. The top became slightly charred-looking in some spots and extra crispy all over. The almonds got super-toasty, too. I thought it was really tasty, and it's a fun way to finish off a dish like this.

Thanks to Heide for the pick this week. I'm glad I got to try it, success or not. Besides, like I said, I'm now motivated to make this recipe again, but hopefully with improvements! Maybe the other CEIMBers made out better than me; you can check out the blogroll here.

Wednesday, September 29, 2010

Apple Cinnamon Rolls


Well, I am proud to say that I have now made cinnamon rolls, from scratch, without the aid of a bread machine or any other type of "cheating." It's a miracle! Of course, never one to stick to the traditional, I opted to make these ooey gooey Apple Cinnamon Rolls, and they were divine.


These rolls incorporate a sweet, sticky filling of caramel and finely chopped apples into the proceedings, rather than the standard butter/sugar/cinnamon mixture. Just before baking, the rolls are sprinkled with cinnamon and sugar, but without all that butter inside, these rolls actually are a little bit better for you, too!


Of course, they certainly don't taste healthy. These are oozy, melty, and decadent just as they are. The apples add just enough tart texture to make them complementary to the sweetness, rather than detract from it. If you're looking for an excuse to use up some fall apples this year, I highly recommend these rolls. Plus, as far as yeast dough-type things to make, I found this to be very doable and not difficult at all.


I'm so happy that I'm finally beginning to conquer my fear of yeast, and these rolls are baked proof that the results are well worth the effort. The recipe makes two pans' worth of rolls, so I was able to bake one pan after an overnight rise, and then I froze the other pan for a rainy day. Oh, and one final note: the caramel/apple mixture that serves as the filling is to die for, and has become the inspiration for yet another decadent treat that you will be seeing me blog about in the near future. Look for it soon!


Apple Cinnamon Rolls
from Breadworld
makes 24 rolls (2 pans)


Ingredients
For the rolls:
5 to 5 1/2 cups all-purpose flour
1/2 cup sugar
4 1/2 tsp. RapidRise yeast (2 envelopes)
1 tsp. salt
1/2 cup water
1/2 cup milk
1/4 cup butter or margarine
3 large eggs

For the apple filling:
2 large cooking apples, peeled and chopped
2 Tbsp. all-purpose flour
3/4 cup sugar
1/4 cup butter or margarine
1 tsp. ground cinnamon
1/2 tsp. nutmeg

For the cinnamon sugar topping:
3/4 cup sugar
1 tsp. ground cinnamon
1/2 tsp. nutmeg


Directions
Make the apple filling: 1. Combine the apples, flour, sugar, and butter or margarine in a medium saucepan. Bring to a boil over medium-high heat; cook for 3 minutes. Reduce heat to medium-low; cook 10 minutes, stirring constantly, until thick. Remove from the heat. Stir in the cinnamon and nutmeg; cool completely.

Make the rolls: 1. In a large bowl, combine 1 cup flour, sugar, undissolved yeast, and salt. In a saucepan on the stove, heat the water, milk, and butter until very warm (120 to 130 degrees F). Gradually add to flour mixture. Beat 2 minutes at medium speed with an electric mixer, scraping bowl occasionally. Add eggs and 1 cup flour; beat 2 minutes at high speed, scraping bowl occasionally. Stir in enough remaining flour to make a soft dough. Knead on lightly floured surface until smooth and elastic, about 8 to 10 minutes. Cover; let rest 10 minutes.

2. Divide dough into 2 equal portions. Roll each portion into 12x8-inch rectangle. Spread Apple Filling evenly. Beginning at long end of each, roll up tightly, jelly-roll style. Pinch seams to seal. Cut each roll into 12 equal pieces. Place, cut sides up, in greased 9-inch round pans. Cover; let rise in warm, draft-free place until doubled in size, about 45 minutes. (After covering the pans, they can be frozen at this point, or if you're preparing this in the evening for the next morning, you can refrigerate these overnight.)

Prepare cinnamon sugar topping and bake rolls: 1. In a small bowl, combine all of the cinnamon sugar ingredients, then stir well to fully incorporate.

2. Sprinkle the risen rolls with the cinnamon sugar topping. Bake in a 375 degree oven for 25 to 30 minutes, until browned on top. Remove from pans; serve warm.

Tuesday, August 24, 2010

Pancakes Two Ways


I love pancakes and I'm always trying to find new and exciting ways to make them. Recently, I decided to make not one, but two new recipes when I made breakfast for dinner. Breakfast for dinner is probably one of my favorite meals! It doesn't even matter what the breakfast is, so long as it is served at dinnertime.

Anyway, I wanted to make green tea pancakes with the brand-new container of matcha powder that I bought not too long ago. I had worked with matcha powder years ago, when I was an employee of Starbucks. It's basically very finely ground Japanese green tea, and it contains a lot of antioxidants, vitamins, and minerals for a powerfully healthy kick. In addition, it imparts such a lovely green shade to anything you add it to (as I'm sure you can tell from my pictures).


Now that I had my first type of pancake, I had to come up with one more. I figured my children weren't going to eat the green tea pancakes, and I was right. So what would I make for them that would be a big winner?

Cinnamon pancakes, that's what! My kids are gigantic cinnamon fans. I mean, just enormous. I'm almost inclined to start sprinkling cinnamon on their veggies, just to see if they'll be more enthusiastic about eating them! Not a bad idea....


So I had my two ideas, and I was ready to start mixing up ingredients. I was fortunate enough to find two successful recipes on other blogs. The green tea pancakes came from justJENNrecipes, and the cinnamon pancakes were found on Sugarlaws. Go check both of them out if you get the chance; both are great!

I didn't want to become too experimental my first time making either, so I stuck pretty close to the original recipes. However, in an attempt to give mine a bit more fiber, I added a bit of wheat bran to each batter. The kids didn't seem to notice, and I thought it gave the pancakes a nice little extra something, an added texture that would otherwise not have been there. I also studded some of them with slivered almonds. I sprinkled a few on the pancakes just before flipping them to their second side. Xander wanted almond faces, but I just wasn't that talented this time. Instead, my almonds are a bit more free-form. Next time, perhaps!


As expected, my kids did love the cinnamon variation. They are especially good with a bit of cinnamon sugar sprinkled on top, along with the maple syrup. It's almost like dessert.

And the green tea pancakes were a hit as well! When Andy first saw them, he thought I had simply put green food coloring in them, so he was intrigued when he found out that the color came from matcha powder. The green tea flavor is present, but not at all overwhelming. It gave the pancakes a bit of earthiness, mixed with a mild grassy-ness that was subtly sweet. It's hard to describe, but suffice it to say, they were pretty awesome. I think I'd like to make some matcha cookies or a matcha cake for my next green tea endeavor. I just love the taste!


Green Tea Pancakes
adapted from justJennrecipes
makes about 6 large pancakes

Ingredients (Note: I cut the original recipe in half. Also, this includes the variations I made.)

3/4 cup all-purpose flour

1/4 cup wheat bran

1/2 Tbsp. baking powder

1 Tbsp. sugar

1 tsp. matcha powder (powdered green tea)

1 egg

3/4 cup milk

1/2 Tbsp. Smart Balance 50/50 Blend, melted

slivered almonds, for sprinkling (optional)


Directions

1. In a large bowl, whisk together the flour, wheat bran, baking powder, sugar, and matcha. Add the egg, milk, and butter blend just until combined.

2. Heat a skillet or griddle to medium or medium-low. Grease the pan (or use nonstick cooking spray). Using a 1/4-cup measure, drop scoops of batter onto your pan. Wait until bubbles begin to form and just start popping on the pancake's surface, then add a few slivered almonds to the top, if desired. Flip pancakes, then cook an additional 2-3 minutes on the other side.

3. Remove pancakes to a plate, then serve with whatever pancake toppings you like.


Cinnamon Pancakes

adapted from Sugarlaws

makes about 6 large pancakes


Ingredients (Note: this version includes my own variations.)

1 cup whole milk

3/4 cup plus 2 Tbsp. all-purpose flour

1/4 cup wheat bran

2 tsp. baking powder

1/4 tsp. salt

2 tsp. ground cinnamon

2 Tbsp. sugar

1 egg

1 Tbsp. Smart Balance 50/50 Blend, melted

slivered almonds, for sprinkling (optional)


Directions
1. Combine all the ingredients except the almonds in a mixing bowl. Whisk until smooth.

2. Heat a skillet or griddle to medium or medium-low. Grease pan (or use nonstick cooking spray). Using a 1/4-cup measure, drop scoops of batter onto your pan. Wait until bubbles start to form and just start popping on the pancake's surface, then add a few slivered almonds to the top, if desired. Flip pancakes, then cook an additional 2-3 minutes on the other side.

3. Remove pancakes to a plate, then serve with whatever pancake toppings you like.

Thursday, May 13, 2010

CEIMB: Whole-Wheat Apple Pancakes with Nutty Compote


For this week's Craving Ellie in My Belly recipe, we made these wonderful Whole-Wheat Apple Pancakes. This was chosen by Dishin', and I was really looking forward to it. I could probably eaet pancakes for breakfast every single day; that's how much I love them. Waffles run a close second, but they require a little bit more effort. Once I finally learned how to make pancakes, a few years back, I have enjoyed preparing them in different ways. This way, to sprinkle apples on top of the pancakes while they cooked on the griddle, was one I hadn't tried before.


The preparation was simple. An easy pancake batter is put together, made with half whole-wheat and half all-purpose flours. You chop up an apple into small chunks and gently heat the chunks in the microwave. Once the pancakes are on the griddle, you sprinkle about a tablespoon of apple onto each pancake. When you flip them, the apple continues to heat through, and they are served (or at least, we served them) with the apple on the bottom.


But wait, that's not all. Next, you make a nutty compote, which of course is really just a fancy way of saying "nutty topping." I loved the nutty topping, but I have to admit that I modified Ellie's recipe. It was partially out of laziness (not wanting to go to the store for some things) and partially because I thought we would like it better if we altered it a bit. Instead of the sunflower seed-pumpkin seed-almond mix that was called for, we used only almonds. We did use the sesame seeds, wheat germ, and pure maple syrup that was part of the original recipe.


Altogether, this made for a wonderful breakfast. The compote worked so well with the pancakes. The nutty crunch was an unexpected, but welcome contrast to the soft pancakes. I have to admit, I did add some additional syrup, mostly because the compote didn't contribute that syrupy coating that I love so much. Even so, this recipe was fabulous, and I believe I'll be making it again. Even Xander, my picky eater, admitted that this was good. Score!

The recipe for these pancakes, and their topping, can be found here. Thank you to Dishin' for a great meal!