Showing posts with label caramel. Show all posts

Sunday, September 11, 2011

Baked Sunday Mornings: Caramel Apple Cake


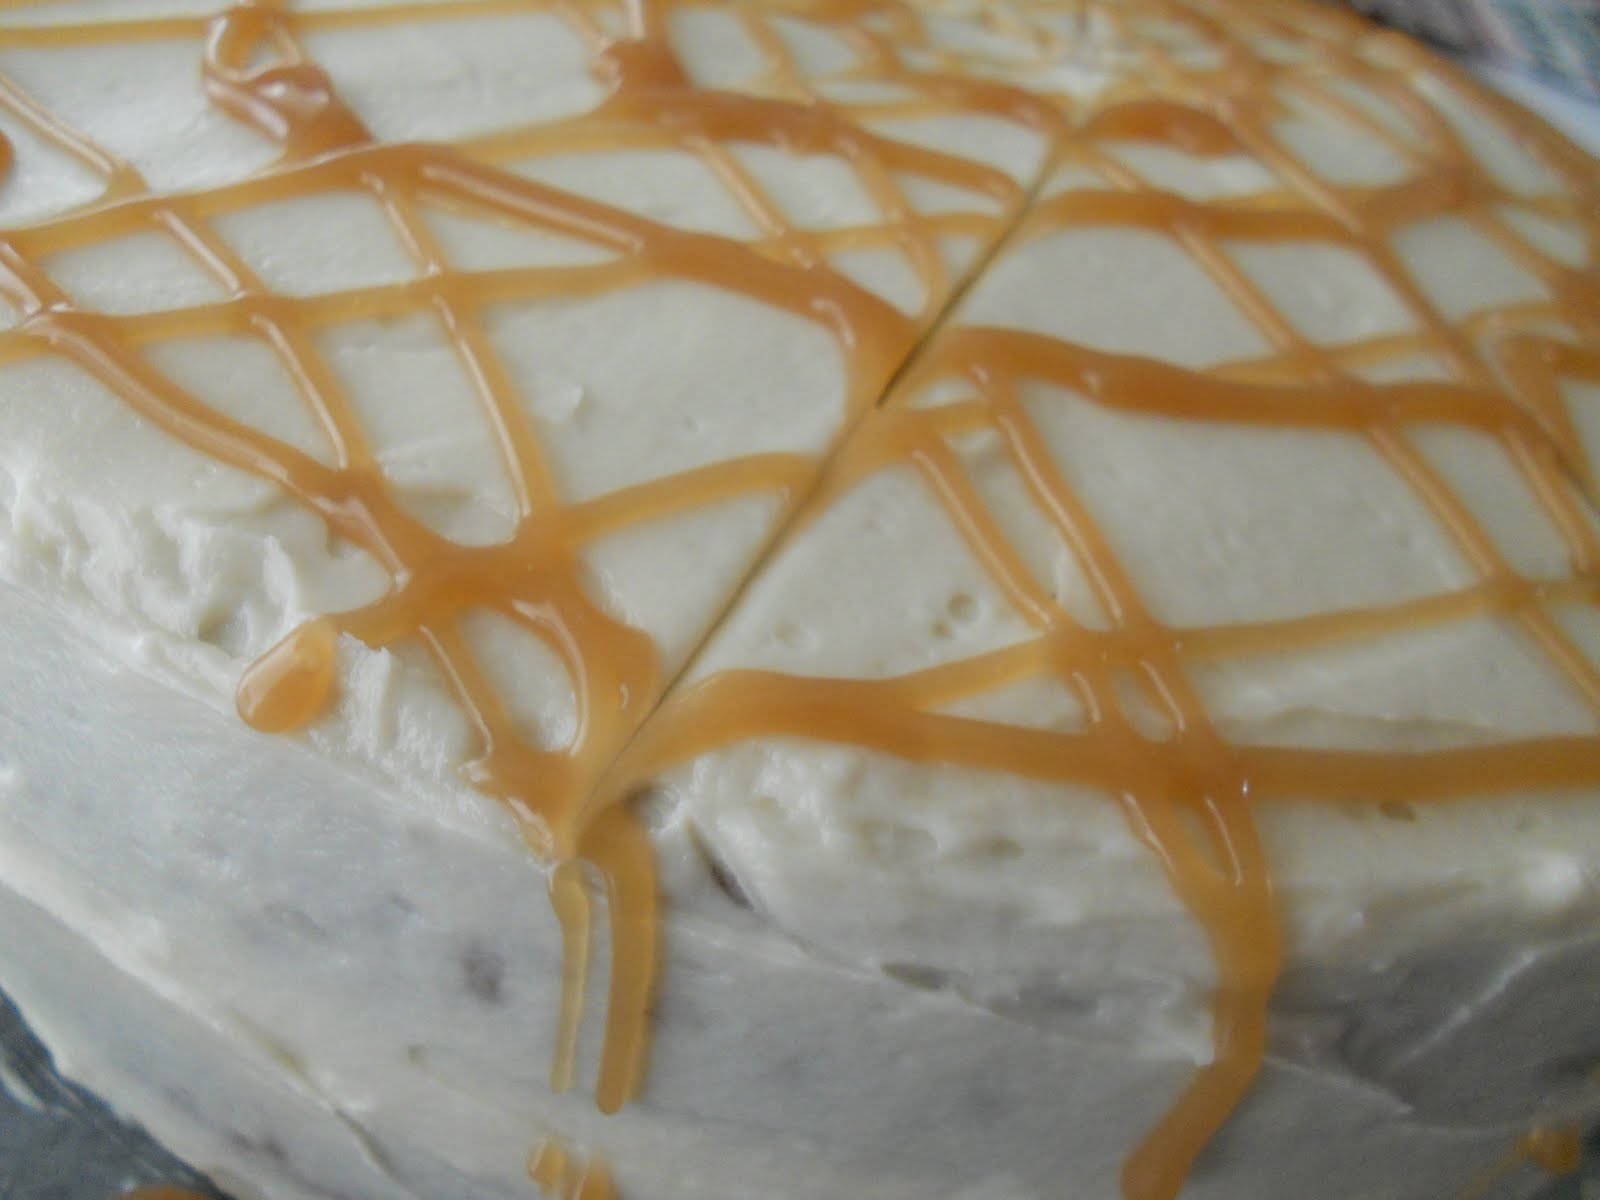
I had the privilege of making the Baked Explorations book's Caramel Apple Cake last weekend for my Baked Sunday Mornings group. Boy, what an undertaking! This was not your simple, thrown-together kinda cake. This was much more of a clear-your-calendar, spend the whole day covered in flour and frosting cake. But let me tell you, it was worth every second spent on it! It was nothing short of magnificent.


I broke the recipe up into steps; it made the whole thing so much easier and more manageable. I made the homemade applesauce, which goes into the cake batter, about two days before I was going to bake the cake. I made the homemade caramel, which is incorporated into the frosting as well as drizzled on top of the finished cake, about three or four days prior to baking day. I have to say, my confidence was totally boosted by making both the applesauce and the caramel; I had great success with both! I tend to mess up when making caramel, but this particular batch turned out pretty perfect. The applesauce was my first ever attempt at making it from scratch. It was completely easy to do and came together beautifully.


For the cake itself, I decided to cut the whole recipe in half. I was serving this for my brother-in-law's birthday, and there were going to be 7 of us eating the cake. Since this is a very decadent cake and I didn't really want there to be tons of leftovers lingering for days later, I thought a two-layer cake instead of a three-layer cake would be best. The cake was easy to whip up; I used two 9-inch round pans for it. The baking time was a bit less than the book indicated, but I am pretty sure it's because I switched things up.


The frosting, which is a cooked flour frosting, turned out way better than I expected it to. I've made this type of frosting before, and both times I have hit a bump in the road. Not this time. This batch came out great; satiny, luxurious, with a perfect hint of caramel flavor. Addictive stuff! I reduced the amount of frosting I made to just a third of the original amount, and it wasn't actually enough to frost the top and sides and fill the middle layer. So, I improvised. I had some leftover butterscotch frosting from my son's birthday cake, so I used that to fill the middle of the cake. It worked beautifully! The butterscotch complemented the spice cake so well, and the pale orange color coordinated nicely as well.


The cake was a huge hit, needless to say. Everyone really loved it. It was impressive to look at (even though my cake decorating skills need some work) and tasted unbelievably delicious. The cake was so moist from all that applesauce, and the spices were gentle but present. Everything comes together wonderfully in this cake; I don't know what else I can say about it!

But maybe there are some other people who have different things to say about it. Go check out the Baked Sunday Mornings blogroll to see the group's thoughts on this cake.

Wednesday, April 6, 2011

Burnt Sugar Bundt Cake


I decided to whip up an easy bundt cake to take to my in-laws' house not too long ago. My hubby's birthday is today (Happy Birthday, darling!), and so I figured it would be nice to have a cake that everybody could eat together, since he wouldn't be seeing any extended family on the actual day of. I knew I could turn to my Baked Explorations book for something that would be tasty and easy, but would still appear elegant and fancy enough to qualify as birthday cake.


This one is a real gem. It's listed in the book as Burnt Sugar Bundt Cake with Caramel Rum Frosting, but since I left out the rum mine is simply a caramel frosting. The cake is a simple one, but it is dressed up with the addition of a burnt sugar mixture, which is divided in half and added to both the cake batter and the frosting. A basic hard caramel candy topping is made on the stovetop, broken into pieces, and arranged on top of the frosted cake, dressing it up nicely. The book lists the topping as optional, but I totally think it's a must here.


I think I may have made my burnt sugar liquid a little, well, less burnt than I was supposed to. You're instructed to heat sugar in a saucepan until it melts and turns a dark caramel color. I thought I did that, but the resulting liquid (which is a blend of the melted sugar, heavy cream, coconut milk, and lemon juice) turned out an off-white color. The cake, which contains half the liquid, is a pale yellow color, while the picture in the book clearly shows a dark brown, almost chocolate-looking cake. However, I honestly don't think it mattered to anybody because the cake was positively scrumptious.


One little note about the frosting, though: I think it needs extra confectioners' sugar. The recipe calls for 2 1/3 cups, but I would venture to say that closer to 3 cups is called for here. When I attempted to apply the frosting to the cooled cake, I encountered a problem. The frosting ran, avalanche-style, down the sides of the cake! Because it's a liquid/confectioners' sugar blend, it eventually did set up for me, like a glaze, although I had to refrigerate it overnight to make sure everything stayed put. After that, it was firm and it stayed that way. The hole in the center of the cake was filled with extra frosting, since it had pooled down there before settling. Again, it did not affect the taste at all, but I just thought I'd issue a warning in case anybody tried to make this! It's worth the steps, and it's not complicated at all. Just perfect to take along to a party!


Burnt Sugar Bundt Cake with Caramel Frosting
adapted from Baked Explorations
makes 1 (10-inch) bundt cake

Ingredients
For the burnt sugar liquid:
1/2 cup granulated sugar
1/2 cup heavy cream
Approximately 3/4 cup coconut milk
1 1/2 Tbsp. fresh lemon juice

For the bundt cake:
3 cups all-purpose flour
1 tsp. baking powder
1/2 tsp. baking soda
1 tsp. salt
1 1/4 cups unsalted butter
(2 1/2 sticks) cut into 1-inch cubes, at room temperature
2 cups granulated sugar
4 large eggs
1 tsp. pure vanilla extract
Burnt Sugar Liquid (see above)

For the caramel shard topping:
1/2 cup granulated sugar
About 1 tsp. water

For the caramel frosting:
1/2 cup (1 stick) unsalted butter
1 Tbsp. pure vanilla extract
2 1/3 cups confectioners' sugar (or more, as needed)
Burnt Sugar Liquid (see above)

Directions
Make the burnt sugar liquid: 1. In a medium saucepan over medium heat, slowly melt the sugar. Use a wooden spoon to stir it continuously to ensure even melting. When the sugar turns a dark caramel color, remove the pan from the heat and slowly stream in the cream while continuing to stir (don't worry if mixture starts to clump). Return the pan to medium heat and stir until completely combined; cook for 2 minutes longer, stirring.

2. Transfer the burnt caramel mixture to at least a 2-cup heatproof liquid measuring cup (like Pyrex) and add enough coconut milk to make 1 1/4 cups liquid. Add the lemon juice. Whisk to combine, divide the mixture in half, and set both portions aside.

Make the bundt cake: 1. Preheat the oven to 325 degrees F. Generously spray the inside of a 10-inch Bundt pan with nonstick cooking spray; alternatively, butter it thoroughly, dust it with flour, and knock out the excess flour.

2. In a medium bowl, whisk together the flour, baking powder, baking soda, and salt. Set aside. In the bowl of a standing mixer fitted with the paddle attachment, beat the butter and sugar until pale and fluffy. Scrape down the bowl and add the eggs, one at a time, beating until each is incorporated. Add the vanilla and beat for 5 more seconds.

3. Retrieve one of the reserved portions of burnt sugar liquid. Add the flour mixture in three parts, alternating with the burnt sugar, beginning and ending with the flour mixture. Scrape down the sides and bottom of the bowl and beat again for 10 seconds. Pour the batter into the prepared pan and bake for 45 to 50 minutes, or until a small sharp knife inserted into the center of the cake comes out clean. Transfer the pan to a wire rack to cool completely. Gently loosen the sides of the cake from the pan and turn it out onto the rack.

Make the caramel shard topping: 1. Place the sugar in a small saucepan. Add enough water - it takes approximately 1 tsp. - to make it the texture of wet sand. Cook on high heat until the sugar turns amber. Pour the caramel onto a half-sheet pan lined with nonstick aluminum foil. Let cool. Break the cooled caramel into small shards and use them to decorate the frosted cake.

Make the caramel frosting: 1. Put the butter, vanilla, confectioners' sugar, and remaining portion of burnt sugar liquid in a food processor. Pulse in short bursts until the frosting is shiny and smooth.

Assemble the burnt sugar bundt cake: 1. Use an offset spatula to spread the frosting over the crown of the Bundt in a thick layer. Top with caramel shards. Let the frosting set before serving. The cake will keep in an airtight container, at room temperature, for up to 3 days.

Sunday, December 5, 2010

Sweet and Salty Brownies: Baked Sunday Mornings First Post!


I am so excited right now! I'm about to present you with my very first post as....(drumroll, please!): an official member of the new blogging group, Baked Sunday Mornings!

Yep. If you happen to read my blog sorta often, chances are you've noticed a recipe (or six!) that I have baked from those wonderful Baked cookbooks. They're the ones written by the co-owners of the Brooklyn bakery of the same name, and they're always wonderful. The Baked guys love to think outside the box, and I'm always inspired by their ideas.


So imagine my utter delight when I happened to stumble across this new group of bloggers dedicated to baking from the newest Baked book, Baked Explorations. Their mission: to bake every recipe from this cookbook and post about them on Sunday mornings. The rules are not strict; we can participate when we want to. Plus, we only blog every other Sunday. It works out great; we don't have to worry about having a Baked treat lying around our house basically at all times, which is a relief to me and my waistline!

I was able to jump in and start baking along with the group just in time for these Sweet and Salty Brownies, which I had already made before joining. Fortunately, I had photographed them but never blogged about them. I was going to get around to it eventually, but now here was my chance! Anyway, on to the brownies!

These are some of the yummiest brownies I've ever eaten, hands down. They're a riff on the classic Baked brownie, with a surprising twist. You make a salted caramel, and spread some of it across the batter (you put down half the batter, then the caramel, then the remaining brownie batter). When you bake it, the caramel seamlessly melts into the brownie, so you don't end up with a discernible caramel layer. What you do end up with is a deeper flavor that winds its way through the whole thing and just elevates it. Once the brownies come out of the oven, you sprinkle them with some coarse sugar, and some fleur de sel (or in my case, coarse sea salt). Mmm. A wonderful first recipe with the new group!


We don't post the full recipes on our blogs in this group, but they will always be posted over at the main site for Baked Sunday Mornings. The Sweet and Salty Brownie is here. If you're looking for one wonderful brownie recipe that will wow everybody this holiday season, look no further. And do check out the blogroll for the group, here! I can't wait to bake more goodies with them!

Friday, October 22, 2010

Caramel Apple Cupcakes with Apple Cider Caramel Sauce


These cupcakes were the product of my imagination, running wild, and trying to come up with the perfect way to use a really awesome caramel sauce that I made recently. Funny how something as multi-step as a cupcake could be born from something so simple as caramel, but that's exactly what happened. Of course, there are many, many things you could do with this caramel sauce; it's actually quite versatile. But for my blogging purposes today, we're just going to talk about it in this recipe.


So what is this magical caramel I speak of, anyway? Well, it's Apple Cider Caramel Sauce, and it is heaven. Instead of making this caramel with lots of butter or cream, or both, you add lots of fresh apple cider. Then, to make it even more apple-y, you throw in a bunch of diced apple pieces and allow them to get all soft and mushy in there. Once the caramel has had a chance to come together, you puree the mixture, so the apple pieces actually become part of the sauce. Oh, my, is it good! After it's had a chance to chill in your fridge, it thickens up nicely, almost becoming a cross between a caramel sauce and an applesauce. Then, you're ready to use it!


The cupcakes I decided to make were from Cooking Light. I found a special issue that I snatched right up at the bookstore; it was a Fall Baking edition! I flipped through it before purchasing and realized I could see myself making over half of the recipes; I thought it would be a good investment! (Okay, that's what I told myself so I'd feel better about buying the more expensive special edition.) I'd probably have to put these cupcakes in the sorta cupcake/sorta muffin category. I mean, they're delicious and everything. They're moist, with nice chunks of apple throughout, but they did remind me of a muffin more so than a cupcake. Still, I suppose that's to be expected when it's a "light" recipe. And, besides, the frosting would more than make up for the healthiness! So I forged on.


I whipped up a Swiss Meringue Buttercream for the cupcakes, using Martha Stewart's basic recipe as my guide. I did have a little bit of trouble with the buttercream, as is usually the case when I make this tricky frosting. But I managed to get everything under control, and the frosting came together quite nicely.


So now it was time to add my Apple Cider Caramel Sauce! I wanted to transform my ordinary, muffin-y apple cupcakes into Caramel Apple Cupcakes, and I knew that adding the caramel to the frosting would be divine. I wasn't sure how much caramel to add to the buttercream at first, so I started out with about 2/3 cup and kept checking the flavor. It took a little over 3/4 cup caramel total before you could really taste the sauce in the frosting. Once I had enough caramel in there, the frosting turned a lovely light caramel color. It was silky and smooth, and you could detect the hint of apple flavor in the caramel sauce. It was pretty amazing.


Just to take these over the top, I finished them off with a drizzle of the caramel sauce over the buttercream. The piping on some of these were really weird, sorry about that (I was trying a thing. It didn't work), but I think for the most part these were a rousing success. I love it when a crazy notion in my head turns into delicious reality!


Caramel Apple Cupcakes

cupcakes adapted from Cooking Light (the original recipe had a streusel topping and a glaze, which I omitted due to my addition of buttercream frosting)

makes 12 cupcakes


Ingredients

6.75 oz. all-purpose flour (about 1 1/2 cups)

1/2 tsp. baking powder

1/4 tsp. salt

1/4 tsp. baking soda

3/4 cup granulated sugar

1/4 cup (2 oz.) 1/3-less-fat cream cheese, softened

1/4 cup butter, softened

2 Tbsp. amaretto (you can use 2% milk, which I did)

1 tsp. vanilla extract

1 large egg

1/2 cup reduced-fat sour cream

1/4 cup 2% reduced-fat milk

3/4 cup finely chopped Gala apple

1 Tbsp. all-purpose flour


Directions

1. Preheat oven to 350 degrees F. Place muffin cup liners in 12 muffin cups; coat with cooking spray. Weigh or lightly spoon 6.75 oz. flour into dry measuring cups; level with a knife. Combine this flour with baking powder, salt, and baking soda in a small bowl; stir with a whisk.


2. Combine granulated sugar, cream cheese, and 1/4 cup butter in a large bowl; beat with a mixer at high speed until well blended. Add amaretto or 2 T. milk, vanilla, and egg to sugar mixture, and beat with a mixer at high speed until well blended. Combine sour cream and 1/4 cup milk in a small bowl, and stir with a whisk until well blended. Combine apple and 1 T. flour in a small bowl, and toss well.


3. Add flour mixture and sour cream mixture alternately to sugar mixture, beginning and ending with flour mixture. Beat just until blended. Fold in apple mixture. Divide batter evenly among muffin cups. Bake at 350 for 27 minutes or until a wooden pick inserted in center comes out clean. Cool in pan for 15 minutes on a wire rack; remove the cupcakes from pan and allow to cool on racks.


Caramel Swiss Meringue Buttercream

adapted from Martha Stewart (I made just half the recipe)

makes about 2.5-3 cups


Ingredients

1/4 cup plus 1 Tbsp. sugar

3 large egg whites

Pinch of salt

1/2 pound (2 sticks) butter, softened and cut into tablespoon-sized pieces

1/2 tsp. pure vanilla extract

3/4 (or more as needed) Apple Cider Caramel Sauce, recipe follows


Directions

1. Whisk together the sugar, egg whites, and salt in the heatproof bowl of a standing mixer. Set bowl over a pan of simmering water, whisk until sugar is dissolved and mixture registers 140 degrees on an instant read thermometer.


2. Return bowl to mixer; fit mixer with whisk attachment. Beat on medium-high speed until stiff. Reduce speed to medium-low; add butter, a few tablespoons at a time. Continue whisking until smooth.


3. Switch to paddle attachment. Add caramel and vanilla; beat on lowest speed until combined, 3 to 5 minutes. The buttercream can be made several days ahead and stored in the refrigerator. Before using, bring buttercream back to room temperature; return to mixer and beat with the paddle attachment until smooth.


4. To assemble cupcakes, pipe the frosting onto each cupcake in the desired pattern. Drizzle with leftover caramel sauce and serve. (The frosted cupcakes do keep well in the fridge; just bring to room temperature before serving.)


Apple Cider Caramel Sauce

from The Craft of Baking

makes about 2 cups


Ingredients

2 1/4 cups sugar

1/2 cup light corn syrup

1/4 vanilla bean, split lengthwise, seeds scraped out, bean and seeds reserved

2 small tart baking apples, such as Mutsu, Cortland, or Granny Smith, cored, and cut into 1-inch pieces

3/4 cup apple cider

1/4 tsp. kosher salt


Directions

1. Combine the sugar, corn syrup, 1/2 cup water, and the vanilla bean and seeds in a medium saucepan. Cook over high heat until the sugar becomes a medium golden caramel, about 15 minutes. Add the apples and stir to combine. Reduce the heat to low and cook until the apples have softened, 2 to 3 minutes. Carefully add the cider and stir to combine. Continue to cook until the sauce is sticky, about 5 minutes more.


2. Remove the pan from the heat and remove the vanilla bean. Rinse and recycle the vanilla bean for another use. Whisk the salt into the mixture.


3. Transfer the mixture to a blender and puree until smooth. Strain it through a fine mesh sieve into a bowl. Serve immediately, or store in an airtight container in the refrigerator for up to 2 weeks. Reheat the sauce in a saucepan over low heat.

Tuesday, July 6, 2010

Sweet and Salty Cake


No picture I could ever take of this cake could do it the true justice it deserves. No picture is ever going to capture the deep, dark, chocolatey fluffiness of the frosting. I won't be able to sell you on words alone on the moist, tender crumb of the three chocolate cake layers. Likewise, I'm probably never going to convince you that the salted caramel layers are nothing short of a revelation, lending an amazing depth and complexity of flavor that just elevates the entire cake to a whole other level. But hey, I'll do the best I can!

This cake caught my eye immediately about a year ago, back when I first purchased the Baked cookbook. As I flipped through the pages, reading recipe titles, none sounded quite as interesting, as innovative, as downright delicious to me as this one. Sweet and Salty Cake. How intriguing. The idea of sweet and salty together in an almost absurdly decadent chocolate cake definitely appealed to me. This, I thought, was the very embodiment of indulgence.

How fitting, then, that I should finally decide to make this as a very special birthday treat for....me! Yes, I am ridiculous and wanted to make myself a birthday cake. Why not? I enjoy baking, and I enjoy eating. Sounds like a great way to spend a birthday to me.


I had read on several other blogs about how other people had a devil of a time making this cake. People truly lamented their time spent slaving in the kitchen, all for the love of the sweet and salty. However, the unanimous consensus heard 'round the blogosphere, as far as I could tell, was that eating the cake was well worth the effort and hours.

The effort I speak of is as follows: first, you bake a three-layer chocolate cake; next, you make your own salted caramel. This will be drizzled on each cake layer and allowed to soak into the cake a bit.....yum! See above picture, in which the salted caramel is sprinkled with sea salt atop my second cake layer. Finally, you make even more caramel, to be incorporated into a heinously unhealthy (but ever so delicious!) whipped chocolate ganache frosting. You assemble the cake, garnish it with a final sprinkle of sea salt (or fleur de sel, as the recipe states), and there you have it.


Perhaps it is simply because I was warned about how complicated it was, but I really didn't find this cake all that complex. I mean, sure, there are a ton of steps. It does take a very long time to put everything together, beginning to end. There are elements that are tricky, such as making the caramel...twice. However, I felt as though I was successful in the end, and I was proud of the accomplishment.

I did face one complication, though. The recipe's instructions state that this cake keeps "beautifully" at room temperature in a cake saver. I finished making this cake around 10:30 p.m. When I lifted the lid to my cake saver about 12 hours later to admire it, I realized that some of the frosting had begun to roll, avalanche-style, down the side of the cake! I still don't know for certain why this happened, but I decided to bite the bullet and throw the whole shebang in the fridge to let the frosting firm up. I realize that refrigerating a cake such as this is violating like a hundred baking commandments, but I felt like my hands were tied in this situation. I couldn't have runny frosting!


Its brief stay in the fridge did allow me to fix the gooey side after a couple hours of chilling, and in the end I think it all worked out. The cake turned out divine, exquisite, like no other cake I've had. Each element is distinctly flavorful, but when combined it's just out of this world! My husband proclaimed this cake "the best one I've ever eaten." A superior compliment, to be sure, but I believe he has said this before about other cakes (or cupcakes) I've made in the past. So, he's either being way too nice and forgiving with me, or maybe I'm really improving with each cake I make. I don't know for sure, but I do know that this cake was among the best I've ever eaten, too. Seriously, I don't think I could have asked for a better cake for my birthday. Worth every second I worked on it, truly!


Sweet and Salty Cake
recipe from Baked
makes one 8-inch, 3-layer cake (I made mine in 9-inch cake pans)


Ingredients
For the classic chocolate cake layers:
3/4 cup dark unsweetened cocoa powder
1 1/4 cups hot water
2/3 cup sour cream
2 2/3 cups all-purpose flour
2 tsp. baking powder
1 tsp. baking soda
1/2 tsp. salt
3/4 cup unsalted butter, softened
1/2 cup vegetable shortening (I used a trans fat-free variety from Whole Foods)
1 1/2 cups granulated sugar
1 cup firmly packed dark brown sugar
3 large eggs, at room temperature
1 Tbsp. pure vanilla extract

For the salted caramel:
1/2 cup heavy cream
1 tsp. fleur de sel
1 cup sugar
2 Tbsp. light corn syrup
1/4 cup sour cream

For the whipped caramel ganache frosting
1 lb. dark chocolate (60 to 70% cacao), chopped
1 1/2 cups heavy cream
1 cup sugar
2 Tbsp. light corn syrup
2 cups unsalted butter, soft but cool, cut into 1/2-inch pieces

To assemble the cake
2 tsp. fleur de sel, plus more for garnish


Directions
Make the classic chocolate cake layers: 1. Preheat the oven to 325 degrees F. Butter three 8-inch (or 9-inch) round cake pans, line the bottoms with parchment paper, and butter the parchment. Dust with flour, and knock out the excess flour.
2. In a medium bowl, combine the cocoa powder, hot water, and sour cream and set aside to cool. Sift the flour, baking powder, baking soda, and salt together in another medium bowl and set aside.
3. In the bowl of an electric mixer fitted with the paddle attachment, beat the butter and shortening on medium speed until ribbonlike, about 5 minutes. Add the sugars and beat until fluffy, about 5 minutes. Add the eggs, one at a time, beating well after each addition, then add the vanilla and beat until incorporated. Scrape down the bowl and mix again for 30 seconds. Add the flour mixture, alternating with the cocoa mixture, in three additions, beginning and ending with the flour mixture.
4. Divide the batter among the prepared pans and smooth the tops. Bake for 35-40 minutes (mine took 30 for the 9-inch cake pans), rotating the pans halfway through the baking time, until a toothpick inserted in the center of each cake comes out clean. Transfer the cakes to a wire rack and let cool for 20 minutes. Invert the cakes onto the rack, remove the pans, and let cool completely. Remove the parchment.

Make the salted caramel: 1. In a small saucepan, combine the cream and fleur de sel. Bring to a simmer over very low heat until the salt has dissolved.
2. Meanwhile, keeping a close eye on the cream mixture so it doesn't burn, in a medium saucepan combine 1/4 cup water, the sugar, and corn syrup, stirring them together carefully so you don't splash the sides of the pan. Cook over high heat until an instant-read (or candy) thermometer reads 350 degrees F., 6 to 8 minutes. Remove from the heat and let cool for 1 minute.
3. Add the cream mixture to the sugar mixture. Whisk in the sour cream. Let the caramel cool to room temperature, then transfer to an airtight container and refrigerate until you are ready to assemble the cake. (At this point, the caramel will keep in the fridge up to 3 days.)

Make the whipped caramel ganache frosting: 1. Put the chocolate in a heatproof bowl and set aside. (I just placed mine inside the bowl that goes to my stand mixer, since we'll need the chocolate in there soon anyway.)
2. In a small saucepan, bring the cream to a simmer over very low heat. Meanwhile, keeping a close eye on the cream so it doesn't burn, in a medium saucepan combine 1/4 cup water, the sugar, and corn syrup, stirring them together carefully so you don't splash the sides of the pan. Cook over high heat until an instant-read (or candy) thermometer reads 350 degrees F., 6 to 8 minutes. Remove from the heat and let the caramel cool for 1 minute.
3. Add the cream to the caramel and stir to combine. Stir slowly for 2 minutes, then pour the caramel over the chocolate. Let the caramel and chocolate sit for 1 minute, then, starting in the center of the bowl, and working your way out to the edges, slowly stir the chocolate and caramel mixture in a circle until the chocolate is completely melted. Let the mixture cool, then transfer it to the electric stand mixer.
4. Mix on low speed with the paddle attachment until the bowl feels cool to the touch. Increase the speed to medium-high and gradually add the butter, beating until thoroughly incorporated. Scrape down the bowl and beat on high speed until the mixture is fluffy.

Assemble the cake: 1. At this point, I wrapped each cake layer in two layers of saran wrap and put them in my freezer for about 45 minutes, just to firm them up enough to trim the tops. The cookbook does not say to do this, but after reading up on this cake on other blogs, it seemed like a crucial step. I think it helped me out. But it is optional.
2. Trim each cake layer so it lays flat on top and on the bottom. Place one cake layer on a serving platter. Spread 1/4 cup of the caramel over the top. Let the caramel soak into the cake, then spread 3/4 cup of the ganache frosting over the caramel. Sprinkle 1 tsp. of the fleur de sel over the frosting, then top with the second cake layer.
3. Spread with caramel, then frosting, and sprinkle with 1 tsp. of the fleur de sel. Then top with the third layer. Spread with caramel. Crumb coat (spread a very thin layer of the ganache frosting over the entire cake) the cake and put the cake in the refrigerator for 15 minutes to firm up the frosting. Frost the sides and top with the remaining frosting. (I did generously frost my cake, but I still had some frosting left over.) Garnish with a sprinkle of fleur de sel.
4. This cake will keep (maybe?) in a cake saver at room temperature (cool and humidity-free) for up to 3 days. If your room is not cool, place the cake in a cake saver and refrigerate for up to 3 days. Remove the cake from the refrigerator and let it sit at room temperature for at least 2 hours before serving.