Wednesday, July 7, 2010

CEIMB: Pesto Potato Salad


This week's Craving Ellie in My Belly recipe comes to us from Liz over at The Not So Skinny Kitchen. We love all things pesto around these parts, so of course we were very excited to make this one. I have to confess, I didn't actually make it; my hubby did. We had this dish on my birthday, and it was one of Andy's gifts to me to make the entire dinner we ate that evening. Hey, I wasn't about to put up a fight, even though technically I felt like I should prepare the potato salad. After all, it's my assignment, not his. But I think it still counts for the group. I ate it, so I totally participated!


Funny story, though. The next morning, I went into the refrigerator to try and figure out what leftovers I had on hand to serve for that evening's dinner. I couldn't find the leftover pesto, so finally I asked Andy where he had put it. Well, as it turns out, there was no leftover pesto! That's right; he had used the entire batch of fresh pesto in the potato salad! I thought mine looked particularly green, but I just figured that's the way it was supposed to look.


It didn't matter to us, though, because we loved it just the way it was! I'd like to try it the right way in the future, but for this meal I thought it was great. I absolutely love pesto, so having extra on my salad surely wasn't a problem for me. I'm just sorry I don't have another pesto dish to look forward to now with the leftovers. Oh, well. It'll give me an excuse to make more, I guess!


With this potato salad, we ate some fried chicken and waffles. I have always wanted to try chicken and waffles together, and I'm so glad I finally did. I loved it! I can't say for certain that the pesto salad paired up perfectly with waffles, but I didn't care. I loved everything I ate that night. And it was my birthday, after all, so as long as it made me happy, that's all that matters. And even though my older son initially found the mashup of foods on his plate a little weird at first, he ended up loving it, too!


Thanks to Liz for the great pick. A winner around here, made incorrectly and all! The recipe for the potato salad can be found on Food Network's site, here. The recipe we used for the fried chicken can be found on Recipezaar, here. Finally, the recipe for the Brown Butter Waffles can be found on the Daydreamer Desserts blog, here. Sooo very good!

Tuesday, July 6, 2010

Sweet and Salty Cake


No picture I could ever take of this cake could do it the true justice it deserves. No picture is ever going to capture the deep, dark, chocolatey fluffiness of the frosting. I won't be able to sell you on words alone on the moist, tender crumb of the three chocolate cake layers. Likewise, I'm probably never going to convince you that the salted caramel layers are nothing short of a revelation, lending an amazing depth and complexity of flavor that just elevates the entire cake to a whole other level. But hey, I'll do the best I can!

This cake caught my eye immediately about a year ago, back when I first purchased the Baked cookbook. As I flipped through the pages, reading recipe titles, none sounded quite as interesting, as innovative, as downright delicious to me as this one. Sweet and Salty Cake. How intriguing. The idea of sweet and salty together in an almost absurdly decadent chocolate cake definitely appealed to me. This, I thought, was the very embodiment of indulgence.

How fitting, then, that I should finally decide to make this as a very special birthday treat for....me! Yes, I am ridiculous and wanted to make myself a birthday cake. Why not? I enjoy baking, and I enjoy eating. Sounds like a great way to spend a birthday to me.


I had read on several other blogs about how other people had a devil of a time making this cake. People truly lamented their time spent slaving in the kitchen, all for the love of the sweet and salty. However, the unanimous consensus heard 'round the blogosphere, as far as I could tell, was that eating the cake was well worth the effort and hours.

The effort I speak of is as follows: first, you bake a three-layer chocolate cake; next, you make your own salted caramel. This will be drizzled on each cake layer and allowed to soak into the cake a bit.....yum! See above picture, in which the salted caramel is sprinkled with sea salt atop my second cake layer. Finally, you make even more caramel, to be incorporated into a heinously unhealthy (but ever so delicious!) whipped chocolate ganache frosting. You assemble the cake, garnish it with a final sprinkle of sea salt (or fleur de sel, as the recipe states), and there you have it.


Perhaps it is simply because I was warned about how complicated it was, but I really didn't find this cake all that complex. I mean, sure, there are a ton of steps. It does take a very long time to put everything together, beginning to end. There are elements that are tricky, such as making the caramel...twice. However, I felt as though I was successful in the end, and I was proud of the accomplishment.

I did face one complication, though. The recipe's instructions state that this cake keeps "beautifully" at room temperature in a cake saver. I finished making this cake around 10:30 p.m. When I lifted the lid to my cake saver about 12 hours later to admire it, I realized that some of the frosting had begun to roll, avalanche-style, down the side of the cake! I still don't know for certain why this happened, but I decided to bite the bullet and throw the whole shebang in the fridge to let the frosting firm up. I realize that refrigerating a cake such as this is violating like a hundred baking commandments, but I felt like my hands were tied in this situation. I couldn't have runny frosting!


Its brief stay in the fridge did allow me to fix the gooey side after a couple hours of chilling, and in the end I think it all worked out. The cake turned out divine, exquisite, like no other cake I've had. Each element is distinctly flavorful, but when combined it's just out of this world! My husband proclaimed this cake "the best one I've ever eaten." A superior compliment, to be sure, but I believe he has said this before about other cakes (or cupcakes) I've made in the past. So, he's either being way too nice and forgiving with me, or maybe I'm really improving with each cake I make. I don't know for sure, but I do know that this cake was among the best I've ever eaten, too. Seriously, I don't think I could have asked for a better cake for my birthday. Worth every second I worked on it, truly!


Sweet and Salty Cake
recipe from Baked
makes one 8-inch, 3-layer cake (I made mine in 9-inch cake pans)


Ingredients
For the classic chocolate cake layers:
3/4 cup dark unsweetened cocoa powder
1 1/4 cups hot water
2/3 cup sour cream
2 2/3 cups all-purpose flour
2 tsp. baking powder
1 tsp. baking soda
1/2 tsp. salt
3/4 cup unsalted butter, softened
1/2 cup vegetable shortening (I used a trans fat-free variety from Whole Foods)
1 1/2 cups granulated sugar
1 cup firmly packed dark brown sugar
3 large eggs, at room temperature
1 Tbsp. pure vanilla extract

For the salted caramel:
1/2 cup heavy cream
1 tsp. fleur de sel
1 cup sugar
2 Tbsp. light corn syrup
1/4 cup sour cream

For the whipped caramel ganache frosting
1 lb. dark chocolate (60 to 70% cacao), chopped
1 1/2 cups heavy cream
1 cup sugar
2 Tbsp. light corn syrup
2 cups unsalted butter, soft but cool, cut into 1/2-inch pieces

To assemble the cake
2 tsp. fleur de sel, plus more for garnish


Directions
Make the classic chocolate cake layers: 1. Preheat the oven to 325 degrees F. Butter three 8-inch (or 9-inch) round cake pans, line the bottoms with parchment paper, and butter the parchment. Dust with flour, and knock out the excess flour.
2. In a medium bowl, combine the cocoa powder, hot water, and sour cream and set aside to cool. Sift the flour, baking powder, baking soda, and salt together in another medium bowl and set aside.
3. In the bowl of an electric mixer fitted with the paddle attachment, beat the butter and shortening on medium speed until ribbonlike, about 5 minutes. Add the sugars and beat until fluffy, about 5 minutes. Add the eggs, one at a time, beating well after each addition, then add the vanilla and beat until incorporated. Scrape down the bowl and mix again for 30 seconds. Add the flour mixture, alternating with the cocoa mixture, in three additions, beginning and ending with the flour mixture.
4. Divide the batter among the prepared pans and smooth the tops. Bake for 35-40 minutes (mine took 30 for the 9-inch cake pans), rotating the pans halfway through the baking time, until a toothpick inserted in the center of each cake comes out clean. Transfer the cakes to a wire rack and let cool for 20 minutes. Invert the cakes onto the rack, remove the pans, and let cool completely. Remove the parchment.

Make the salted caramel: 1. In a small saucepan, combine the cream and fleur de sel. Bring to a simmer over very low heat until the salt has dissolved.
2. Meanwhile, keeping a close eye on the cream mixture so it doesn't burn, in a medium saucepan combine 1/4 cup water, the sugar, and corn syrup, stirring them together carefully so you don't splash the sides of the pan. Cook over high heat until an instant-read (or candy) thermometer reads 350 degrees F., 6 to 8 minutes. Remove from the heat and let cool for 1 minute.
3. Add the cream mixture to the sugar mixture. Whisk in the sour cream. Let the caramel cool to room temperature, then transfer to an airtight container and refrigerate until you are ready to assemble the cake. (At this point, the caramel will keep in the fridge up to 3 days.)

Make the whipped caramel ganache frosting: 1. Put the chocolate in a heatproof bowl and set aside. (I just placed mine inside the bowl that goes to my stand mixer, since we'll need the chocolate in there soon anyway.)
2. In a small saucepan, bring the cream to a simmer over very low heat. Meanwhile, keeping a close eye on the cream so it doesn't burn, in a medium saucepan combine 1/4 cup water, the sugar, and corn syrup, stirring them together carefully so you don't splash the sides of the pan. Cook over high heat until an instant-read (or candy) thermometer reads 350 degrees F., 6 to 8 minutes. Remove from the heat and let the caramel cool for 1 minute.
3. Add the cream to the caramel and stir to combine. Stir slowly for 2 minutes, then pour the caramel over the chocolate. Let the caramel and chocolate sit for 1 minute, then, starting in the center of the bowl, and working your way out to the edges, slowly stir the chocolate and caramel mixture in a circle until the chocolate is completely melted. Let the mixture cool, then transfer it to the electric stand mixer.
4. Mix on low speed with the paddle attachment until the bowl feels cool to the touch. Increase the speed to medium-high and gradually add the butter, beating until thoroughly incorporated. Scrape down the bowl and beat on high speed until the mixture is fluffy.

Assemble the cake: 1. At this point, I wrapped each cake layer in two layers of saran wrap and put them in my freezer for about 45 minutes, just to firm them up enough to trim the tops. The cookbook does not say to do this, but after reading up on this cake on other blogs, it seemed like a crucial step. I think it helped me out. But it is optional.
2. Trim each cake layer so it lays flat on top and on the bottom. Place one cake layer on a serving platter. Spread 1/4 cup of the caramel over the top. Let the caramel soak into the cake, then spread 3/4 cup of the ganache frosting over the caramel. Sprinkle 1 tsp. of the fleur de sel over the frosting, then top with the second cake layer.
3. Spread with caramel, then frosting, and sprinkle with 1 tsp. of the fleur de sel. Then top with the third layer. Spread with caramel. Crumb coat (spread a very thin layer of the ganache frosting over the entire cake) the cake and put the cake in the refrigerator for 15 minutes to firm up the frosting. Frost the sides and top with the remaining frosting. (I did generously frost my cake, but I still had some frosting left over.) Garnish with a sprinkle of fleur de sel.
4. This cake will keep (maybe?) in a cake saver at room temperature (cool and humidity-free) for up to 3 days. If your room is not cool, place the cake in a cake saver and refrigerate for up to 3 days. Remove the cake from the refrigerator and let it sit at room temperature for at least 2 hours before serving.

Thursday, July 1, 2010

CEIMB: Penne with Roasted Tomatoes, Garlic, and White Beans


For this week’s Craving Ellie in My Belly recipe, I got to choose the dish we made! I originally thought that when my time came, I was going to choose something that would require baking. Maybe next time, I will, but for now I thought hey, it’s summer, why not make it easy on everybody and do this simple pasta dish?


I have to say, I partially picked this one because I knew it would force me to step out of my comfort zone. I have been making strides towards eating tomatoes and beans, and this meal would just get me that much more acquainted with both. The funny thing is, I have no problem with the flavor of tomatoes or beans, just the texture. So I wanted to make this; it will help me get closer to conquering my texture phobia.


I liked this meal! I found that the white beans kind of blended right in with the pasta, so I felt like I was still just eating pasta when I got a forkful of beans. The tomatoes, when roasted like this, are so bright and tart and kinda sweet. I just loved them this way! The roasted garlic lent such a nice, smooth flavor to the light lemon juice mixture, and I enjoyed the sprinkling of basil to finish. I only had Thai sweet basil on hand, but I don’t think it really affected anything. It still tastes like the basil we all know and love, at least to me. The other things I did differently: I used a whole (13.25-ounce) box of whole wheat penne, one extra clove of garlic, and only 1 ½ Tbsp. olive oil. I was happy with the changes I made; I don’t think the 8 recommended ounces of pasta would have been enough to feed my crew!


I couldn’t remember if we’re supposed to reprint the recipe when we host the group, so I just decided to copy it below. You can also find the recipe on Food Network's site, here, although that version is slightly different. Thanks to everybody who cooked along with me, and be sure to check out how everybody else did by stopping by the CEIMB blogroll!


Penne with Roasted Tomatoes, Garlic, and White Beans
Recipe by Ellie Krieger, from The Food You Crave (p. 156-157)
Makes 4 servings

Ingredients
3 large ripe tomatoes (about 2 pounds)
6 large cloves garlic, papery outermost skin removed, but left unpeeled
3 Tbsp. olive oil
½ tsp. salt, plus more to taste
Freshly ground black pepper
One 15.5-ounce can cannellini or other white beans, preferably low-sodium
½ box (8 ounces) penne pasta
2 Tbsp. fresh lemon juice
1/3 cup fresh basil leaves, cut into ribbons
¼ cup freshly grated Parmesan cheese

Directions
1. Preheat the oven to 450 degrees F. Slice each tomato into 8 wedges and discard the seeds. Put the tomato wedges and garlic in a 9x13-inch roasting pan, toss with 2 Tbsp. of the oil, and sprinkle with ¼ tsp. salt and a few turns of the pepper. Roast, uncovered, until the tomatoes lose their shape and become slightly charred, 35 to 40 minutes.
2. Drain the beans in a large colander in the sink. Cook the pasta according to the package directions. Drain the pasta in the colander that contains the beans, so the hot pasta water warms the beans. Return the drained pasta and beans to the pasta pot.
3. When the tomatoes are done, carefully pick out the garlic cloves, squeeze the garlic out of the skin into a small bowl, and mash with a fork. Add the lemon juice, the remaining 1 Tbsp. oil, the remaining ¼ tsp. salt, and a pinch of pepper, and stir to combine.
4. Transfer the roasted tomatoes to the pasta pot, add the garlic-lemon mixture, the basil, and some salt and pepper, to taste. Toss to combine. Serve topped with the Parmesan.

Wednesday, June 30, 2010

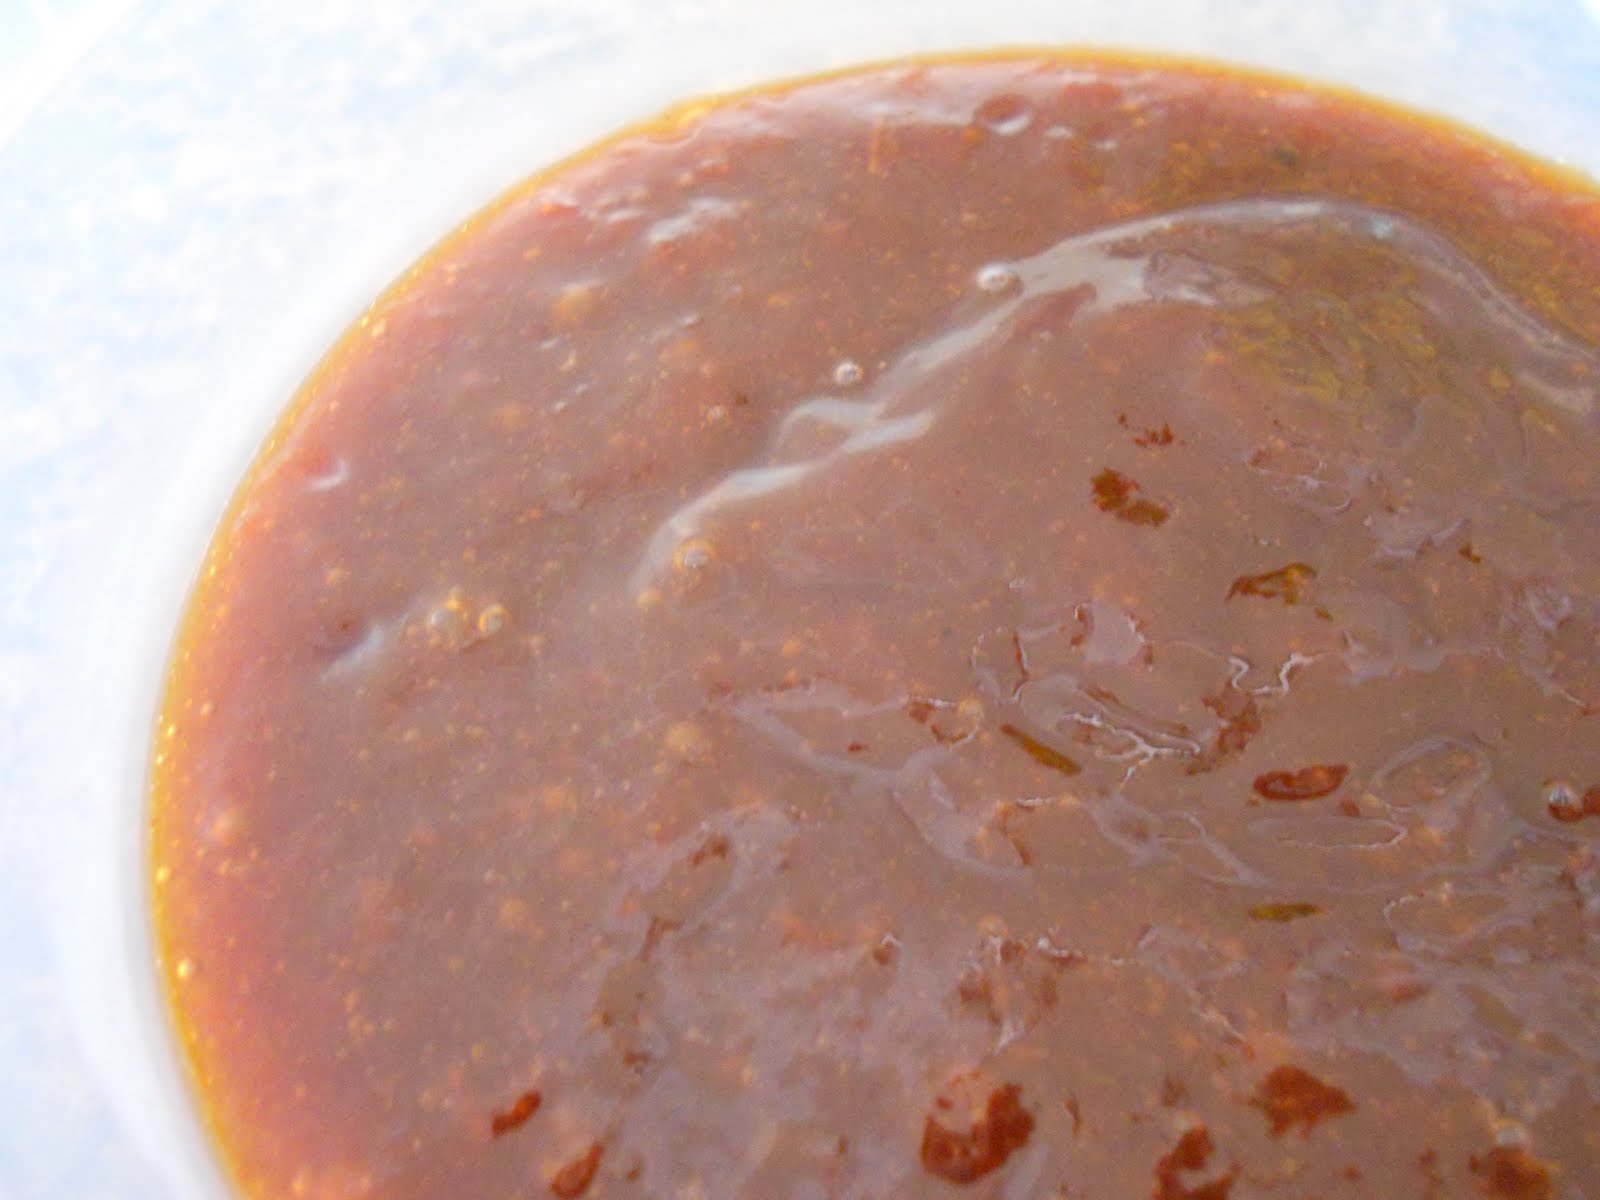
Homemade Barbecue Sauce


Usually, when I am blogging about a meal or a baked good, it's something I've made last week, or at least a few days prior. I like to keep my meals in order, and so I have a queue of sorts. The pictures are uploaded onto the computer, and they wait patiently until I get around to them.

So when I say that I made this barbecue sauce yesterday, and that I couldn't wait any longer to blog about it, that's truly saying something special about this sauce!


I've been a huge fan of barbecue sauce for pretty much my whole life. It is, hands down, my favorite condiment. I can't get enough of it. I'll put it on pretty much anything you can think of. I was dared, as a teenager, to try it on the likes of pancakes, Reese's peanut butter cups, even cinnamon rolls! Ok, let me tell you, none of those were brilliant ideas; they were all pretty gross. But I still tried them, because I was just that devoted to my love of barbecue sauce.

However, I had never made it from scratch....until yesterday. I'd always wanted to, for sure. I knew that I would enjoy playing around with components and spicing it the way I wanted to, and I finally found a reason to whip up a batch; leftover habanero peppers. That's right; we had some extra peppers we'd bought, and suddenly my brain was overtaken with visions of a habanero-flavored barbecue sauce that would knock your socks off. I took to my trusty Recipezaar to see what I could find.


Finally, I found the perfect recipe. It did not have habanero listed in its title; the pepper is almost like a stealth ingredient, listed all the way at the end of the recipe. But, boy, does it make its presence known! I tasted this sauce first before I added the pepper, and then again after I had incorporated it, and the difference was astounding. Of course, that's to be expected when you're dealing with such a hot pepper, but still! It just adds so much to the overall flavor and heat level of the sauce.


Of course, I did tinker with the original recipe a bit, because that's just what I do. I decided to use up some more of my pomegranate molasses in this, since it did call for some molasses. I had to add more sweetness after that, since the pomegranate is very tart and regular molasses is not. So I threw in some honey to increase the sweet. I found out that I was out of chili sauce, so I improvised and used some more of my new best friend, Frank's RedHot Sweet Chili Sauce, along with a bit of extra ketchup. The recipe called for chili powder; instead of regular, I used some ancho chili powder. Oh, and I cut the recipe down to 1/3 the full amount, since that would have yielded about 3 pints of sauce. A bit too much for my little family!

The end result of my playing and experimenting was a dark, thick, sweet sauce that had a sharp tang and a swift kick from the habanero. I have to admit, I just couldn't stop taste-testing this stuff while it was simmering on the stove! It filled the house with an incredibly smoky aroma; it just smelled like summer to me. (It also smelled like dinner to me, so it was very hard to wait around until we could eat!)

I served this alongside a relatively simple turkey burger that was seasoned to taste like Caribbean jerk, a barley and veggie salad, and sweet potato oven fries. The barbecue sauce was fantastic for dipping the burgers in, and I thought it paired especially well with the sweet potato fries. A winner, if I do say so myself!

I said it before, but I'll say it again. If you do try this sauce, be warned: it is spicy! However, it would be just as delicious if you were to omit the habanero, or substitute a slightly less spicy pepper (a jalapeno would be great in this, as well). There's plenty of other flavors in there to make up for the heat.


The original barbecue sauce recipe can be found right here. The recipe I used for the turkey burgers can be found here. It originally came from Rachael Ray, and then somebody posted it to Recipezaar. The sweet potato fries I used were just Ore-Ida frozen fries, and they were good! Finally, the barley and veggie salad recipe is half Cooking Light, half my own creation. I won't post a step-by-step description of what I did, but here is a link to the Cooking Light recipe. I used barley in place of the orzo, kept the dressing the same, and omitted the chicken and goat cheese. It was delicious!

Homemade Barbecue Sauce
adapted from Recipezaar
makes about 2-3 cups

Ingredients
1/2 cup onion, chopped
1/2 cup red bell pepper, chopped
1 clove garlic, minced
1 Tbsp. olive oil
1 tsp. ground dry mustard
1 tsp. ancho chili powder
1/2 cup apple cider vinegar
3/4 cup ketchup
1/2 cup sweet chili sauce
1 Tbsp. Worcestershire sauce
1 Tbsp. liquid smoke
1/4 cup pomegranate molasses
2 Tbsp. blackstrap molasses
1/3 cup honey
1/4 cup dark brown sugar
1 habanero pepper, minced (remove seeds before using, and don't forget to use protective gloves while handling your pepper!)

Directions
1. Heat the olive oil in a medium saucepan. Add the onions, bell peppers, and garlic and saute until onions are translucent, about 5 minutes. Add dry mustard and chili powder, and stir to incorporate.
2. Lower the heat to a simmer, and add all the remaining ingredients. Stir well, then simmer on low, covered, for at least an hour, stirring occasionally.
3. Let cool, then use either a regular blender or an immersion blender to puree the sauce. Sauce can be stored in an airtight container for about 2 weeks in the fridge, or stored in mason jars in the fridge for longer.

Monday, June 28, 2010

Asian Chicken Meatball Salad


This recipe was invented right smack in the middle of me preparing it! In other words, I set out one day to make a specific dish, but by the end of my meal preparation, I had come up with something completely different! And I must say, I like what I've invented here. It sounds strange, perhaps, but it was a seriously delicious little Frankenstein of a dish. Here, let me take you through it.


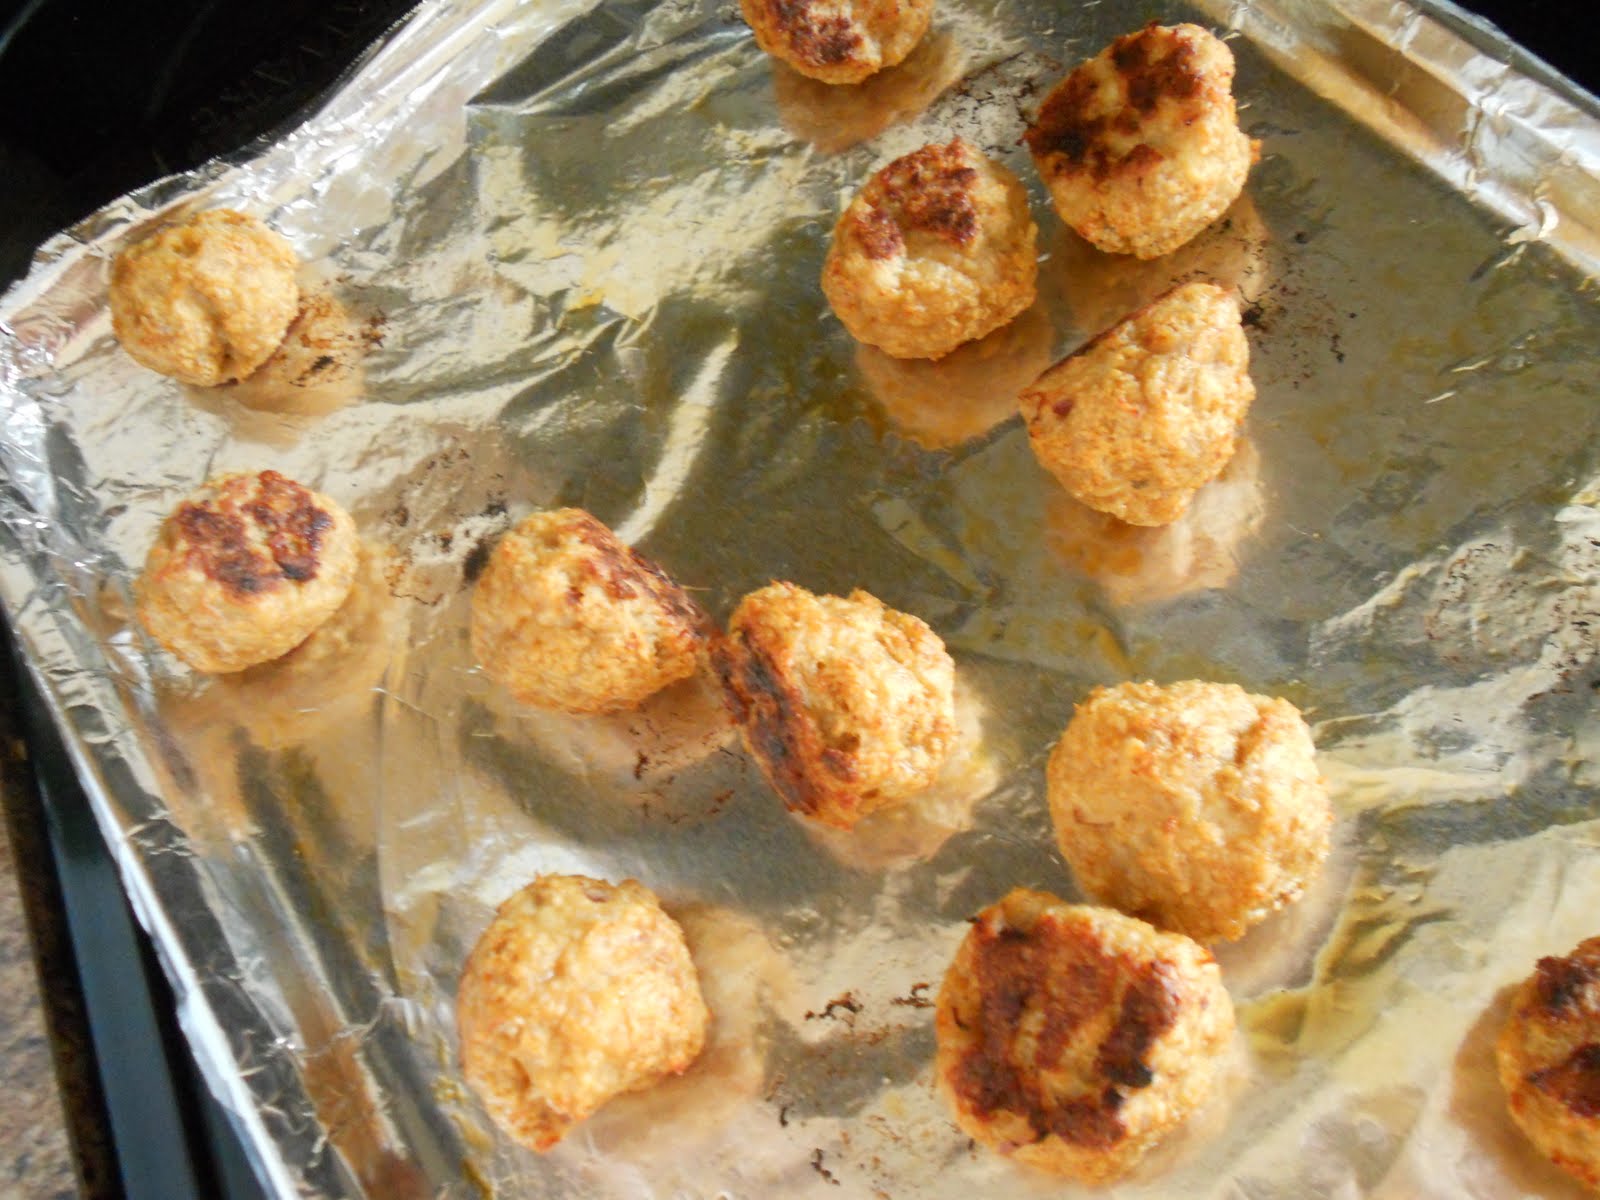
It all started with these chicken meatballs. I just had a hankering for chicken meatballs. I finally found 99% lean ground chicken at my local grocery store, and I was very excited. I hadn't found this in the stores near where I live up until now, so I had to stock up. At first, when pondering what I should make, I came up with buffalo chicken meatballs. It sounded really good. I thought it may be fun, then, to throw the meatballs on top of a salad, and have it be a fun spin on buffalo chicken salad. So far, still sounding good.

So I mixed the chicken meat with some panko breadcrumbs, some smoked paprika, garlic powder, salt, and pepper, and formed and baked my meatballs. While they were baking away, I went to my fridge to find the buffalo sauce. But once I found it, my heart sank. It was nearly empty! And I had not bought a backup bottle! Wait a minute, though. All was not lost. I suddenly remembered that I did have a bottle of something else I've been wanting to try.


I found this Frank's RedHot Sweet Chili Sauce not too long ago, and bought it eagerly. It just sounded so good. It's made with fresh chilis, it's slightly hot and sweet and sticky all at once, and it was on sale! It was meant to be. So, armed with this bottle of RedHot and a fresh idea in my head, I took the meatballs and tossed them with the sauce. Now, I was on a roll! I'd turn my salad into an Asian-y one, with fresh spinach and carrot and some sliced almonds. I'd top it off with a simple Asian salad dressing, and crown it all with these meatballs. It sounded too good to be true.


I fell madly in love with this salad upon first bite. It was a fantastic blend of sticky-sweetness, salty bite (from the Asian dressing I used), crispness (from the spinach), crunch (from the almonds), and meaty goodness (the meatballs!).

Sure, there were things I could have done differently. It wasn't absolutely perfect. For starters, I had seasoned the meatballs before I knew that they were going to be housed in an Asian-themed salad. Therefore, when I make this again (and I will), I will put more Asian flavors into the meatballs. I could see ginger in there, along with maybe some 5-spice and a touch of soy, or even hoisin sauce. They probably could use a bit of heat, too, since the RedHot just isn't, well, hot enough for our tastes. If I had had different salad ingredients on hand, I could have improved upon the salad portion of things, as well. I could have thrown in radishes, sugar snap peas, bean sprouts. I thought the presentation was screaming for some sesame seeds sprinkled on top, but I couldn't find any. However, I used all ingredients that I had on hand at the time, and I was satisfied with this meal. Isn't that what really matters, in the end?


Asian Chicken Meatball Salad
recipe by Bri
makes 4 servings

Ingredients
1 lb. ground chicken (I used a 50/50 mix of lean ground chicken and ground chicken breast, which are different in their calorie/fat content)
1 cup panko breadcrumbs
1 tsp. garlic powder
1 tsp. smoked paprika (I thought this was good, but you may want to use ginger or 5-spice powder in place of this)
1/2 tsp. ground black pepper
1/4 tsp. kosher salt
1/3-1/2 cup Frank's RedHot Sweet Chili Sauce
1 (9 oz.) bag fresh spinach
1/2 cup sliced almonds
1 cup baby carrots, coarsely chopped
1/4 cup soy sauce
1/4 cup rice wine vinegar
1 clove garlic, minced
1/2 tsp. ground ginger (or 1 tsp. fresh grated ginger)
1/4 tsp. sesame oil
1 Tbsp. honey
1 Tbsp. water

Directions
1. Preheat the oven to 400 degrees F. Mix the chicken with the breadcrumbs, paprika, garlic powder, salt, and pepper, and form meatballs (I shaped mine by using a large cookie scoop). You should end up with about 2 dozen. Place on a lightly oiled or nonstick-sprayed cookie sheet lined with foil, and bake for 18-20 minutes, turning once halfway through.
2. While the meatballs bake, gather the salad ingredients. Divide the spinach evenly into 4 bowls, followed by the carrots and almonds. In a small bowl, combine the soy sauce, vinegar, garlic, ginger, sesame oil, honey, and water. Set aside.
3. When the meatballs are done, remove them from the baking sheet immediately and place in a medium-sized bowl. Add the RedHot sauce, and toss gently to coat the meatballs evenly.
4. Divide the meatballs among the 4 salad bowls, drizzle the salad dressing evenly over each, and serve.

Sunday, June 27, 2010

Chocolate-Black Pepper Cookies


I definitely have a thing for unusual flavor combinations. When I hear or read about new and exciting ways to mix flavors, I usually want to try them right away. These cookies do fall into that category, but I waited a long time to make them. I'd had my eye on them ever since I first saw them in Martha Stewart's Cookies. I just never got around to making them. Perhaps it is because I tried baking sugar cookies with black pepper a few years ago, and I really did not like them.


Well, I think I waited way too long to try these cookies! I say that because I am in love with them. They are perfectly chocolatey, like a brownie, with an exotic and delightful blend of spices that give them a hint of warmth. It's so hard to explain them; you should just try them!


The cookie dough was supposed to be shaped into a round log, which was then rolled in coarse sanding sugar (I used turbinado sugar). The whole log was chilled in the refrigerator, then sliced into round cookies. The cookies were then sprinkled with freshly ground black pepper before being baked in the oven. As I'm sure you can tell from the picture, I need some work on my log-rolling skills! My cookie pieces hardly turned out round; they're all flat on one side and domed on the other. I darsay that the shape of these cookies hardly matter, though. One taste and you won't care what they look like. They are that scrumptious.


The most amazing thing about these cookes, aside from their taste, is the fact that the fat content isn't that high. That's why I chose to make them finally. I was looking for a good cookie that wouldn't break the fat-gram bank, and these fit my criteria perfectly. If you slice the dough log evenly into three dozen cookies, each cookie only has about 65 calories and 3 grams of fat. Not bad for a decadent chocolate cookie! Keep in mind, I'm not saying they're healthy, exactly! But there are worse things you could be eating when you're looking for a sweet treat that cures your cravings.


Chocolate-Black Pepper Cookies
from Martha Stewart's Cookies
makes 36 cookies

Ingredients
1 1/2 cups all-purpose flour
3/4 cup unsweetened, Dutch-process cocoa powder
1/4 tsp. coarse salt
1/4 tsp. finely ground black pepper, plus more for sprinkling
1 Tbsp. plus 1 tsp. good-quality instant espresso powder
1/2 tsp. ground cinnamon
3/4 cup unsalted butter, softened
1 cup granulated sugar
1 large egg
1 1/2 tsp. pure vanilla extract
coarse sanding sugar, for rolling (I used turbinado sugar)

Directions
1. Sift together the flour, cocoa powder, salt, pepper, espresso powder, and cinnamon into a medium bowl. Set aside.
2. Put butter and sugar together into the bowl of an electric stand mixer fitted with the paddle attachment. Beat on medium speed until pale and fluffy, about 3 minutes. Mix in egg and vanilla. Reduce speed to low. Slowly add flour mixture; mix until just combined.
3. Turn out dough onto a piece of parchment paper, and roll into a log that is 2 inches in diameter. Roll log in the parchment. Refrigerate at least 1 hour or overnight.
4. Preheat oven to 350 degrees F. Remove log from parchment paper. Let soften slightly at room temperature, about 5 minutes. Roll log in sanding sugar, gently pressing down to adhere sugar to dough. Transfer log to a cutting board, and slice into 1/4-inch-thick rounds. Place rounds on baking sheets lined with parchment paper, spacing 1 inch apart. Sprinkle each round with freshly ground black pepper.
5. Bake cookies until there is slight resistance when you lightly touch centers, about 10 minutes. Transfer to wire racks to cool completely. Cookies can be stored in airtight containers at room temperature for up to 2 days.

Thursday, June 24, 2010

CEIMB: Chicken Paella with Sausage and Olives


Mmm, paella! This week's Craving Ellie in My Belly recipe was Chicken Paella with Sausage and Olives, chosen by Margaret of Tea and Scones. It seems that CEIMB will be able to live on, after all! Marthe of Culinary Delights has taken over the blogging group, so we are definitely moving forward and continuing to cook fantastic dishes week after week. Very exciting!


Now, onto this week's dish. This was a great one, possibly one of my favorites to come out of Ellie's So Easy cookbook so far. First of all, paella is something I usually think of in my mind as something that will be very labor intensive and take forever to make. I think it's been a couple years since I have attempted to make a paella, and I do recall it taking quite a while. It's a Spanish dish, and I believe it is traditionally cooked in a special paella pan, which makes the rice in the dish kind of crisp and crunchy on the bottom.

Fortunately, you do not need any special equipment for Ellie's version, and you do not have to slave over a hot stove all day, either. This relatively simple chicken and rice dish is a one-pot wonder that just requires some chopping, sauteeing, and a final cook in the oven. It's worry-free and tastes like it was a lot more complicated than it was.


For the sausage in the dish, you would normally use a chorizo. I found some "Soy-rizo" at Trader Joe's that I decided to use in its place. One big difference between regular chorizo and my meatless version was the casings. Ellie has you remove the casings and slice the chorizo into thin slices. My "Soy-rizo" had a thin plastic casing on it, and once removed the sausage underneath was crumbly, much like ground meat. So you can't really see any of my sausage in the pictures of the dish, but it is there. It's just tiny and finely ground. It was delicious, though; the meatless sausage worked out great! I also used chicken breast instead of chicken thighs, and I didn't really miss the thighs.


I'm so glad I used the olives; I was wary of them because I haven't been the hugest fan of them in the past. They really added something this time, though. I loved them. I loved the peas, too; they imparted a nice texture to the proceedings, a bright pop in your mouth every now and then.

This dish is seasoned relatively sparsely, but it has such a fabulous flavor. You throw in some salt, pepper, turmeric, and a pinch of saffron threads. And that's really all you need. The dish has a slow-cooked, rich flavor that I just didn't feel the need to improve upon. All in all, very satisfying and a big success!

Next week will be my pick for the group! I'm really looking forward to that. In the meantime, this recipe can be found here. I had to do a quick Google search to find that link, because I couldn't find it on Food Network's site like I normally can with Ellie's recipes. You can also check the CEIMB site to find out how the other members fared this week. And a big thank you to Margaret for the excellent choice!